Jump to content


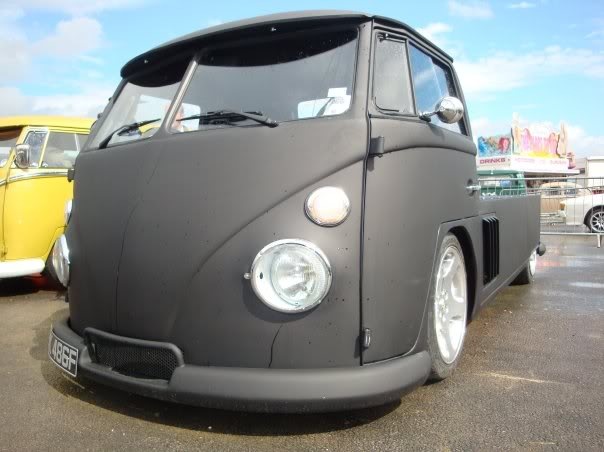
SINGLE CAB KOMBI UTE V8 BUILDUP


  • Please log in to reply
225 replies to this topic

#201 _dirtbag_

_dirtbag_
  • Guests

Posted 06 May 2012 - 08:32 AM

So anyway, I've done a little bit more to the kombi. I can't remember exactly where I was up to so if there's some double ups sorry about that : )


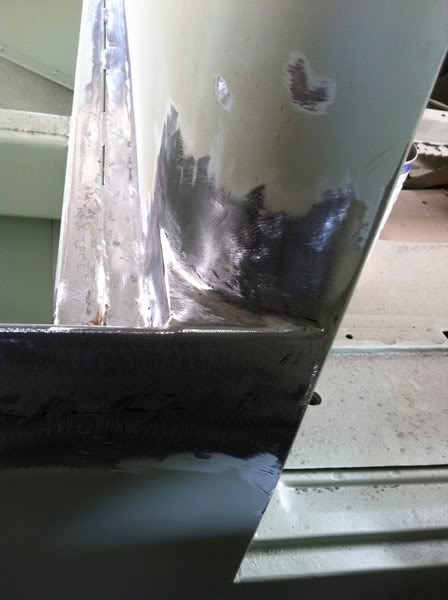
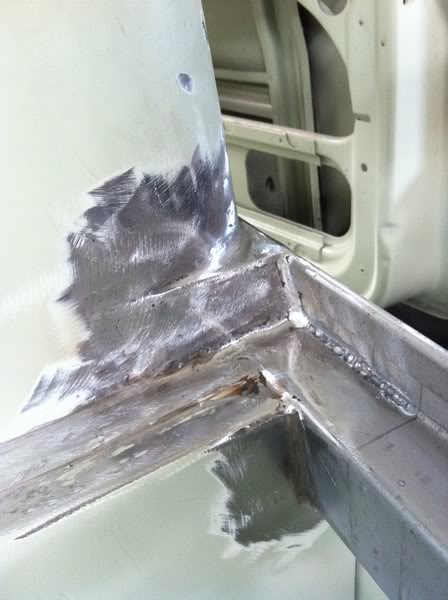
Well next thing I did was to box the little corner at the base of the cab on the drivers side.
Posted Image

Posted Image


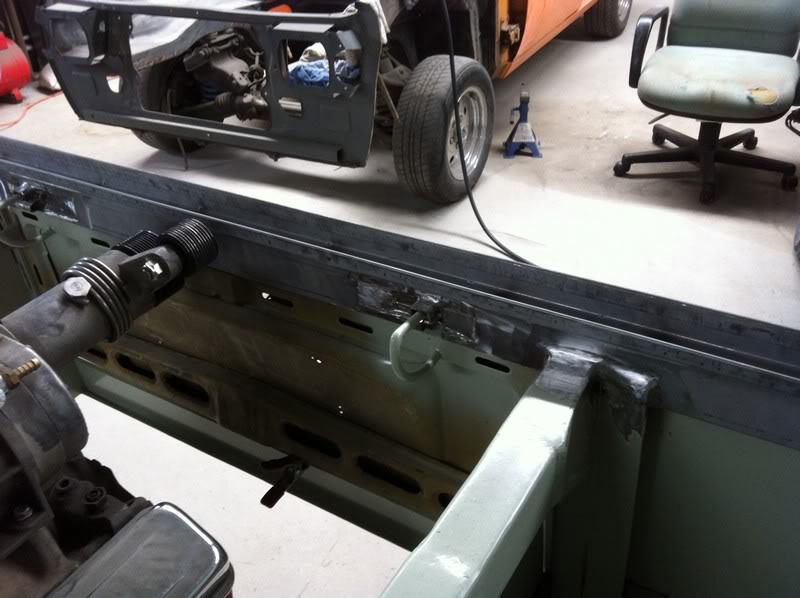
I then welded up the recesses I made in the rear piece to clear the hinge pins. I also cleaned up and welded the new piece to the top rails.

Posted Image


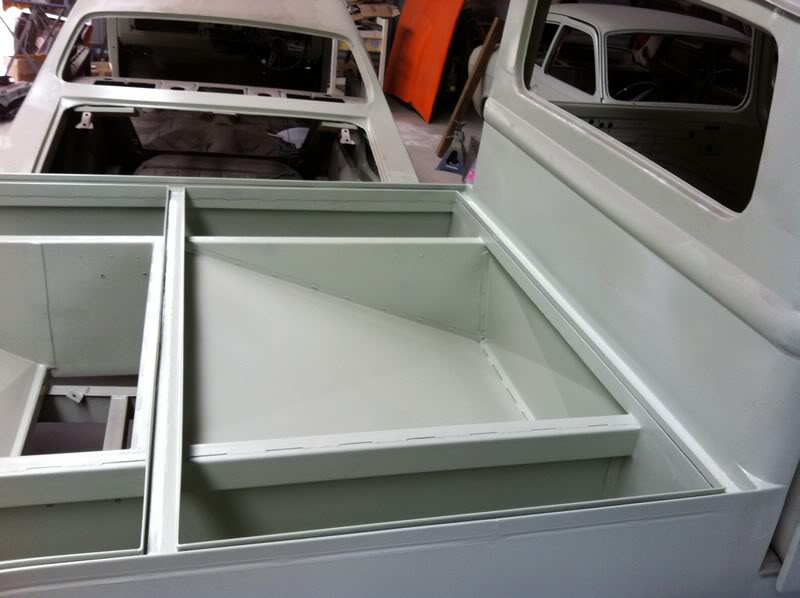
I also finished making all the lips for the 3 compartments.
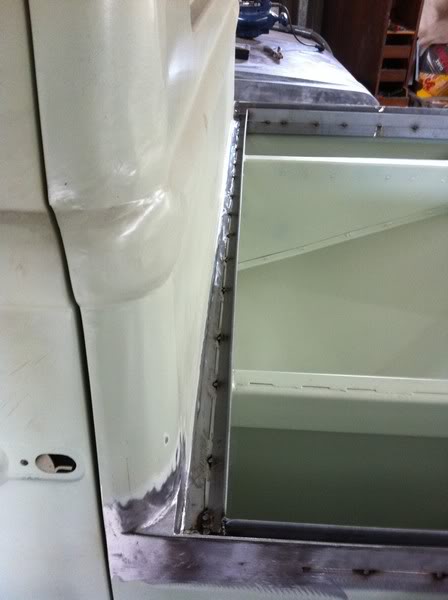

Posted Image

Posted Image


The two centre supports that run across the tray have a lip on each side. I left a gap in between them so when I weld them to the support I can weld them both at the same time.
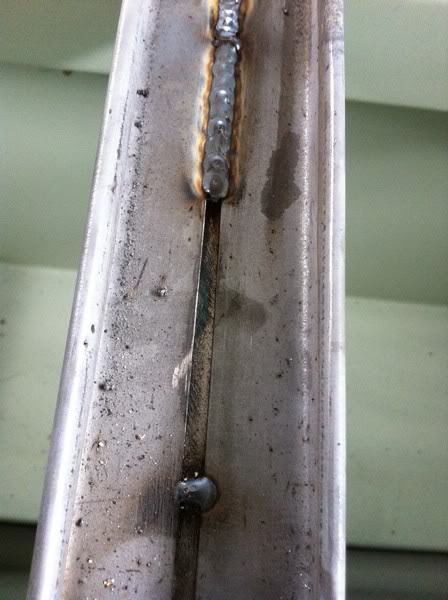

Posted Image


So much welding! Each weld across the car is over 1500mm and there's 4 of them, and that's not including fully welding the lips around the outside of the tray!
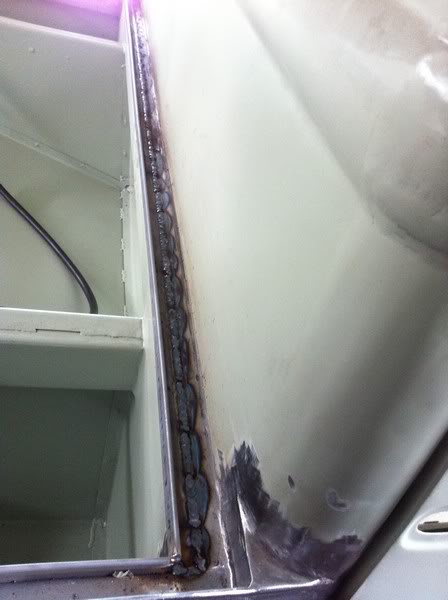

Posted Image


Then of course comes the grinding. How fun hahaha!
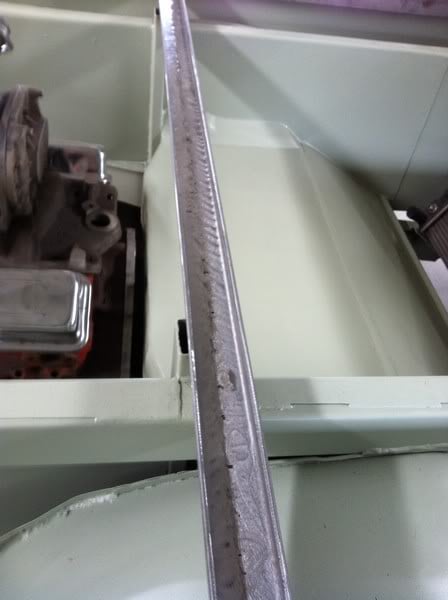

Posted Image


I then stitch welded the side lips on.
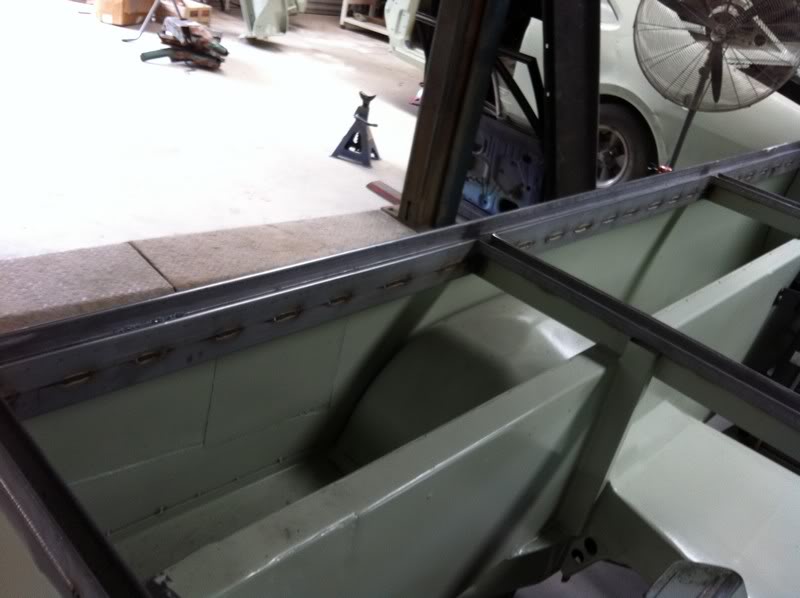

Posted Image


I then welded the rear piece along the outside, and prepped all the new metal for etch primer.
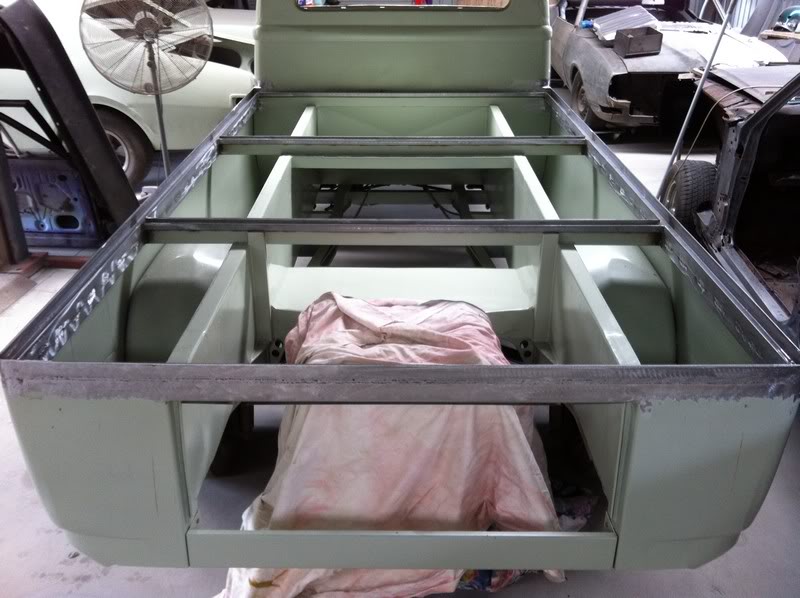

Posted Image


I wasn't in the mood for welding the sides up along the top of the quarters but I wanted to get some etch on it so I just taped up the join so I don't have to dig primer out later to weld.
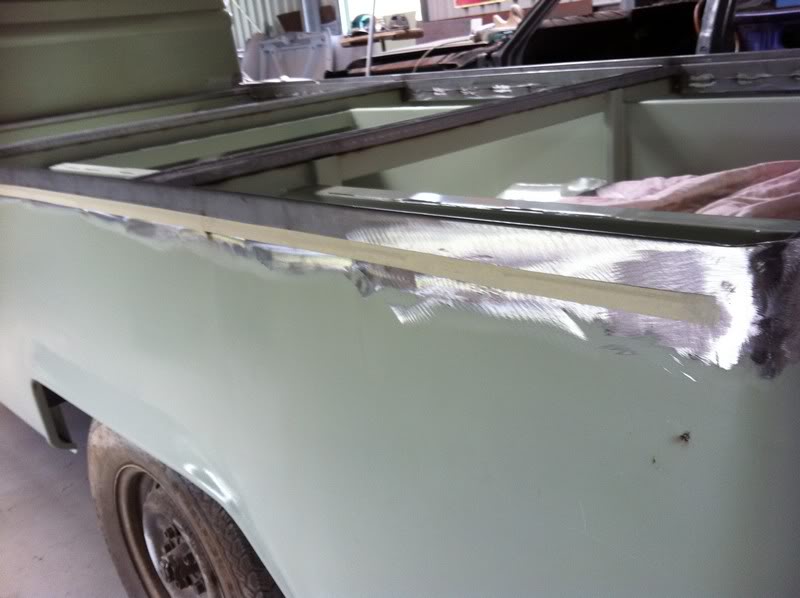
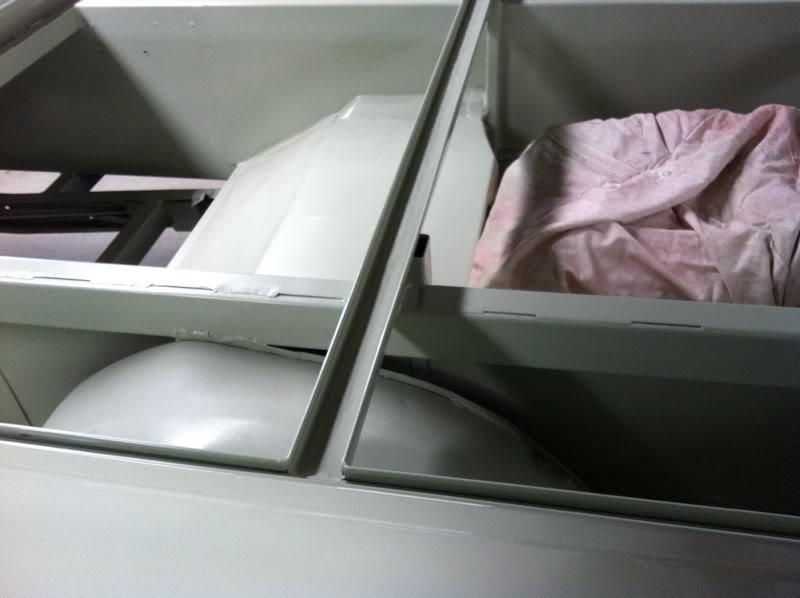
Posted Image

Posted Image

Posted Image

Posted Image


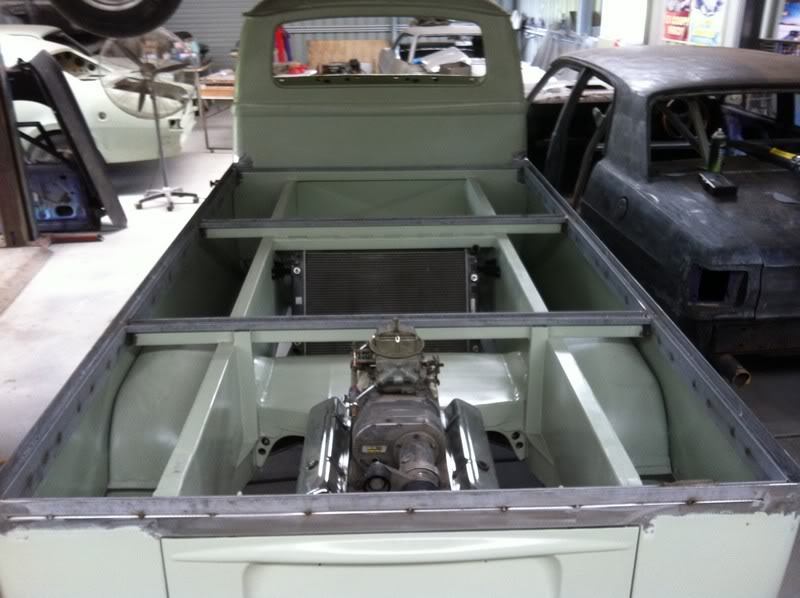
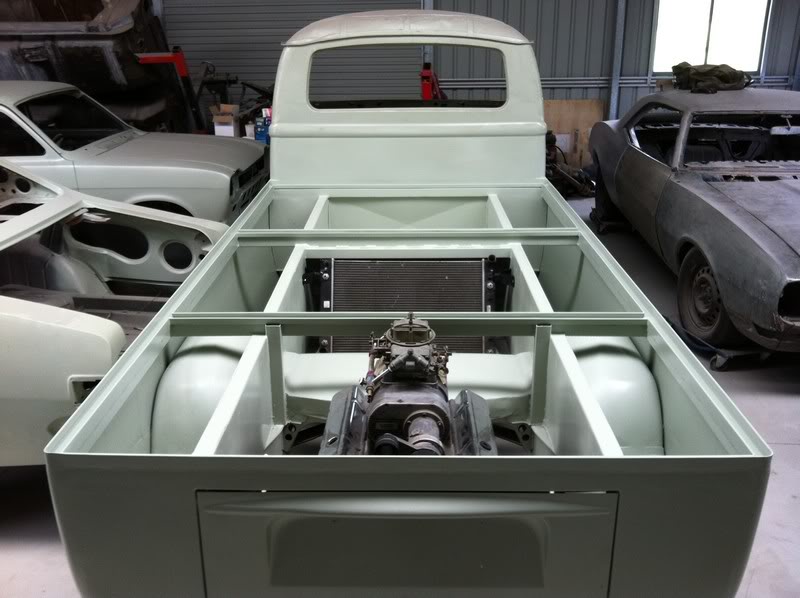
Well it's getting there but there's still a lot to do even just for this part. I still have to put the drain pipes in, but that'll be easy, and make the lids for the 3 compartments and figure out hinges and catches for them. Then I still have to weld down each side which I'm not looking forward to, mainly because I'm lazy : )

Then I still need to cut rust out of the doors and engine lid, panel beat it, make extractors, radiator hoses, engine cradle etc etc. I'm loving this build though : )

#202 _wblje_

_wblje_
  • Guests

Posted 11 May 2012 - 08:34 PM

Come on DB give us a thread on the coon. I don't want to hijack this cool thread. The coon will require some good metal repairs . Looks molested and rotted. Going to be a hell of a project but I think my xa can rival it.

#203 _dirtbag_

_dirtbag_
  • Guests

Posted 06 June 2012 - 11:47 PM

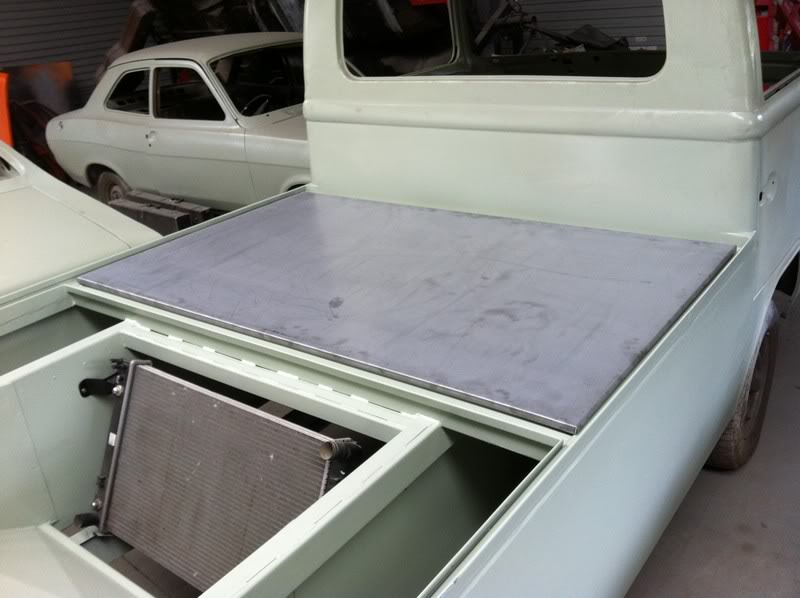
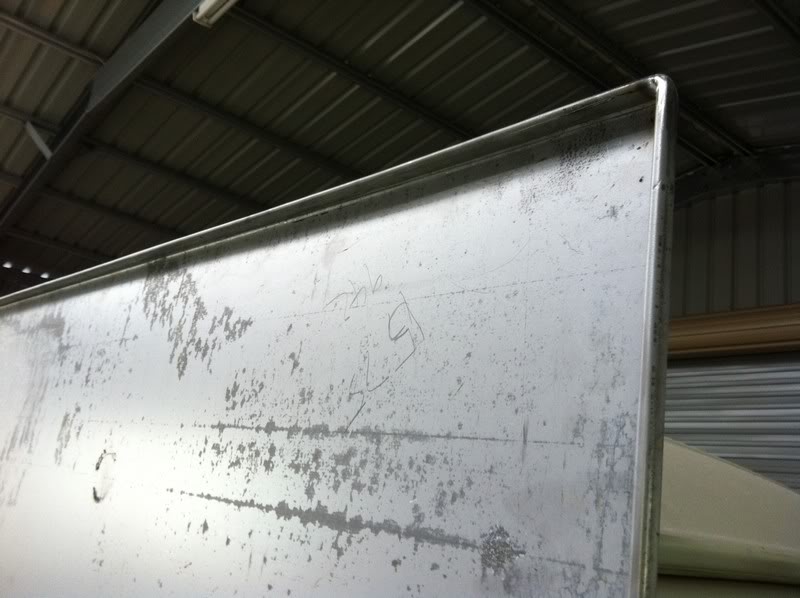
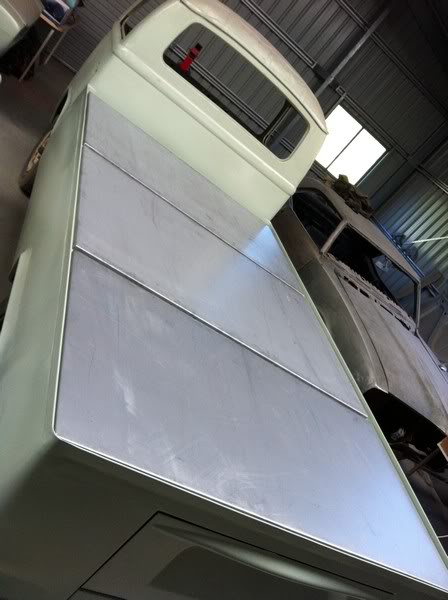
I made a start on the lids for the three sections of the tray. They'll just be zinc sheet with hardwood decking over the top.

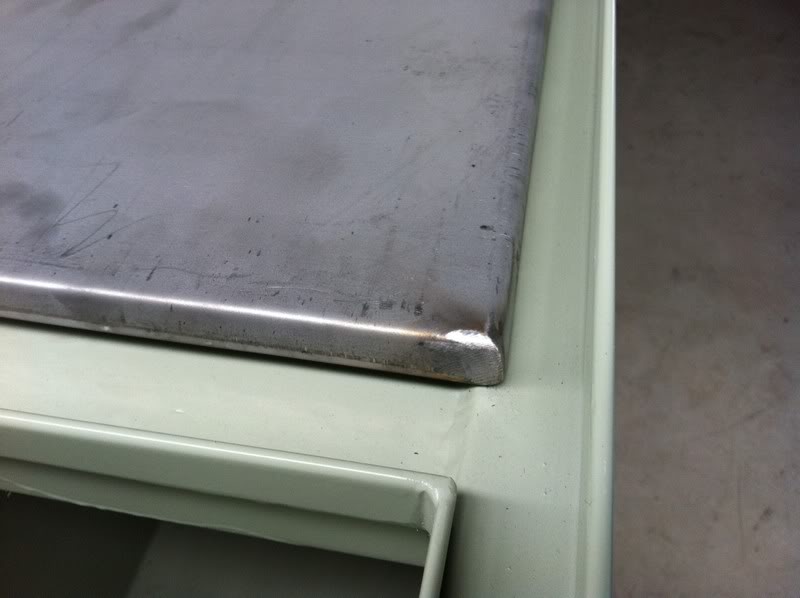
They've just got a 15mm folded edge with a safety edge underneath.


Posted Image


The only welds needed are the corners.


Posted Image


I figured a safety edge on the lids would make lifting them a bit nicer, even though they'll have frames inside and gas struts, I still don't want sharp edges.


Posted Image


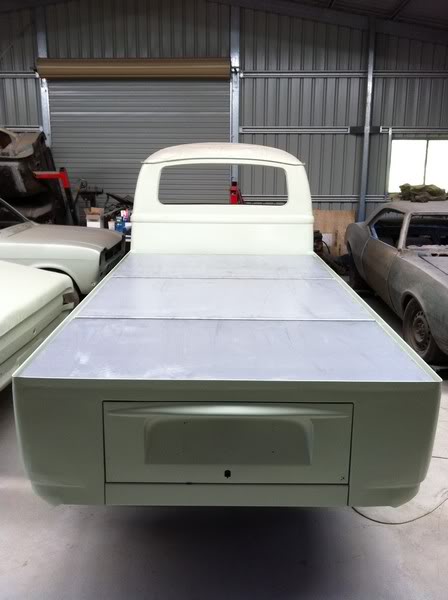
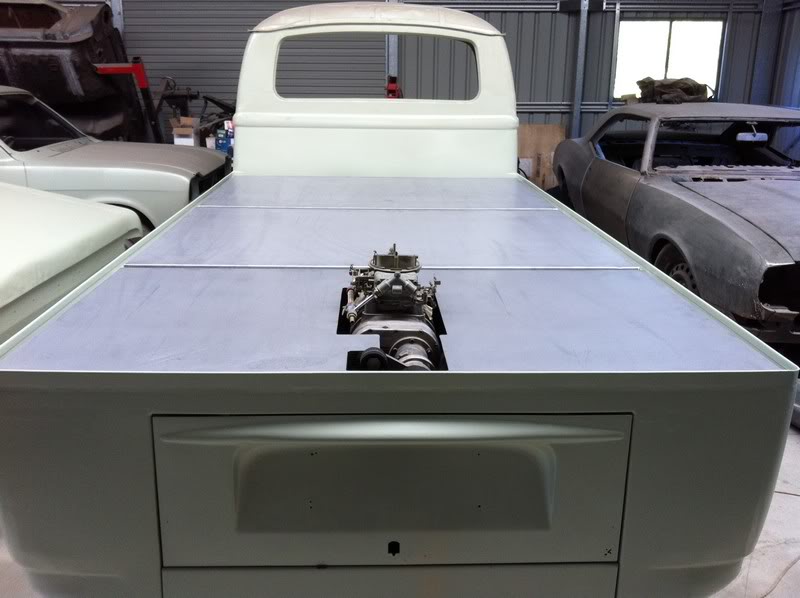
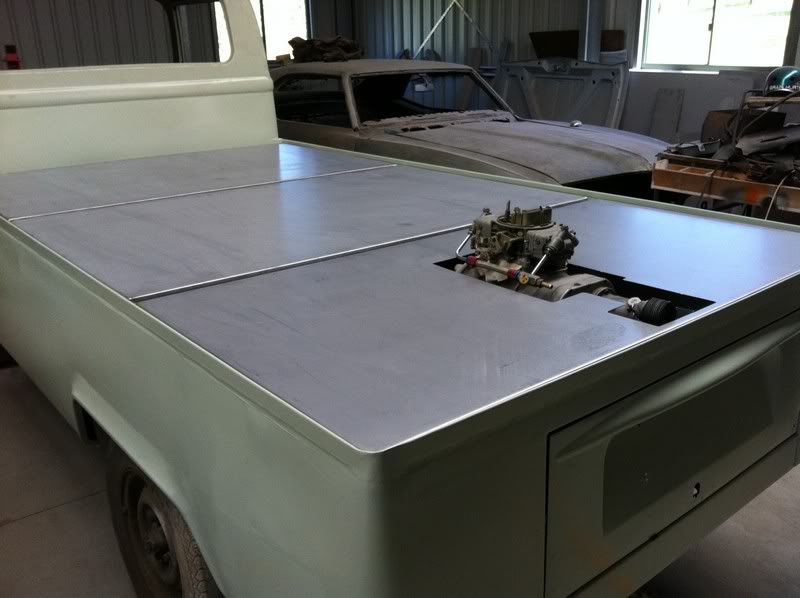
This is how it was supposed to look in the beginning. Just a long flat tray. But then the blower came up so it now needs a hole. What a damn shame! Not : )


Posted Image


Posted Image


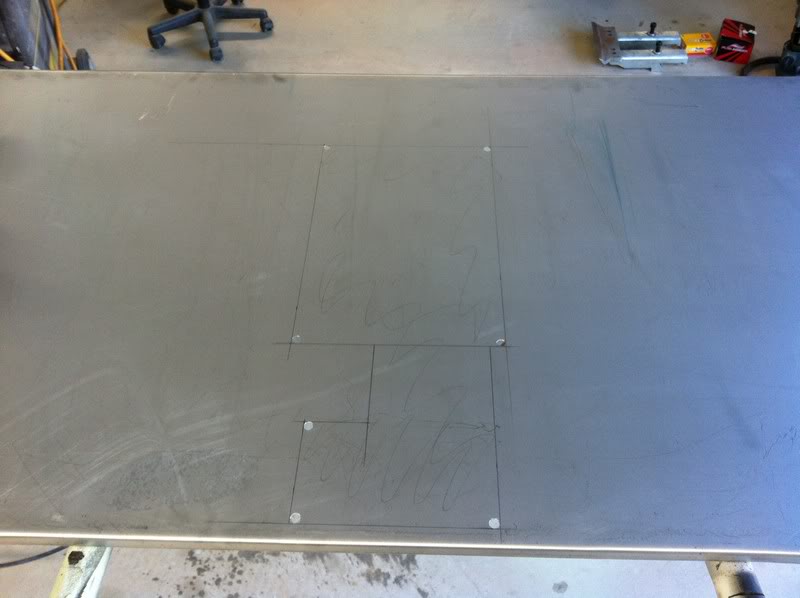
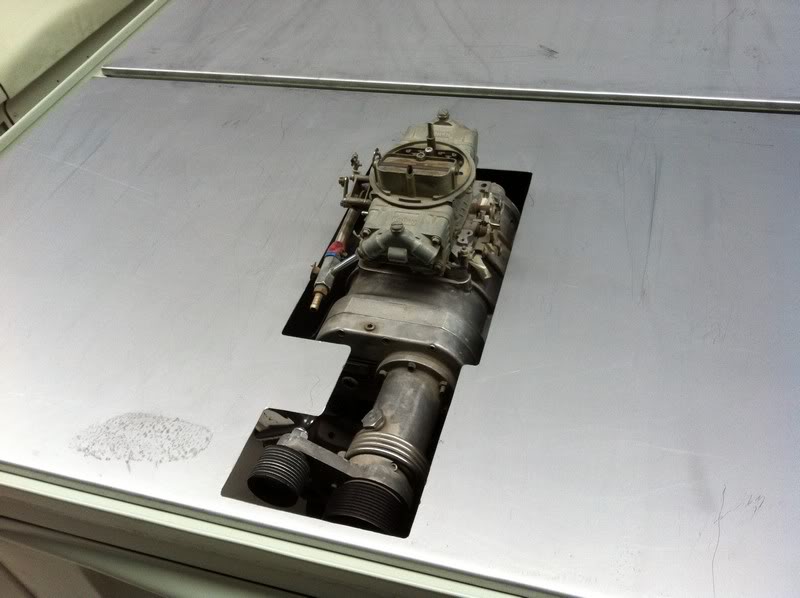
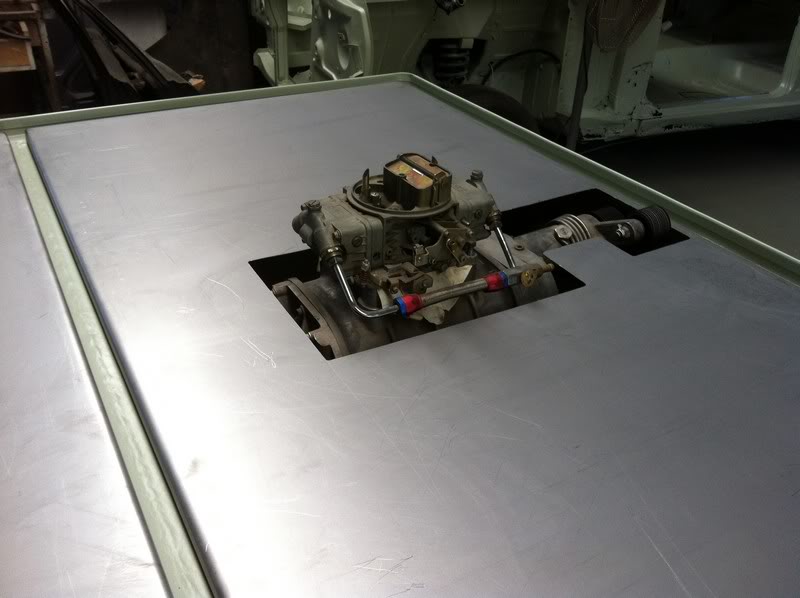
So after taking one or two measurements I marked out where to cut for the blower. I used a 12mm drill to do the inner corners so they're rounded as opposed to being a right angle.


Posted Image


I'll have to change the shape of the hole once I have the shotgun scoop here, but for now it's good enough.


Posted Image

Posted Image


It'll sit up about an inch higher once I've made the engine cradle to go underneath.


Posted Image

Posted Image


So my next job is to build frames, hinges and latches and get these things opening. They're not small or light so a pair of struts will be fitted to each one.

I'm still loving this build : )

Edited by dirtbag, 06 June 2012 - 11:48 PM.


#204 lxsstorana

lxsstorana

    Forum Fixture

  • Members
  • PipPipPipPipPip
  • 2,499 posts
  • Name:Mick
  • Location:Eastwood, Sydney
  • Car:SS Hatchback
  • Joined: 23-March 06

Posted 07 June 2012 - 05:40 AM

Great work as always. :spoton:

#205 _Liam_

_Liam_
  • Guests

Posted 08 June 2012 - 07:15 PM

Awesome work Tim... I know you are always busy and all, but I would still love that thread on that naked XY you keep hidden...

#206 _wblje_

_wblje_
  • Guests

Posted 09 June 2012 - 07:47 PM

Awesome work Tim... I know you are always busy and all, but I would still love that thread on that naked XY you keep hidden...


see another one that wants that thread. looking good. shame that nasty looking engine thingy has to ruin the look of the tray............:)

#207 YELLAcakeu308

YELLAcakeu308

    Forum Fixture

  • Members
  • PipPipPipPipPip
  • 723 posts
  • Name:ben
  • Location:nt
  • Car:A10X
  • Joined: 30-April 11

Posted 10 June 2012 - 07:36 AM

love this thread. Great work tim. R u goin 2 build annother engine lid without blower hole? So if u changed the inlet manifold it be a sleeper.... Ben

#208 _dirtbag_

_dirtbag_
  • Guests

Posted 08 July 2012 - 09:43 AM

Hi ben. I see what you're saying, but taking the blower off!!?? WTF!?!? hahaha.


Well I've done a little bit more to this beast.

I spent a couple of hours at a jap wreckers in the rain and mud looking for some hinges that might be good. Luckily for me, one of the last cars I checked was a mazda 121 bubble. The boot hinges are perfect! Also adding to my luck was the fact they had 3 pairs!


Posted Image


I also bought some steel to make frames for the lids and to mount the hinges.


Posted Image


I'm mounting the hinges to the body with some 75x75x5mm angle. I'm mounting the hinges to the lid frames with some 50x5mm flat bar. Nice and simple. Just like me : )

Getting the first pair of hinges in the perfect position took a bit of figuring out but once the first pair was done the others were easy.


Posted Image


The mazda hinges work a treat!


Posted Image


By plug welding the lid to the new frame took all the flex out of the lid. I can now open the lid from one side without it twisting and catching on the edge.


Posted Image


Posted Image


The rear lid frame will need a little bit more work, just to clear the blower snout.


Posted Image


I replaced that section of RHS with some 5mm flat bar. I'll just blend it in to make it look less dodgy. I also added a couple of extra pieces to the frame just to help support the lid where the hole is cut.


Posted Image

Posted Image

Posted Image


With all the lids welded on and open, it has a bit of a sail boat look going on : )


Posted Image


There's not much room but the lip on the body fits nicely between the lid and the frame. If it just fits - it fits : )


Posted Image


Posted Image


So that's it for now : )

Edited by dirtbag, 08 July 2012 - 09:44 AM.


#209 _nial8r_

_nial8r_
  • Guests

Posted 08 July 2012 - 10:55 AM

great work there Tim :D i think once the timber is on the lids it will take all the twistage out of them but, best to be safe than sorry. well done with the hinge / strut set up.

would be interesting to see it all coloured in with and without the timber.

scuse my dumbness as im not up to speed when it comes to engines but do you think there may be any overheating problems with the radiator so far away from the donk?

#210 _dirtbag_

_dirtbag_
  • Guests

Posted 08 July 2012 - 12:59 PM

great work there Tim :D i think once the timber is on the lids it will take all the twistage out of them but, best to be safe than sorry. well done with the hinge / strut set up.

would be interesting to see it all coloured in with and without the timber.

scuse my dumbness as im not up to speed when it comes to engines but do you think there may be any overheating problems with the radiator so far away from the donk?


I'd assume getting the radiator as far away from a hot cast iron motor the better job the radiator can do. Plus the extra long hoses will hold a fair bit more water too which wont hurt.

#211 _nial8r_

_nial8r_
  • Guests

Posted 08 July 2012 - 04:39 PM

lol the way you explaned that makes more sence :D

#212 _DomDom_

_DomDom_
  • Guests

Posted 08 July 2012 - 05:51 PM

Awesome job again Tim. You seem to have a knack of finding and making the right "stuff". It will look really nice with the timber deck. Will you fix the timber from underneath or from the top?

BTW. the shed is looking a bit full. You know what they say? "Have space, will fill."

Cheers Dom.

#213 _wblje_

_wblje_
  • Guests

Posted 08 July 2012 - 06:08 PM

starting to come together real nice man.

#214 _turbotorrie_

_turbotorrie_
  • Guests

Posted 02 August 2012 - 08:16 PM

Hi mate,
I've been keenly watching your work on the kombi I think your bloody awesome at what you do.
I was wondering if I could pick your brains, I am building a 4 cylinder lc torrie its in members builds. I am currently doing the body for paint and I'm not scared to admit my work is not 100% I know I should not paint it a dark colour but I can't get my head around black with only the chrome around the windows and bumper and grill, what's scaring me is that when I paint it it will look like corrugated iron maybe not that bad but you get the picture.what I was thinking was that I have some black hi gloss lacnam enemel and was thinking of spraying the car to see if the car is straight enough for black and if it is rub back and undercoat and spray it with 2 pack tuxedo black (autothane) or if the body is Crap another colour ,what are your thoughts or should I leave black to the pro's thanks for your time,Daryl


Very sorry to hijack your build I could not message you kept saying error ,feel free to tell me to piss off if required

Edited by turbotorrie, 02 August 2012 - 08:19 PM.


#215 _mick74lh_

_mick74lh_
  • Guests

Posted 02 August 2012 - 08:33 PM

Hi mate,
I've been keenly watching your work on the kombi I think your bloody awesome at what you do.
I was wondering if I could pick your brains, I am building a 4 cylinder lc torrie its in members builds. I am currently doing the body for paint and I'm not scared to admit my work is not 100% I know I should not paint it a dark colour but I can't get my head around black with only the chrome around the windows and bumper and grill, what's scaring me is that when I paint it it will look like corrugated iron maybe not that bad but you get the picture.what I was thinking was that I have some black hi gloss lacnam enemel and was thinking of spraying the car to see if the car is straight enough for black and if it is rub back and undercoat and spray it with 2 pack tuxedo black (autothane) or if the body is Crap another colour ,what are your thoughts or should I leave black to the pro's thanks for your time,Daryl


Hey mate, I saw your Torry in the thread and have to admit the look of the flares has grown on me. Should look pretty unique once done.

No doubt Dirtbag will offer some good advice but I'd suggest guide-coating with a fine misty coat of acrylic black over your high-fill and using a long speed-file with something like 240 or 320 grit paper (I prefer dry at this stage), take your time to carefully smooth down the high-fill. The black will stay in any low spots or course scratches and show them up.

You may have to repeat this process several times of high-filling, guide-coating and blocking straight. If ya still worried about it being rippled you can wet a rag with prepsol and quickly wipe it over an area, get your head down next to the panel with the light in the right position to inspect it for smoothness. As you repeat the process you may also want to go one step finer with the sandpaper each time till you get to say 4 or 600 grit.

Pay particular attention to the folds and edges of any panel creases. Even getting some mates to come and look and see if there's anything you've missed can help.

I'm sure other people could suggest different better methods but really its not rocket-science, but just takes alot of time and patience. Good luck.

#216 _dirtbag_

_dirtbag_
  • Guests

Posted 04 August 2012 - 03:58 AM

Yep, what he said ^^^

If you have trouble blocking the little wobbles out use polyester spray filler rather than just primer filler. It's bloody marvellous stuff. You'll need at least a 2.5mm nozzle though in your gun.

#217 _turbotorrie_

_turbotorrie_
  • Guests

Posted 04 August 2012 - 10:54 AM

Thank you mick and dirtbag keep up the good work cant wait to see the finished product, thanks again Daryl


Edited by turbotorrie, 04 August 2012 - 10:55 AM.


#218 _jabba_

_jabba_
  • Guests

Posted 16 September 2012 - 08:08 PM

bump

#219 _Emu_

_Emu_
  • Guests

Posted 11 November 2012 - 01:01 AM

bump :)

#220 _LH308_

_LH308_
  • Guests

Posted 12 November 2012 - 07:14 PM

Was everyone else like me? I spent half the time looking at all the other projects in the shed. Not to mention the shed itself. Great bloody set up mate.
.
I admire you metal work. I am just starting out with my first project and having to pick up metal working skills. I am a carpenter and metal seems so hard to work with atm. To be able to make the window tracks and floor for the car seems awesome to me. I gess I'll have to keep practicing.

#221 _wblje_

_wblje_
  • Guests

Posted 18 November 2012 - 11:55 AM

is dirtbag still about. i thought i read he was crook a while back.

#222 MictheAussie

MictheAussie

    Forum Member

  • Members
  • PipPipPip
  • 234 posts
  • Name:Mic
  • Location:Colorado, USA
  • Car:LJ
  • Joined: 14-January 10

Posted 18 December 2012 - 01:53 PM

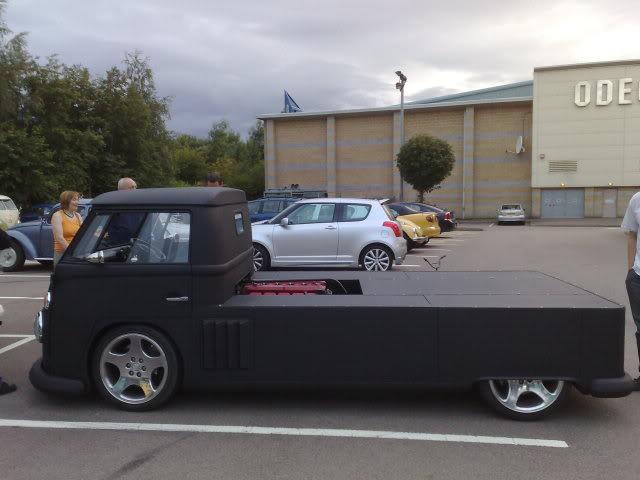
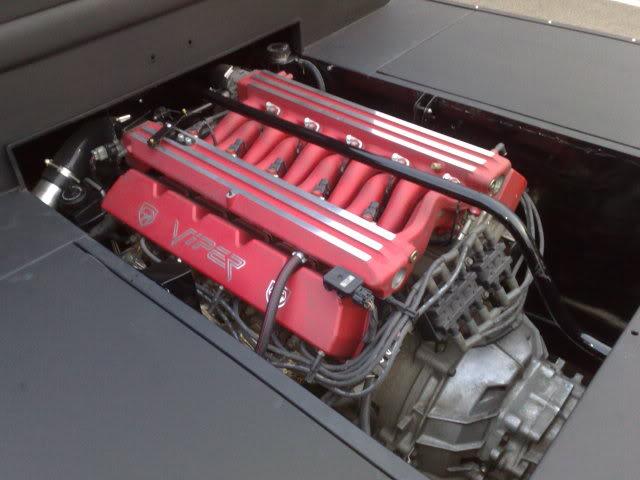
Just came over this surfing online. Looks like a dodge viper V10 and side mounted radiators. Pretty cool.Posted ImagePosted ImagePosted ImagePosted Image

#223 _dirtbag_

_dirtbag_
  • Guests

Posted 10 November 2013 - 06:50 PM

This project is now up for sale as the owner has other things going on. He's asking around $8k, and that includes a fully rebuilt and warranted 305 Vortec small block as well as the blower set up. Wish I could afford it for myself!


#224 MODNIZD

MODNIZD

    Forum Fan

  • Members
  • PipPipPipPip
  • 460 posts
  • Name:Phil
  • Location:Perth WA
  • Car:4 Door LC RB25DET
  • Joined: 12-November 05

Posted 21 November 2013 - 04:41 PM

Bargain.


#225 _Torana007_

_Torana007_
  • Guests

Posted 22 November 2013 - 07:12 PM

SOLD SOLD


3 user(s) are reading this topic

0 members, 3 guests, 0 anonymous users