
Keeping an eye on this one!
May I ask which engineer you went through?

YT's LH Project
Started by
_YTsLH_
, Mar 06 2011 03:31 PM
83 replies to this topic
#27
 _mick74lh_
_mick74lh_
-

- Guests
Posted 16 March 2011 - 10:50 PM
Wow I love this build! Can't wait to see it progress more
#28
fenz
-

- Members
-

- 220 posts
Forum Member
- Name:Aaron
- Location:South Australia
- Car:LJ 2 door and UC V8 4door
- Joined: 26-July 09
Posted 17 March 2011 - 12:17 PM
Is my imagination that the rego mob here in south oz dont seem to be so anal about modified cars these days????
#29
_Gunmetal LH_
_Gunmetal LH_
-
- Guests
Posted 17 March 2011 - 01:34 PM
Maybe not but the cops certainly are...
#30
_YTsLH_
_YTsLH_
-
- Guests
Posted 17 March 2011 - 06:37 PM
I went to three engineers before I could find one that would do it.
My engineers name is Doug Potts from Australian Technology. I didn�t have any problems with the proposal to Motor Reg.
Cheers,
YT
My engineers name is Doug Potts from Australian Technology. I didn�t have any problems with the proposal to Motor Reg.
Cheers,
YT
#31
_YTsLH_
_YTsLH_
-
- Guests
Posted 17 March 2011 - 07:27 PM
Here�s some pics of the rear A9X guards I extended. I did this because I saw quite a few flares fitted at a Torana show that ran very close to the tyre. As I am running 26�OD tyres I thought best to give it a little more room.
*Warning I am neither a fibre glasser, or is it fibre glassier *
*
I basically cut the guard where it seemed best, mounted the two pieces separately to the body, then bent up a piece of tin and bolted the two bits together. I then glassed them together from the back with about 6 � 8 layers of cloth.
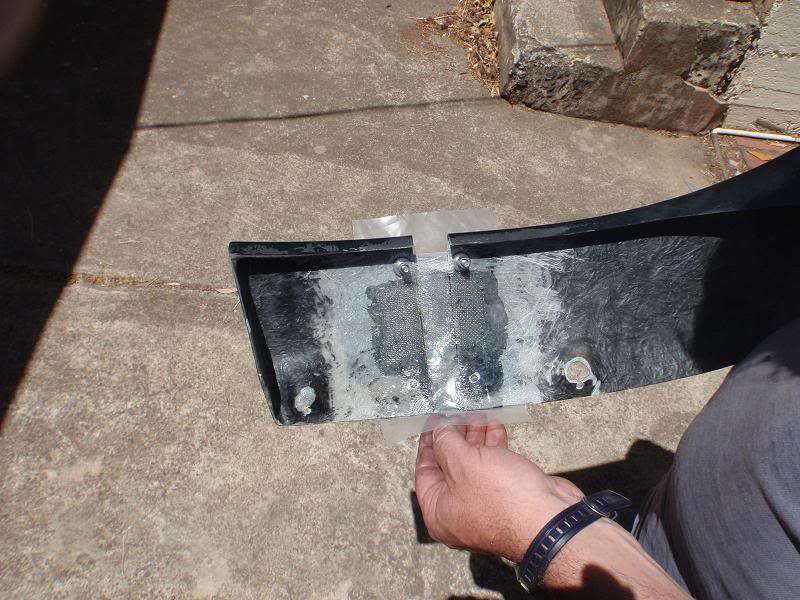
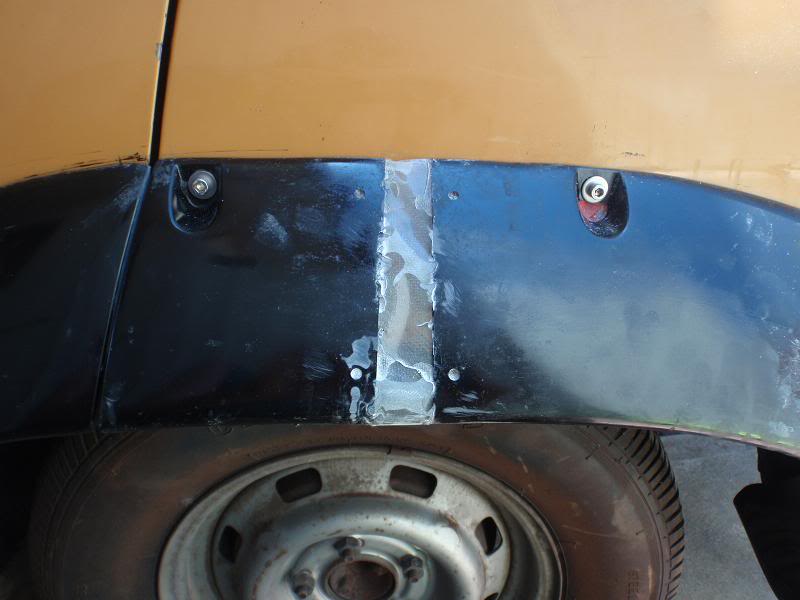
I also glassed in a corner fixing for the door flare.
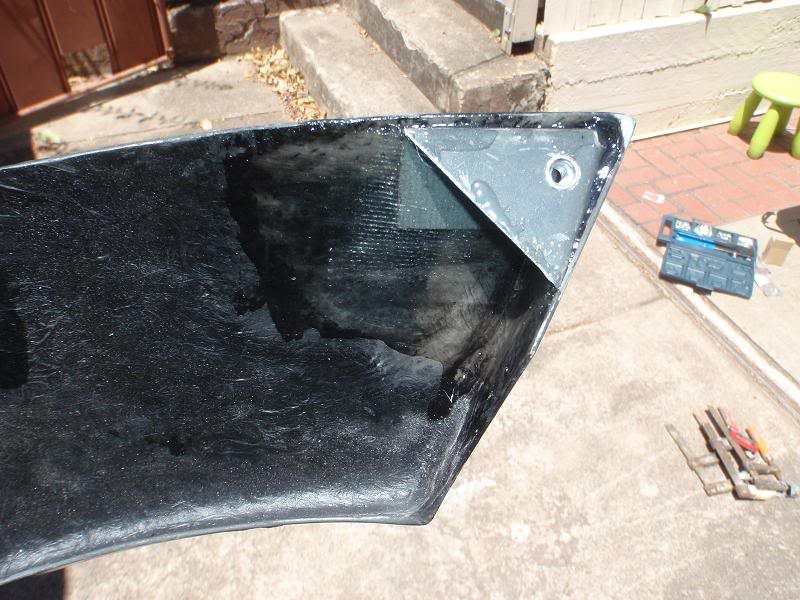
At the Torana show I also saw a lot of flares that dipped inwards where the door and rear quarter guards met or downward to form the shape of a �M�.
This is it almost finished.
Yes, that is filler to get the shape right.
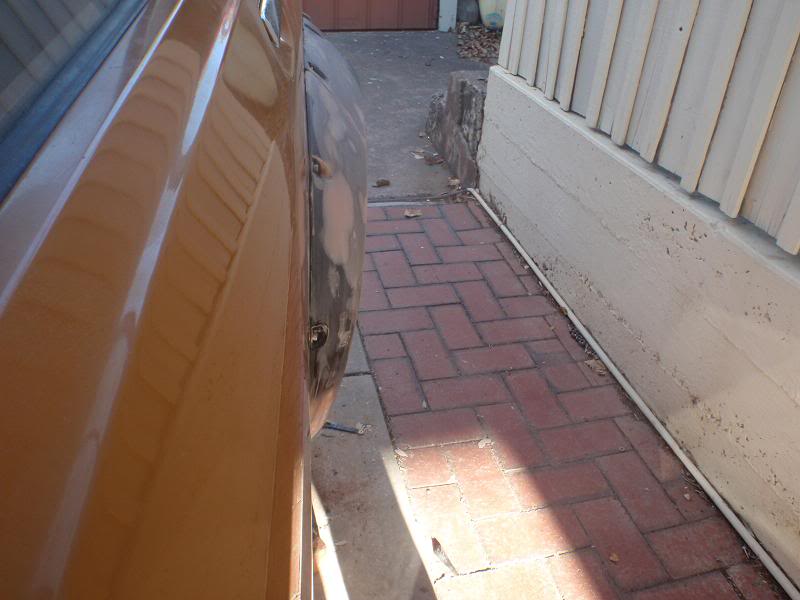
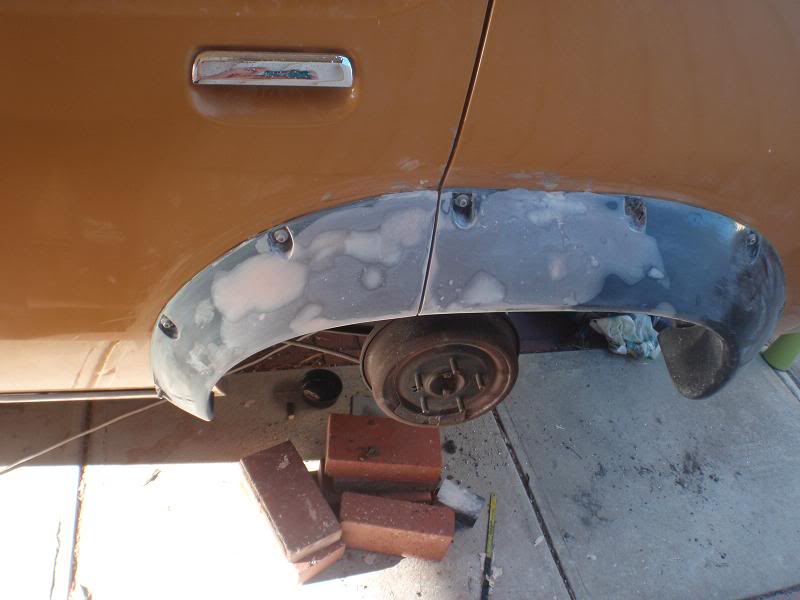
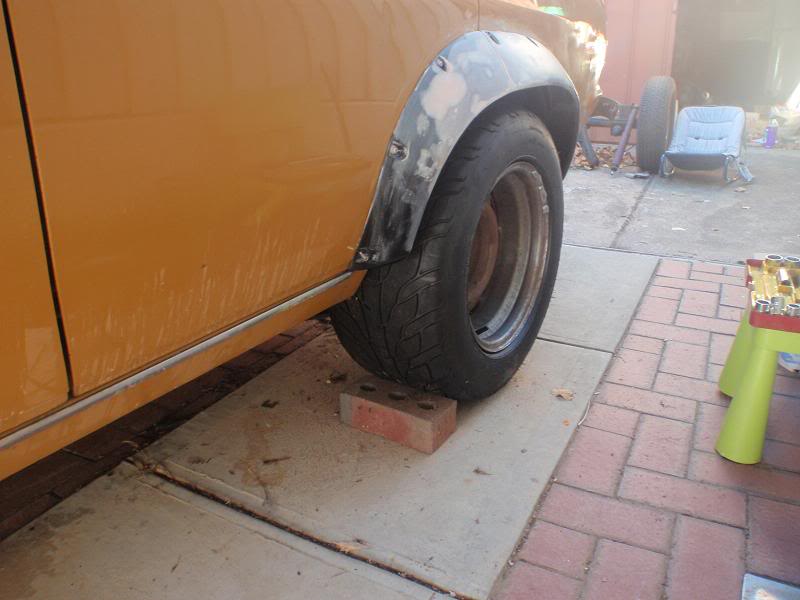
Once I have the shape all perfect I will cover it with a thin layer of fibre glass and cloth to hold it all together permanently and stop it falling off.
Cheers,
YT
*Warning I am neither a fibre glasser, or is it fibre glassier
*I basically cut the guard where it seemed best, mounted the two pieces separately to the body, then bent up a piece of tin and bolted the two bits together. I then glassed them together from the back with about 6 � 8 layers of cloth.
I also glassed in a corner fixing for the door flare.
At the Torana show I also saw a lot of flares that dipped inwards where the door and rear quarter guards met or downward to form the shape of a �M�.
This is it almost finished.
Yes, that is filler to get the shape right.
Once I have the shape all perfect I will cover it with a thin layer of fibre glass and cloth to hold it all together permanently and stop it falling off.
Cheers,
YT
#32
_YTsLH_
_YTsLH_
-
- Guests
Posted 17 March 2011 - 07:28 PM

Edited by YTsLH, 17 March 2011 - 07:31 PM.
#34
Growla
-
- Members
-
- 229 posts
Forum Member
- Location:Canberra ACT
- Car:LX SL/R LS1 conversion completed July 2010
- Joined: 07-February 07
Posted 18 March 2011 - 08:56 AM
Great work! I'm in the process of changing my external fuel pump to an internal as I'm sick of the Bosch 044 being so noisy when hot. I’m thinking of going with a BA/BF falcon fuel pump assembly as it has screws on the top head plate. Just got to check the minimum tank depth and pump pressure etc otherwise I'll change it to the VY fuel pump I have.
Cheers
Mark
Cheers
Mark
Edited by Growla, 18 March 2011 - 08:57 AM.
#35
_YTsLH_
_YTsLH_
-
- Guests
Posted 27 April 2011 - 03:44 PM
Well it is still making progress, all be it slowly.
The diff is still getting made.
9" Heavy Duty housing
31 spline Currie billet axels.
The proposed centre is a
4.1 STRANGE CENTRE
RACE CASE
NASCAR PINION SUPPORT
1350 YOKE
DETROIT LOCKER
Comments are welcome on this setup.
I'm fitting XF rear disks as this is what the engineer specified and is on the Statement of Requirements. I picked up the mounting brackets and callipers this week for $44.
I have also been getting rough prices for the headers and exhaust setup and also trying to source some rigid 3/8" fuel line. If anyone knows where to get some in Adelaide the help would be appreciated.
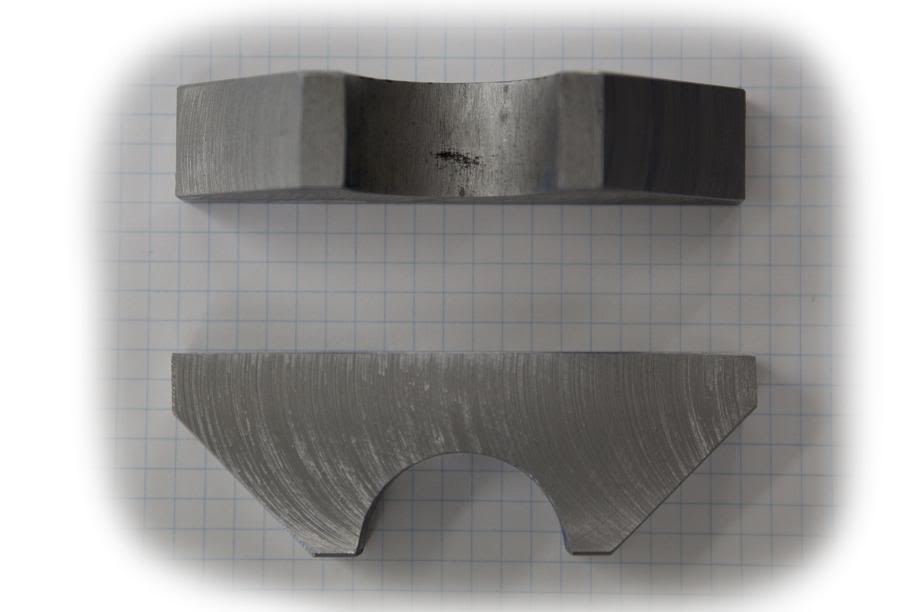
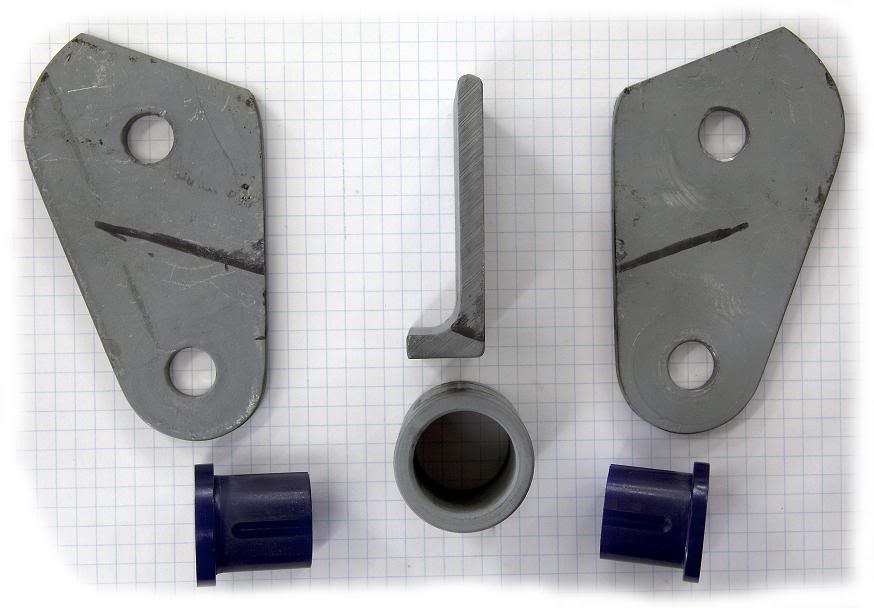
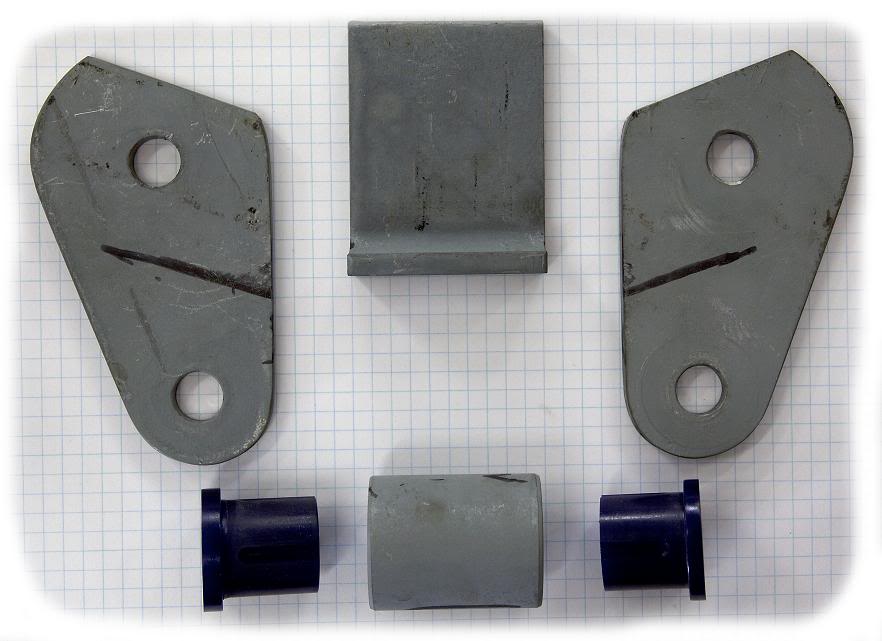
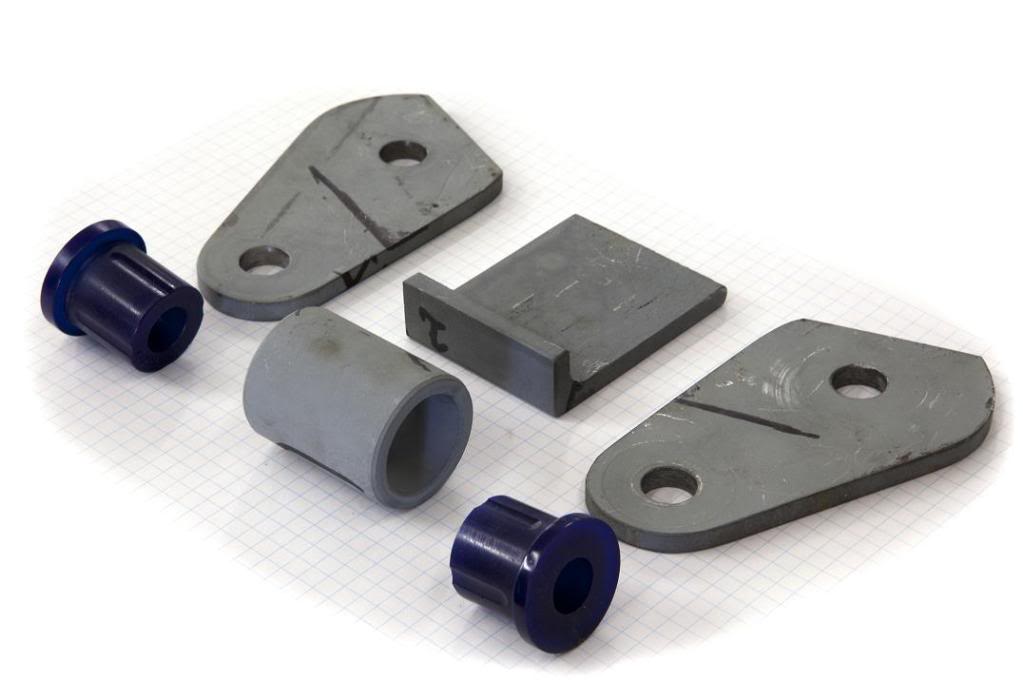
Here are the picks of the engine mounts I made before they were welded.
Cheers,
YT
The diff is still getting made.
9" Heavy Duty housing
31 spline Currie billet axels.
The proposed centre is a
4.1 STRANGE CENTRE
RACE CASE
NASCAR PINION SUPPORT
1350 YOKE
DETROIT LOCKER
Comments are welcome on this setup.
I'm fitting XF rear disks as this is what the engineer specified and is on the Statement of Requirements. I picked up the mounting brackets and callipers this week for $44.
I have also been getting rough prices for the headers and exhaust setup and also trying to source some rigid 3/8" fuel line. If anyone knows where to get some in Adelaide the help would be appreciated.
Here are the picks of the engine mounts I made before they were welded.
Cheers,
YT
#36
blue308
-

- Members
-
- 13 posts
Forum Participant
- Location:Adelaide, southern
- Car:Lx 4 Door , Lx Hatch
- Joined: 01-January 08
Posted 27 April 2011 - 04:03 PM
i got some 3/8 aluminium fuel line 25ft for around $40 from outlaw speed shop
Thanks Shane
Thanks Shane
#37
_YTsLH_
_YTsLH_
-
- Guests
Posted 07 June 2011 - 06:11 PM
A quick update.
Still awaiting the diff to be made. I've been assured it will happen this week although the centre hasn�t been ordered as yet.
I've modified the VE hydraulic clutch master cylinder to fit.
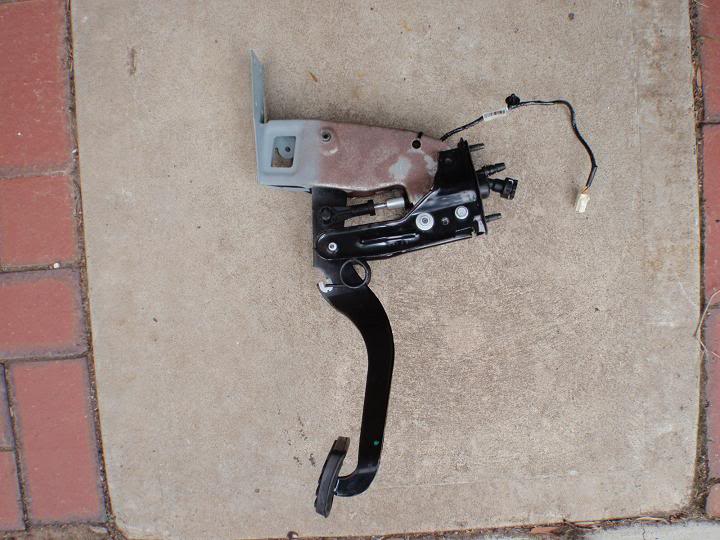
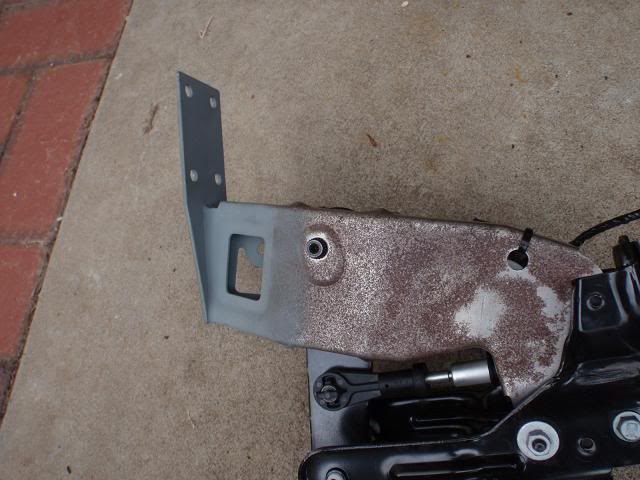
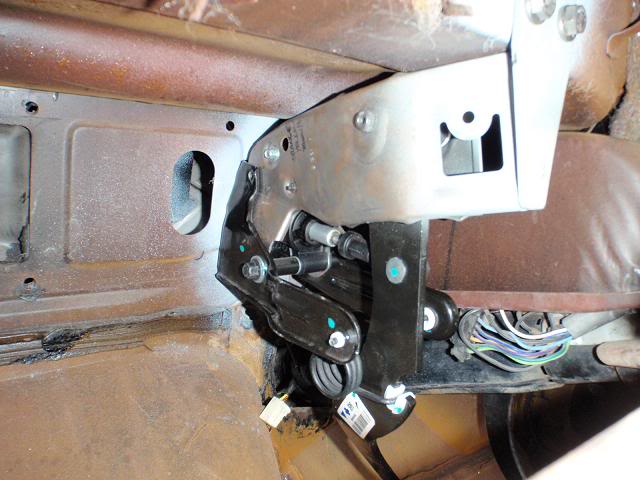
And fit the "Fly by wire" accelerator pedal.
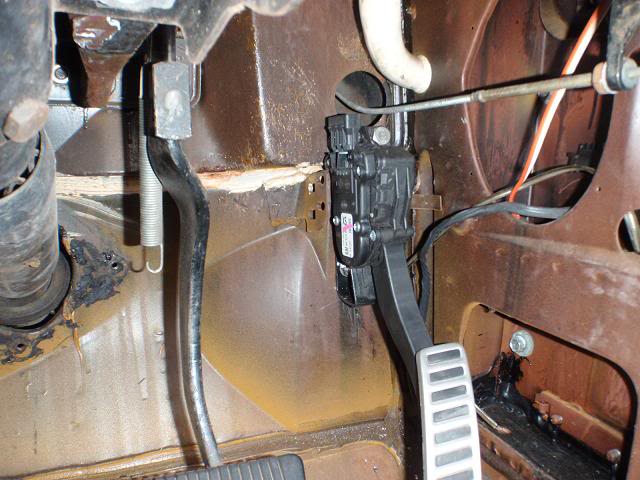
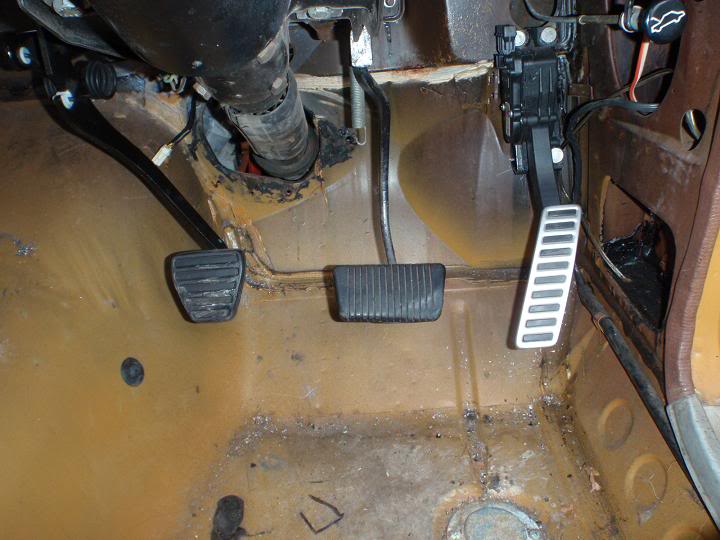
Just need to match the pedals.
Overall I'm pretty happy with it. It�s all very strong and will take many a stomping in its life.
Hoppers Stoppers front brake kit and Drop Stubs arrived last week but wont install them until I get the diff in.
I'm also looking at an in boot fuel tank and radiator at the moment.
I'll keep you posted.
Cheers,
YT
Still awaiting the diff to be made. I've been assured it will happen this week although the centre hasn�t been ordered as yet.
I've modified the VE hydraulic clutch master cylinder to fit.
And fit the "Fly by wire" accelerator pedal.
Just need to match the pedals.
Overall I'm pretty happy with it. It�s all very strong and will take many a stomping in its life.
Hoppers Stoppers front brake kit and Drop Stubs arrived last week but wont install them until I get the diff in.
I'm also looking at an in boot fuel tank and radiator at the moment.
I'll keep you posted.
Cheers,
YT
#38
_YTsLH_
_YTsLH_
-
- Guests
Posted 18 June 2011 - 06:21 PM
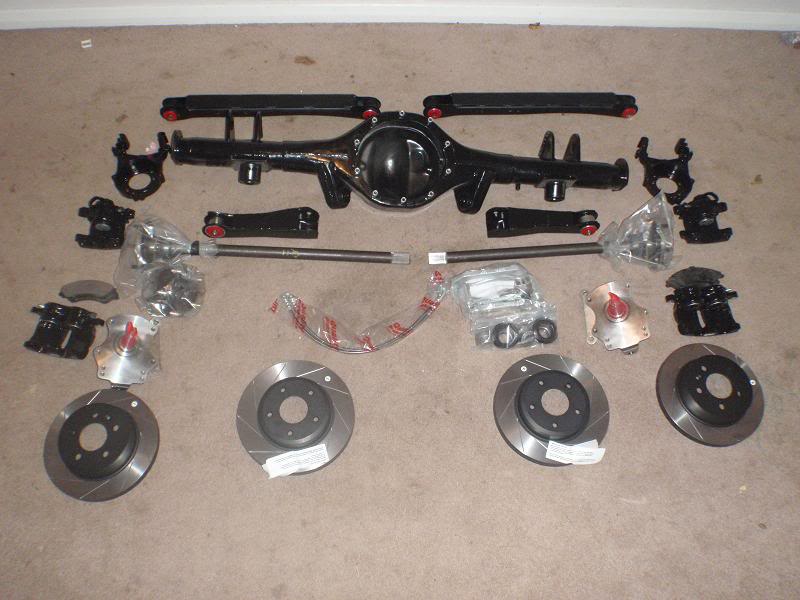
I finally got some bits home to play with.
Shorten heavy duty 9� diff housing setup for LH Torana, Curry billet axles, bearings.
I re-cond a pair of XF rear callipers and mounting brackets. DBA slotted disks to suit.
Boxed upper and lower trailing arms with new bushes.
Stub tech drop stubs.
Standard Hoppers Stopper front brake kit.
I�m still awaiting the centre.
The little fella helping fix the calliper brackets and axles.
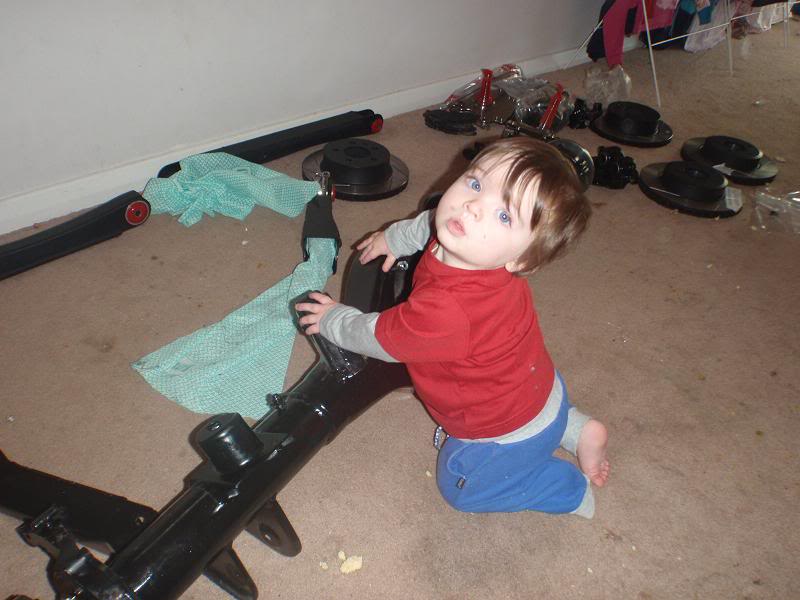
For the curious I made timber bushes and pressed them in to the inside of the diff housing to hold the axles straight while I wait for the centre.
Cheers,
YT
Shorten heavy duty 9� diff housing setup for LH Torana, Curry billet axles, bearings.
I re-cond a pair of XF rear callipers and mounting brackets. DBA slotted disks to suit.
Boxed upper and lower trailing arms with new bushes.
Stub tech drop stubs.
Standard Hoppers Stopper front brake kit.
I�m still awaiting the centre.
The little fella helping fix the calliper brackets and axles.
For the curious I made timber bushes and pressed them in to the inside of the diff housing to hold the axles straight while I wait for the centre.
Cheers,
YT
#39
_abtorana_
_abtorana_
-
- Guests
Posted 18 June 2011 - 06:36 PM
geez mate for someone that has no experience you are doin a cracker of a job there
sure your not tellin porky pies (lol)
anyway i will be following this build for sure , going to be a real weapon when finished
good luck
sure your not tellin porky pies (lol)
anyway i will be following this build for sure , going to be a real weapon when finished
good luck
#40
_YTsLH_
_YTsLH_
-
- Guests
Posted 19 June 2011 - 10:10 AM
Cheers mate.
Nah, lucky enough I have a couple of people and my engineer to run ideas past. That plus lots and lots of research. I have found that everything has been done at least once on the internet
Also I work in an industrial maintenance field so have access to a lot of trades and machinery, lathes, mils, boiler making, etc.
Cheers,
YT
Edited by YTsLH, 19 June 2011 - 10:12 AM.
#41
_YTsLH_
_YTsLH_
-
- Guests
Posted 18 July 2011 - 04:20 PM
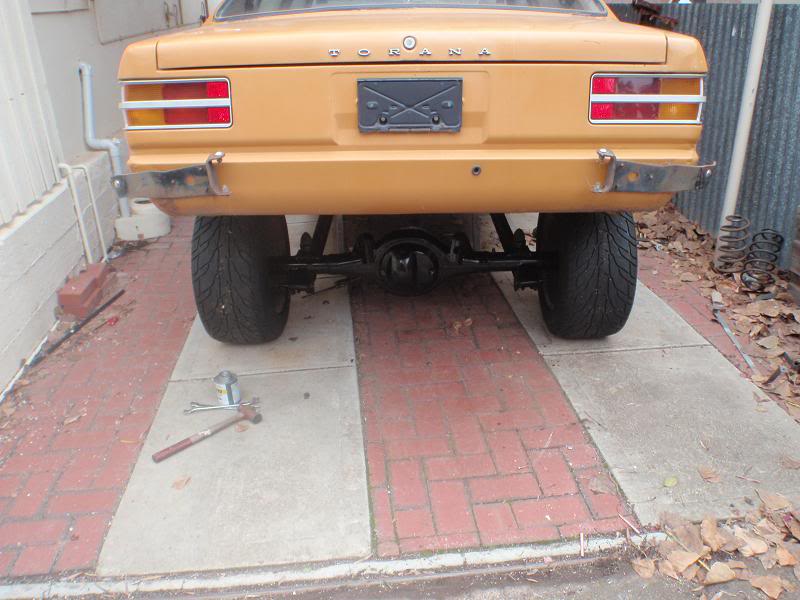
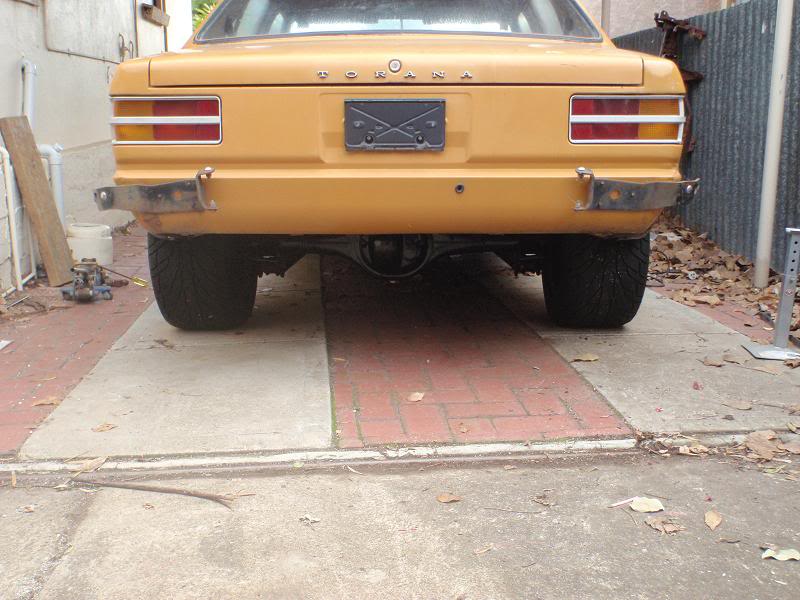
A quick update.
All most finished installing a -8 aluminium fuel line. I�m going to use the original one as a return line. The front drop stubs and brakes are on. I�m hunting for a couple of HQ 15� now. I didn�t realise how hard they are to find. The engine wiring loom is on and finished some final touches to the gearbox cross member.
I�ll stick the K Frame/Engine back in this week and get stuck into the rest of the looms. Hope to have it to a point where I can turn the ignition on and see what dramas that can unfold.
Cheers,
YT
#42
_Fugly_
_Fugly_
-
- Guests
Posted 19 July 2011 - 09:18 PM
Awesome job, i agree with abtorana's comment....... what your doing would put some professionals to shame.
Might even make a set of them mounts myself, what are the bushes from?
If i had have seen your thread earlier i would have suggested different rear brakes, i use them on one of my Centura's, as brakes they work great but the handbrake is shit & in my case they are a pain is the arse when competing in burnout comps.
Thanks for contacting me with the link, i will definitely be watching.
Cheers Brenton.
#43
_YTsLH_
_YTsLH_
-
- Guests
Posted 22 July 2011 - 05:53 PM
Thanks Brenton. I think the bushes are from a corolla??? Just some one of my mates had lying around. I originally had XD callipers spec'd from the engineer but was told the XF's were far better so went with them. Oh well I'll see how they go.
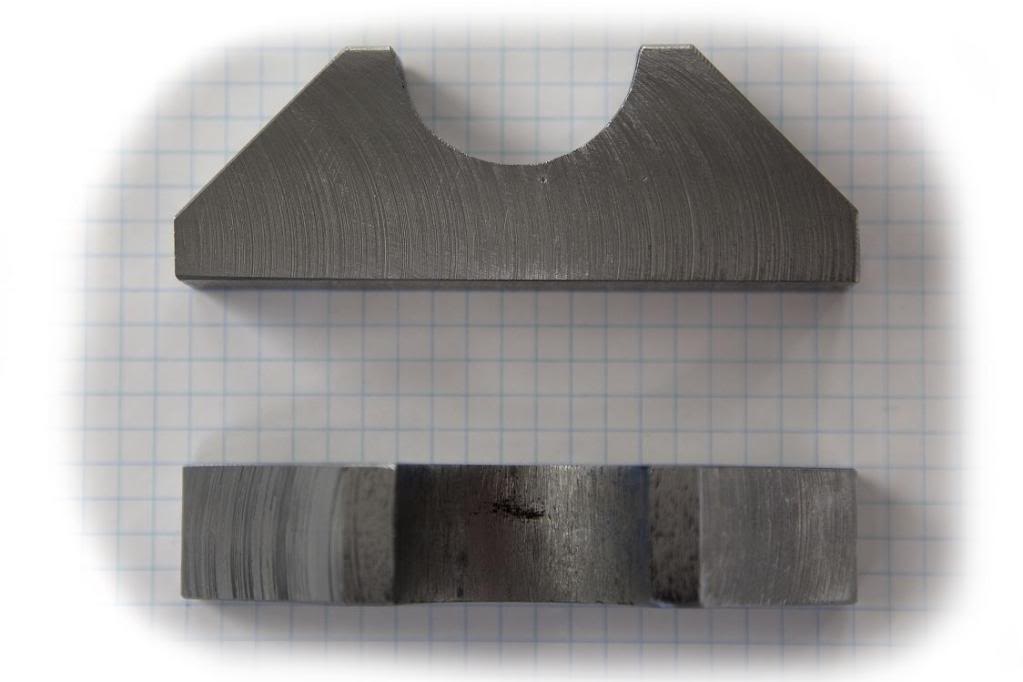
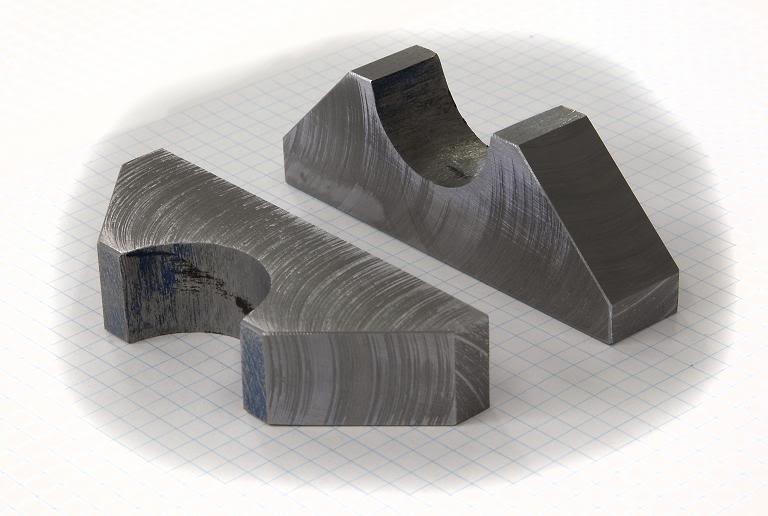
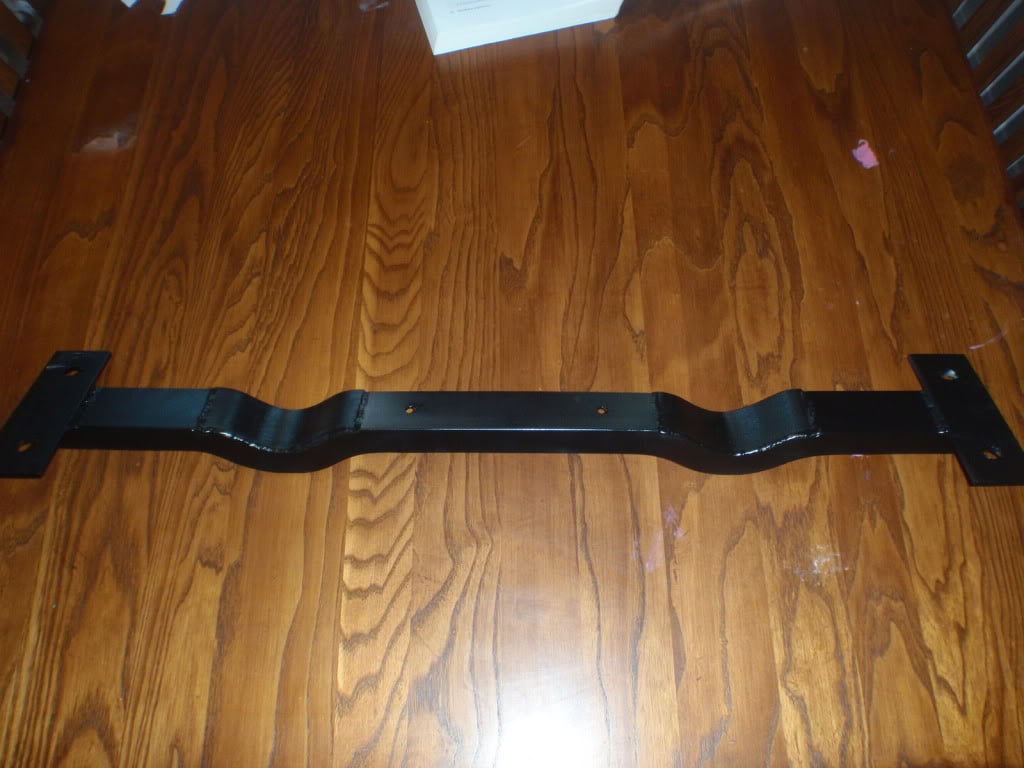
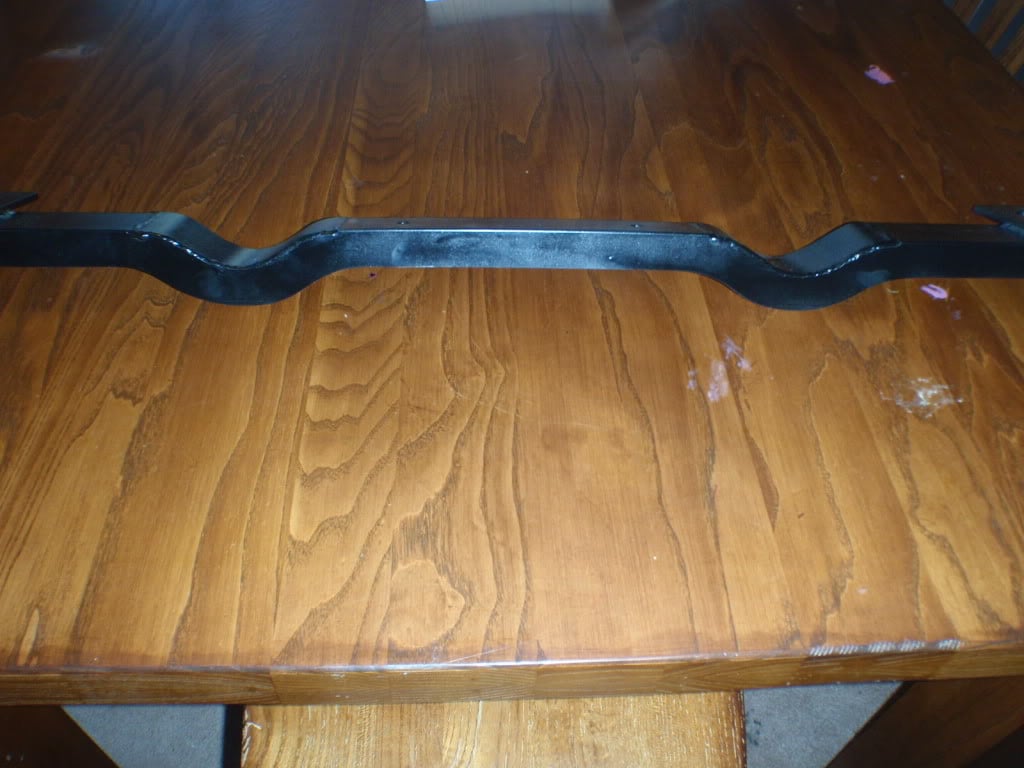
Here's a couple of pics of the Gearbox cross member I knocked up. The humps are to fit the 3" pipes through.
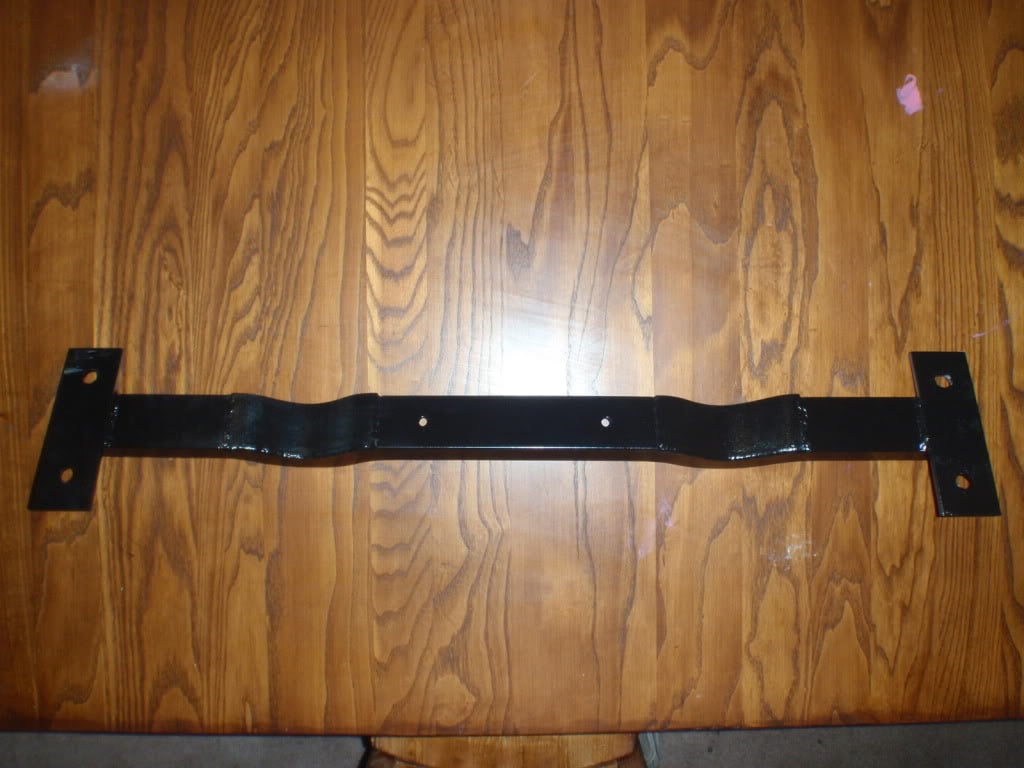
Cheers,
YT
Here's a couple of pics of the Gearbox cross member I knocked up. The humps are to fit the 3" pipes through.
Cheers,
YT
#44
_YTsLH_
_YTsLH_
-
- Guests
Posted 24 July 2011 - 11:40 AM
The 1/2" aluminium fuel line bent up and ready to go in.
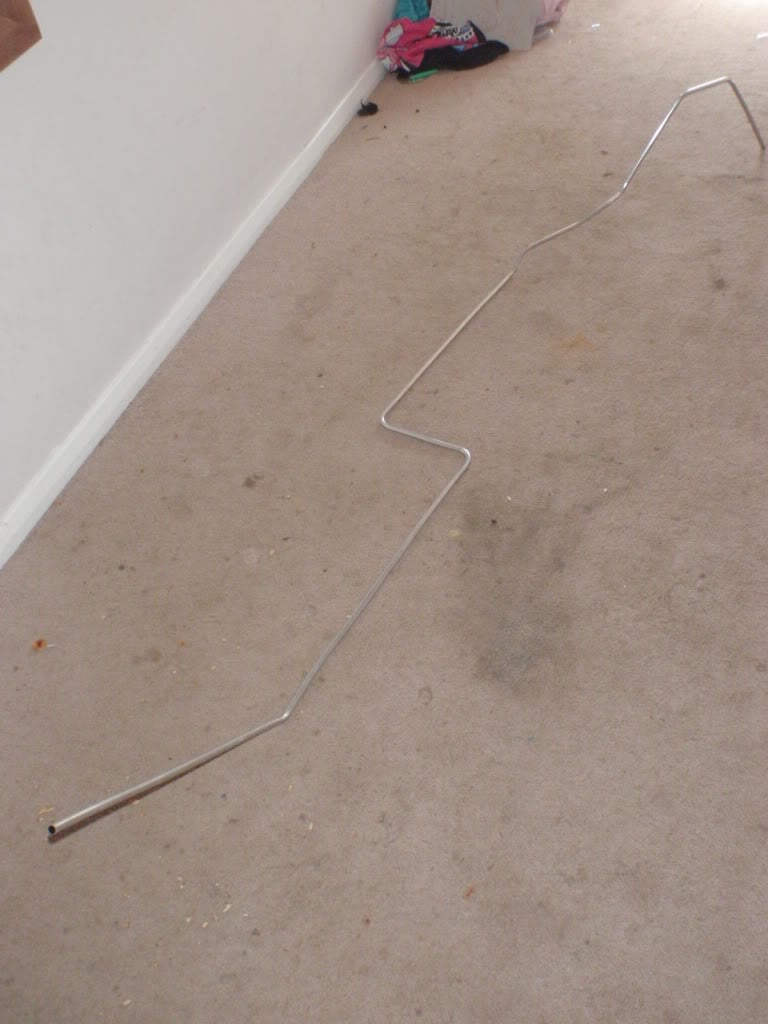
A random pick my work area.
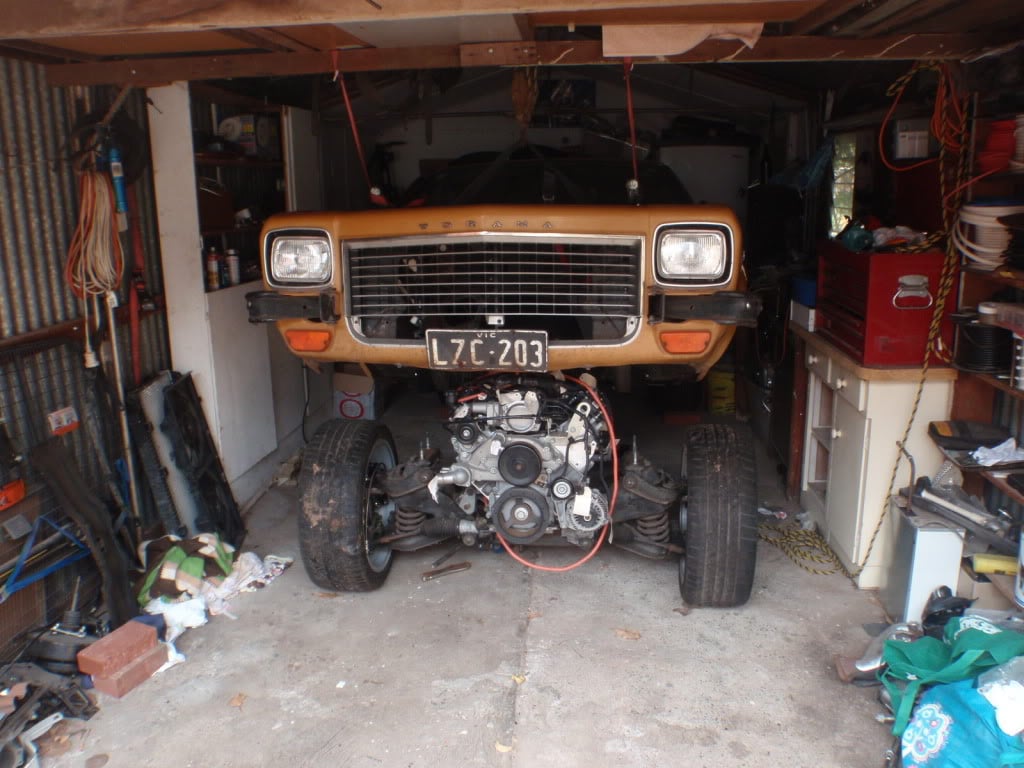
I've plugged all the looms in and about to start nutting out any issues that arise.
Cheers,
YT
A random pick my work area.
I've plugged all the looms in and about to start nutting out any issues that arise.
Cheers,
YT
#45
_patch_
_patch_
-
- Guests
Posted 24 July 2011 - 04:16 PM
for some one that isn't experienced or hasnt done up cars be for your doing one bloody great job at doing it! keep up the great work
#46
mrlctorana
-

- Members
-
- 572 posts
Forum Fixture
- Location:North-West Tassie
- Joined: 17-January 06
Posted 24 July 2011 - 06:23 PM
I agree, excellent job so far and i might be a bit biased but thats a great conversion you've chose to do there  looking forward to seeing it progress.
looking forward to seeing it progress.
#47
_patch_
_patch_
-
- Guests
Posted 24 July 2011 - 06:39 PM
^^^ all he has to do is paint it purple lol
#48
_BLACK LH_
_BLACK LH_
-
- Guests
Posted 24 July 2011 - 08:20 PM
awesome thread cant wait to see it in real life on the Adelaide streets 
#49
_YTsLH_
_YTsLH_
-
- Guests
Posted 25 July 2011 - 11:14 AM
Thanks Guys.
With the looms all plugged in again I cautiously turned the ignition on and the instruments all lit up which was a good sign. Then it went through its self check and came up with the expected faults so pretty happy with that. It gives me something to work with.
I�ll get back on it tomorrow and let you know how I go.
Cheers,
YT
#50
_LS1 Hatch_
_LS1 Hatch_
-
- Guests
Posted 25 July 2011 - 01:08 PM
Sounds like you are making good progress!
I made my loom, and remember that first time turning the key...lol (all went well and it fired right up actually)
I made my loom, and remember that first time turning the key...lol (all went well and it fired right up actually)


2 user(s) are reading this topic
0 members, 2 guests, 0 anonymous users

