
Ok so things today went as well as expected which means I got nowhere.
Trying to overcome the faults with the VE control system. Alarms are up for the Brakes, ABS, Stability Control and Air Bag�s. The workshop manual I have doesn�t have the schematics nor the detail I need for the entire electrical system which makes it hard to frig things.
The next step is to find somewhere that can get in and turn these parts off from the inside.
So many wires (Shudder).............
Cheers,
YT

YT's LH Project
Started by
_YTsLH_
, Mar 06 2011 03:31 PM
83 replies to this topic
#52
 _BLACK LH_
_BLACK LH_
-

- Guests
Posted 26 July 2011 - 09:03 PM
might be worth investing in after market ECU and use different throttle body with a cable, i cant think how that computer with run the engine without the other self tests being completed without faults, being a can based system.
#53
_YTsLH_
_YTsLH_
-
- Guests
Posted 26 July 2011 - 09:17 PM
You might be right there. That�s my fallback position.
From what I understand, all the bus linked modules need to remain but you can turn certain points off to disable the alarms. If I could see the logic or at least a hard copy of it I�m sure I could nut out what needs to be enabled/disabled.
Cheers,
YT
From what I understand, all the bus linked modules need to remain but you can turn certain points off to disable the alarms. If I could see the logic or at least a hard copy of it I�m sure I could nut out what needs to be enabled/disabled.
Cheers,
YT
#54
_BLACK LH_
_BLACK LH_
-
- Guests
Posted 28 July 2011 - 08:15 PM
i worked at a holden dealer for a long time, and havnt seen anyway to disable computer settings, everything on the bus has to stay, as to turn off alarms, used to be able to b4 items were std features like abs, trac control srs , but now all std v8's have this so unlikely to be turned off]

#55
ls2lxhatch
-

- Members
-

- 5,332 posts
- Location:Perth
- Car:LX Hatch
- Joined: 29-May 06
Posted 29 July 2011 - 02:59 AM
Give Sideshow Performance Wiring a call, they will be able to tell you want can and can't be done with the factory ECU. There are plenlty of parameters that are usually disabled for an engine swap.
Edited by ls2lxhatch, 29 July 2011 - 03:01 AM.
#56
_YTsLH_
_YTsLH_
-
- Guests
Posted 04 August 2011 - 05:19 PM
Thanks Andy. I gave him a call and he was quite reluctant to freely hand over information. He said 50% of his business was helping people over the phone and it was sending him broke so understandably I didn�t push too hard. He did say he was unsure as to what could be turned off or not.
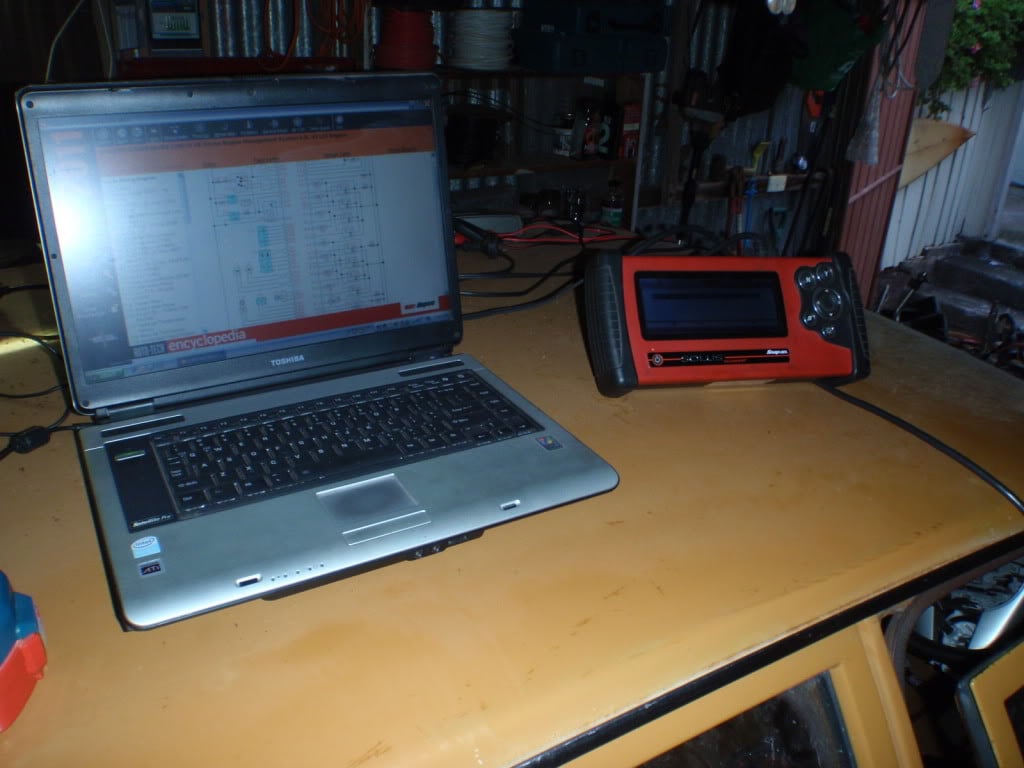
So......... Since then I have managed to frig sensors enough to get rid of the ABS and Stability Control alarms leaving the Brake and Air Bag Alarms to go. Still no broom broom though. I was given a program �Auto-Tech Encyclopaedia� to use which has been massively useful. Anyone needing to hunt down these types of problems with any Make or Model looms/ECU�s etc I thoroughly recommend it.
Next week I have lined up a Fault Code Scan Tool to start looking at what�s going on from the inside.
Still awaiting my Diff Centre :(
Cheers,
YT
#57
_YTsLH_
_YTsLH_
-
- Guests
Posted 06 August 2011 - 07:36 PM
I got to use the scan tool today. Managed to clear a lot of existing faults and found a couple of extra things I needed plugged in. I even managed to get rid of the Air bag alarm (for a short while anyway).
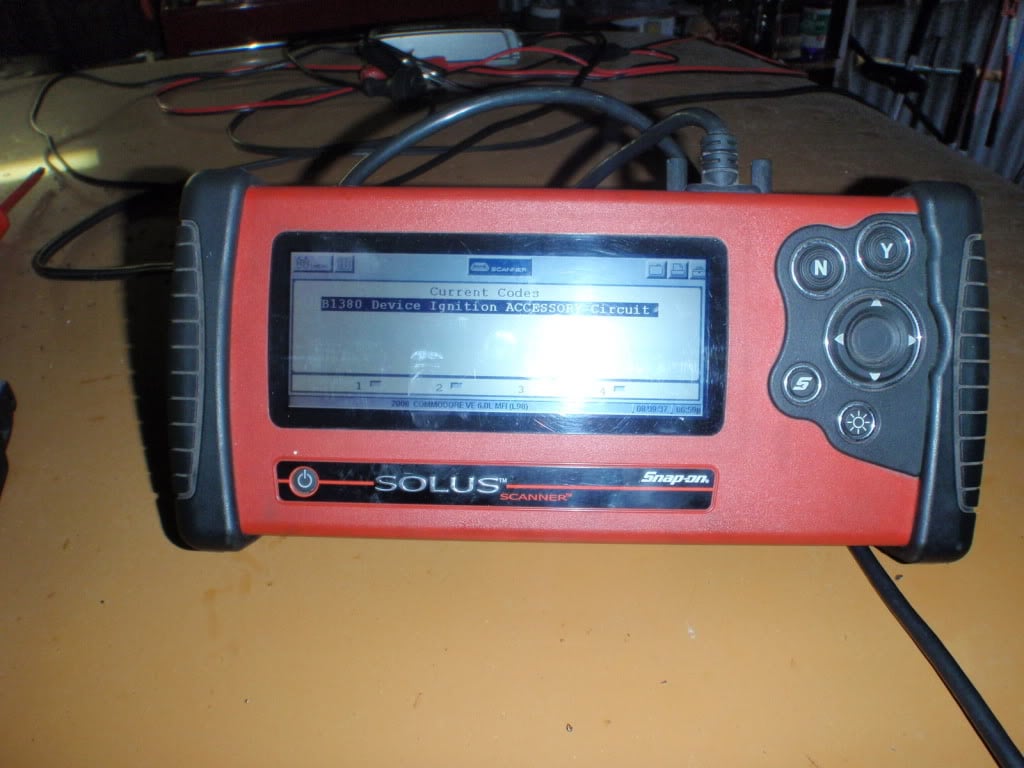
The only fault I was unable to clear was �B1380 Device Ignition ACCESSORY Circuit� and I can�t find any info on what can cause it to come up. I�ll have to look further into it this week.
Stay tuned.
YT
The only fault I was unable to clear was �B1380 Device Ignition ACCESSORY Circuit� and I can�t find any info on what can cause it to come up. I�ll have to look further into it this week.
Stay tuned.
YT
#58
_YTsLH_
_YTsLH_
-
- Guests
Posted 24 August 2011 - 07:32 PM
So after quite a few hours of investigation, here it is.

Finally found the problem and it kicked over. You can see the flames shoot out of the exhaust ports before I shut it down. Scared the bajezus out of me.
Next I�m going to de-loom all that is not needed then fix them all in tidy so I can take it to get the exhaust and some other trinkets fitted
What a relief.
Cheers,
YT
#60
_YTsLH_
_YTsLH_
-
- Guests
Posted 24 August 2011 - 08:13 PM
Relieved, yes. Most auto elec�s, mechanics, tuners and senior Holden techs I spoke to said what I am doing can not be done. It�s good to prove them wrong.
#61
_LS1 Hatch_
_LS1 Hatch_
-
- Guests
Posted 26 August 2011 - 07:59 AM
Next I�m going to de-loom all that is not needed then fix them all in tidy..
That is the fun part...lol..I actually went through the loom first and thinned it all down. So was hoping it would run again for that first time hitting the key..that I didn't snip something I had needed, ha ha..
And good progress it's looking like!
#62
_BLACK LH_
_BLACK LH_
-
- Guests
Posted 28 August 2011 - 10:56 AM
good to hear you got it running, goes to show all the other modules must be only for security to enable ecm to turn on, great work.
#63
_YTsLH_
_YTsLH_
-
- Guests
Posted 08 April 2012 - 01:36 PM
Hi All, Smee again. It’s been 7 months since my last confession.
The project got a little slow late last year with work and the silly season etc. Since then I’ve been head down bum up into it. Lots of little things that aren’t really worth posting about.
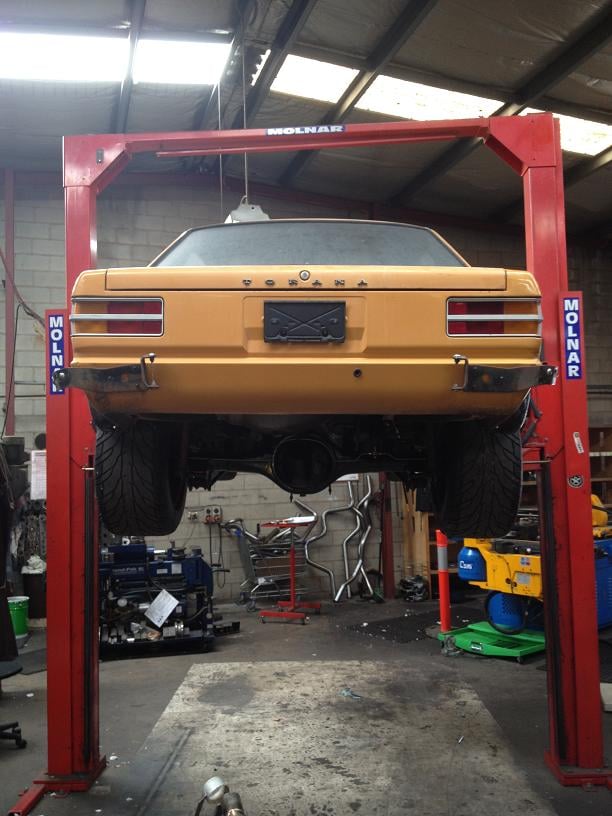
I’ve moved the original fuel tank into the boot. Making up mounting brackets and modifying the fuel filler to stick out behind the number plate still. I just think it looks much better without the fuel tank underneath the back.
I’ve re-loomed most of the wiring harnesses to suit the Torana.
Manufacturing some brake components to install a handbrake and plumb the rear brakes up.
Installed the drop stubs and front brakes.
Finally found some wheels that will fit over the Hopper Stopper front brake kit.
Re-modified the hybrid VE/Torana steering column so it sits closer to the dash.
Put the Diff centre in. Ready to measure up for a tail shaft.
From here I’m going to continue with the wiring, get the radiator/fans in, finish the brakes, install some fuel pumps/filters etc and get a tail shaft.
Cheers,
YT
The project got a little slow late last year with work and the silly season etc. Since then I’ve been head down bum up into it. Lots of little things that aren’t really worth posting about.
I’ve moved the original fuel tank into the boot. Making up mounting brackets and modifying the fuel filler to stick out behind the number plate still. I just think it looks much better without the fuel tank underneath the back.
I’ve re-loomed most of the wiring harnesses to suit the Torana.
Manufacturing some brake components to install a handbrake and plumb the rear brakes up.
Installed the drop stubs and front brakes.
Finally found some wheels that will fit over the Hopper Stopper front brake kit.
Re-modified the hybrid VE/Torana steering column so it sits closer to the dash.
Put the Diff centre in. Ready to measure up for a tail shaft.
From here I’m going to continue with the wiring, get the radiator/fans in, finish the brakes, install some fuel pumps/filters etc and get a tail shaft.
Cheers,
YT
Edited by YTsLH, 08 April 2012 - 01:36 PM.
#64
Redslur
-
- Members
-
- 3,536 posts
Has been Torana owner
- Name:Gerry
- Location:Canberra
- Car:HQ GTS Replica 350.
- Joined: 08-November 05
Posted 08 April 2012 - 06:46 PM
Should be a nice build when done. Starting to become a popular conversion now. We already have 3 of them in our club. Out of curiosity, is the colour Autumn Gold? I would like to know the trim / paint code of the body options tag is possible?
#65
_YTsLH_
_YTsLH_
-
- Guests
Posted 09 February 2013 - 12:28 PM
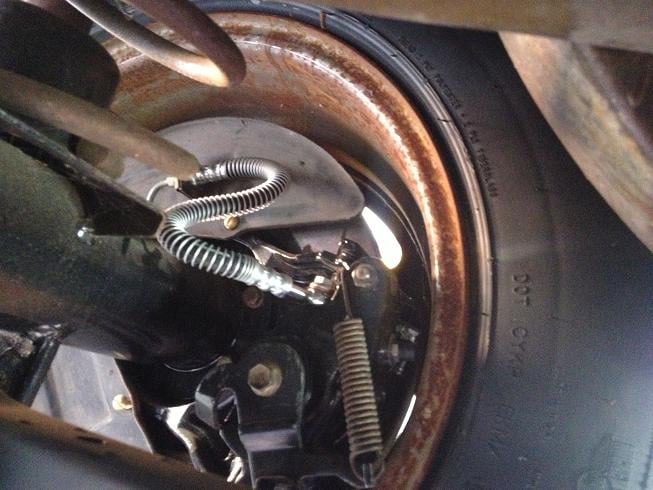
The latest update
Rear brakes, hand brake components and brake lines are complete. I had clearance problems with the banjo bolt hitting the rim. I ended up swapping it to the bleeder point location. All good now.
https://cache.gmh-to...cp/IMG_1758.jpg
https://cache.gmh-to...cp/IMG_2805.jpg
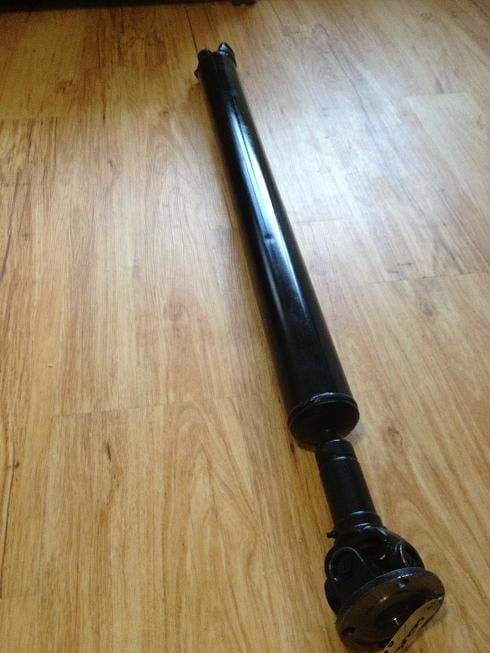
Tail shaft to trans adapter plate made.
https://cache.gmh-to...cp/IMG_2795.jpg
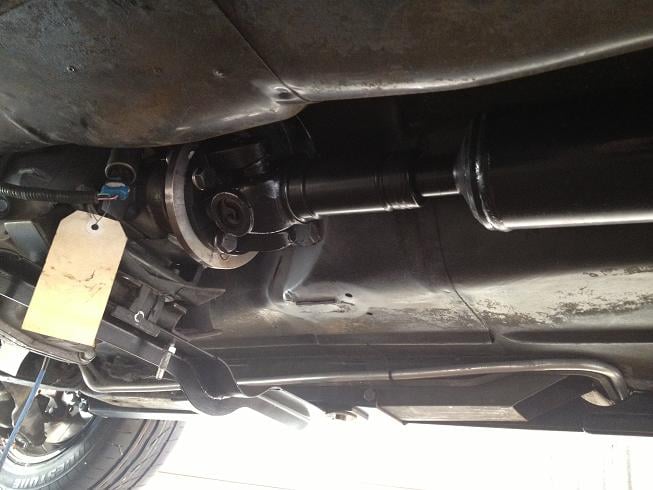
Tail shaft made and installed. (The front is joined to the back. Woohoo!)
https://cache.gmh-to...cp/IMG_2664.jpg
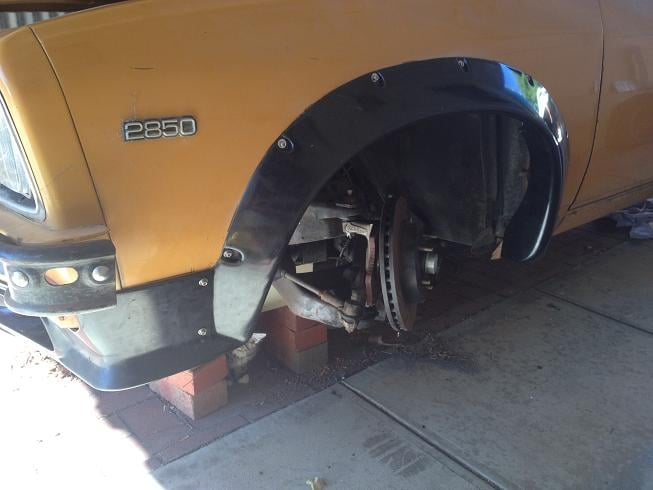
Dent knocked a dent out in the front quarter.
Front flares and spoiler fitted. Guards cut and finished. Two of us spent 8hrs on one side just to make sure it was right. I hate seeing flares that haven’t had the care taken to get them straight.
https://cache.gmh-to...cp/IMG_2965.jpg
https://cache.gmh-to...cp/IMG_2967.jpg
https://cache.gmh-to...cp/IMG_3103.jpg
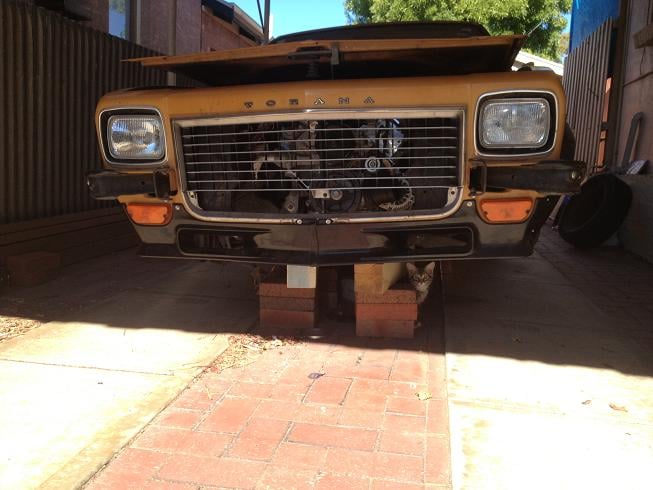
Steering linkages completed.
The front rims I bought are too wide and I am not happy with the offset so I’ll have to get another set.
Made front bump stop spacers to limit the upward travel with clearances at full lock.
https://cache.gmh-to...d4a8a2dfd52.jpg
I’m about ready to get an exhaust made so hopefully the next update will include that.
Cheers,
YT
Rear brakes, hand brake components and brake lines are complete. I had clearance problems with the banjo bolt hitting the rim. I ended up swapping it to the bleeder point location. All good now.
https://cache.gmh-to...cp/IMG_1758.jpg
https://cache.gmh-to...cp/IMG_2805.jpg
Tail shaft to trans adapter plate made.
https://cache.gmh-to...cp/IMG_2795.jpg
Tail shaft made and installed. (The front is joined to the back. Woohoo!)
https://cache.gmh-to...cp/IMG_2664.jpg
Dent knocked a dent out in the front quarter.
Front flares and spoiler fitted. Guards cut and finished. Two of us spent 8hrs on one side just to make sure it was right. I hate seeing flares that haven’t had the care taken to get them straight.
https://cache.gmh-to...cp/IMG_2965.jpg
https://cache.gmh-to...cp/IMG_2967.jpg
https://cache.gmh-to...cp/IMG_3103.jpg
Steering linkages completed.
The front rims I bought are too wide and I am not happy with the offset so I’ll have to get another set.
Made front bump stop spacers to limit the upward travel with clearances at full lock.
https://cache.gmh-to...d4a8a2dfd52.jpg
I’m about ready to get an exhaust made so hopefully the next update will include that.
Cheers,
YT
#66
_YTsLH_
_YTsLH_
-
- Guests
Posted 09 February 2013 - 01:14 PM
Sorry. Wrong pic links and I can find the edit button.


#67
_Azza_
_Azza_
-
- Guests
Posted 10 February 2013 - 05:09 PM
Hey Chad the build is looking really good.
If you are still having trouble with alarms on the computer, I know that making the computer think it is a Police Vehicle, that will disable a lot of alarms!
My VY ute thinks it a police car, and it gave me a digital speedo
Cheers, hope all goes well.
If you are still having trouble with alarms on the computer, I know that making the computer think it is a Police Vehicle, that will disable a lot of alarms!
My VY ute thinks it a police car, and it gave me a digital speedo
Cheers, hope all goes well.
#68
_YTsLH_
_YTsLH_
-
- Guests
Posted 16 February 2013 - 10:40 AM
Hey Adam, thanks for the tip.
Once I get the exhaust on I can go back to getting it running again. I'm sure that will open up a whole nother can of worms.
Cheers,
YT
Once I get the exhaust on I can go back to getting it running again. I'm sure that will open up a whole nother can of worms.
Cheers,
YT
#69
_YTsLH_
_YTsLH_
-
- Guests
Posted 13 March 2013 - 05:32 PM
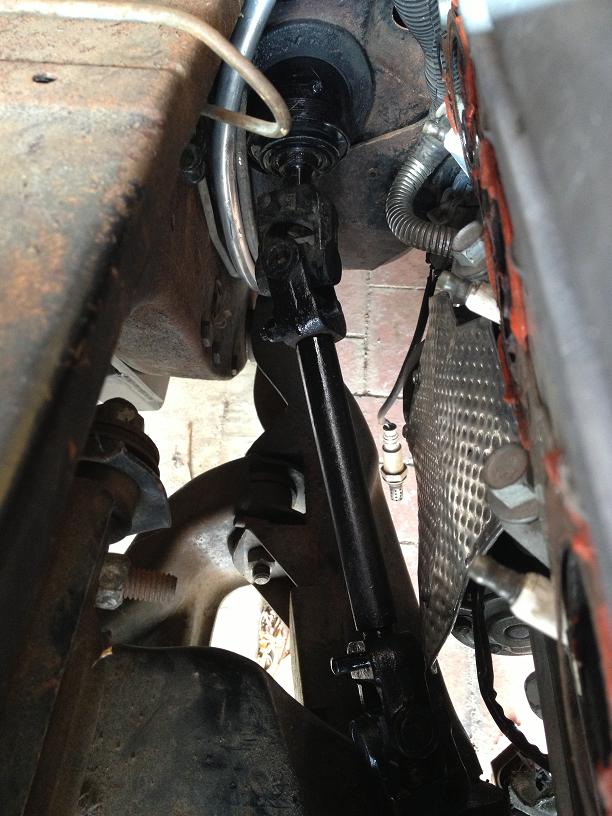
Shortened the steering column and made a new linkage.
Much more room for the pipes.
It’s booked in to get the exhaust fitted Monday.
Cheers,
YT
#70
Heath
 View Garage
-

- Administrators
-
- 18,364 posts
I like cars.
- Name:Heath
- Location:Eastern Suburbs, Melbourne
- Car:Heavily Modified UC Sunbird Hatchback
- Joined: 07-November 05
View Garage
Posted 13 March 2013 - 07:13 PM
That steering column work is awesome, definitely gonna do the same on my Torana! Any tips?
#71
_YTsLH_
_YTsLH_
-
- Guests
Posted 13 March 2013 - 08:24 PM
It was surprisingly quite easy Heath. It took me less than an hour.
I'll post a couple more pics to help explain it.
Cheers,
YT
#72
_YTsLH_
_YTsLH_
-
- Guests
Posted 16 March 2013 - 03:03 PM
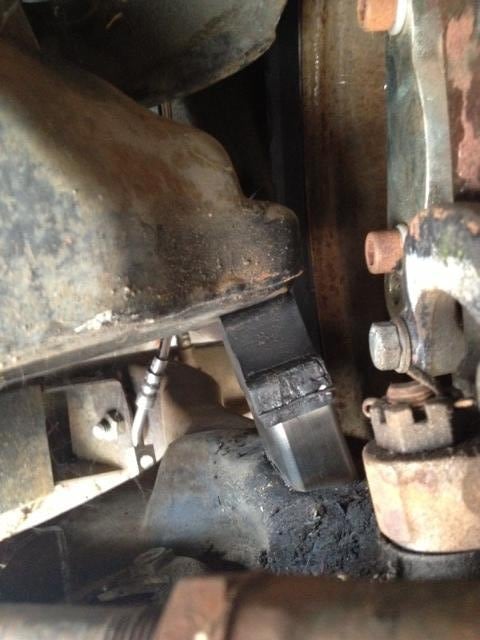
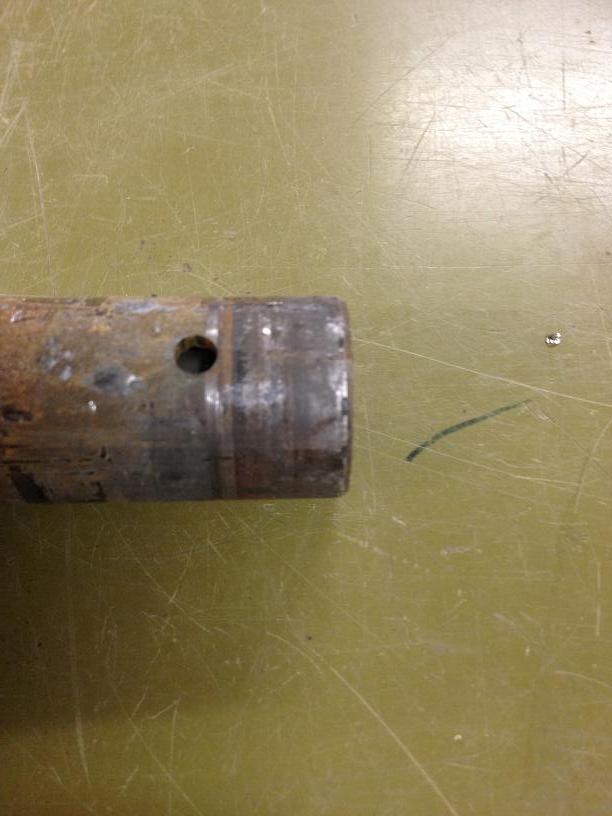
Here’s how I shortened the steering column.
Before someone jumps in, this car is being engineered and DMV registered. The mods have minimal intrusion on the crush capabilities of
the column.
This is what it looked like before.
Before removing the column I marked where I wanted it shortened too.
I took the column out.
Removed the lower bearing.
Cut the outer housing with a tube cutter to get it nice and
straight.
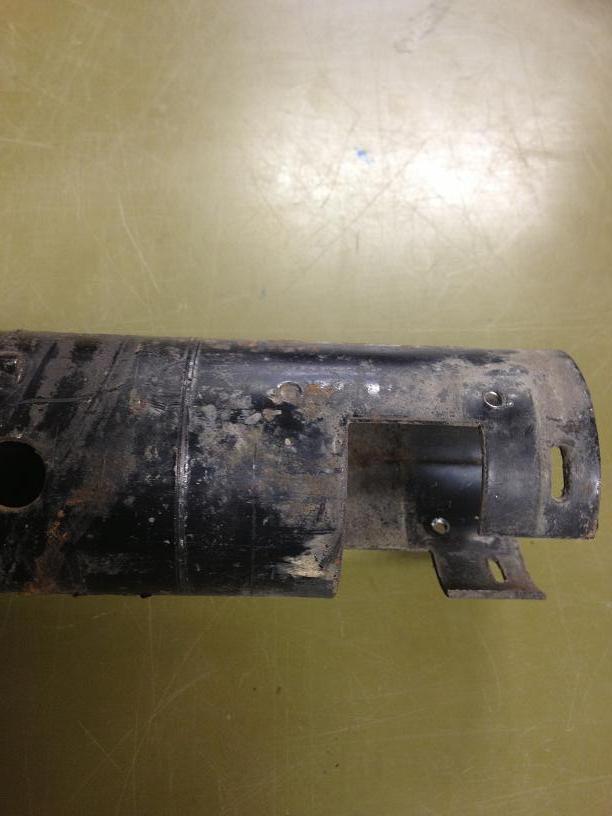
Cut the inner shaft again with a tube cutter to get a clean cut. Deburred the inside. Drilled a single hole where the new roll pin will go.
Removed the roll pin and drove out the end connector thingy(I don’t know what you would call it).
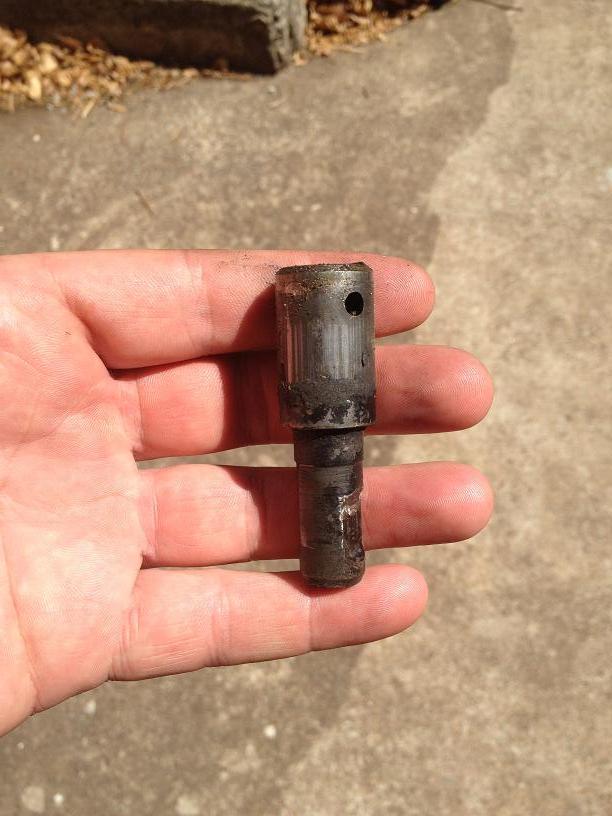
If I knew before hand I would have turned down the outside of the end connector slightly as it was a very tight fit back into the shaft
and it actually ended up swelling the outside of the shaft that I then had to file down to fit the outer bearing over. It looks like originally the inner of
the shaft may have been machined ever so slightly to fit the end connector.
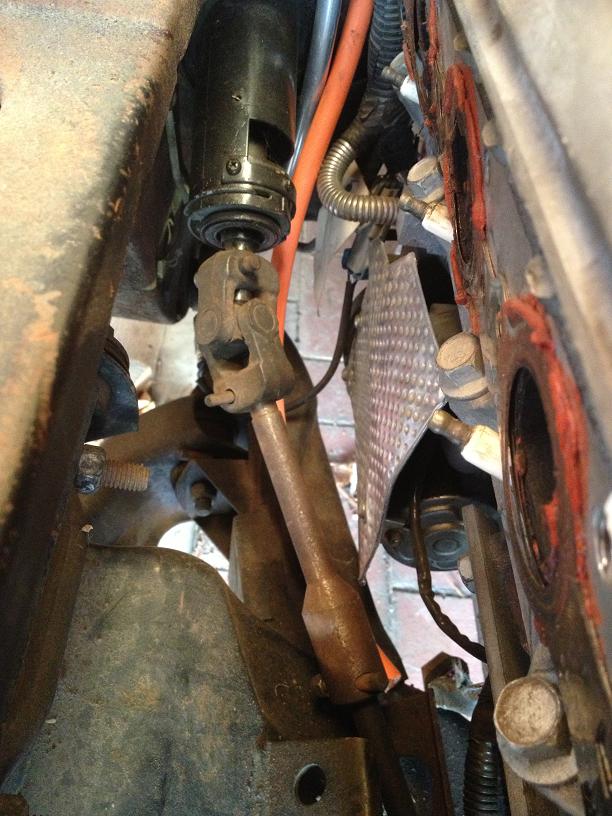
Line the end connector hole with the roll pin hole. Drill through the roll pin hole out the other side and knock the roll pin in.
I filed down the raised bits on the outer of the bearing and fitted it into the outer housing, holding it in place with the two small
screws.
Last but not least I added an extra uni joint and turned up a shaft that fits the cotter pins.
Cheers,
YT
#73
_YTsLH_
_YTsLH_
-
- Guests
Posted 18 March 2013 - 12:43 PM
In for an exhaust and headers
Should be done in 2 to 3 weeks.
Looking forward to the results.
Cheers,
Chad
#74
_hatch76_
_hatch76_
-
- Guests
Posted 18 March 2013 - 09:06 PM
Hey mate, where did you get your exhaust done as I'll be looking for someone soon.
cheers dan
#75
_YTsLH_
_YTsLH_
-
- Guests
Posted 20 March 2013 - 07:14 PM
Exhaust Technology on Goodwoor Rd.
I went there because I need custom Headers made. Not a lot of places to choose from who do that in adelaide.
Cheers,
YT


3 user(s) are reading this topic
0 members, 3 guests, 0 anonymous users

