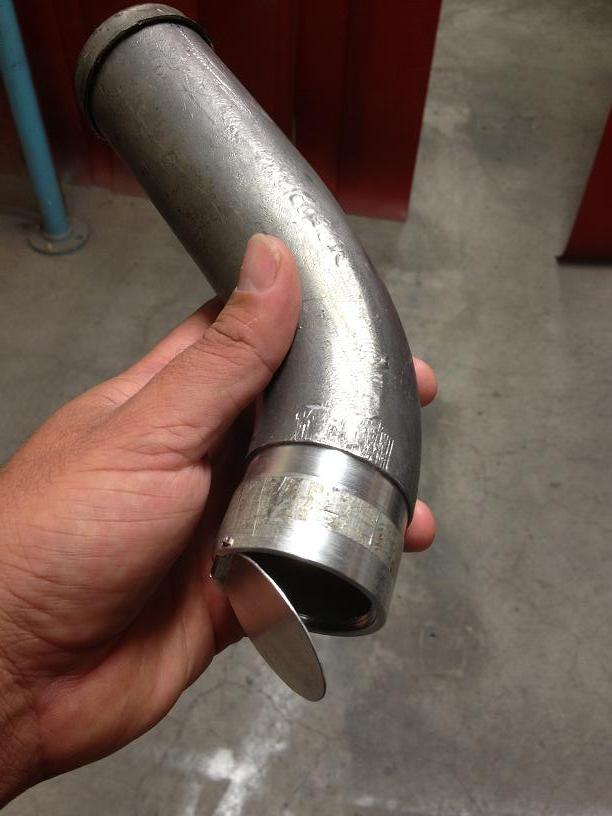
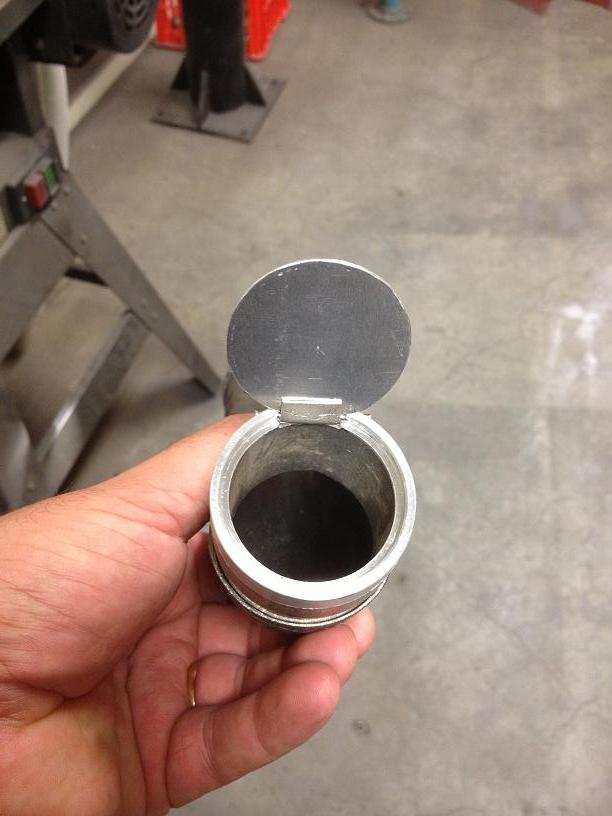
I made a surge flap to go on the inside of the fuel tank filler neck to stop all the fuel spewing out the back on fast take off’s.
It’s aluminium and extremely light so won’t cause any back pressure when filling.
Cheers,
YT


Posted 24 March 2013 - 12:26 PM
I made a surge flap to go on the inside of the fuel tank filler neck to stop all the fuel spewing out the back on fast take off’s.
It’s aluminium and extremely light so won’t cause any back pressure when filling.
Cheers,
YT
Posted 13 April 2013 - 02:06 PM
An update on the exhaust.
The headers are almost finished.

The tricky side.

Glad I shortened the steering column. It keeps the exhaust clear of the starter motor. (Yes, an extra pipe will be going in there)


The rest of the system will be finished this weekend and I get to pick it up Monday.
Cheers,
YT
Posted 13 April 2013 - 03:00 PM
Hi Chad,
Great thread and very impressive work.
I should have had custom headers made for mine but believed the CAE would work. I've needed to seriously modify mine. Yours are coming along really nice.
Keep it up!
Posted 14 April 2013 - 09:45 AM
Cheers mate.
Yeah had heard mixed things about the CAE ones.
As soon as I get it home the fun stuff begins.
Cheers,
YT
Posted 15 April 2013 - 07:34 PM
Picked up the car today with its new exhaust.
I went with 2 1/2” mild steel, mandrel bends and 4 Lukey Mufflers.
Very happy with the quality work from Exhaust Technology.

Clearance over the gearbox cross member I knocked up.


Cheers,
YT
Posted 07 August 2013 - 06:08 PM
Here’s the update.
I had massive problems getting the clearance needed with the 2” dropstubs so I went back to the original ones. Unfortunately as you can see in the pic below I had to machine the mounting brackets a little to clear over the ridged section on the back of the stub axle. I didn’t want to pack it out with washers(as suggested by Hoppers when I rang them about it). The spacers they supplied were not big enough either so I made new ones(also suggested by Hoppers). Then after all that the callipers were still fouling on the disk. Turns out the disks were 300mm rather than 290mm. Spun them down and all is now well in the brake department 

I have a day permit to take it on the road tomorrow for a wheel alignment and Friday into work to asses some of the welding that is needed.
So this is how it looks.


Next Friday I’ll be taking it down to the Aerodrome with the engineer for some testing. Then pending any further modification required it will be ready to strip down ready for body work and paint.
The Supercharger won’t be fitted until it’s all put back together and final testing will be carried out.
Happy Days!
Cheers,
YT
Posted 07 August 2013 - 07:12 PM
wot a great job you r doing this tozdogs will be a top one good work chad love it makes me look at my again
clean the garage out that is a start for me
Posted 07 August 2013 - 07:26 PM
for some one that isn't experienced or hasnt done up cars be for your doing one bloody great job at doing it! keep up the great work
that is for shore
Posted 07 August 2013 - 08:07 PM
Cheers lads.
With the amount that I’ve researched, designed, modified and such I don’t think I can get away with the label of having “little to no experience rebuilding cars” anymore.
For every successful modification posted, in most cases, there have been many failed concepts trailed and thrown out. I like the “design by failure” approach.
Cheers,
YT


0 members, 1 guests, 0 anonymous users

