Jump to content


Restoring my engine bay..


  • Please log in to reply
45 replies to this topic

#1 _bangbang_

_bangbang_
  • Guests

Posted 15 June 2011 - 08:20 PM

Hey peoples..
I have just finshed restoring my 1977 LX into a A9X replica.. this is how it looks now:
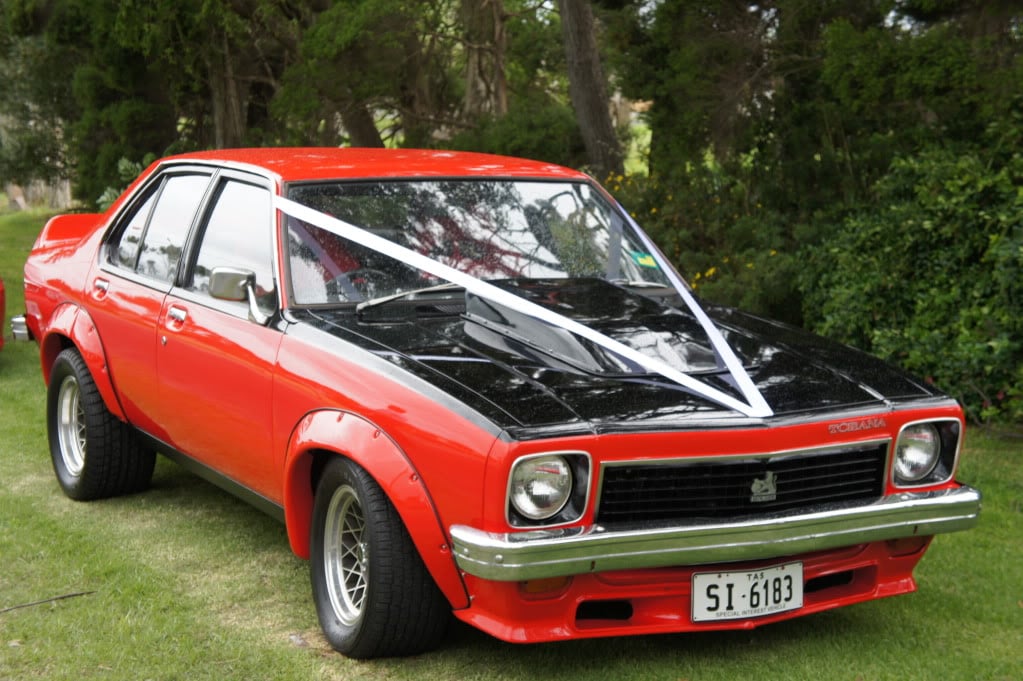
Posted Image


I am now in the process of getting a new engine built (383 stroker), but the plan is to have the externals of the engine looking the same as an A9X. While the current engine (253) is out of the engine bay, I am also wanting to convert the current engine bay into that of an A9X.

This is what the engine bay looks like currently:
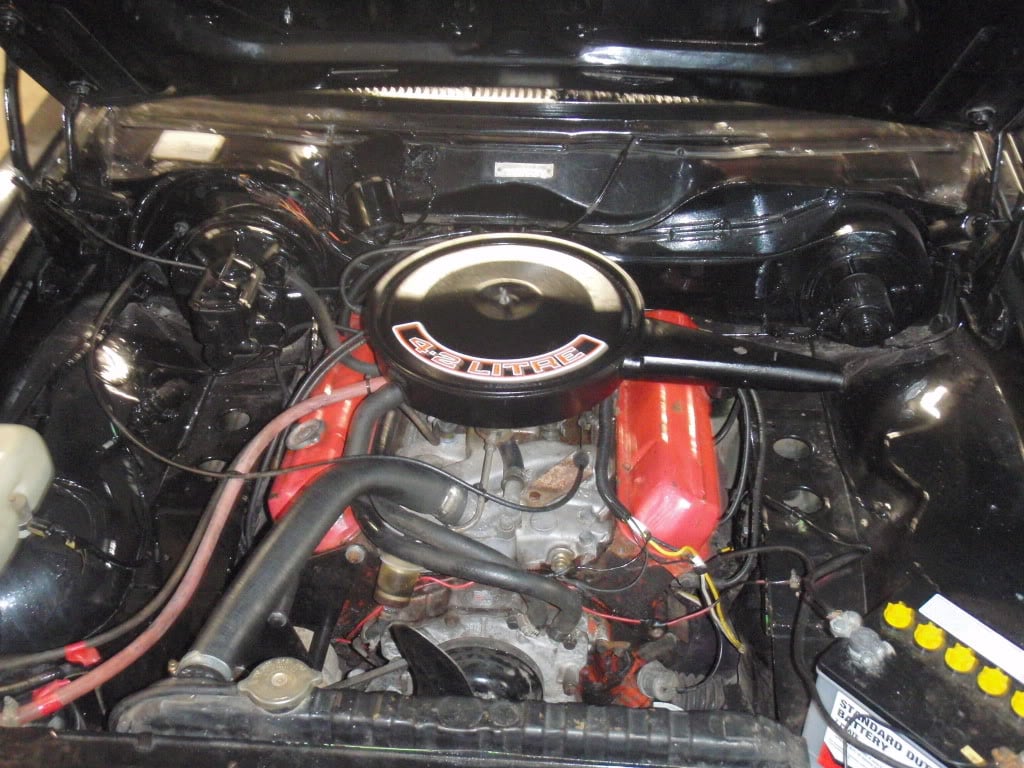
Posted Image

When the previous owner/s painted the engine bay, they didn't remove a single thing.. just thick black paint all over the top!! Big huge runs, painted brake lines etc.

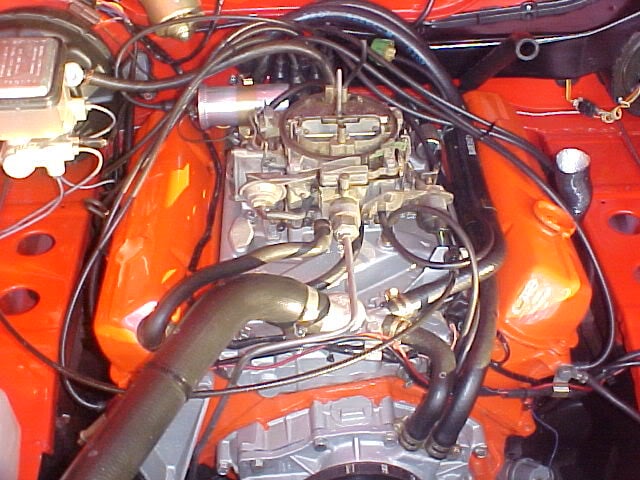
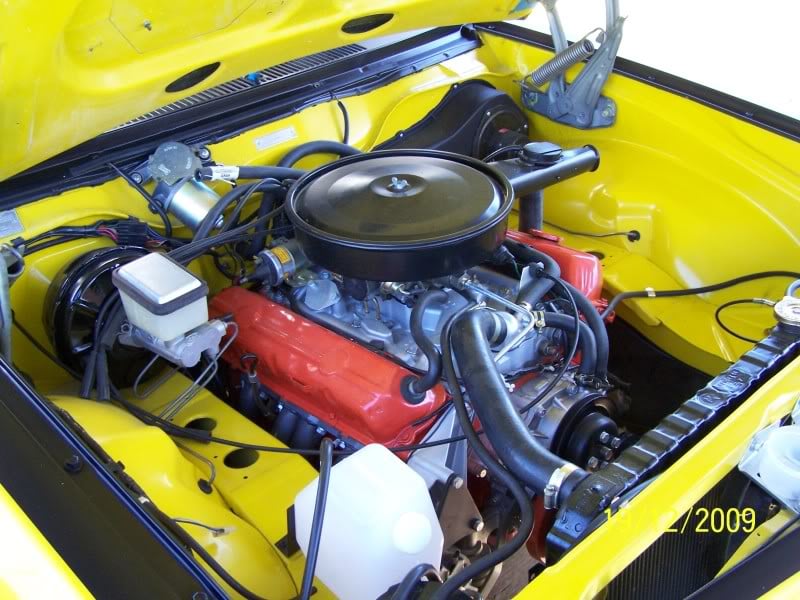
Here are some original A9X engine bay pics.. (thanks REDA9X), this is what I want mine to look like:
Posted Image

Posted Image

I have very little experience with paint/panel etc.. so I'm after some advise please.
Should I use paint stripper anywhere, or sand it all back by hand (including brake lines etc, in the little corners etc)?? To do a proper job, I will be removing everything and painting/stripping it all individually. Is there any special paint to use for the radiator?? Any help/suggestions would be great please :)

Thanks heaps

Coxy


#2 _LS1 Hatch_

_LS1 Hatch_
  • Guests

Posted 16 June 2011 - 08:28 AM

When I did mine, I used a chemical stripper and got it down to bare metal pretty quickly...but in your case I might be a little worried with all the other paint being so nice. (Might have been worth doing the engine bay when you had the car being sprayed) but it is how it is now.... so sanding/wire wheel/paint stripping discs might be a better way to go.

I pulled everything out of the engine bay completely and detailed everything seperately and then put it back.

With your brake lines, you could easily pull the front ones and stip them, then maybe just give them a rub back with scotchbrite or such before putting them back. For me, I just made new ones...but I changed around the booster/master cylinder/etc all at the same time.

I pulled my wiper motor completely apart, paint stripped it, regreased it, painted, etc before putting it back on as well.

Also paint stripped the bonnet hinges and springs before giving them a fresh coat.

On the radiator...over here they do sell a special paint just for them, that is somewhat thinner than normal paint so it does not clog or impede airflow inbetween the fins. Not sure if you guys have anything like that?


And by the way....pefect color combo on your car. :D

Here are a couple pictures of mine...not a restoration to stock, but gives you a little idea of it at least hopefully. With it done, one while I was paint stripping it and one from a while back just before pulling the engine to start the rebuild process...


Posted Image

Attached Files


#3 _bangbang_

_bangbang_
  • Guests

Posted 17 June 2011 - 10:22 AM

Thanks heaps matey... lovely work :)

#4 _LS1 Hatch_

_LS1 Hatch_
  • Guests

Posted 17 June 2011 - 10:43 AM

Thank you :D

#5 _bangbang_

_bangbang_
  • Guests

Posted 04 July 2011 - 10:44 AM

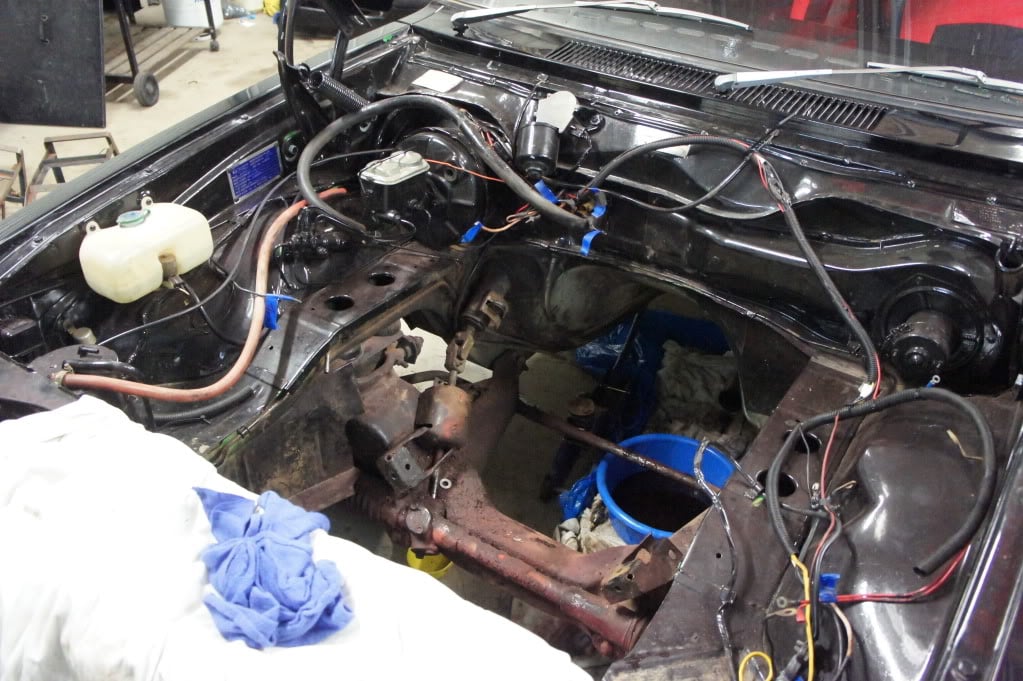
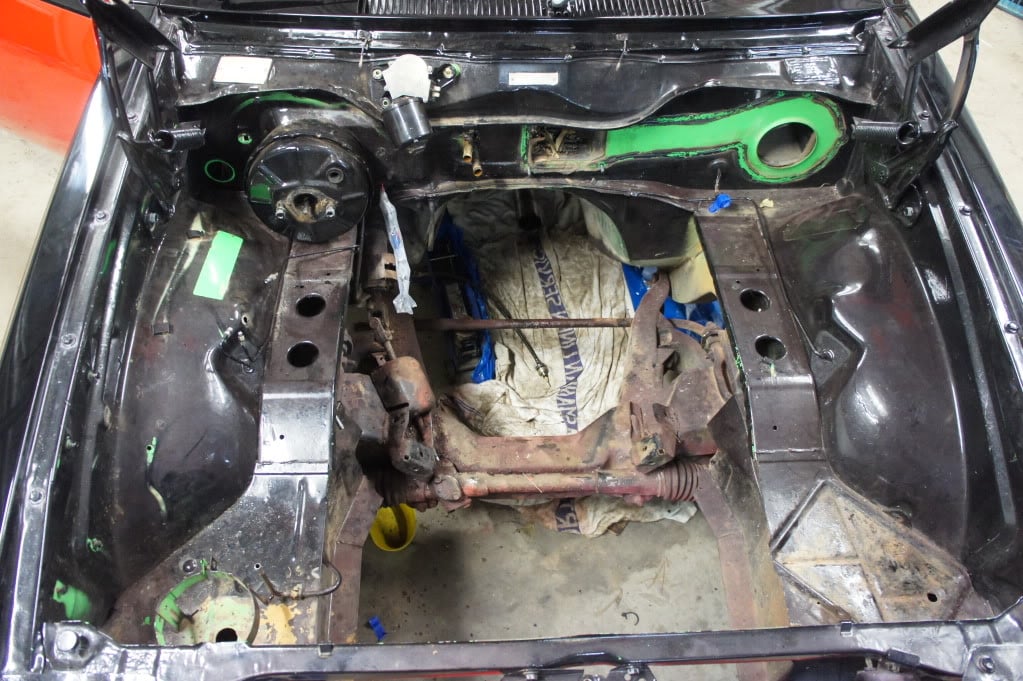
Hey peoples.. I have started stripping the engine bay back � ready to start rubbing it all down. Quick question.. in the corners etc, there is a build up of gunk (most likely oil etc) which would obviously affect the paint once its applied.


Now.. what should I do??!! 1: Get in there with sand paper (600??) and try to rub it back.. 2: Sandblast the entire engine bay � including these little hard to reach places and then sand it back.. 3: Degreaser/truck wash and a karcher pressure cleane it all, followed by rubbing it back with 600 wet and dry??


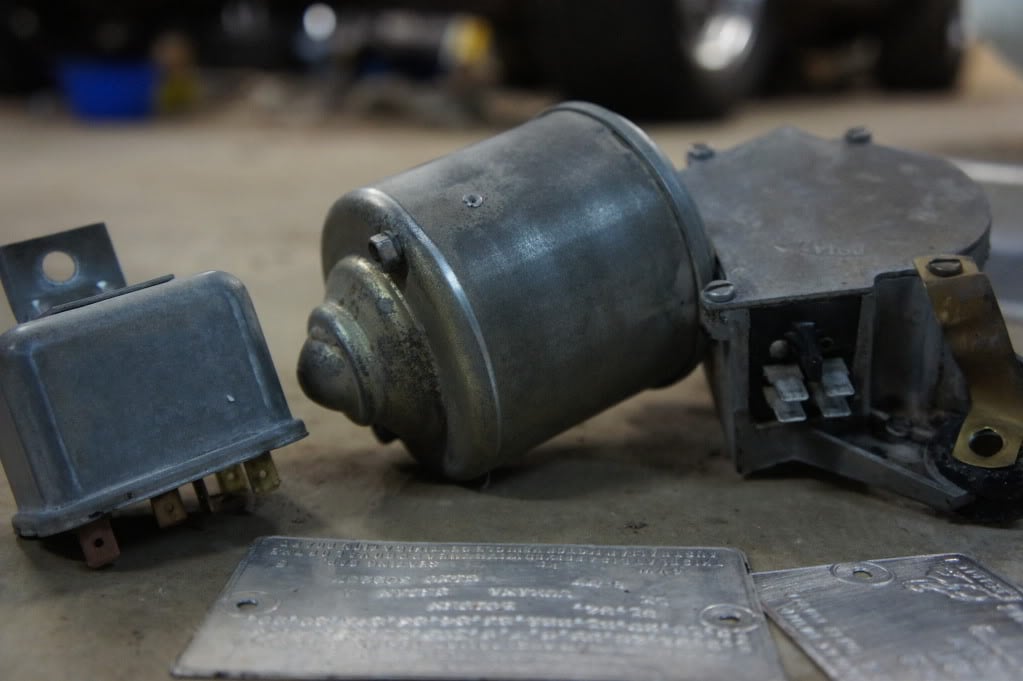
Thanks for the help/advise.. heres where I am up to, although I have since removed the brake booster, started rubbing back the headlight relay, wiper motor etc..


Posted Image


Posted Image


#6 _Quagmire_

_Quagmire_
  • Guests

Posted 04 July 2011 - 12:14 PM

option 2 and 3 should work
just depends how much you want too spend and how wet you want to get :)
remember to prepsol after and before rubbing
gl and i got to do the same on a hx ute next weekend too
but i'm too cheap to buy a sandblaster so i'm going option 3 .....with possibly a paint stripper chaser :)

#7 _bangbang_

_bangbang_
  • Guests

Posted 04 July 2011 - 02:16 PM

Thanks pal, I reckon I will sandblast it - followed by an immediate layer of undercoat. You mentioned to prepsol before and after rubbing it back, just wondering the reason behind this?? Cheers :)

#8 76lxhatch

76lxhatch

    That was easy!

  • Members
  • PipPipPipPipPipPipPip
  • 7,201 posts
  • Location:Unzud
  • Car:SS
  • Joined: 04-August 08
Garage View Garage

Posted 04 July 2011 - 02:22 PM

Degreaser and water blaster will get most of it, there is usually a fair bit of seam sealer gunk in the back corners too

#9 _bangbang_

_bangbang_
  • Guests

Posted 04 July 2011 - 03:09 PM

Thanks mate.. theres quite a few thick runs in the current paint from when the previous owner attempted to paint it.. so perhaps sand blasting it all back to bare metal may be the way to go - as that should be nice and straight?? I am new to the bodywork/painting world.. very keen to give it a go and learn though :)

#10 _Quagmire_

_Quagmire_
  • Guests

Posted 04 July 2011 - 04:05 PM

you prepsol (wax and grease remover....prepsol is a brand name sorry)
to remove 90% of the contaminants and give a good base for the paint to stick to
the reason to do it before you rub back is so you don't sand any nasties into the remaining paint
if your sandblasting i doubt you will need to do a before wipe with prepsol
but i would give it a good blow with the air gun and a vacum to remove the "media"

#11 xu1kid

xu1kid

    Forum Fan

  • Members
  • PipPipPipPip
  • 364 posts
  • Name:anthony
  • Location:Albury
  • Car:lj gtr xu1
  • Joined: 30-December 08

Posted 04 July 2011 - 07:16 PM

i sandblasted my engine bay and god sand gets everywhere spent ages blowing it all out with compressor before etch primed

#12 _bangbang_

_bangbang_
  • Guests

Posted 04 July 2011 - 10:11 PM

Ohhhh ok, that makes sense!! Thanks for the advise :)

xu1kid.. I have been advised strongly to ensure that everything is 100% sealed up, cause the sand makes a real mess if you don't!! hehe

#13 _bangbang_

_bangbang_
  • Guests

Posted 04 July 2011 - 10:29 PM

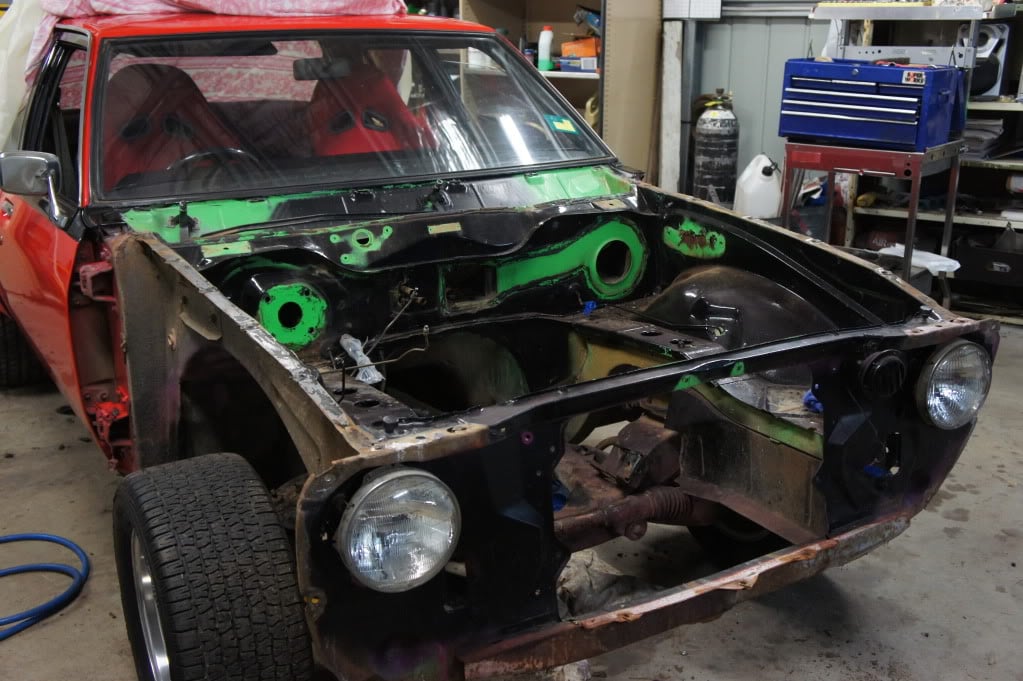
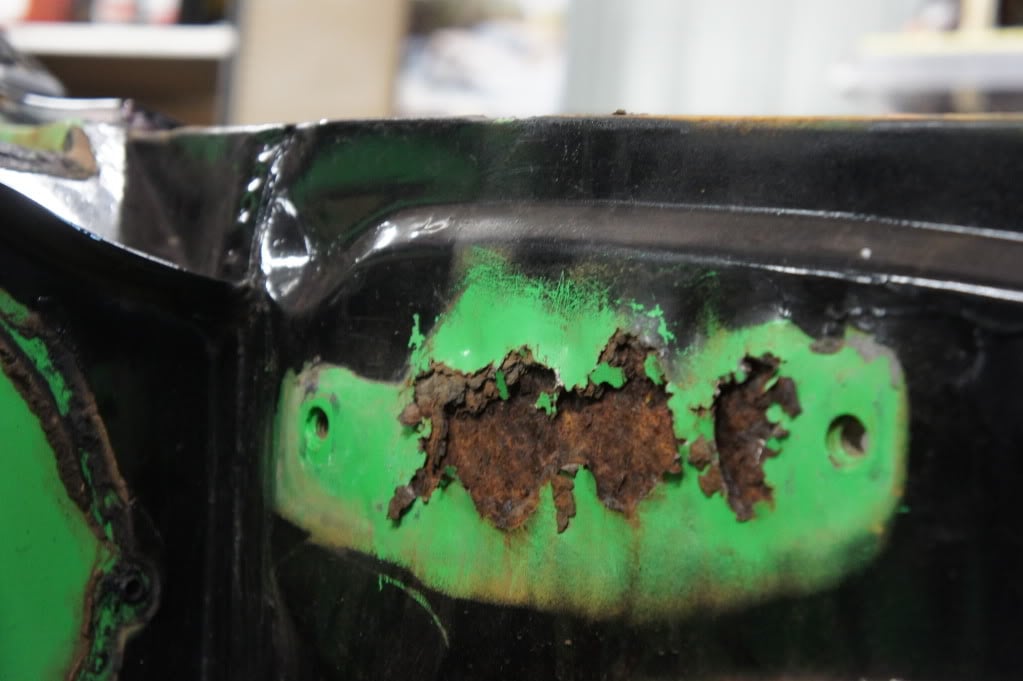
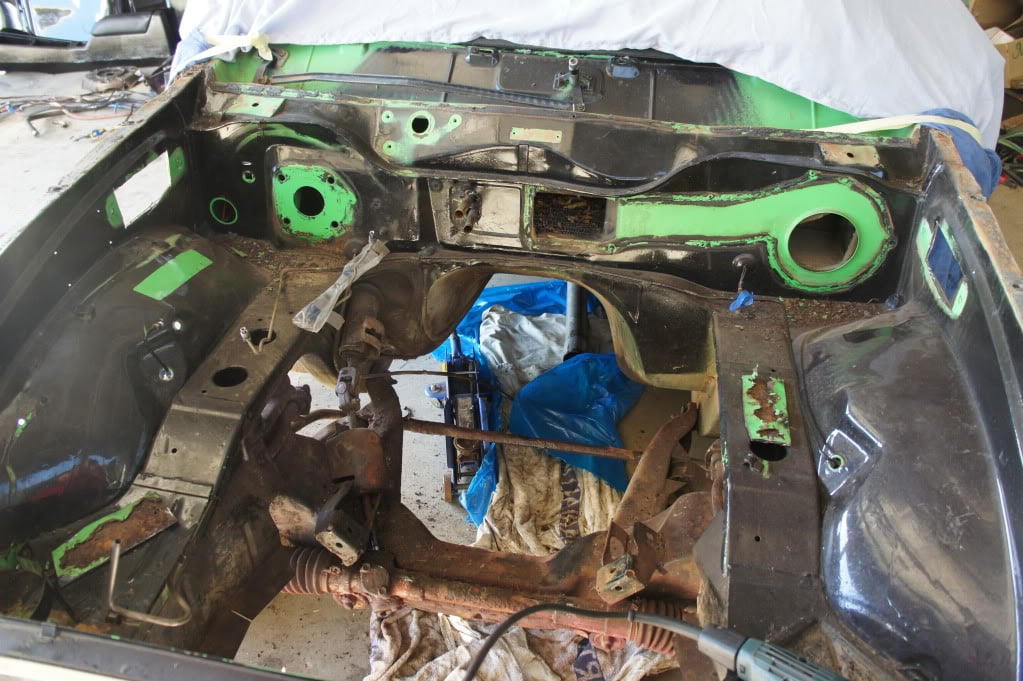
Bit more progress lately.. I wasn't planning on removing the gaurds/nose cone etc, as I didn't want to risk chipping the paint!! But since then, I have decided to buy a sand blaster and strip the engine bay etc with that.. plus then I found some.... Rust :( It was hiding behind the bonnet hinges.. grrrrr. So, tonight I ripped the gaurds etc off. I have also been stripping/rubbing back the wiper motor, relays etc. So looks like I am also going to be learning how to cut rust out now!!

Posted Image

Posted Image

Posted Image


#14 _Liam_

_Liam_
  • Guests

Posted 05 July 2011 - 05:37 PM

I think the Rad Support needs a bit of attention too mate. Otherwise it will bite you later on.

#15 _Quagmire_

_Quagmire_
  • Guests

Posted 05 July 2011 - 06:19 PM

at least there is no visable rivots :tease:

#16 _markymark20_

_markymark20_
  • Guests

Posted 05 July 2011 - 09:00 PM

Hi guys, I am going to be doing similar to my car in the not to distant future. Have bought a sand blaster from autobarn or supercheap, what is the best sand to use and where do you get it?

#17 _Liam_

_Liam_
  • Guests

Posted 05 July 2011 - 09:14 PM

at least there is no visable rivots :tease:


You be quiet Al... :lol:

#18 _LS1 Hatch_

_LS1 Hatch_
  • Guests

Posted 06 July 2011 - 01:04 AM

have also been stripping/rubbing back the wiper motor, relays etc


While you have the wiper motor off, you might want to go through it, just incase. I pulled mine to bits while I was cleaning it up...cleaned all the contacts, fresh grease, etc. Nicer to paint it all in pieces then assemble it anyways I figure.. :D

#19 _bangbang_

_bangbang_
  • Guests

Posted 07 July 2011 - 12:25 PM

Thanks pal, I'll do that :)

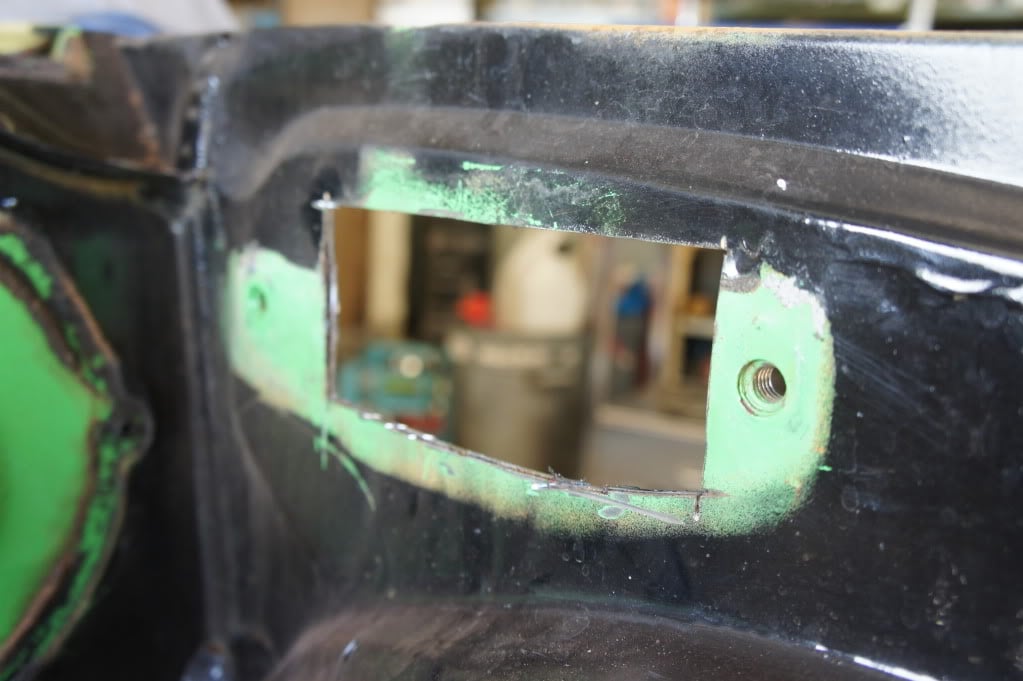
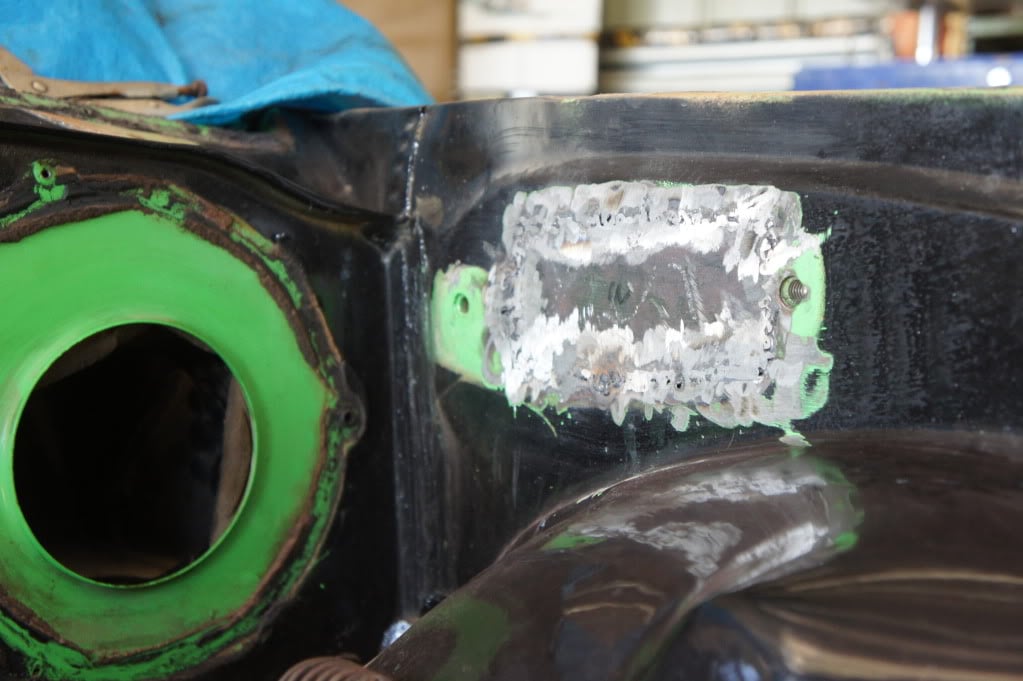
I've never done any rust repairs before, so thought this would be a great place to start as you can't see the end result!!! Coming along I think :)

Posted Image

Posted Image

Posted Image


And I havent finished this side off yet either ;) hehe

#20 _LS1 Hatch_

_LS1 Hatch_
  • Guests

Posted 07 July 2011 - 01:13 PM

Thanks ! Here is how it came out...


And the rust repairs look like they are going well also. :D

Attached Files


#21 _Liam_

_Liam_
  • Guests

Posted 11 July 2011 - 07:11 PM

Just be careful mate, I cut my hinges out like that, and than some pitting got the better of me so I drilled the spot welds and pulled the bracket off, and there is usually rust in between the bracket and the panel... So up to you, you've done half of it, you may as well pull them off and check the condition otherwise in a few years time, the rust working it's way out will split your paint there... As I said up to you.

#22 _bangbang_

_bangbang_
  • Guests

Posted 12 July 2011 - 09:00 PM

LX torry freak: hmmmm, thanks for the heads up pal..

Well bugga the stick welders!! The small panels are prooving to be too difficult for the old stick (plus I can't use it properly).. so If anyone knows of a mig for sale, please let me know :) Untill then, I won't be able to continue with those rust repairs :(

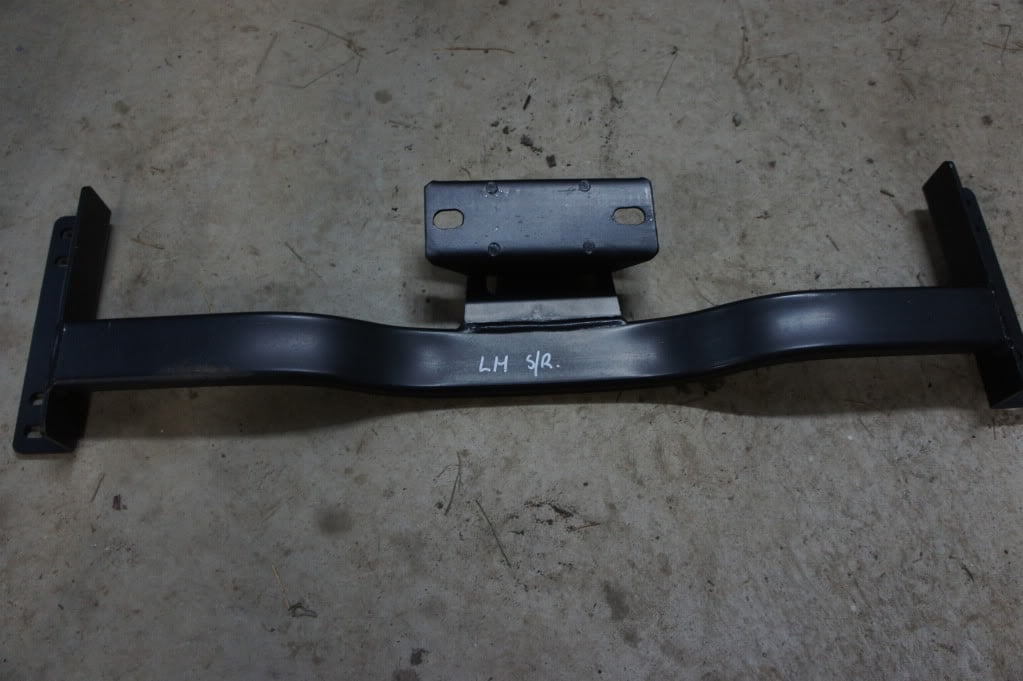
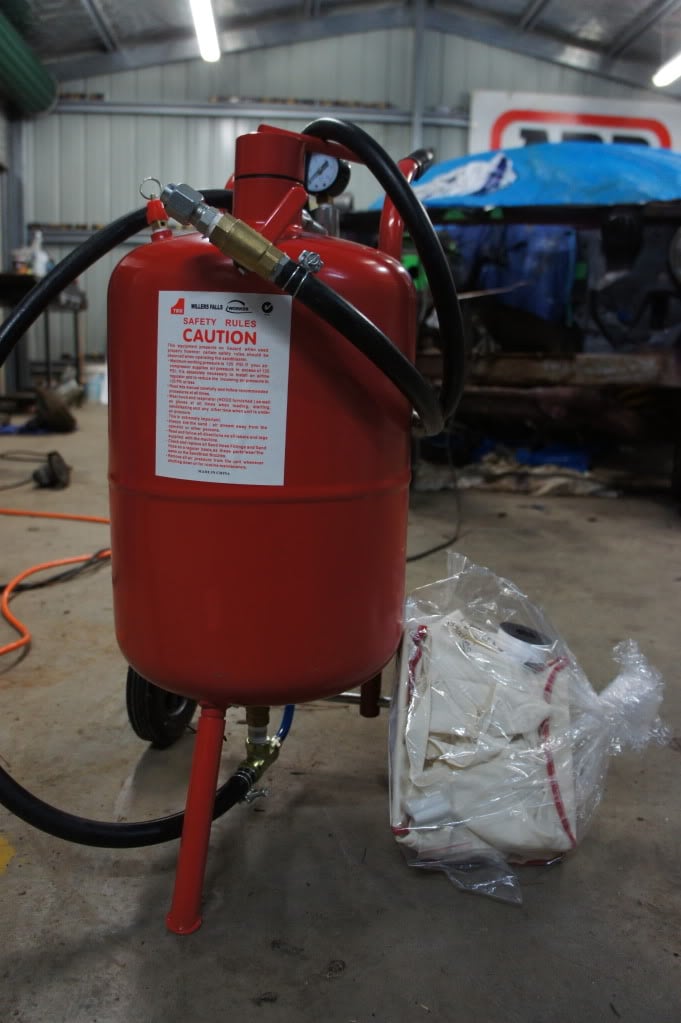
I recieved some goodies in the mail today.. a sand blasting unit - which will be used for the engine bay etc, and a CRS cross member for the singel rail gearbox. The crank/pistons etc were balanced up yesterday at COME racing, and will be here later in the week!! The block is getting grout filled and bored this week.. its all coming along nicely [bigthumbsup]

Posted Image

Posted Image


#23 TerrA LX

TerrA LX

    Fulcrum Fixture

  • Members
  • PipPipPipPipPipPipPip
  • 14,241 posts
  • Location:Sid 'n' knee
  • Joined: 31-May 06

Posted 12 July 2011 - 09:12 PM

Love your progress, hey let us know how the sand blaster works out for ya please?

#24 Mort

Mort

    Lotsa Posts!

  • Members
  • PipPipPipPipPipPip
  • 2,760 posts
  • Name:Mort
  • Location:Moranbah, QLD.
  • Car:74 LH SL/R 4.2, 75 LH 4 door 186
  • Joined: 16-December 07
Garage View Garage

Posted 13 July 2011 - 12:21 AM

+1 on the sand blaster, got one for Christmas but haven't had a chance to us it yet and gotta find somewhere to buy the stuff to go in it

#25 _bangbang_

_bangbang_
  • Guests

Posted 13 July 2011 - 07:10 PM

No worries, will do :)

I managed to burrow a mig welder, so both plates are now welded in place :) Tomorrow I will pick up some sand, bog and undercoat. Woo hoo!


1 user(s) are reading this topic

0 members, 1 guests, 0 anonymous users