UC 5000
#76

Posted 28 November 2012 - 07:47 PM
#77

Posted 28 November 2012 - 09:04 PM
#78

Posted 03 December 2012 - 05:02 PM
#79
 _alchemist_
Posted 10 December 2012 - 01:15 PM
#80

Posted 10 December 2012 - 01:29 PM
#81

Posted 13 January 2013 - 10:50 PM
So I fit the new pump, turn the ignition on, pump hums away nicely (and much quieter), but still no damn fuel getting to the engine! Bugger, should've replaced the fuel line when I added the new return line, the old one must be blocked... So I ordered some more bundy tube but before doing anything else I thought I'd try blowing through the line with compressed air. After a couple of blows with the air gun I heard a rather satisfying 'PACHOOOO' and a bit of crud flies out the other end unblocking the line. SWEET! I connect everything back up and turn on the ignition, fuel fills the fuel rails AND...... starts leaking from the top of all 8 injectors!!! F%$K! looks like the engine has been sitting soo long before I bought it that all the injector o'rings have dried up and shrunk...
So tomorrow I'm ordering some new injector o'rings, and if anything else goes wrong after that I'm putting a goddamn starfire back in there!
#82

Posted 19 January 2013 - 10:13 PM
Refurb'd injectors went in and it fired straight up - sweet! Ran for about 30secs but wasn't building up oil pressure so I've gotta get a new gasket and some vaseline so I can prime the pump. Should be an easy fix, then I'll post a vid of it purring.
Next dilemma - sort the oil pump tomorrow or blow it off and go to Motorvation.....hmmm
#83
 _j.e.d._
Posted 21 January 2013 - 05:29 AM
#84

Posted 21 January 2013 - 07:42 PM
#85

Posted 21 January 2013 - 09:13 PM
Next dilemma - sort the oil pump tomorrow or blow it off and go to Motorvation.....hmmm
Thanks guys. I chose Motorvation so its not done yet! Got it lined up for Saturday....
#86

Posted 02 February 2013 - 08:18 PM
Water pump is a bit squealy....
#87
 _j.e.d._
Posted 03 February 2013 - 02:51 AM
#88

Posted 03 February 2013 - 09:07 PM
#89

Posted 11 March 2013 - 12:29 AM
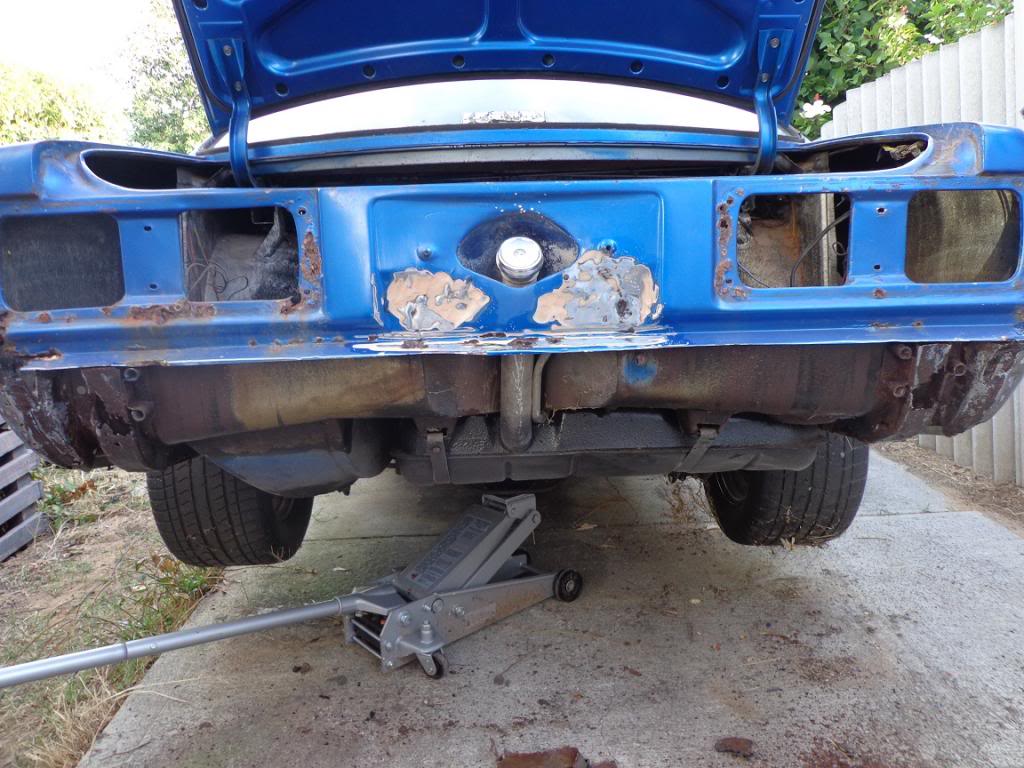
Well, I've been tinkering with power steering hoses and other bits and pieces, then thought it was time to pull the bumper and tail lights so I could assess the worst of the rust and finally start on some body work.
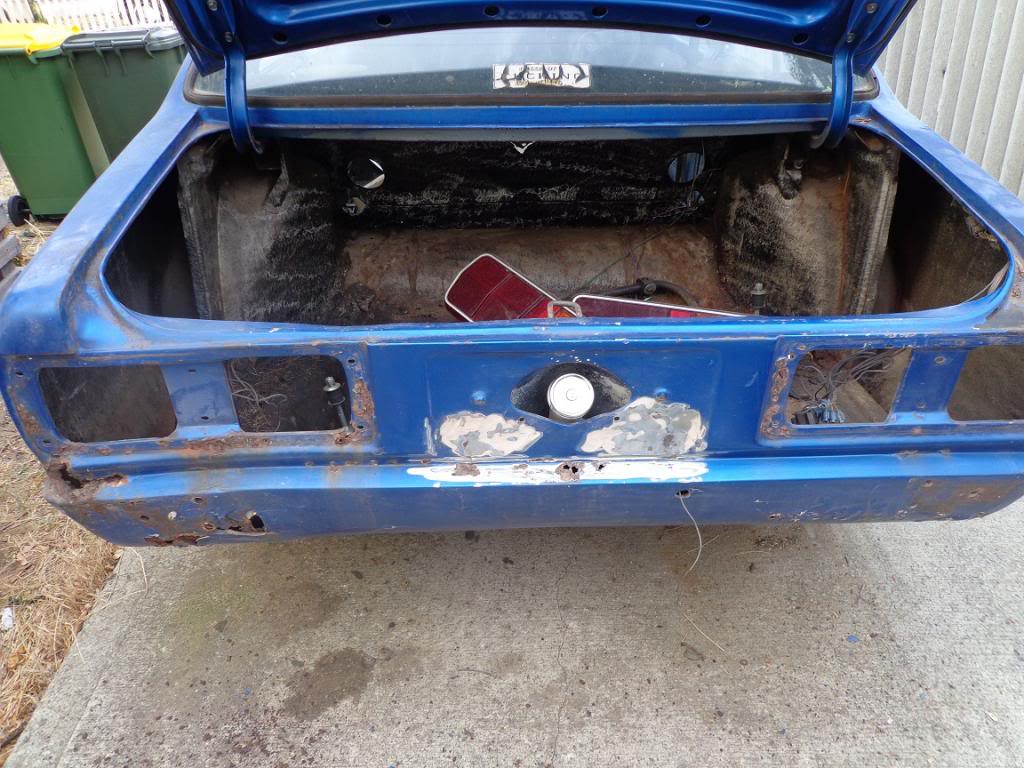
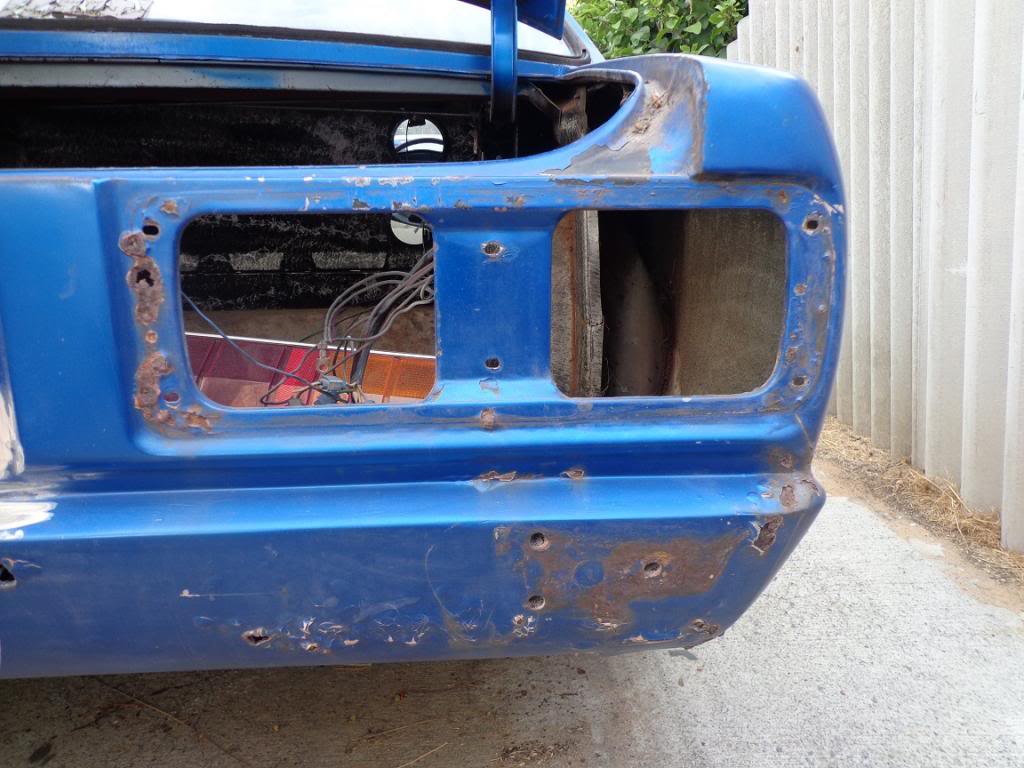
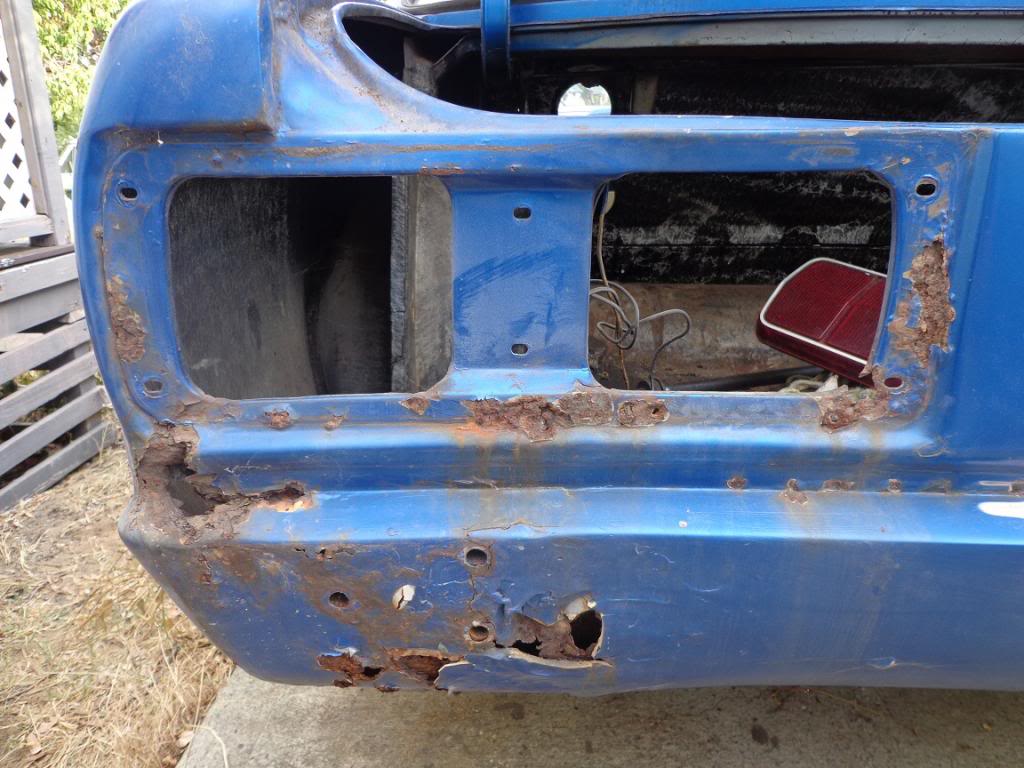
Nasty! You can see some accident damage below the left tail light too. So looks like I need to order a new beaver panel and find some good tail light cuts from a donor (I've got a few leads). Thats the worst of the rust, a bit in the rear wheel arches and the bottom of the B pillars too, but I've already got good donor sections for those.
#90

Posted 23 March 2013 - 08:42 PM
Guess what was hiding under the beaver panel...
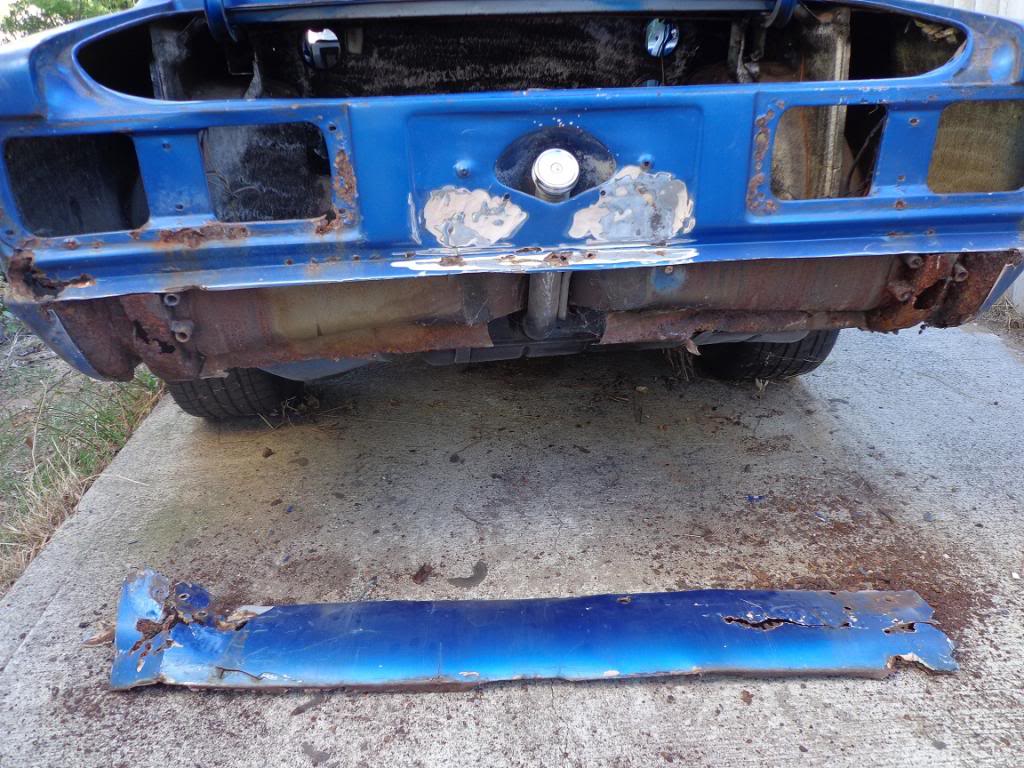
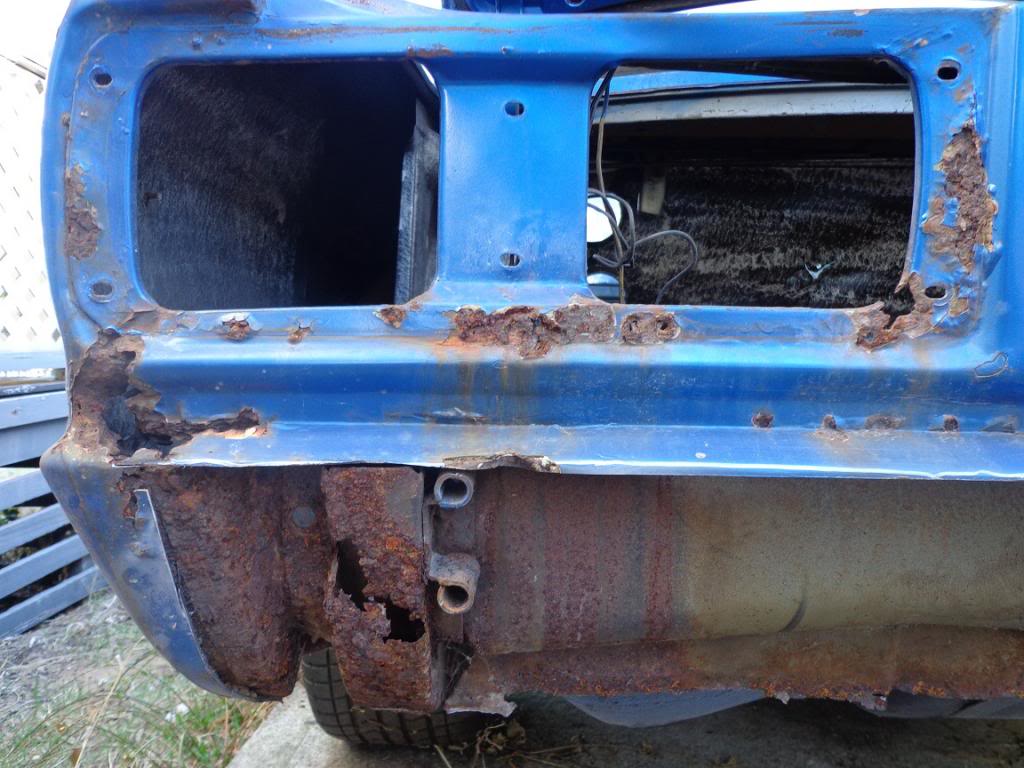
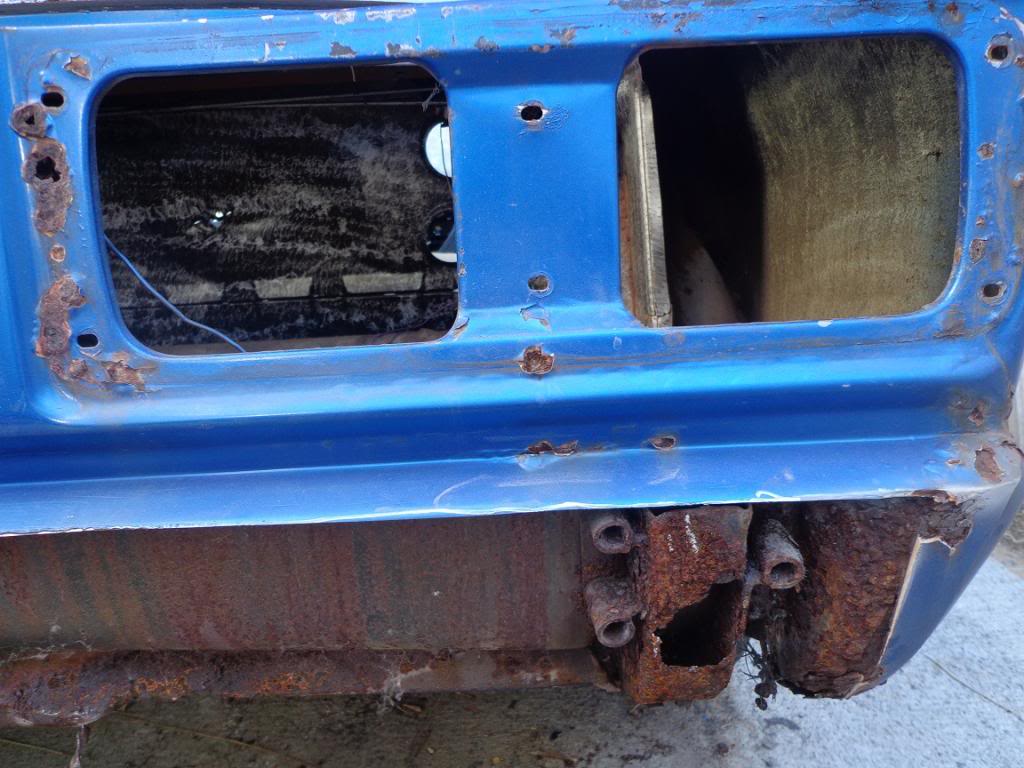
Yep, more rust! I'll start cleaning and treating the rust and welding patches tomorrow. I've ordered and 'aussie restos' beaver from ebay but it didn't get here before the
weekend so I'll have to finish it next week...
#91
 _alchemist_
Posted 23 March 2013 - 09:44 PM
Damn that's a fair bit of rust :(
I'm slowly getting there also, my body has been stripped and there is next to no rust in it, although the doors are pretty had it, have been repairing them over last few weeks on and off.
#92

Posted 23 March 2013 - 11:52 PM
Yeah its rough but it wont be for long... I've been collecting doors - I'm up to 9 lol, 4 of them are rust free so at least they wont need repairs!
#93

Posted 24 March 2013 - 10:12 PM
Just trimmed the leftover edges of the old beaver off, ran over it quickly with a flapper disc on the grinder to see how much metal was left and brushed on some rust-convertor. Spent the rest of the day looking for some POR-15 and didn't get started on any welding yet. I need longer weekends!.....
#94

Posted 25 March 2013 - 08:16 PM
Got some hard yards ahead Garth. At least your getting somewhere! Ive hit a go slow for the last 6-8 weeks hopefully get back into it after easter.
Looks like a lot of that rust was well hidden?
Burty
#95

Posted 25 March 2013 - 08:38 PM
Yeah its had a hit in the back and a poor repair job in its past, which caused water to leak in around the tail lights and rust out the lower quarters and beaver area. Makes you wonder how much rust is under everyone else's beaver panel, because you cant really tell till you cut it off...
#96
 _alchemist_
Posted 25 March 2013 - 11:16 PM
I'm too scared to cut mine open down there lol
Surely it won't have much rust there, the taillights were always sealed up good and proper and there's no sign of cancer on the back at all from some prodding I've been doing ![]()
#97

Posted 25 March 2013 - 11:51 PM
Check out this thread from Dirtbag - http://www.gmh-torana.com.au/forums/topic/42661-fixing-my-brothers-uc-hatch/page-2 looked pretty clean until the panel came off... Not as bad as ours but!
Edited by UCgazman, 25 March 2013 - 11:52 PM.
#98

Posted 28 March 2013 - 11:48 PM
Hey.... who wants to see my beaver?
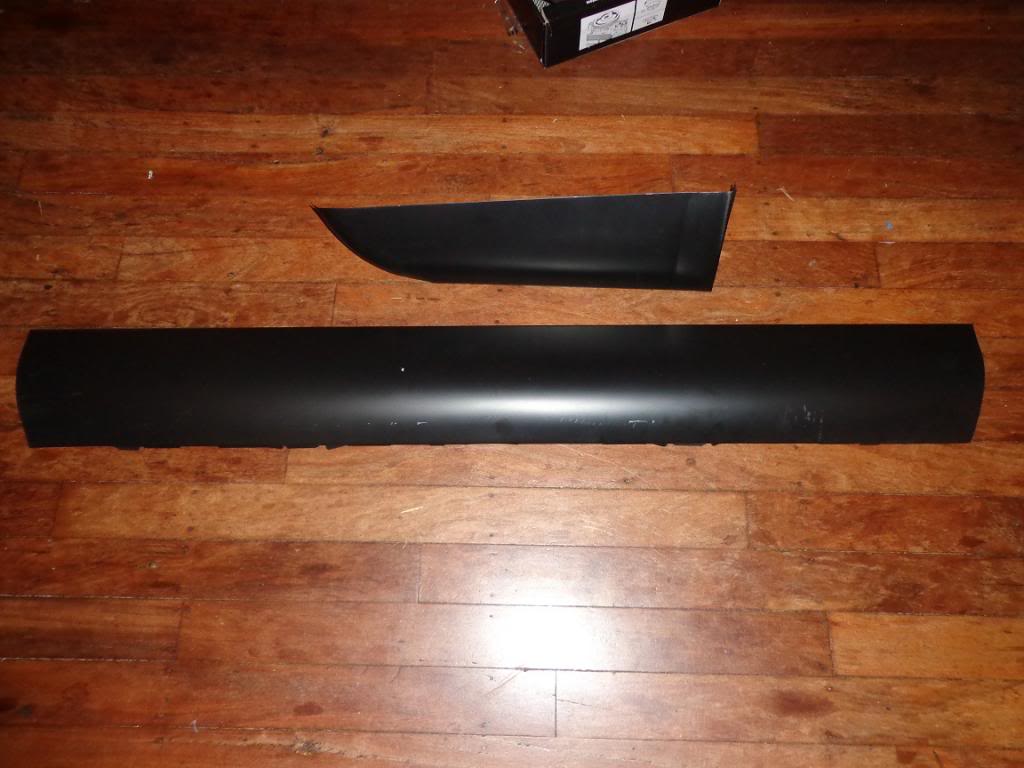
Ahem... beaver panel I mean lol. Also got a RHR lower quarter panel, they look good on my living room floor, I'll do some trial fitting on the weekend and post pics on how they fit on the car.
#99

Posted 30 March 2013 - 08:27 PM
Patched up one of the chassis rails, it feels a lot more solid there now
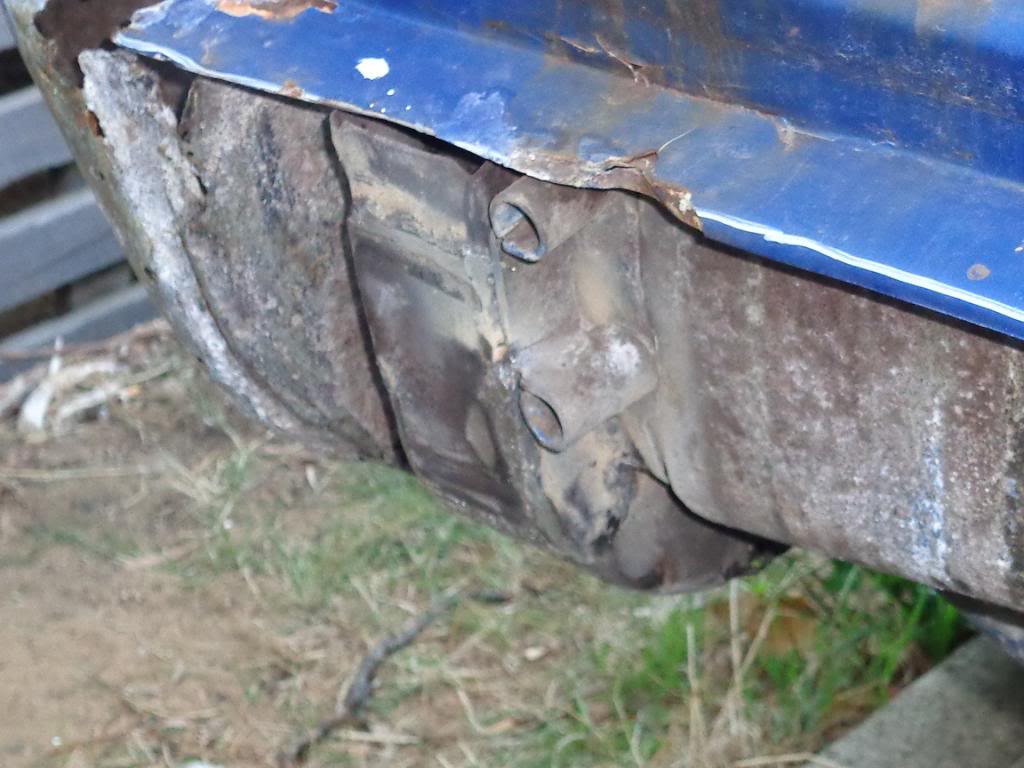
I'll need to tack on a new crush tube for one of the bumper bolts on this side too, it turned to dust when the grinder touched it.
Hopefully get more done on Monday...
#100

Posted 31 March 2013 - 07:58 AM
Also you can get POR15 or KBS online from their relevant websites and delivery is quick, though you probably wanted it straight away.
1 user(s) are reading this topic
0 members, 1 guests, 0 anonymous users


 View Garage