Axistr's Father & Son LH SLR Project.
#151

Posted 16 May 2014 - 09:35 PM
Still not sure how I will do the boot floor pump cover yet - how did you do yours?
#152

Posted 17 May 2014 - 02:06 AM
It would probably be quicker to just remove the pump and check. However these may help.

Looks like from top to bottom in the diagram below. Fuel Pressure to fuel filter, Vapour Vent, Fuel Return from filter.
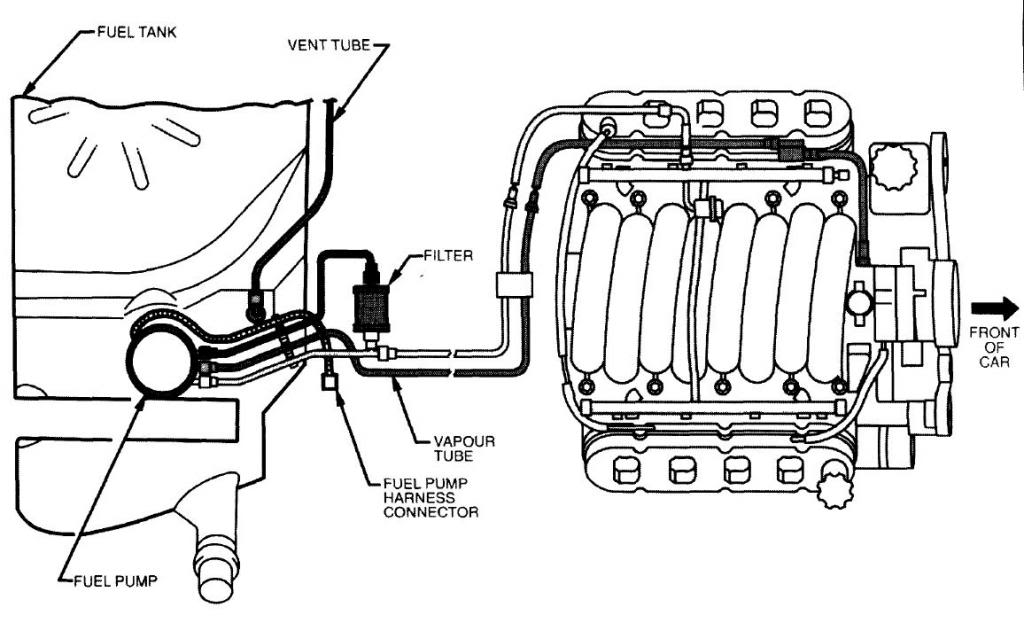
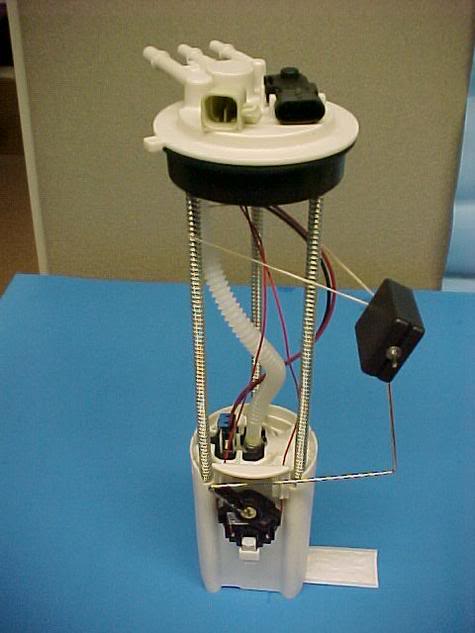
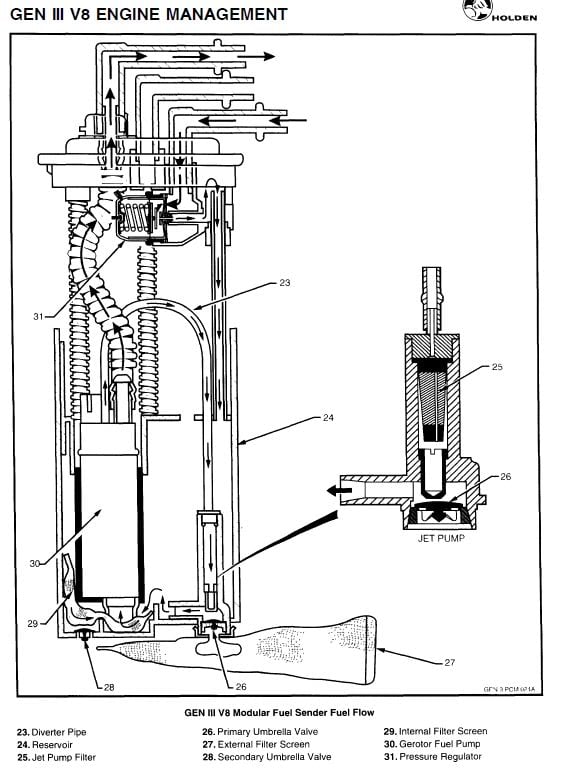
The last diagram is from page 89 (pdf page 92) of the Holden Gen III V8 Engine Management Service Training Manual.
Edited by ls2lxhatch, 17 May 2014 - 02:17 AM.
#153

Posted 17 May 2014 - 08:20 AM
Thanks Andy, Getting the pump and fuel sender out of the tank is a delicate operation as its a tight fit even with the tank removed from the car. Just didn't want to do it unless I really had to. The sketches have verified my thoughts thanks, so I am off to the shed to make a new supply pipe and complete the hook ups.
Sam the black plate on the left of the photo is the cover plate that I made and scribed it to the boot floor, I will post a better photo of it when I complete the hook ups. I bought a 4m length of 5/16 bundy pipe and will bend, flare and contour the pipe to the same shape as the original supply pipe which I will use as the return. Even though the internal pump has a sock filter I will still incorporate a external fuel filter in the supply pipe. I have used the original vapour system and will use the commodore VS canister due to being more compact in the engine bay.
#154

Posted 17 May 2014 - 12:08 PM
I had a plate welded onto the front of the droptank, and have mounted my supply filter there (just a standard vn v8 one for now).
I used a vn canister as well, just tossing up where to put it.
Cant wait to see what ypu get done this weekend!
#155

Posted 19 May 2014 - 05:57 PM
Sam Here are photos of how I run the fuel system and boot pump cover plate which is around 16mm deep. I used the original fuel pipe for the return and made a new pipe for the pressure supply. Also fitted a quick release external fuel filter with easy access and heat shield to make sure they don't get hot. I am going over the diff exhaust tail pipes and the exhaust people are renowned for getting thing close to things they shouldn't. just extra insurance in case.
Attached Files
#156

Posted 19 May 2014 - 09:13 PM
Yours is coming along brilliantly, and good call on the heat proofing.
#157

Posted 21 May 2014 - 08:52 PM
A well designed Fuel System Lenny
#158

Posted 07 June 2014 - 03:36 PM
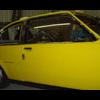
The slow process of the assembly. We have to slice & buff the new paint so I was trying to install the glass to keep out the buffing compound from the inside, but I forgot to order the top of door trims so I can install the door glass. Thanks to Cindy & Glen I now have good fitting trim. Then I started to fit the rubber kit and door window glass belt seals.
After fitting three seals I found they were defective. No they weren't Rare spares but they were per thetic examples and have been waiting two weeks for them to send replacement ones from QLD, Very pissed off, its hard enough fitting them but its a real bugger getting them off again without damaging the new paint, then having to waiting for ever to get the replacements in a reasonable time frame. The photo shows the steel showing the rubber.
I moved on to fitting up some engine bay components, had to wait for items to come back from the painters, so that's why I have been a bit slow on the assembly and couldn't fit the engine until these components were in place. Made new brake lines, made bracket and fitted the clutch reservoir and finalised some wiring.
I drilled some holes on the under side in the dummy fan duct to run the engine harness and hide the coil, Map sensor and a few odd bits and pieces. The harness will go through the original fan fire wall hole so I can mount the E.C.M under the dash. Hopefully next week I will get time to put the engine & box in.
While waiting for stuff to turn up I got back onto the MAN CAVE, I started out just building a shower, dunny and store room, then I thought it might be way cooler to have a mezzanine floor to keep all the torrie parts and other rubish out of the way, and machine section for doing the racks. Then I started to thing a man cave would be much cooler again, have a bar, fridge, whine rack or even better a Bourbon rack to the point where you see it now. Just got to build the bar and seating area, up stairs railing and its time to have a few mates over to christen it. Maybe have to wait and finish the SLR off as well and christen both at the same time. To many decisions, going inside for a beer and do some more thinking, can't rush these things.
Attached Files
#159

Posted 07 June 2014 - 07:42 PM
Bloody hell! You don't muck around Lenny. Careful, or you'll end up moving into the man cave.
#160

Posted 07 June 2014 - 07:50 PM
Sure is looking like Home Lenny,
You have made a new word for this way of working:-
HOMESHOP
or
CAVESHOP
#161

Posted 07 June 2014 - 08:21 PM
the car is taking shape beautifully
so is the man cave!
one contentious issue though? the torrie parts and other rubish
i hope you mean the torrie parts
and rubbish
cheers davemc
#162

Posted 08 June 2014 - 09:06 AM
Yep Dave when I mean rubbish I mean the kids junk that I have to store. I only keep good torrie stuff. Sam, the Mrs reckons I spend way to much time out in the shed so she thinks it will be a good idea to build in a wardrobe, that ok I will be able to sleep on the bar top after a few refreshments.
Got some more done yesterday.
Attached Files
#163

Posted 08 June 2014 - 04:03 PM
Thanks Lenny for the positive feedback...
Glenns still in shed envy lol what a shed!!!.. its a palace, only thing missing is a spray booth?
#164

Posted 08 June 2014 - 06:05 PM
#165

Posted 19 June 2014 - 08:57 AM
Got back onto the Torrie and spent the last three days reconfiguring the wiring. I have gone for a VY commodore fuse/relay box because they are compact and have the relays and fuses all in the one unit and I think they look tidy and easy access if I ever have an issue. I have wired in the torrie harness and horn,headlights, a/c clutch, fans as well as all the efi relay & fuel pump. I managed to fit in a third fan relay for the fans cut in so I can have auto mode through the ECM with a manual override circuit. In either auto or manual override when the fans cut in the cabin manual switch light glows.
Attached Files
#166

Posted 19 June 2014 - 05:23 PM
I will throw this one up for comments/feedback and discussion.
When I sent the Torrie out for paint I asked them to fill in the hole on the left front guard (aerial hole). I was intending fiting a centre roof aerial. But when I picked it up I noticed they forgot to do it. They said that when I finished the assembly to bring it back and they would do it at their cost, or just fit the original aerial. Of course they would like me to fit the original aerial which lets them off the hook. But I would hate for it to not colour match or have a problem in this area now or later on if I do get them to fill, repair and repaint.
So what do you guys think looks better ? centre roof aerial or power aerial in the guard. Need help making the decision.
Lenny.
#167

Posted 19 June 2014 - 06:15 PM
#168

Posted 19 June 2014 - 06:17 PM
I would have an aerial in the guard before putting one in the roof, but if it was me I would have neither and have a hidden internal aerial.
Good work by the way.
#169

Posted 19 June 2014 - 06:40 PM
#170
 _2ELCS_
Posted 19 June 2014 - 07:04 PM
I would say in the guard too Lenny....centre mounted roof aerials are a pain when you want to put a cover over the car...
#171

Posted 19 June 2014 - 09:05 PM
hey lenny!I will throw this one up for comments/feedback and discussion.
When I sent the Torrie out for paint I asked them to fill in the hole on the left front guard (aerial hole). I was intending fiting a centre roof aerial. But when I picked it up I noticed they forgot to do it. They said that when I finished the assembly to bring it back and they would do it at their cost, or just fit the original aerial. Of course they would like me to fit the original aerial which lets them off the hook. But I would hate for it to not colour match or have a problem in this area now or later on if I do get them to fill, repair and repaint.
So what do you guys think looks better ? centre roof aerial or power aerial in the guard. Need help making the decision.
Lenny.
mate my opinion only
the detail and care you have taken with this project
i ask why?????
there is a very good reason they did not drill holes in it for an aerial
it's not meant to have one!
thats seen anyway!
many possibilities out there
don't ruin it
run an internal or in glass or bootlid aerial with a booster if you have to
but no to the hole!
what do you need a radio for when you can enjoy the sweet sound of that engine?
#172

Posted 19 June 2014 - 11:23 PM
I like the look of a central Aerial, keeps the Torana looking symmetrical,
but now that you guy's are saying other things, the internal Aerial sounds good.
#173

Posted 20 June 2014 - 08:19 AM
Thanks for the feedback guys, all good points. I wouldn't mind having it in the rear glass or hidden to, no aerial at all, but it still leaves me with the original problem with the hole already in the front guard.
#174

Posted 20 June 2014 - 10:46 AM
Shouldnt be a problem with matching the colour.
Looking at the results so far the painters know what they are doing.
Years ago for an internal aerial I just ran some telecom wire around the windscreen under the rubber.
Worked well.
#175

Posted 20 June 2014 - 03:04 PM
The problem with roof mounted aerials is that they wear thru the car cover.
2 user(s) are reading this topic
0 members, 2 guests, 0 anonymous users



 View Garage
