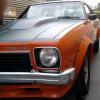
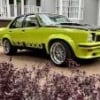
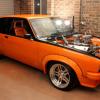
Good idea Rockon with the aerial, The new black painted sections on the torrie are clear over base black metallic, so there is no painted lip line felt, and the yellow is a plain non metallic clear on base. I thought trying to get it all to match in now might be harder than it sounds. knowing my luck you would be able to tell the difference. I am now leaning towards a power guard mount jobbie. But I still like the look of the centre rood aerial, may be it's me still stuck in the seventy's like the car, but as mentioned above I also find they are a bit of a pain with the cover going on and off. Thanks for the feedback guys.
Axistr's Father & Son LH SLR Project.
#176

Posted 20 June 2014 - 07:12 PM
#177

Posted 20 June 2014 - 08:42 PM
sorry lennyThanks for the feedback guys, all good points. I wouldn't mind having it in the rear glass or hidden to, no aerial at all, but it still leaves me with the original problem with the hole already in the front guard.
must have misread your post
and just looking your pics i now clearly see the hole!
go for the electric guard antenna
big no to the roof aerial imho!
#178

Posted 21 June 2014 - 08:37 AM
It's settled then, it seams more would prefer guard mount then centre mount, so I will go with the majority and grab a power aerial. Off to the shed I go to fit the roof lining, the decision was holding me up on fitting it.
#179

Posted 24 June 2014 - 06:41 PM
started the assemble of the interior so I can get all the glass in.
Made some adaptors up on the lathe for the head rests, fitted the parcel shelf & speakers so I can fit the rear glass.
Attached Files
#180
 _LS1 Taxi_
Posted 24 June 2014 - 06:45 PM
Now you are just showing off.
How smart does that look!! Love it.
#181

Posted 24 June 2014 - 09:03 PM
#182

Posted 14 July 2014 - 09:18 AM
Finally have all the glass in, so its time to start overhauling the front end.
I have gone for UC top control arms so I can achieve better caster & camber angles with the power steering.
Front end assembled and power steering fitted, the bushes were all ok as far as movement but the bushes were all original and the rubbers were showing signs of cracking so new rubber bushes fitted. No crap plastic bushes the real stuff (Rubber) bushes was fitted.
I get asked quite a bit about the rear mounted front sway bars wont fit on members cars. The sway bar shown here was originally straight, I bent and contoured it to clear the bell housing and added a new coat of paint. no magic here just used the press and cold bent it to shape.
Even the original UC rag joint cover fitted but will have to see if the exhaust still clears with the engine in.
Front brakes next.
Attached Files
#183

Posted 14 July 2014 - 09:48 AM
#184

Posted 14 July 2014 - 10:20 AM
A Nice and comfy Ride you are Creating Lenny,
Who would of ever thought you could put a Sway-bar in the Press and reshape it, another Job well done.
Radial Tuned Suspension has gone to a New level.
#185

Posted 14 July 2014 - 03:18 PM
Thanks Guys, Its very easy to do and I only used around 3 tonnes to bend it over the short distance.
Went to get some more parts last week for the Torrie and noticed they had chassis plugs in the display cabinet for $120 a set. "ouch" So I decided to buy a 60mm aluminium bar and make some myself. I also machined out the lower section for an O-ring grove to make sure they don't rattle or fall out. Don't know weather to polish or paint them chrome yellow yet to match the rails. Total cost $30 for the aluminium bar, and one hour of my time. Saved $90 plus it more fun making thing yourself that fit perfect.
Attached Files
#186

Posted 14 July 2014 - 04:04 PM
Its been a busy week and got a few things done on the SLR. The next thing I need to get sorted are the front brakes. I didn't bother redrilling the rear axles as it was from a commodore with rear discs. So I thought I will just run commodore disc on the front including the master cylinder and keep the whole system commodore except for the Torana brake peddle. I had some VB commodore front rotors and a pair of old Girlock alloy callipers up stairs. I started to grind away at the calliper bracket to clearance the tie rod ends and the bracket is starting to get very thin. I will need to take off around 3.5mm from the outside diameter of disc rotor, No biggie have the lathe. But not real happy about taking so much metal off every thing. I think these callipers are off a WB or VB-VH I am not sure, dattoman maybe able to enlighten me here. Then I would need to set the calliper up in the mill and drill & tap a hole at the back for the brake hose as these callipers have the inlet hole facing the engine, then I would need to plug the original holes.
I seam to remember that these callipers had a reasonable amount of flex back in the day and a bit of a spongy peddle. I was wondering who has done what for front brakes. My be I should look at a different system. I would like to keep the callipers in the original position, and don't really need big expensive brakes on the front, car only weighs 1250kg, and don't want to go to HQ stubs, already have the right ride height with the new springs. And I defiantly don't want to cut out control arms or K-frame for clearance. With power steering I get around 2 1/2 degrease better turning circle so any system must have a reasonable amount to clearance or I mite as well stick with the standard brakes and redrill to suit the commodore wheel stud paten.
I am open for suggestions and alternatives.
Thank in advance Lenny.
Attached Files
#187

Posted 14 July 2014 - 04:16 PM
Would Harrop steering arms upset the steering geometry too much? Would lower the tie-rod a bit...
#188

Posted 14 July 2014 - 04:23 PM
and Very nicely made plugs Lenny,
is the groove for a cir-clip?
#189

Posted 14 July 2014 - 04:36 PM
Dave, groove is for a rubber O-ring so they push into the rail firm and won't rattle or fall out.
myss427 I am Running UC arms to insure all the steering geometry is ok and the UC arms are in-between the LH & A9X in height and length scale. I can make it all fit and have decent clearances but I suppose I'm a bit fussy and like every thing spot on. Being a perfectionist really pisses me off sometimes. Just looking at alternatives.
#190

Posted 14 July 2014 - 04:50 PM
Are the Commodore rotors as thick as HQ-WB, guessing they must be close?
#191

Posted 14 July 2014 - 06:56 PM
Thanks lx76hatch, rotors are around 22mm thick. They have stamped on them 20mm min thickness. I think you might be right I may have removed them from a HZ-WB not 100% sure. I thought it was only the commodores that had the inlet port facing in towards the engine. As I said I can make them fit, just getting a bit thin. But when I had a good look and study it a bit more I noticed the amount of aluminium around the slides mounts areas, I think I still have around 8x the amount of steel where I was grinding metal from which made me feel a bit better. Sill a bit more buggering around yet to get it right if I use them.
#192
 _hatch76_
Posted 14 July 2014 - 07:45 PM
I have the same setup but with the Harrop arms if you want some photos
Sorry also have the hq stubs and standard springs. Sits nice.
For what I spent on it, if a hoppers kit fitted I would have went down that track
Cheers Dan
Edited by hatch76, 14 July 2014 - 07:53 PM.
#193
 _parsons5000_
Posted 14 July 2014 - 08:50 PM
#194

Posted 15 July 2014 - 04:01 PM
They are a bit thinner then; HQ-WB are 25.4mm new and 24.5mm minimum if I remember correctly. I imagine they would be OK as long as the pads don't get too low?rotors are around 22mm thick. They have stamped on them 20mm min thickness.
Calipers are definitely not (unmodified) Commodore, I think hatch76 may be on the money with the WB ones having the fitting in a different spot to HZ, that rings a bell. Definitely not HJ. You could always swap the bleeder and supply line, makes it more of a pain to bleed them but hopefully not a regular occurrence.
#195
 _JustLH_
Posted 15 July 2014 - 06:54 PM
Certainly makes my SLR look dirty....and it's in pretty good nick!
Good stuff mate.
#196

Posted 16 July 2014 - 10:17 PM
Very nice Lenny.
I noticed you have a bolt and nyloc nut in the bottom hole of the rag joint, is it ok to use them or is it just a temp fix.
#197

Posted 17 July 2014 - 07:16 AM
G'day Mort,
You have good eyes its hard to pick in the photo.
The bolts & nyloc nuts go through the rag joint with a small crush spacer so there is only partial crush on the rag joint. The extra length of the bolts allows for contact with the safety plate in the event that the rag joint collapses. as per original Holden design. The bolts are 8.8 grade.
#198

Posted 17 July 2014 - 11:55 AM
Thanks for that Lenny, actually the one i was referring too was the bolt replacing the cotter pin, but it is good to know about the other two.
#199

Posted 17 July 2014 - 12:34 PM
The bolt and nylock are on the Subaru rack end of the rag joint. This end is a splined joint the Lenny had made to adapt the Subaru steering shaft to the Torana rag coupler.
The joint in the pictures below is using a SuperPro kit which includes the special bolts to replace the original rivets and a urethane coupler disc that should be thrown in the bin before it melts from exhaust heat and you loose steering.


Edited by ls2lxhatch, 17 July 2014 - 12:44 PM.
#200

Posted 17 July 2014 - 05:33 PM
Ok thanks for that ls2.
1 user(s) are reading this topic
0 members, 1 guests, 0 anonymous users


 View Garage