
With the flares and rear spoiler the rear end should be body colour. But that's just my preference so take my opinion with a grain of salt. It looks like a very nice hatch. Like the colour a lot.

LX rebuild
Started by
_SmartE_
, Feb 02 2012 10:46 PM
195 replies to this topic
#27
 _SmartE_
_SmartE_
-

- Guests
Posted 28 June 2012 - 10:56 PM
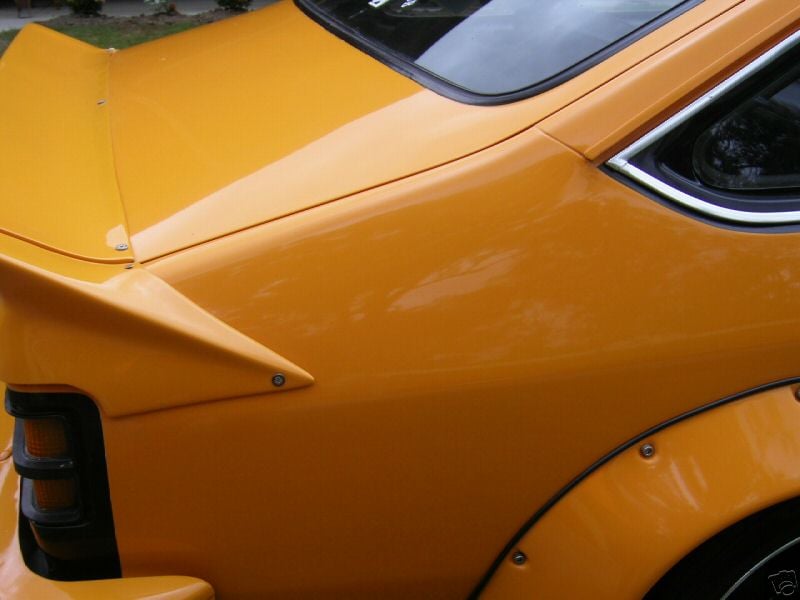
With the flares and rear spoiler the rear end should be body colour. But that's just my preference so take my opinion with a grain of salt. It looks like a very nice hatch. Like the colour a lot.
yea I'm waiting for the drop tank to go on to make up my mind if it needs the black to run along the bottom of the car

#28
_j.e.d._
_j.e.d._
-
- Guests
Posted 29 June 2012 - 05:04 AM
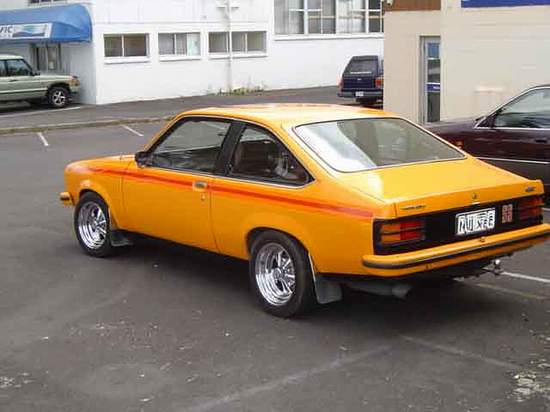
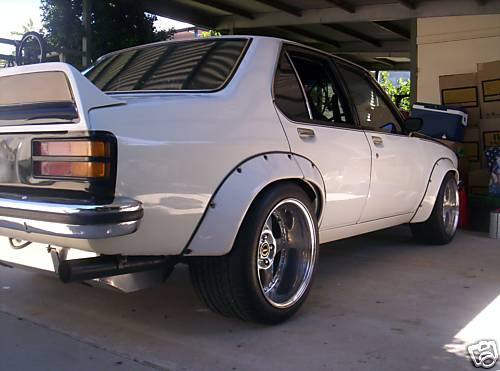
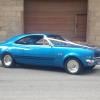
My uneducated opinion mate...the black curves with the side of the spoiler then went down & then the sills were painted black as well....otherwise it'd look better stopped before going below the bumper like the pic I've added of a sedan..
#29
_SmartE_
_SmartE_
-
- Guests
Posted 29 June 2012 - 02:44 PM
My uneducated opinion mate...the black curves with the side of the spoiler then went down & then the sills were painted black as well....otherwise it'd look better stopped before going below the bumper like the pic I've added of a sedan..
Thanks Jase the black on the sedan is the look I was after

#30
_j.e.d._
_j.e.d._
-
- Guests
Posted 30 June 2012 - 05:30 AM
Sweet mate, happy to help...hope its not too much drama for the painter to re-do that area 
Car is looking good though by the way....
Car is looking good though by the way....
#31
_SmartE_
_SmartE_
-
- Guests
Posted 30 June 2012 - 10:10 PM
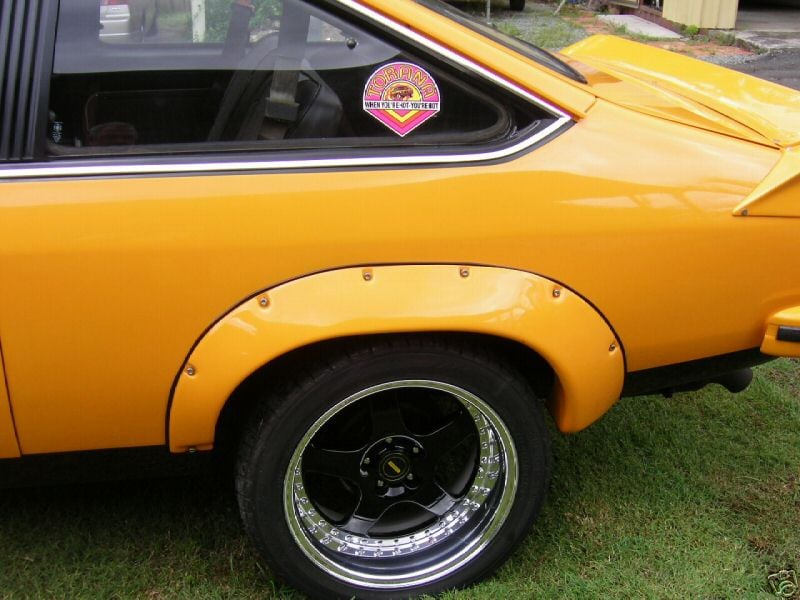
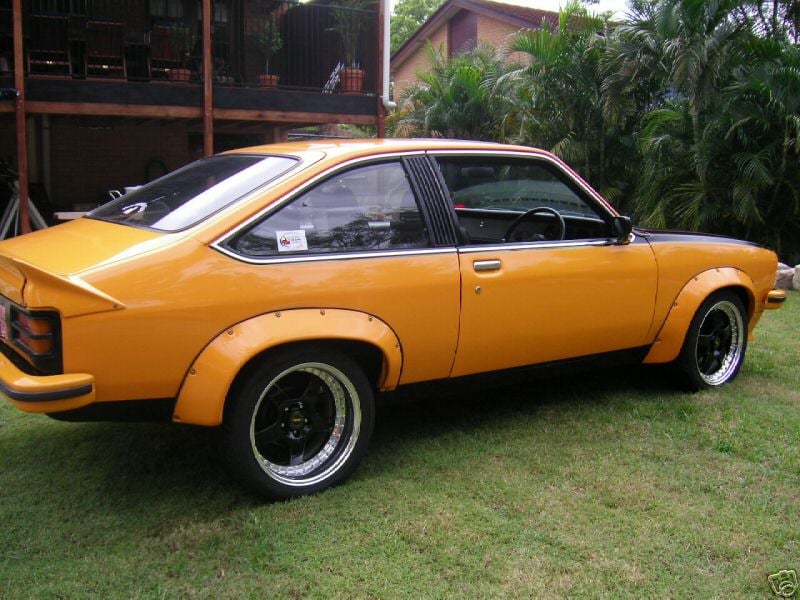
Hey jase would you have picture of that orange hatch with the flares from the rear endSweet mate, happy to help...hope its not too much drama for the painter to re-do that area
Car is looking good though by the way....
#32
_nasty1_
_nasty1_
-
- Guests
Posted 01 July 2012 - 09:55 AM
looks good more photos?love the black/silver combo on any car
#33
_j.e.d._
_j.e.d._
-
- Guests
Posted 02 July 2012 - 03:17 AM
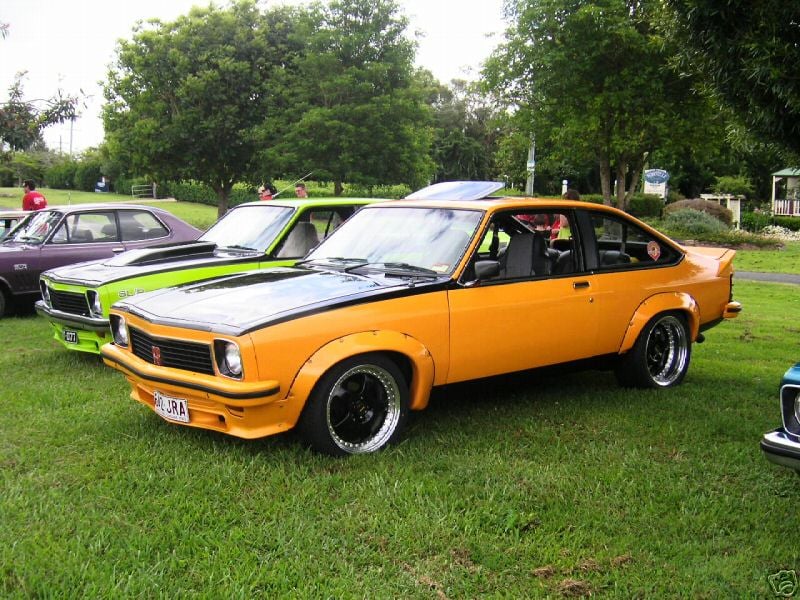
Yea mate here ya go, coupla shots from different angles...
#34
_j.e.d._
_j.e.d._
-
- Guests
Posted 02 July 2012 - 03:21 AM
Nothing from the back though sorry....maybe some else can help with a pic of this car?
#35
_j.e.d._
_j.e.d._
-
- Guests
Posted 09 July 2012 - 04:40 PM
Here's a link to a hatch over here that's featured in the NZV8 mag...similar colour as well
http://www.v8.co.nz/...holden-torana-6
http://www.v8.co.nz/...holden-torana-6
#36
_SmartE_
_SmartE_
-
- Guests
Posted 09 July 2012 - 09:00 PM
Hey Jase,
Thanks for that link and all the pictures I really appreciate it, after reading through about 500 muscle car magazines I found about three cars that have the same style back blackout as mine.It is starting to grow on me, the link that you supplied is what I was thinking originally but I probably didn't reseach it enough and left it up to painter to sort out not knowing the three different ways of doing it. If there are any painters out reading this what would it involve to get rid of the black under the bumber and put it back to silver(More money) .Being 2pac I've have heard you can't blend it in? I have also noticed that the black out has right angle instead of a rounded bend under the spoiler that will need fixing when the painter gets it back to finish the inside.
 SAM_0615 - arrow.JPG 86.09K
6 downloads
SAM_0615 - arrow.JPG 86.09K
6 downloads
Thanks for that link and all the pictures I really appreciate it, after reading through about 500 muscle car magazines I found about three cars that have the same style back blackout as mine.It is starting to grow on me, the link that you supplied is what I was thinking originally but I probably didn't reseach it enough and left it up to painter to sort out not knowing the three different ways of doing it. If there are any painters out reading this what would it involve to get rid of the black under the bumber and put it back to silver(More money)
.Being 2pac I've have heard you can't blend it in? I have also noticed that the black out has right angle instead of a rounded bend under the spoiler that will need fixing when the painter gets it back to finish the inside.
SAM_0615 - arrow.JPG 86.09K
6 downloads
#37
_SmartE_
_SmartE_
-
- Guests
Posted 13 July 2012 - 05:25 PM
Just got a phone call from the mechanic the K-frame has arrived from the powder coaters and fitted with nolathene bushes throughout. He spent a couple hours trying to fit with no luck. It seems the front ends not true and is about 8mm out. A closer inspection of the old bushes showed that one side may had small whack at one stage and the bushes had worn to suit it.
At the moment he is seeking advice from a car restorer on how to rectify it with out to much damage to the paint, he mentioned a car aligner or .some way spreading the front apart but we both agree we don't want rough quick fix..
At the moment he is seeking advice from a car restorer on how to rectify it with out to much damage to the paint, he mentioned a car aligner or .some way spreading the front apart but we both agree we don't want rough quick fix..
#38
_LXSS350_
_LXSS350_
-
- Guests
Posted 13 July 2012 - 06:18 PM
Measure the centres off the car itself on the four engine bay bolts. Then measure the insides of the chassis where the Kframe support arms bolt. Then using a porta-power or press adjust as necessary to the chassis measurements ( expand or contract). Don't over do it .... Use small adjustments and have a mate on the tape telling you how close to your chassis measurements you are (as you do it). You will have to go way past it ...... small bits at a time so you understand the spring back ratio.
#39
_SmartE_
_SmartE_
-
- Guests
Posted 13 July 2012 - 09:34 PM
Measure the centres off the car itself on the four engine bay bolts. Then measure the insides of the chassis where the Kframe support arms bolt. Then using a porta-power or press adjust as necessary to the chassis measurements ( expand or contract). Don't over do it .... Use small adjustments and have a mate on the tape telling you how close to your chassis measurements you are (as you do it). You will have to go way past it ...... small bits at a time so you understand the spring back ratio.
LXSS350 thanks for the advice. As I am a couple of weeks away from flying home, I forward this on to the mechanic. Worst of all the painter just finished touching up the engine bay only two days ago.
#40
ls2lxhatch
-

- Members
-

- 5,332 posts
- Location:Perth
- Car:LX Hatch
- Joined: 29-May 06
Posted 14 July 2012 - 02:08 PM
Just got a phone call from the mechanic the K-frame has arrived from the powder coaters and fitted with nolathene bushes throughout. He spent a couple hours trying to fit with no luck. It seems the front ends not true and is about 8mm out. A closer inspection of the old bushes showed that one side may had small whack at one stage and the bushes had worn to suit it.
At the moment he is seeking advice from a car restorer on how to rectify it with out to much damage to the paint, he mentioned a car aligner or .some way spreading the front apart but we both agree we don't want rough quick fix..
Measure the distance between the chassis bolts on the k-frame to confirm the k-frame is not the problem. It is common for the rear bolts to be closer together than the front bolts as a result of the k-frame flexing under brakes. It is reasonably easy get the k-frame back into spec with a jack or porta power. I have a jig I use to check the measurements.
Fitting a k-frame to a Torana can be a difficult exercise for someone that has not done it before. People often try to fit the bolts in the legs first and then swing the k-frame up, this will not work.
Have a look here for one way to fit a k-frame.
http://members.westn...gineinstall.htm
#41
_SmartE_
_SmartE_
-
- Guests
Posted 15 July 2012 - 12:15 PM
Thanks ls2lxhatch really appreciate the advice on this probem. I was thinking the other day things were going too well and this happened. But if this is the biggest problem in the build I will be happy.
#42
_SmartE_
_SmartE_
-
- Guests
Posted 31 July 2012 - 03:44 PM
Dropped in to see how the car was going along. First I thing I saw was the front end was in and the motor fitted  As disscused in previous posts there was trouble with the K-frame fitting. I forwarded the helpfull replies from LXSS350 and ls2lxhatch on to the mehanic which he used and found out the K-frame was twisted, so thanks for the help gentleman. the headers have been fitted as you can see a nice tight fit. Next to go on will be the brake and fuel lines and master cylinder and booster. The widened front simmons were going to be fitted but it turns out the thread on the bolts is catching on the break calipers so back to rim repairers to fit smaller bolts
Nearly on the home stretch the tailshaft and gearbox will be fitted next week. Still waiting for the new diff to arrive, some eletrics to run, radiator, cage to be finished and then it back to the painter to finish the inside and bonnet to completed.
SAM_0700.JPG 108.3K
5 downloads
SAM_0701.JPG 125.8K
5 downloads
SAM_0702.JPG 96.74K
4 downloads
SAM_0703.JPG 88.31K
5 downloads
SAM_0704.JPG 129.15K
4 downloads
SAM_0705.JPG 114.84K
4 downloads
SAM_0706.JPG 93.82K
4 downloads
As disscused in previous posts there was trouble with the K-frame fitting. I forwarded the helpfull replies from LXSS350 and ls2lxhatch on to the mehanic which he used and found out the K-frame was twisted, so thanks for the help gentleman. the headers have been fitted as you can see a nice tight fit. Next to go on will be the brake and fuel lines and master cylinder and booster. The widened front simmons were going to be fitted but it turns out the thread on the bolts is catching on the break calipers so back to rim repairers to fit smaller boltsNearly on the home stretch the tailshaft and gearbox will be fitted next week. Still waiting for the new diff to arrive, some eletrics to run, radiator, cage to be finished and then it back to the painter to finish the inside and bonnet to completed.
SAM_0700.JPG 108.3K
5 downloads
SAM_0701.JPG 125.8K
5 downloads
SAM_0702.JPG 96.74K
4 downloads
SAM_0703.JPG 88.31K
5 downloads
SAM_0704.JPG 129.15K
4 downloads
SAM_0705.JPG 114.84K
4 downloads
SAM_0706.JPG 93.82K
4 downloads
#43
_greenmachine215_
_greenmachine215_
-
- Guests
Posted 31 July 2012 - 10:18 PM
Mate this things just FAT!
How much longer till its ready to be rego'd and driven?
How much longer till its ready to be rego'd and driven?
#44
_SmartE_
_SmartE_
-
- Guests
Posted 01 August 2012 - 08:28 PM
Mate this things just FAT!
How much longer till its ready to be rego'd and driven?
That's the golden question greenmachine215, there is still the electrics, fuel and driveline to be fitted and the mechanic erred on the side of caution and recommended a stronger shortened diff to handle the 640+ horsepower. That's still being built so I will have a spare nine inch out of a F-100 spair with a ford stud patton. It will need to go back to the paintshop to finish the inside once the cage has been welded and bonnet fitted and painted. I'm thinking 7-8 for all paint and mechanical work to be finished.
It's already rego'd and will only need engineerring to get it driving. I'll drive it about 15kms to the trimmers and leave it there for a couple weeeks and then it should be ready for summer cruises and events coming up.

#45
_SmartE_
_SmartE_
-
- Guests
Posted 22 August 2012 - 10:53 PM
Not much to report since three weeks ago, just the brake booster and master cylinder has been fitted. Also added a pic of the hopper stoppers. The mechanics been flat last couple of weeks but should be hitting it it over the next couple of weeks. The browns radiator has arrived and the diff is due and both should be fitted soon. Any thoughts on the brake booster I wanted to break up the crome in the engine bay.
IMG_0289.JPG 125.71K
7 downloads
IMG_0290.JPG 125.38K
9 downloads
IMG_0291.JPG 121.19K
5 downloads
IMG_0289.JPG 125.71K
7 downloads
IMG_0290.JPG 125.38K
9 downloads
IMG_0291.JPG 121.19K
5 downloads
#47
_LJ355_
_LJ355_
-
- Guests
Posted 23 August 2012 - 07:02 AM
great looking car mate my opinion on the booster i would either paint it the body colour or black
#48
_lx-ls3_
_lx-ls3_
-
- Guests
Posted 14 September 2012 - 02:21 PM
just read your whole thread mate! this car is a credit to you!Not much to report since three weeks ago, just the brake booster and master cylinder has been fitted. Also added a pic of the hopper stoppers. The mechanics been flat last couple of weeks but should be hitting it it over the next couple of weeks. The browns radiator has arrived and the diff is due and both should be fitted soon. Any thoughts on the brake booster I wanted to break up the crome in the engine bay.
was the browns radiator a custom unit or do they have specs for them?
cheers
#49
_SmartE_
_SmartE_
-
- Guests
Posted 25 September 2012 - 06:51 PM
Thanks Lx-Ls3 the browns radiator is of the shelf (biggest we could buy) and I can chase the specs up for you. The shop has already fitted the same radiator on another car and it has done a few burnouts over minute without the temp gauge barely moving. Visited the shop today and its moving along slowly the T400 and cross member has been fitted. Front simmons have had the thread on the bolts cut down so the they don't hit the hoppers/stoppers and fitted. Got a few photos of it while it was up on the hoist.
IMG_0434.JPG 72.75K
4 downloads
IMG_0435.JPG 90.75K
5 downloads
IMG_0436.JPG 89.06K
4 downloads
IMG_0437.JPG 87.23K
6 downloads
IMG_0434.JPG 72.75K
4 downloads
IMG_0435.JPG 90.75K
5 downloads
IMG_0436.JPG 89.06K
4 downloads
IMG_0437.JPG 87.23K
6 downloads
#50
fatslr
 View Garage
-
- Members
-
- 1,247 posts
Forum Fixture
- Name:Garth
- Location:Dunsborough W.A.
- Joined: 17-July 07
View Garage
Posted 25 September 2012 - 10:15 PM
Looking good mate slowly but surely .
Just wondering are you planning on having it finished in time for motorvation and actually going , just asking as I am debating going or not as it is about the only show this summer that I am not working .
Garth
Just wondering are you planning on having it finished in time for motorvation and actually going , just asking as I am debating going or not as it is about the only show this summer that I am not working .
Garth


2 user(s) are reading this topic
0 members, 2 guests, 0 anonymous users

