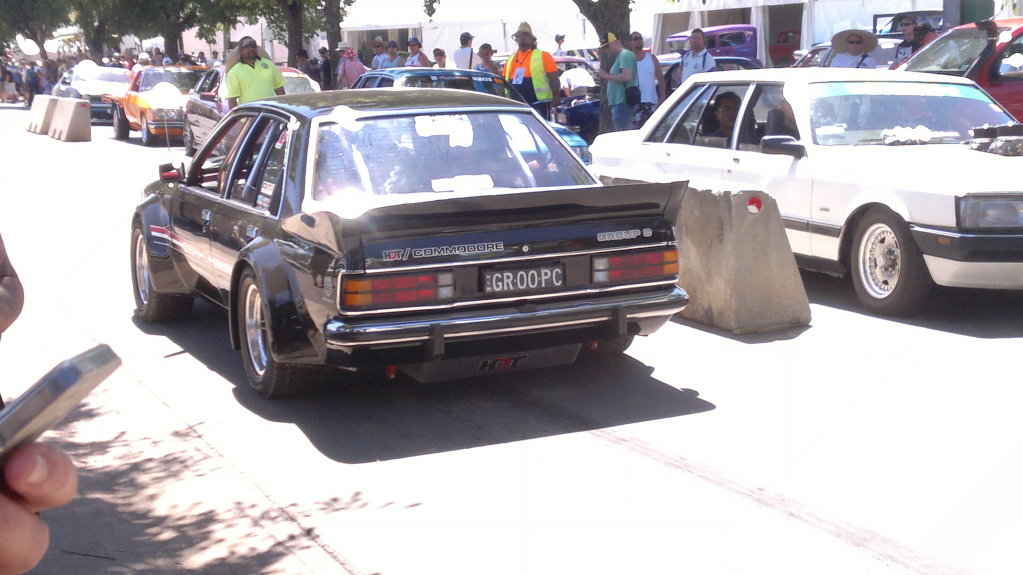
Group C Opel Monza build by Dirtbag
#251
 _jabba_
Posted 16 September 2012 - 08:08 PM
#252
 _dirtbag_
Posted 28 September 2012 - 05:40 AM
I started by cutting the lower rear part of the quarter off.


I'm going to have to replace most of the inner panel, but I'll keep what I can.
I started by cutting the lower part of the inner panel off, then cut off and made a new rear section.


The next bit I replaced was the crusty bit near the wheel arch. I also trimmed the whole wheel arch off so it can be welded.


Then I made and fitted the new lower part with a lip on it so I can plug weld the new outer panel to it when the time comes.


I then made up the new outer panel.

Like the other side I had to put a slight curve in it.

Looks a bit better than the old piece : )

OK, so the next thing I had to do before the outer panel goes on was fix the rust where the inner support was mounted. The support itself was pretty well stuffed so the whole lot came out.


The floor above the support was rusty also so I cut that out at the same time as I cut the support out.


This shows the area I'm working on. You can see where the hole is I cut.

I then cut a much larger hole so I could get to some decent metal.

When I was welding the new support in I had a nice smoke screen coming out of the chassis rail : )

Here's the inner panel finished at last, ready for rust converter and etch primer.

I made the new support a different shape to the original one, purely to make it easier to make. It's about twice as wide as it used to be.

Once the inner panel was primed I could at last start on the outside.

I've punched holes along the lower edge for plug welding.


I then trimmed the wheel arch end and welded the inner and outer panels together.


Last piece of this puzzle was the corner. Again for the sake of ease I made it in two pieces.


So that's where I'm up to. I know it doesn't look much but there's a fair bit of work in that lot. I still have to weld the wheel arch, remove the inner and outer fuel filler holes, replace the inner and outer sill, both A pillars etc etc etc : )
#253

Posted 28 September 2012 - 06:05 AM
Your work and attention to detail is amazing.
#254

Posted 28 September 2012 - 04:02 PM
#255

Posted 28 September 2012 - 05:30 PM
#256
 _Pete_
Posted 29 September 2012 - 09:21 PM
#257
 _jabba_
Posted 30 September 2012 - 04:20 PM
Edited by jabba, 30 September 2012 - 04:21 PM.
#258
 _L32M20_
Posted 30 September 2012 - 08:10 PM
#259

Posted 11 December 2012 - 12:47 PM
#260
 _Matvex_
Posted 11 December 2012 - 02:06 PM
Thanks for taking the time to show us what you do.
#261
 _cruiza_
Posted 11 December 2012 - 04:58 PM
#262

Posted 11 December 2012 - 06:54 PM
#263
 _dirtbag_
Posted 12 December 2012 - 07:55 AM
WellI have done a little bit more to this car.
The first fun job was to strip the rest of the tar out of the car. I couldn't get onto any dry ice so had to go with the heat gun. It was quicker than chipping it off but still took ages. Done now though!!!

Then I chopped the whole drivers side sill off.


So then I got to chop more of the bad bits off

Then I remade the bits I'd just cut off.

Once the inside was back to normal it got rust converted and etch primed. Rather than mix up a small bit of 2 pac I just use rattle cans for small jobs. I only use one sort though as it seems to have a good rep as far as spray can etch goes.


I then did a trial fit of the new sill.

Then welded it on : )

Some rust converter.

I still need to finish inside the front of the wheel tub but it's getting there.
Next thing that arrived was a drop tank from a torana that I need to make fit. I haven't mounted it yet but I did prop it up in there to see how it'd look.


The mounts will need a little bit of adjusting : )

#264
 _dirtbag_
Posted 12 December 2012 - 08:02 AM


Well that's it for now : )
#265

Posted 12 December 2012 - 11:50 AM
#266
 _73LJWhiteSL_
Posted 12 December 2012 - 11:05 PM
Steve
#267
 _mick74lh_
Posted 13 December 2012 - 09:31 PM
#268
 _Emu_
_Emu_
Posted 13 December 2012 - 11:11 PM
#269

Posted 14 December 2012 - 11:59 AM
#270

Posted 13 January 2013 - 09:10 PM
#271
 _dirtbag_
Posted 01 February 2013 - 10:16 PM
I started by finishing off where the new sill joins the wheel tub.


Just one more little piece to fill in and this part is done.


I then finished welding the rest of where I cut the wheel arch, and made a start on filling the fuel filler.

I made the new outer piece bigger than it needed to be purely so it gave me access to the inner panel that I need to repair as well.


Once the inner piece was finished I cleaned the inside and etch primed it.

Then I could weld the new outer piece in place and finally be rid of the rusty fuel opening : )

I want to start fitting the rear flares as they're not a perfect fit. To get them to fit though I need the rear guards to be straight, so I've started a bit of the bodywork.


It was good to get the first few coats of primer filler on it.


The rear guards are just at the rough in stage, but they're looking pretty good for the initial work. I'll get them blocked down and touched up in the next few days then reprime them and then start on making the flares fit!
#272
 _Bomber Watson_
Posted 01 February 2013 - 11:32 PM
#273

Posted 02 February 2013 - 10:26 AM
#274

Posted 02 February 2013 - 11:51 AM

#275
 _L32M20_
Posted 03 February 2013 - 08:30 PM
1 user(s) are reading this topic
0 members, 1 guests, 0 anonymous users


