
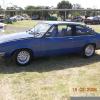
Lookin good tim, looks tough as in the primer

UC Hatch rebuild: 383 Chev, mini tubs, full LX treatment.
Started by
_BLOWN V6HATCH_
, Apr 13 2012 01:02 PM
115 replies to this topic
#52
 _BLOWN V6HATCH_
_BLOWN V6HATCH_
-

- Guests
Posted 20 June 2012 - 07:05 PM
Thanks mate.
Anyway, just a bit of engine porn...

Everything cam related. For $750 odd landed, you can't really go wrong.
Anyway, just a bit of engine porn...
Everything cam related. For $750 odd landed, you can't really go wrong.
#53
_BLOWN V6HATCH_
_BLOWN V6HATCH_
-
- Guests
Posted 24 June 2012 - 05:40 PM
So, some more progress this weekend.
Yesterday i put the final pieces on the hatch area. I finished the channel for the rubber to sit in at the back (you will notice in the last lot of pics that the corners are missing and the rear section was only tacked on).
Done.

Then today i repaired the rust around the front screen that i found last weekend. Then i fixed some rust in the drivers door on the inner frame. This is the only rust in both doors, the rest of the frames are good and the skins are perfect (which is obviously pretty rare for hatchback doors these days).
Tacked in.

Done.

A bit more tinworm.

All fixed.

Then this afternoon, i did the filler work on the L/H guard. I just about have it done.
That's about it for now.
Yesterday i put the final pieces on the hatch area. I finished the channel for the rubber to sit in at the back (you will notice in the last lot of pics that the corners are missing and the rear section was only tacked on).
Done.
Then today i repaired the rust around the front screen that i found last weekend. Then i fixed some rust in the drivers door on the inner frame. This is the only rust in both doors, the rest of the frames are good and the skins are perfect (which is obviously pretty rare for hatchback doors these days).
Tacked in.
Done.
A bit more tinworm.
All fixed.
Then this afternoon, i did the filler work on the L/H guard. I just about have it done.
That's about it for now.
#54
_greg2240_
_greg2240_
-
- Guests
Posted 12 July 2012 - 03:32 PM
any updates planned? it looks pretty good so far. cheers Greg
#55
YiriSS
-
- Members
-

- 581 posts
Forum Fixture
- Location:Melbourne
- Joined: 08-November 05
Posted 13 July 2012 - 09:43 PM
absolutely love reading about your build up, great work so far, i cant wait to see it finished
the mini tubs look great and the size of wheels suit it perfectly, im tempted to do the same to mine , i prefer the non flared looking hatch
might have to talk to you about doing mine when the time is right
the mini tubs look great and the size of wheels suit it perfectly, im tempted to do the same to mine , i prefer the non flared looking hatch
might have to talk to you about doing mine when the time is right
#56
_berro59_
_berro59_
-
- Guests
Posted 14 July 2012 - 02:05 AM
Kill the tin worm kill... kill.. kill!
nice repairs.
nice repairs.
#57
torana_nick
-
- Members
-
- 759 posts
Forum Fixture
- Name:Nick
- Location:victoria
- Car:LH Torana Project
- Joined: 11-December 11
Posted 14 July 2012 - 12:38 PM
This is coming nicely mate, repairs are looking very good.
Can't wait for some more updates chasing inspiration....
Cheers
Nick
Can't wait for some more updates chasing inspiration....
Cheers
Nick
#58
_BLOWN V6HATCH_
_BLOWN V6HATCH_
-
- Guests
Posted 21 July 2012 - 07:08 PM
OK, update time.
Last weekend i finished the engine bay (ready for the filler work) and epoxy primed it. I put a new piece in the firewall where the heater box used to be as i wasn't happy with what was in there. The steel was a bit thin and it warped when i welded the lower piece in, all sorted now.


Then during this week i started fitting up the drivers side panels to sort out gaps. It didn't gap up too bad, but it needs a bit of work on the door and/or 1/4 panel to get it the way i want it. That can wait until a later date when i have all the panels fitted so i know exactly where i'm at.


Also fitted the L/H guard now that's finished ready to start gapping up the L/H side once the door is epoxy primed.

On the subject of the L/H door, i started stripping the paint off that today.

I have bought an A9X bonnet scoop, and ofcoarse it doesn't fit exactly the way i want it too. It has a bit of a bow in the middle, so i've cut it up and will re glass it all back together. I'm also going to glass some brackets on the inside so there are no bolts visible from the outside (No self tapping screws for this baby.)


And, just a pic with my ute. My toys...

That's about it for now.
Last weekend i finished the engine bay (ready for the filler work) and epoxy primed it. I put a new piece in the firewall where the heater box used to be as i wasn't happy with what was in there. The steel was a bit thin and it warped when i welded the lower piece in, all sorted now.
Then during this week i started fitting up the drivers side panels to sort out gaps. It didn't gap up too bad, but it needs a bit of work on the door and/or 1/4 panel to get it the way i want it. That can wait until a later date when i have all the panels fitted so i know exactly where i'm at.
Also fitted the L/H guard now that's finished ready to start gapping up the L/H side once the door is epoxy primed.
On the subject of the L/H door, i started stripping the paint off that today.
I have bought an A9X bonnet scoop, and ofcoarse it doesn't fit exactly the way i want it too. It has a bit of a bow in the middle, so i've cut it up and will re glass it all back together. I'm also going to glass some brackets on the inside so there are no bolts visible from the outside (No self tapping screws for this baby.)
And, just a pic with my ute. My toys...
That's about it for now.
#59
torana_nick
-
- Members
-
- 759 posts
Forum Fixture
- Name:Nick
- Location:victoria
- Car:LH Torana Project
- Joined: 11-December 11
Posted 21 July 2012 - 08:25 PM
Coming up very nice, your moving along at a good pace.
Keep up the good work.
Cheers
Nick
Keep up the good work.
Cheers
Nick
#60
_BLOWN V6HATCH_
_BLOWN V6HATCH_
-
- Guests
Posted 22 July 2012 - 06:04 PM
Thanks mate.
Small update. Finished stripping the paint off the L/H door and epoxy primed it inside and out.


Small update. Finished stripping the paint off the L/H door and epoxy primed it inside and out.
#61
_greg2240_
_greg2240_
-
- Guests
Posted 23 July 2012 - 07:20 PM
g'day again, just wondering why no one seems to use galvanised sheet steel on the c pillar repairs? i thought this would be much better in the long run, you seem to know what your doing so do you have any advice? keep up the good work, almost dont want you to finish it as its been a great source of motivation for me, but its always on here i guess, thanks again.
#62
_BLOWN V6HATCH_
_BLOWN V6HATCH_
-
- Guests
Posted 23 July 2012 - 07:57 PM
I don't used galvanised steel as it's a pain to weld and makes the weld shitty. I also plan to rust proof the hell out of this car when it's finished and i've painted inside the panels as i go, so mild steel will be fine.
Thanks for the comments mate.
Thanks for the comments mate.
#63
_BLOWN V6HATCH_
_BLOWN V6HATCH_
-
- Guests
Posted 23 July 2012 - 09:24 PM
Just bought an SL/R cluster. Got it relatively cheap, only thing is it's only got the 160km/h speedo, not the 200km/h and it's LH not LX. I don't really care though, i only really wanted the extra gauges and tacho. I guess that's the good thing about it being a cut up UC, i can buy whatever i want...
Edited by BLOWN V6HATCH, 23 July 2012 - 09:25 PM.
#64
YiriSS
-
- Members
-
- 581 posts
Forum Fixture
- Location:Melbourne
- Joined: 08-November 05
Posted 25 July 2012 - 01:39 AM
There's been a few 200 kmh speedos on eBay of late,
They are easy to swap if you decide to get one
They are easy to swap if you decide to get one
#65
Heath
 View Garage
-

- Administrators
-
- 18,385 posts
I like cars.
- Name:Heath
- Location:Eastern Suburbs, Melbourne
- Car:Heavily Modified UC Sunbird Hatchback
- Joined: 07-November 05
View Garage
Posted 25 July 2012 - 09:40 AM
Can always just grind the edges of the gal back on the repair pieces if you do want to use it, admittedly that kinda defeats the purpose as the corrosion is the biggest problem just around the weld I guess.
Loving the work, looks like it's going to be an awesome result.
Loving the work, looks like it's going to be an awesome result.
#66
_BLOWN V6HATCH_
_BLOWN V6HATCH_
-
- Guests
Posted 25 July 2012 - 12:18 PM
There's been a few 200 kmh speedos on eBay of late,
They are easy to swap if you decide to get one
Yeh, i've seen a few 200 speedos on Ebay, i'll just keep an eye out. If i see one at the right price i'll probably buy it, but i'm really not too concerned. I can do that anytime, i really just wanted the cluster for the time being.
Can always just grind the edges of the gal back on the repair pieces if you do want to use it, admittedly that kinda defeats the purpose as the corrosion is the biggest problem just around the weld I guess.
Loving the work, looks like it's going to be an awesome result.
Yeh, you can, but honestly if you rust proof it and paint where possible mild steel should last fine.
Thanks for the comment mate.
#67
YiriSS
-
- Members
-
- 581 posts
Forum Fixture
- Location:Melbourne
- Joined: 08-November 05
Posted 26 July 2012 - 01:57 AM
New 200 kph speedo on eBay for $50
Seen this and thought of your hatch
Seen this and thought of your hatch
#68
_BLOWN V6HATCH_
_BLOWN V6HATCH_
-
- Guests
Posted 26 July 2012 - 12:16 PM
Nice work. Thanks for that mate, i'm on it.
#69
_berro59_
_berro59_
-
- Guests
Posted 27 July 2012 - 10:12 PM
With that motor a 200 kmph speedo aint going to cut it!
looking good.
looking good.
#70
_BLOWN V6HATCH_
_BLOWN V6HATCH_
-
- Guests
Posted 28 July 2012 - 10:49 AM
Haha, only at the track mate. Speaking of the engine, i'm hopefully going to buy a set of new alloy AFR heads. With the rest of the parts i've got for the 383, it should make 500hp. I'd be stoked with that.
#71
_greg2240_
_greg2240_
-
- Guests
Posted 09 August 2012 - 06:29 PM
g'day again, done anything else yet? i was wondering if you could tell me where to unpick the dash, i have done all along the windscreen, any cutting required
as i can see welds in the corners, i cant tell by your photos, keep up the good work, cheers, Greg
as i can see welds in the corners, i cant tell by your photos, keep up the good work, cheers, Greg
#72
_BLOWN V6HATCH_
_BLOWN V6HATCH_
-
- Guests
Posted 09 August 2012 - 07:17 PM
Hi Greg, I havn't done anything apart from hang the panels on to check gaps and line up, then i can start modifying panels to make them fit a bit nicer. It's on the back burner a little bit at the moment as i've got a 66 Chevelle that i have to put floor pans in. Being a paying job, unfortunately it comes first, but it's more money towards this car, so it all works out in the end. It'll pay for AFR heads.
With the dash, there are all the spot welds along the base of the windscreen as you have found. There are also the mig welds at the corner of the dash where it meets the A pillars. Then there are also spot welds right down the A pillar to the bottom the dash, these are a bit tedious. On the front cut, i just cut the A pillars out then drilled the dash out that way. But when i came to do my car, i obviously couldn't do that, so i cut down the dash with a 1mm cut off wheel to get the dash out, then with the bulk of the dash gone i had better acess to the spot welds and ground the spot welds out with the angle grinder.
There are also spot welds around where the steering column goes. Hope that helps.
#74
_greg2240_
_greg2240_
-
- Guests
Posted 18 August 2012 - 02:44 PM
worked out well thanks. by the way, what is the difference between the lx and uc diff mounts, i read they are different?
#75
_BLOWN V6HATCH_
_BLOWN V6HATCH_
-
- Guests
Posted 18 August 2012 - 03:41 PM
Glad to hear it all worked out mate. The upper mounts are closer together on a UC (same as HQ), the lower mounts are the same as LH-X.
So, i sold the Dart iron eagles and bought a pair of these bad boys....


Mmm, CNC ported out of the box.

So, i sold the Dart iron eagles and bought a pair of these bad boys....
Mmm, CNC ported out of the box.


1 user(s) are reading this topic
0 members, 1 guests, 0 anonymous users

