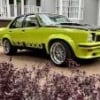
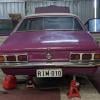
Luvverly!
#676

Posted 27 May 2015 - 02:43 PM
#677

Posted 27 May 2015 - 03:15 PM
#678

Posted 27 May 2015 - 10:29 PM
Now for the fun bit!
#679
 _duggan208_
Posted 27 May 2015 - 10:56 PM
Mate, your car is becoming a concouse car, maybe leave some overspray in a few places, are you going to use all of the correct decals in the engine bay? Looking foward the engine. You know what Face Book's initials are, F B arstards.
regards
#680
 _05-BROCKY-05_
Posted 05 June 2015 - 10:57 AM
Love this build. Quality work and very happy you show the process of the work you do, i'm yet to see a panel shop to this level of work.
#681
 _mikecatts_
Posted 05 June 2015 - 11:56 AM
Love this build. Quality work and very happy you show the process of the work you do, i'm yet to see a panel shop to this level of work.
When doing your own, we tend to go all out, test our abilities and hope it goes well.. In this instant it did.. Im happy.. Not too many shops have the time to do it or people just wont pay.. expecially acrylic as it takes soo long to prepaire.. You can cut some corners with 2K.
#682

Posted 05 June 2015 - 08:28 PM
Mike , amazing skills and work , would love to see this car when completed ...
#683
 _duggan208_
Posted 06 June 2015 - 12:12 AM
Yep, acrylic is hard long work.
Regards
#684
 _Keiron_
Posted 06 June 2015 - 12:43 AM
#685
 _mikecatts_
Posted 06 June 2015 - 09:19 AM
I try guys.. Just hope the other 2 im working on turn out the same..
#686
 _mikecatts_
Posted 17 June 2015 - 08:55 AM
Hi all... Just an update.. I made a bush puller..Works well.
While pulling apart the rear end, diff.
Ive found more of that yellow and white paint.. was painted over the original black finnish, red was painted over that..
More racing history markings.. Now to find some info on a rally-cross LC XU-1 that was painted yelow, white and some light blue. raced in 71-72. Anyone?
Attached Files
#687
 _Agent 34_
Posted 18 June 2015 - 06:42 AM
Mike - PM me with the chassis no and i can send to the guy at CAMS for a look on his registry if you really want.
I swear that my GTR had been raced based on the tell tale signs- jack marks on the chassis rails dented in - tail shaft loop - flares front and back - muncie box floor cut out - but no record of the car being logged booked by the chassis no.at cams.
G
#688
 _mikecatts_
Posted 22 June 2015 - 10:56 AM
I went shopping... All the fuel/loom clips and firewall grommet set. new bonnet hinges and steering wheel... Its a start.. I can now fit the fuel/brake lines..
Attached Files
#689

Posted 22 June 2015 - 06:17 PM
#690
 _Macca97_
Posted 22 June 2015 - 08:11 PM
looks bloody amazing mike, I also keep rereading this thread so I can try and learn something for later down the line,
it would almost be straighter than it was when it left the factory,
it a real credit to you ![]()
and you have amazing patience
#691
 _duggan208_
Posted 22 June 2015 - 11:33 PM
like that steering wheel
regards
#692
 _mikecatts_
Posted 23 June 2015 - 06:02 AM
Mike, take the springs off the bonnet hinges and paint them battleship grey like they're meant to be.
will do.. Are ALL the springs grey?
#693
 _mikecatts_
Posted 23 June 2015 - 06:05 AM
looks bloody amazing mike, I also keep rereading this thread so I can try and learn something for later down the line,
it would almost be straighter than it was when it left the factory,
it a real credit to you
and you have amazing patience
Im very happy how it turned out.. well the paint/body work.. Yet to do anything else..
I tried to get it the best I could..
I have nothing else better to do except work and fix my houses.. I enjoy the challenge and enjoy the work.. keeps my mind active..
like that steering wheel
regards
So do I... Hope it looks the part.. I took it for a test drive.. Broom broom... LOL :-)
Edited by mikecatts, 23 June 2015 - 06:06 AM.
#694
 _oz772_
Posted 23 June 2015 - 10:21 AM
will do.. Are ALL the springs grey?
Yeah. Not sure why they did them black on the repro's....The under-bonnet photo of the yellow press release LC shows the correct grey colour.
#695
 _mikecatts_
Posted 08 July 2015 - 08:29 PM
Hi all..
I havnt spent a lot of time on the car..
I got around to getting some more zincing done.. ( im over doing my own, takes too long and it isnt as good).
I rebuilt some wiper motors/ heater box motors and a LJ heater box..
I discovered that the LC and LJ heater boxers are different in 3 ways..
I gave the fibreglass a good clean, fixed any cracks from the inside, gave it a light scuff with steel wool then a very thin/light coat of clear epoxy resin, just enough to fill some small cracks and the loose fibres.. making sure to keep the original rough texture.. A light scuff with steel wool, then a light cut n polish with a coarse polish.. Turned out nice.. A bit more satin than original, but way better than the faded cracked way it was.. It will dull up over time. Im happy.
Before assembling, I gave it my favourite POR 15 on the pitted areas,, just to make sure it dont rust again.. they all did in this area.. Couldnt hurt...Its not seen any ways.. Just light scuff of zinc and paint.. nothing fancey
I cut some new gaskets from some 6mm rubber that I bought.. very similar to original.. It will work.
The unit works well with new felt and aircon foam.. I flushed and tested the radiator.. no probs.. Works well, I just bolted together to test.. Ill seal up properly later when Ive done the LC one.
Should last another 40 years or so..
Oh, ever wonderd why the heater fan is so bloody hard to get off.. its the very thin stainless wire they used to lock the fan to the shaft.. it gets bent into the fan when it gets pushed on. It locks real good..
"Some times it comes off... some times it dont"..
Attached Files
Edited by mikecatts, 08 July 2015 - 08:37 PM.
#696
 _mikecatts_
Posted 08 July 2015 - 08:41 PM
a thought..
I havnt put the barcket that holds the cable on yet as Im not sure which one im going to use.. The lc and lj are differnt.. I dont want to use this on my XU-1.. but if I have to I will.. Depends on how the other turns out..
Attached Files
Edited by mikecatts, 08 July 2015 - 08:47 PM.
#697

Posted 08 July 2015 - 09:38 PM
Might be worth some consideration.
All the old heater cores were only 7 1/2 pound cores.
Right up through the commodores.
Which is why the commodore one usually failed fairly early.
Just for longevity may be worth considering getting a 15 pound core put in.
#698
 _Agent 34_
Posted 09 July 2015 - 06:09 PM
mike that brings back memories.
just a tip with the bracket i used a pop rivet but didn't pop the rivet as it was damaging the fiberglass with expansion. i then made sure it was holding tight and then cut and filed down the centre steel shank.
looks good -= this part of the rebuild will fly and you will enjoy
G
#699
 _mikecatts_
Posted 09 July 2015 - 07:51 PM
mike that brings back memories.
just a tip with the bracket i used a pop rivet but didn't pop the rivet as it was damaging the fiberglass with expansion. i then made sure it was holding tight and then cut and filed down the centre steel shank.
looks good -= this part of the rebuild will fly and you will enjoy
G
Hi Grant.. Ta..Yea I know..Its soft... I use washers underneath for the pop to grab and use light alumin ones that dont require much pressure.. Gotta be carfull with the wire element when putting back in.. its very fragile..
Its a change from panel work and sanding..
Gathering/fixing all the bits for a quick assemble when ready..
Im doing all the bits for 3 cars at once..That way I dont have to go over it again..
#700
 _sunburst73-xu1_
Posted 10 July 2015 - 05:32 PM
Hi Mike
Looking good and love seeing your using a raw unpainted top for that real original look.
cheers Dane
1 user(s) are reading this topic
0 members, 1 guests, 0 anonymous users


 View Garage


