Jump to content


Photo

LH Cotter Pin Instal


  • Please log in to reply
15 replies to this topic

#1 hanra

hanra

    Oh My, Don't you post alot

  • Members
  • PipPipPipPipPipPipPip
  • 10,929 posts
  • Name:Brad
  • Location:Farrrrrr North Qld
  • Car:1975 LH SL/R 5000, 1967 Morris Cooper S, E36 BMW, Toyota Corolla, Isuzu DMax
  • Joined: 24-March 11

Posted 19 June 2012 - 11:19 PM

Ive bought 4 new RSP cotter pins and am planning on fitting my rubber coupling and uni joint to the K-Frame before the motor goes on.

First question, the rubber coupling has some movement up/down the shaft of the steering rack, I would imagine this is going to shift the position of the steering colum once installed... how will I determine the correct spot for the coupling to go...? Or will I just have to try and slighting collapse or extend the colum to suit?

Second...

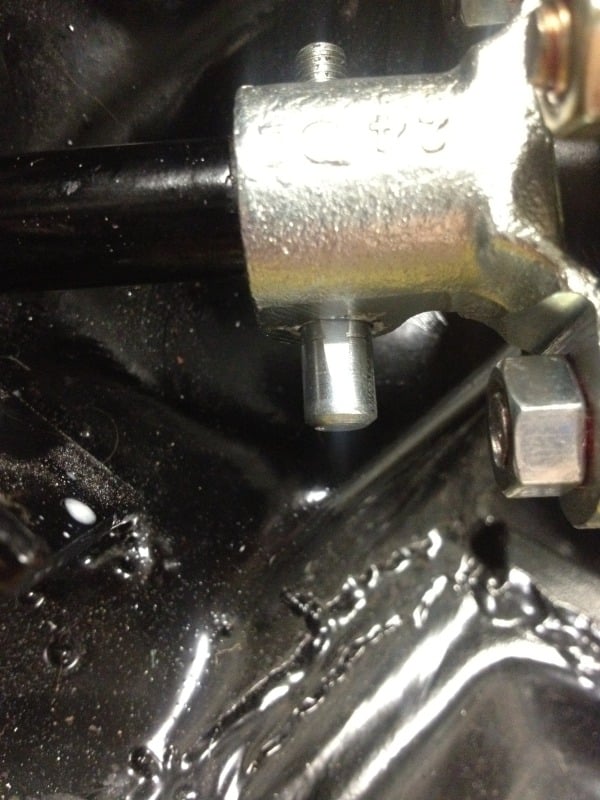
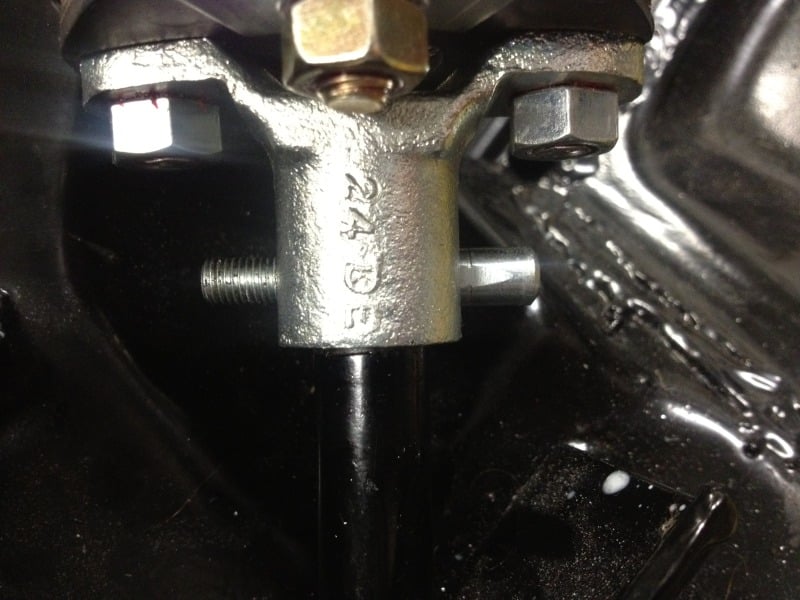
How far are the cotter pins expected to go through????

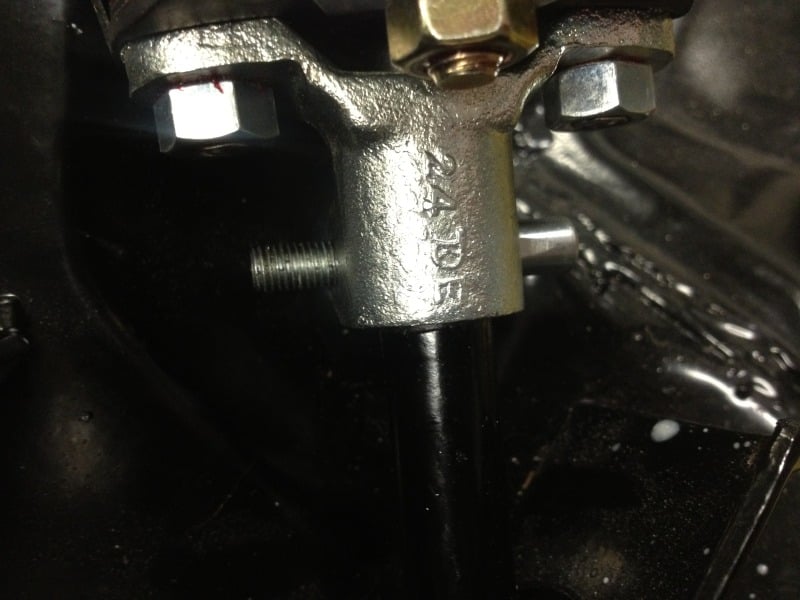
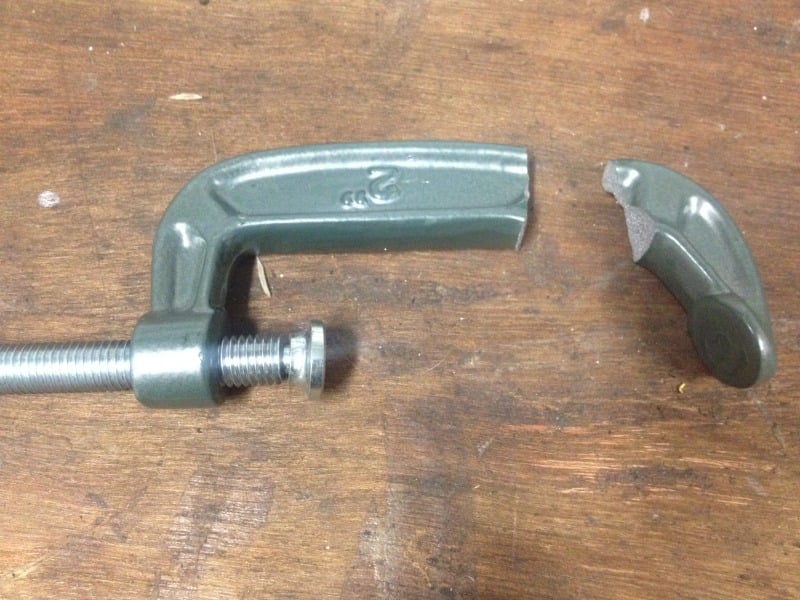
Ive just snapped my little G-clamp trying to get the first pin through. There is what appears to be a groove machined around the end of the pin where I thought perhaps this is where its supposed to push in up to???? Im still a little bit away from that point when my clamp snapped.
Posted Image

Posted Image

Posted Image


You can just make out the groove in this pic
Posted Image

#2 S pack

S pack

    Scrivet Counter

  • Members
  • PipPipPipPipPipPipPip
  • 15,676 posts
  • Name:Dave
  • Location:Luggage Point
  • Car:73 LJ
  • Joined: 25-January 10

Posted 19 June 2012 - 11:31 PM

G/day Brad

Pitty about the G clamp but thems the breaks (pun intended) LOL.
I would suspect your cotter pin is in as far as it's going to go so put on the nylock nut and tighten it up to the torque specs in your shop manual, however you might want to leave it loose ATM (if that is on the steering rack shaft) until you get the intermediate shaft and uni joint in and connected to the steering column.

Don't try to pull or collapse the steering column shaft to obtain adjustment. Work with whatever adjustment has been built into the other parts but don't force the steering column shaft otherwise you could shear the collapsable pins.

Edited by S pack, 19 June 2012 - 11:43 PM.


#3 hanra

hanra

    Oh My, Don't you post alot

  • Members
  • PipPipPipPipPipPipPip
  • 10,929 posts
  • Name:Brad
  • Location:Farrrrrr North Qld
  • Car:1975 LH SL/R 5000, 1967 Morris Cooper S, E36 BMW, Toyota Corolla, Isuzu DMax
  • Joined: 24-March 11

Posted 19 June 2012 - 11:35 PM

It wasnt that expensive. Ill just buy another. Im more concerned that I havnt pressed the pin in far enough...

#4 S pack

S pack

    Scrivet Counter

  • Members
  • PipPipPipPipPipPipPip
  • 15,676 posts
  • Name:Dave
  • Location:Luggage Point
  • Car:73 LJ
  • Joined: 25-January 10

Posted 19 June 2012 - 11:53 PM

Just looking at your pics again. The groove in your pin looks to be sitting away from the coupling a distance which is comparable to the amount of an original pin that is left protruding when fully seated (that's on an LJ coupling though).
AFAIK the LH/LX uses the same cotter pins as the LC/LJ.

#5 hanra

hanra

    Oh My, Don't you post alot

  • Members
  • PipPipPipPipPipPipPip
  • 10,929 posts
  • Name:Brad
  • Location:Farrrrrr North Qld
  • Car:1975 LH SL/R 5000, 1967 Morris Cooper S, E36 BMW, Toyota Corolla, Isuzu DMax
  • Joined: 24-March 11

Posted 20 June 2012 - 07:12 AM

Perhaps it's just that bottom one that goes onto the rack shaft that's like that?

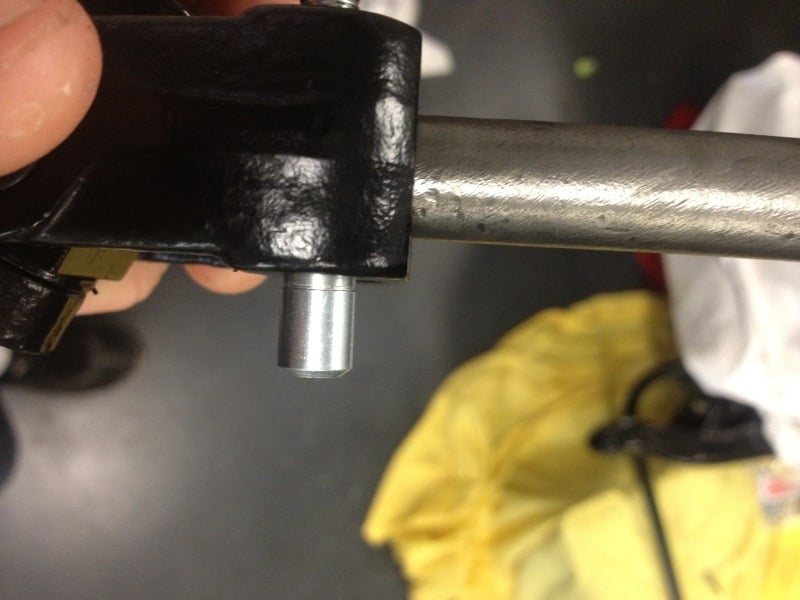
I just had a look at the uni joint with the shaft in it, this is how far I can get the pin through just with finger pressure.

Posted Image

#6 hanra

hanra

    Oh My, Don't you post alot

  • Members
  • PipPipPipPipPipPipPip
  • 10,929 posts
  • Name:Brad
  • Location:Farrrrrr North Qld
  • Car:1975 LH SL/R 5000, 1967 Morris Cooper S, E36 BMW, Toyota Corolla, Isuzu DMax
  • Joined: 24-March 11

Posted 20 June 2012 - 08:00 AM

G/day Brad

Pitty about the G clamp but thems the breaks (pun intended) LOL.
I would suspect your cotter pin is in as far as it's going to go so put on the nylock nut and tighten it up to the torque specs in your shop manual, however you might want to leave it loose ATM (if that is on the steering rack shaft) until you get the intermediate shaft and uni joint in and connected to the steering column.

Don't try to pull or collapse the steering column shaft to obtain adjustment. Work with whatever adjustment has been built into the other parts but don't force the steering column shaft otherwise you could shear the collapsable pins.


Didnt see the rest of your reply last night.

The coupling wont move up/down the rack shaft with the cotter pin pressed in like it is, so regardless if the nut is on/off I now have no adjustment there.

Perhaps I should just leave everything finger tight pressed in until the K-frame/motor is in, then fit the colum and use the adjustment I have in these components, then swear my head off trying to press in the cotter pins then????

#7 S pack

S pack

    Scrivet Counter

  • Members
  • PipPipPipPipPipPipPip
  • 15,676 posts
  • Name:Dave
  • Location:Luggage Point
  • Car:73 LJ
  • Joined: 25-January 10

Posted 20 June 2012 - 08:18 AM

^^^ Agree, remove the cotter pin and coupling and install it all after the K frame and steering column are installed.

#8 hanra

hanra

    Oh My, Don't you post alot

  • Members
  • PipPipPipPipPipPipPip
  • 10,929 posts
  • Name:Brad
  • Location:Farrrrrr North Qld
  • Car:1975 LH SL/R 5000, 1967 Morris Cooper S, E36 BMW, Toyota Corolla, Isuzu DMax
  • Joined: 24-March 11

Posted 20 June 2012 - 08:52 AM

Ill swear your name when Im trying to fit my gorilla hands in there re-fitting it all.

#9 Statler

Statler

    Heckler Extraordinaire

  • Administrators
  • PipPipPipPipPipPipPip
  • 6,307 posts
  • Name:Col
  • Location:Mackay Qld. Whitsundays for all you back packers!
  • Joined: 20-May 06

Posted 20 June 2012 - 09:26 AM

Brad, i don't know the how or why, but before i install the cotterpins, i trial fit them in the knuckles.

For some reason they will fit in 1 side further than the other. I then mark the inside of the hole with a white paint pen so i know which side to feed the pin in from.

I know this doesn't make any sence as the hole is supposed to be the same bore on both sides, but it works for me.

#10 hanra

hanra

    Oh My, Don't you post alot

  • Members
  • PipPipPipPipPipPipPip
  • 10,929 posts
  • Name:Brad
  • Location:Farrrrrr North Qld
  • Car:1975 LH SL/R 5000, 1967 Morris Cooper S, E36 BMW, Toyota Corolla, Isuzu DMax
  • Joined: 24-March 11

Posted 20 June 2012 - 09:39 AM

Yep I did noticed that it will go in one side and not the other. Ive fitted this one into the side that it will fit into. The other side it dosnt come close to fitting.

#11 _walpolla_

_walpolla_
  • Guests

Posted 20 June 2012 - 10:11 AM

Looks about right to me.
I do not press them in, just tap them in first , put some tension on the locknuts, then with a heavy hammer against the housing alongside the pin, give the pin a couple of sharp taps with a smaller hammer to finally seat the pin. Tension nut to spec, good to go.
Works for me. No g clamps and all that.

regards,Rod

Edited by walpolla, 20 June 2012 - 10:11 AM.


#12 hanra

hanra

    Oh My, Don't you post alot

  • Members
  • PipPipPipPipPipPipPip
  • 10,929 posts
  • Name:Brad
  • Location:Farrrrrr North Qld
  • Car:1975 LH SL/R 5000, 1967 Morris Cooper S, E36 BMW, Toyota Corolla, Isuzu DMax
  • Joined: 24-March 11

Posted 20 June 2012 - 10:16 AM

The GMH workshop manual states pretty blatantly that hammering or sharp force should not be applied to the pins, as this could damage the rack bearings or colum lower bearing.

#13 _walpolla_

_walpolla_
  • Guests

Posted 20 June 2012 - 10:41 AM

That is why I use the heavy hammer held against the housing alongside the pin, that absorbs any shock being transmitted to the rack bearing and IMO is as safe as.. My mechanic mate does them this way too, and agrees there is zero risk to rack with that method. May not be by the book, but is quick and effective.
Would be a different matter just hammering on the pin - no way I would do that. And I am not talking about full on bashing, just a couple of sharp taps to finally seat the pins home.

regards,Rod

#14 _torbirdie_

_torbirdie_
  • Guests

Posted 21 June 2012 - 07:49 AM

Shouldnt need any pressing/hammering in of the cotter pins, just do up the nuts until they take up the slack. Move it under a bit of load(turn the steering wheel with the wheels on the ground) and retighten to specs and repeat, check again after some road use.

#15 _76S.L.R_

_76S.L.R_
  • Guests

Posted 24 June 2012 - 12:49 PM

I recently installed a" new old stock Steering Coupling" in the LX and the cotter pins on mine are pushed nearly all the way in!?? ie the non threaded part is only sticking out about 3mm or so

#16 _benster208_

_benster208_
  • Guests

Posted 28 June 2012 - 08:06 AM

i would not be taking the pin back out as you can damage the pin pretty easily. just as long as the flat part of the pin is square to the shaft then you should be right . from your pictures thats the case so i would just tighten the nut to spec and if your worried check it again after a couple of hours running. it cant come out unless the nut comes off so there is no safety issue. By the looks of the pin its after market so its probably a faction longer or the diameter is a fraction different .


1 user(s) are reading this topic

0 members, 1 guests, 0 anonymous users