Burtys UC To LX Conversion
#51

Posted 21 January 2013 - 10:26 PM
Garth looks as if your car is coming along. I didnt touch mine for a month, trip down south and all over christmas. Keen as ever to make some progress in the next month or two.
Your torrie will be a going machine with that motor in it.
#52

Posted 02 February 2013 - 04:02 PM
Hows the hatch going, any more progress?
#53

Posted 03 February 2013 - 11:24 AM
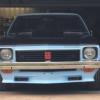
Keen to see how this looks when finished, please post pics when done.More fibreglassing ahead! Decided to make te two piece front spoiler a one piece. I roughly fibreglassed the overlap on the top and bottom and cut out the front overlap while it was bolted to the car. Probably just created more work with out much gain but too late now the cut is done.
Once the fibreglass was set I removed the spoiler. It now fits nicely back onto the flares and nosecone.
Thanks
#54

Posted 03 February 2013 - 02:06 PM
Hey lets put a join and tiny little mounting tabs as a weak spot right where you are most likely to hit, scrape or bump things
#55

Posted 03 February 2013 - 09:02 PM
Also watched a UC to A9X conversion sell for $36000 on ebay last week Had a 350, T400 and 9 Inch ETC.........
http://www.ebay.com....984.m1423.l2649
#56

Posted 03 February 2013 - 09:11 PM
#57

Posted 03 February 2013 - 09:17 PM
#58

Posted 12 July 2013 - 08:57 PM
Finally got back into it in recent weeks. Completed the sound deadening and put the interior back together.
 IMG_0194.JPG 121.95K
10 downloads
 IMG_0201.JPG 85.14K
10 downloads
 IMG_0204.JPG 105.93K
10 downloads
New stereo is also been installed with rear speakers.
The interior gave me something to work on while getting funds together for the exterior work.
#59

Posted 12 July 2013 - 09:01 PM
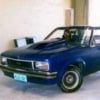
Measured up the position for the bonnet scoop and cut the hole in the bonnet.
 IMG_0131-001.JPG 87.96K
10 downloads
 IMG_0132-001.JPG 97.67K
13 downloads
#60

Posted 12 July 2013 - 09:07 PM
Time to get back into the fibre glassing, earlier this year I decided to make the front spoiler one piece - finally got back to it.
 IMG_0258.JPG 89.5K
11 downloads
Put quite a few layers front and back to give it some more strength.
 IMG_0259.JPG 92.33K
10 downloads
#61

Posted 12 July 2013 - 09:12 PM
Gradually taking shape after a lot of sanding. Still have some prep work before it will be ready for painting.
I have trial fitted it to the nosecone - fits like a glove!
 IMG_0260.JPG 83.72K
13 downloads
 IMG_0261.JPG 74.27K
13 downloads
#62

Posted 12 July 2013 - 09:23 PM
Also fibre glassed the tips of the front flares where I had cut and re-joined them so they would line up with the front spoiler.
They look a bit rough at the moment, but they are in better shape than they look.
 IMG_0256.JPG 81.63K
12 downloads
 IMG_0257.JPG 71.77K
10 downloads
#63

Posted 12 July 2013 - 09:26 PM
Hopefully some progress on the body work in the coming weeks???
Best of intentions, we will see!
 IMG_0311.JPG 113.46K
12 downloads
#64

Posted 12 July 2013 - 09:33 PM
Tody I picked up the bonnet and nosecone after they had been sand blasted and primed. Still some more prep work to do but hopefully I can get the front end fitted up in the not to distant future.
 IMG_0325.JPG 123.89K
13 downloads
#65
 _BARRY JACKPOT_
Posted 13 July 2013 - 07:01 AM
#66

Posted 13 July 2013 - 07:56 AM
Thanks for the pics on the front spoiler. Excellent work on your beast, keep it up.
#67

Posted 13 July 2013 - 01:13 PM
Someones been busy! great progress man... That epotec 408 is good stuff - thats a lot of primer, you going for a colour change?
#68

Posted 13 July 2013 - 03:26 PM
Going to stick with the original colour. There is quite a bit to paint, flares, spoiler, bonnet, nosecone, bonnet scoop and then the back end around the tail lights.
My neighbour Franky is also doing up a Willy's coupe so we share the load with a lot of products. Also 4 litre tins are about twice the cost of the 1 litre.
Just hope I can get into it in the next few weeks and make some significant progress.
How's your project Garth? That bonnet is still in the shed if you want it.
#69

Posted 15 July 2013 - 12:31 PM
Bleh my UC has a few 'issues' at the moment, but I'll update the thread soon with all that...
As for the bonnet, unfortunately my brother in law is a useless pr%@k and will probably never get around to picking it up, so if you need the shed space just sell it...
#70

Posted 15 July 2013 - 06:49 PM
The bonnet can sit there for a bit longer its not really in the way and not worth a lot!
A good mate (old school panel beater and painter) is going to check out the Torana's body work next weekend to make sure I don't make too much of a mess of it.
Hopefully I can get a few more updates in good time instead of a six month gap.
I saw that you've got a bit of rust around the rear end of the UC 5000!
#71
 _greg2240_
Posted 15 July 2013 - 10:41 PM
another great job, congrats, keeps me interested in my project, just gotta find more time, keep up the good work
#72

Posted 16 July 2013 - 06:08 PM
Thanks for the feedback! Decided I will try to completely finish the front then turn the Torrie around & do the back. Figured once the front is done motivation will be high to get the rear end done.
#73

Posted 20 July 2013 - 05:19 PM
After fibre glassing, sanding, fibre glassing sanding, primer, sanding, more primer, butter bog etc etc. The two piece front spoiler is looking like a production one piece. well close anyway.
Just a few more minor blemishes to fix then onto the flare tips.
Not sure if I should leave the ridge in the centre of smooth it off?
 IMG_0331.JPG 75.01K
13 downloads
 IMG_0330.JPG 79.74K
13 downloads
#74
 _Lamo_
Posted 20 July 2013 - 08:27 PM
looks great! Sand off the ridge.
#75

Posted 21 July 2013 - 08:16 PM
 image.jpg 88.42K
13 downloads
1 user(s) are reading this topic
0 members, 1 guests, 0 anonymous users


 View Garage


