Thanks Peter - yes, I know the spring rate won't change (only changing springs does that), but changing the pre-load or pressure on the spring, or spring length, changes its behaviour, I wanted to know the spring length won't change, so that's good news. Getting spring sag right on motorcycles and mountain bikes is a big deal, cars are different.
#226

Posted 09 November 2022 - 12:04 PM
#227

Posted 05 January 2023 - 01:33 PM
Merry new Xmas Year all. Still going nicely here, just waiting an age for the engine to be done, more pics and stuff shortly - in the mean time, it has been years since I researched aftermarket air-con for Toranas. The only options were woeful when I did, has anyone got a direction to point me in, as I won't bother if they still freeze the knees and little else?
There are a few builds on here with nice re-purposed air-con set ups from other cars which I can use, but if there's now an effective under-dash set up from Vintage Air or the like, I am all ears.
Also sway bars - I have a K-Mac set up I could install but wanting a less eye-sorey option. I will look around myself of course, but if anyone has a good option they recommend, please let me know.
#228

Posted 05 January 2023 - 02:31 PM
Hi Sam, the car is looking amazing!
I purchased an under-dash a/c system with heater and adapted it to fit the original centre fan outlets. 3 out of the 4 ducts were used, then I heated and moulded a PVC elbow to send the 4th duct up to the window demisters. As always, if i did it again there would be things I would have done differently (mainly hiding the plumbing under the guard) but you live and learn!
I purchased the system through Auto Aer in Qld.
Attached Files
#229

Posted 05 January 2023 - 03:46 PM
Great Mark, thnaks (and awesome looking rig). Is this the PVC tube you meant? Does it all work okay? And do you know which model air con you purchased? So many questions... :-)
 Screen Shot 2023-01-05 at 4.42.06 pm.png 208.18K
6 downloads
#230

Posted 05 January 2023 - 04:10 PM
Thanks Sam, don't look too close as it really a car to tinker with and drive. Certainly not a show car!
Yes that's the PVC pipe. You will see in the first photo there is a spare outlet that I opened up to suit.
I am pretty sure it was "Heat & Cool kit 3" from the website CONCEALED AIR CONDITIONING HEAT AND COOL - KIT 3 – Auto Aer
I had never attempted a "do it yourself" a/c system before but I was pretty happy with the outcome and it is very efficient!
#231

Posted 05 January 2023 - 04:14 PM
Well mine is far from driving, so I'm impressed with yours! Ha ha. Okay, thanks mate.
#232

Posted 10 January 2023 - 12:13 PM
That's a tidy job on the air con. Not exactly the same as the system I went with, but similar.
#233

Posted 16 February 2023 - 07:53 PM
 29AD1502-EC7D-462F-A43B-A21830C68035.jpeg 73.94K
5 downloads
#234

Posted 16 February 2023 - 10:27 PM
#235

Posted 17 February 2023 - 08:24 AM
#236

Posted 19 February 2023 - 02:22 PM
It's a flash welded stud.
#237

Posted 22 February 2023 - 10:01 AM
Thanks Statler.
The reason I as asking was the TKX and underdash set up arrived from Mal Wood. Great kit, with everything you need, except many instructions... They are good on the phone, though. I drilled out the stud with a 25mm holesaw, to fit the underdash unit.
 IMG_1037.jpeg 289.47K
6 downloads
 IMG_1038.jpeg 292.77K
3 downloads
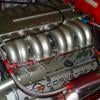
After waiting a few months for an engine builder - they are simply swamped - I ran out of patience and got the VT engine back un touched (for sale if anyone is interested) and found myself a grumpy Holden 383 Stroker instead. Not really the direction I intended, but it's got lots of goodies in it. Always a risk buying a second hand engine, but so is having one built I have found out the hard way in the past. So, stuff it. It's got a forged bottom end, -9 Yella Terra heads, Pro Paw intake, Haltech, etc. Should be a bit of fun.
 IMG_0783.jpeg 333.48K
2 downloads
Lots of other things have been done, painting and fitting the windscreen wiper mechanism (then removing it and fitting it the correct way...), wiper motor tested and painted, then the wiring spread out and checked, cleaned and mid-way through hiding the engine bay wiring. I seem to be missing a hi-beam relay, and other small things, but getting there.
 IMG_0970.jpeg 431.28K
2 downloads
 IMG_1042.jpeg 280.23K
3 downloads
Because I have basically doubled the horsepower I had planned, I have had to change a heap of things, such as adding 31-spline axles and a trutrac to the BW diff, rather than 28 spline and LSD, etc, but it's been fun. The diff should be back next week. I much prefer assembling the driveline, than wiring and interior fitting out, but after the luck I have had with trades, I'd rather do it all myself, and only have myself to blame if it fails.
Also, I have decided to sell the 8/77 park light dash cluster I have, PM me if you're interested. Would rather not go to Marketplace...
 IMG_1059.jpeg 337.37K
4 downloads
#238

Posted 27 April 2023 - 03:32 PM
Been a busy few months on this thing, with the usual ups and downs. It feels so close, but putting in a new engine and gearbox combo, and deciding to re-do the Borg Warner diff, means I am actually at dummy fitting stage again with most things, in amongst fresh paint this time, rather than an unpainted car, like it was the first time I did this. Defo recommend doing it unpainted... Anyway, getting there and no scratches. Yet.
Going the 383 route, I needed an ASR sump designed to clear the rod bolts and add capacity - so 12 weeks later a very nice and expensive piece of metal arrived. It's a lovely bit of kit. I also needed a hi-torq starter motor to suit the Mal Wood bellhousing (std Bosch won't fit), and it bolted on okay here. Check out that bloody pinion gear though... More in a sec.
 IMG_1332.jpeg 98.59K
3 downloads
The Haltech the 383 came with needed wiring into the original Torana harness, as well as it's own fuse box. Lots of help from me annoying Lenny (Axistr) and ido12v, and I ended up with e neat little fusebox for the Haltech and fans, etc, I made new glovebox insert (larger than standard) and stuck it in. Still need to earth the earths and add a few trigger wires, but actually came to enjoy wiring. it's the cleanerst bit you do on a car, but I needed to wear my glasses... The hardest bit was working out what of the original harness was hacked - a lot as it turned out.
 IMG_1374.jpeg 104.67K
2 downloads
 IMG_1424.jpeg 78.38K
1 downloads
I had my Borg Warner cut to std Torana width, filled with 31 spline billet axles, 3.7 Trutrac and suggested we move the rear shock mounts for brake clearance to the VN brakes. The diff builder, who was otherwise excellent, felt they would clear the calipers, and they do, but only by a couple of mil, so when those pads wear, I won't have brakes. i should have stuck to my guns. Instead, I think I will do a mod I have seen before, where I replace the cneter section of the shock mounts pin with a bolt and crush tube. I could reverse the brakes, but that means stuffing around with handbrake cables, and the single bloody aftermarket thing I have bought for this car that fitted straight on was the handbrake cables... Haven't settled on the direct there yet and otherwise very happy with the diff job. I have other problems.
 IMG_1153.jpeg 95.88K
1 downloads
Fitted the Droptank - I went brushed instead of polished and stand by that decision.
 IMG_1306 2.jpeg 91.67K
2 downloads
Fitted a new steering column with UC honeypot to suit the UC stalk (part of the wiring fun and games). Very happy with this too
 IMG_1291.jpeg 79.09K
1 downloads
Fitted the rad and AU fans and H4 headlight conversion, relays, etc
 IMG_1113.jpeg 69.32K
4 downloads
 IMG_1116.jpeg 74.49K
3 downloads
Then pulled the engine crossmember out - I was loathe to do this, but fitting new engine configs on a crossmember out of the car is MUCH easier than in it. So glad I did. Stuck the engine on Tuff Mounts as it's a bit of a monster and needed clearance for the ASR sump (was running HQ mounts, but they are too low for the girth of the sump), but still ended up needing to cut an old set of mounts up to give myself another 6mm (mounted between tuff mounts and block. Sump was fouling on the steering rack otherwise. I rang both companies, as I am not sure why either needed the extra clearance, but building old cars you never know what has happened before I shrugged my shoulders and got it to it with clearance.
TKX bolted on beautifully. Bolts, spigot bearing, etc are supplied. I have the 11in clutch to suit the 383's torque, etc.
 IMG_1388.jpeg 106.36K
4 downloads
 IMG_1381.jpeg 100.94K
3 downloads
But now the Castle headers didn't fit (need HQ mounts), the stupid Pro Flow mini torque starter motor has its starter gear waaaayyyy out of the housing so needs spacing between mounting block and starter body (it simply doesn't suit the 304 engine, I suggest not getting one) and I am not sure it will clear the crossmember. Anyway. So modified the headers to clear, then will cut and weld it to suit.
Stuck the lot back in
 IMG_1403.jpeg 88.06K
5 downloads
 IMG_1406.jpeg 103.22K
5 downloads
Turns out the gearbox crossmember wasn't made right, it's fouling on the floor. New one coming. Rad/fans hit the snout of the electric water pump, easy fix. Etc.
I have a list of stuff to make fit now, then will pull it all put again, detail/paint/polish it and paint under the floor, and THEN I can maybe put it all back in and start it up. Ha ha. Learned a bit about patience, it will be worth it. Tell me I'm right...
Oh and sold the gauges in two days, have a set of the Peter Nash gauges being made up now ish.
#239

Posted 27 April 2023 - 04:06 PM
Well done Sam. I quickly realised that altering one thing from original meant altering a dozen others down the track. Keep up the good progress. Cheers Ron
#240

Posted 28 April 2023 - 10:46 AM
This sounds like building cars.
You're smashing it though, lots of hurdles, and overcoming them one by one. It's the only way to do it.
The car is looking fantastic and it's shaping up to be a weapon.
#241

Posted 28 April 2023 - 12:22 PM
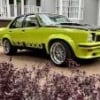
God I love that colour,
that was my second choice.
Wish I had gone for it.
Since painting my car, all I seem to see are orange Torana's everywhere.
Regards Mando.
#242

Posted 28 April 2023 - 04:13 PM
Well done Sam. I quickly realised that altering one thing from original meant altering a dozen others down the track. Keep up the good progress. Cheers Ron
Yes, I knew changing engine, box and diff direction would change everything, but yeah, I now need new wheels, to cut a hole in the bonnet, mod the headers, new throttle cable, etc. Fun eh? Ha ha.
This sounds like building cars.
You're smashing it though, lots of hurdles, and overcoming them one by one. It's the only way to do it.
The car is looking fantastic and it's shaping up to be a weapon.
Yep, just dealing with one whiteboard item at a time and learning heaps. Defo a better car than it was first intended to be. Thanks mate!
God I love that colour,
that was my second choice.
Wish I had gone for it.
Since painting my car, all I seem to see are orange Torana's everywhere.
Regards Mando.
Well another Barbados one is just below this, so I hear ya! Ha ha. Gotta say though, I don't reckon Barbados suits hatches as well, and your hatch looks amazing int hat colour. I reckon you went the right way.
#243

Posted 29 April 2023 - 08:55 AM
Whatever colour you choose, you'll notice other cars in that colour!
#244

Posted 06 September 2023 - 02:48 PM
Been an enjoyable part of the build the last few months - mostly. As mentioned above, I basically had to re-fit a bunch of stuff to get back to where I thought I was months ago. I did a bunch of measuring with the engine and box in (for tailshaft, wiring, fuel and brake lines, etc), then whipped the thing out again.
With an empty engine bat, I added the brake booster, hydraulic clutch master, heater box, routed wiring, fitting the windscreen wiper motor to the arms (after buying the wrong clip), etc. So much easier doing it in an empty bay - I just stand in there and feed it all through.
 IMG_1911.jpg 166.67K
3 downloads
I finished the fusebox wiring in the glovebox (one last bit to tidy up), so decided to do something that looked pretty to feel like I was getting somewhere. Repaired and painted the woodgrain dash - the paint was matched from a genuine SLR dash apparently, but doesn't look the right colour to me. Given the car is a nod to SLRs, not a replica, I don't mind 'cos it looks good! Not sure if I should clear it or not - any opinions on that? Silver pen worked great, but I did smudge one bit which I will do again. New SpeedHut gauges look grouse, and I have wired in the electronic speedo and tacho from the Ice ignition, then fed it through their own new hole in the tranny tunnel (something else I marked out wit the box and center console in place).
 IMG_1937.jpeg 163.84K
2 downloads
 IMG_1939.jpeg 121.78K
2 downloads
 IMG_1950 2.jpeg 235.82K
2 downloads
 IMG_1953 2.jpeg 161.46K
3 downloads
After a lot of stuffing around with starters, ti turns out the Mal Wood Hi Torque fits okay, has the wiring clocked far enough away, and shimmed up nicely (though I had to take the box off to do that - lucky it was out of the car). I will make up a heat shield next, the headers are getting ceramic coated, then they go back on for a long time hopefully!
 IMG_1962 2.jpeg 149.18K
6 downloads
I covered everything up, then sliced into the bonnet - wish I had done tis before paint, but hey, i didn't, and I didn't melt any paint. Mounted the scoop finally.
 IMG_2001.jpeg 113.67K
2 downloads
 IMG_2003.jpeg 79.57K
2 downloads
 IMG_2005.jpeg 153.26K
2 downloads
Monster 3.5 in hardy Spicer tailshaft arrived
 IMG_1757.jpeg 157.97K
3 downloads
Next issue is the throttle cable. I have a Epik cable bracket, but it needs a m6 or so bolt to connect the springs, and finding a ball head to fit that is an issue. What have others done?
 IMG_2014 2.jpeg 123.83K
4 downloads
Getting there, hopefully not long til I roll the engine and box back in and brmmm, brmmm.
#245

Posted 06 September 2023 - 03:41 PM
Could you re-tap to suit available bolt?
Sent from my iPad using Tapatalk
#246

Posted 06 September 2023 - 05:12 PM
Good work Sam, it's getting close to the exciting time.
#247

Posted 06 November 2023 - 05:18 PM
Thanks fellas - By jeebus these things are a lot of work, but I am definitely enjoying this phase more than the rest of the build.
Got the starter motor in, shimmed, heat shielded and wired, then fitted the engine wiring and clamped it. Also had the headers ceramic coated and bolted on. Muuuucccchhhh easier doing this out of the car.
 IMG_2390.jpeg 314.47K
5 downloads
Then finished fitting as much as I could of the engine bay (coil, etc), then rolled the engine back in. I should have left the headers loose, as they got in the way when bolting the k-frame back in, but otherwise it went well. Other than doing it until 2am on a Thursday night - the other half ie normally supportive, but doing that under the bedroom pushed it... Ha ha. You can see the dummy fuel and catch can hoses, getting them made up this week. Because of the ProPaw manifold, the top rad hose is a little higher than the radiator cap, so will be fun bleeding... I actually raised the rad as high as it would go without hitting the bonnet, but hoping using a funnel will allow me to bleed the system okay. Any tips, please let me know!
 IMG_2502.jpeg 326.37K
5 downloads
Got rad hoses in, but need to pull the radiator out again because I need a bung welded into it for the EWP sensor. I was going to install it in the hose, but that just seems a recipe for a leak, so will go the other option. Wiring fitted nicely - I didn't want it totally hidden as I will need to work on this car easily, being a road car that will get driven lots. It's neat enough and looks like it actually runs. I haven't painted the rocker covers yet, because I will be modifying them after I have it running for the catch can set up.
 IMG_2450.jpeg 181.17K
3 downloads
Swapped the rear backing plates to get the rear brake calipers away form the shock, it was a pretty straight forward job. Definitely worth doing.
 IMG_2468.jpeg 203.89K
3 downloads
I liked the old Centerlines, but I like Simmons OM17s better, so grabbed these three-piece jobbies second hand. I wasn't sure I would like the colour - but it works really well. The outers need another 1/2in on them each end to really fill the guards (17 x 8/10 as-is), but I will leave them until I start driving it (and save some coin...)
 IMG_2493.jpeg 201.09K
4 downloads
Modified a LS1 module with a Walbro 460 and upgraded wiring to handle the amps. then fitted in the Droptank. Need to make a cover next, and not sure how to do that. Maybe fibreglass (need to do the kick panel as well for the computer), but would prefer steel.
 IMG_2501.jpg 305.78K
3 downloads
Anyway, lots of progress, some of it pretty frustrating (waiting on bits, buying the wrong bits, making the right bits fit, FFS), but getting there! I can bleed the brakes, the engine box and diff all have oil in them, once I have fuel hoses made up, she should be good to start up. For the first time in 10 years.
#248

Posted 07 November 2023 - 05:48 AM
Wheels look good for now, when you get the new lips made you can respray the centres in Barbados and polish the rims for maximum results.
#249

Posted 08 November 2023 - 07:00 AM
Thanks mate. I hear you on the polished outers, but colour coded centers would make it too green for me. Plus I like different colour wheels - I have actually thought about a bronze or copper center. That said, the current configuration is really growing on me. As you said, good for now, can decide later.
Looking good!
Wheels look good for now, when you get the new lips made you can respray the centres in Barbados and polish the rims for maximum results.
 IMG_2492.jpg 128.19K
3 downloads
#250

Posted 08 November 2023 - 11:39 AM
I actually like the wheels as is. The centres kinda match the drop tank (colour-wise) and the black outers take-away from the larger diameter rims a bit.
I think I agree about 'too much green', but if I were to colour-code the centres I reckon I'd still keep the black outers... there's no other chrome on the car (exterior) anyway.
Damn, she's looking good now, Sam!
1 user(s) are reading this topic
0 members, 1 guests, 0 anonymous users



 View Garage