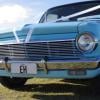
Don't put that 4 door tag on it mate

#626

Posted 25 May 2014 - 03:06 PM
#627

Posted 25 May 2014 - 03:06 PM
#628

Posted 25 May 2014 - 03:07 PM
That was Quick Martin,
Looking Flash. Dave I
#629

Posted 25 May 2014 - 04:29 PM
a true credit to you working away in that little shed
frock the neighbours
you go boy!
this has got to be one of the alltime great builds
love how you find the right answers and then apply it to your build
you could paint one of my cars anytime your ready!!!!!!
your fussy and your great
can't wait to see it complete!
cheers
davemc
#630

Posted 25 May 2014 - 07:17 PM
That answers the question, perfect day for painting by looking at that!!
Getting there mate, step by step, into the fun parts now.....
#631

Posted 25 May 2014 - 08:20 PM
<br />Marty<br />a true credit to you working away in that little shed<br />frock the neighbours<br />you go boy!<br />this has got to be one of the alltime great builds<br />love how you find the right answers and then apply it to your build<br />you could paint one of my cars anytime your ready!!!!!!<br />your fussy and your great<br />can't wait to see it complete!<br />cheers<br />davemc
Wow Dave, High praise, very much appreciated.
It's a challenge working in the carport, there's a metre either side of the car and 750mm front and rear.
I'm really happy with the result, just a few areas where a bit of overspray got under the masking. They will need sanding and buffing off at a later stage.


Getting low on the black paint so the doors weren't painted. I'm thinking of doing them on the car so I can get the lines spot-on.
My next mission is to get the rear-end attached to body then get the car of the dolly.
Marty
Edited by sibhs, 25 May 2014 - 08:25 PM.
#632

Posted 25 May 2014 - 10:02 PM
Hi Marty,
Wow its looking good,no mucking around.
well done.
Regards John.
#633
 _sunburst73-xu1_
Posted 26 May 2014 - 08:19 PM
Well done Marty, that is certainly a real credit to you.
cheers Dane
#634

Posted 30 May 2014 - 08:26 PM


#635

Posted 30 May 2014 - 10:32 PM


#636

Posted 30 May 2014 - 10:39 PM
Beautiful Rear's you have there Martin
Quality helps
#637

Posted 31 May 2014 - 03:02 PM
Hi Marty,
Its really coming along now,it will be rolling soon mate.
Regards John.
#638

Posted 31 May 2014 - 06:08 PM
Admire your work Marty .. great dedication too
#639
 _sunburst73-xu1_
Posted 31 May 2014 - 08:35 PM
Thanks Dane and John, got the car of the cradle and closer to the ground. Testing times working how to do it. Diff is assembled and under the car.
I hear you Marty, when I got mine off the rotisserie to get it on wheels again was a very stressful time.
cheers
#640
 _Macca97_
Posted 01 June 2014 - 05:06 PM
Marty, your attention to detail and patients is unbelievable, this will be one stunning car once its on the road, and i cant believe you wont be leaving Marty's Paint and Panel open after this ones done.
Danny
#641

Posted 01 June 2014 - 10:15 PM
DEFINITELY!!!
Coz see that blue car at top left corner, she needs a "tidy up"....
#642

Posted 02 June 2014 - 12:40 AM
Just noticed your Avatar Marty, you're going to have to update that soon!
What ever happened to that tired looking old gold thing that had to be trailered home anyway?
#643

Posted 03 June 2014 - 06:47 PM
he he Craig, she got operated on hey.
What ever happened to that tired looking old gold thing that had to be trailered home anyway?
#644
 _MaliZ_
Posted 04 June 2014 - 09:37 PM
#645

Posted 07 June 2014 - 11:41 AM
Hi Marty,
I gave you a Like Button for your First Post,
because this thread has now become a Measurement of Bit's and pieces for Members to use as an Original Guide.
Just like all of your work, you do find the Research and then Execute the Job, well done.
oh, and thank's for the down south Torana picture.
#646

Posted 12 June 2014 - 12:16 AM
Admire your work Marty .. great dedication too
Hi Shaun, Thanks, sometimes I think I'm doing a good job, but then I read someone else's thread, and think mine isn't that good! Best I can do and trying for a two year build.
Marty, your attention to detail and patients is unbelievable, this will be one stunning car once its on the road, and i cant believe you wont be leaving Marty's Paint and Panel open after this ones done.
Danny
Hi Danny, I've really enjoyed the panel and paint side of things and hope to one-day get a factory work-shop, so maybe in the future?
Attention to detail and patience, good choice of words, some people say skill, which I disagree with. Most people could do this resto with Patience and attention to detail. Cheers
Just noticed your Avatar Marty, you're going to have to update that soon!
What ever happened to that tired looking old gold thing that had to be trailered home anyway?
Hi Craig, I'm in no hurry to change it, but I will. When she's ready.
So I've just spent ages reading this whole thread. Thank your for all the detail and pics. I have learned alot from your experience so far. You have done an awesome job so far and i cant wait to see the end result.
Hi Mat, I'm glad you liked it, I know what it's like finding an old thread and reading from start to present day. That was all I did for the first 6 months before I started the resto. A great way to learn.
Hi Marty,
I gave you a Like Button for your First Post,
because this thread has now become a Measurement of Bit's and pieces for Members to use as an Original Guide.
Just like all of your work, you do find the Research and then Execute the Job, well done.
oh, and thank's for the down south Torana picture.
Thanks Dave
OK update time.
Sorry some pics decided go upside down.
Got my springs front and rear. Big difference between old and new. I can see why my top bump stop was mush, this tall spring would have been running max height.
 photo 1.JPG 130.98K
24 downloads
Removing some small dents from gutter trim. Here are some of the tools used.
 photo 1-1.JPG 130.59K
25 downloads
Firstly run a fine flat file over dents to see highs and lows.
 photo 5-1.JPG 115.07K
23 downloads
Then using flat punch and pin punch tap the dent till its high.
 photo 3-1.JPG 110.23K
23 downloads
Then file that smooth, then sand it starting with 80g, 180, 320, 600, 1200, 1500, 2000 and polish
 photo 1-2.JPG 124.88K
25 downloads
A picture for comparison of a new heater to an old. I'm going to have to spray this up to get a more original colour and texture.
 photo 2.JPG 130.27K
26 downloads
Steering column ready to go in.The coffee pot was a challenge but thanks to the guys on here its all done.
 photo 5.JPG 123.63K
26 downloads
 photo 4.JPG 124.77K
28 downloads
more to come
#647

Posted 12 June 2014 - 12:26 AM
Bloody pics, they're upright on the computer.
The jig I used to lift the rear of the car up. This hung through the petrol tank hole.
 photo 3.JPG 137.4K
34 downloads
Getting some bits bolted on.
 photo 4-2.JPG 129.51K
38 downloads
 photo 3-2.JPG 123.15K
32 downloads
 photo 5-2.JPG 126.69K
33 downloads
Seeing the car like this, I can sniff the finish line.
 photo 2-2.JPG 110.3K
31 downloads
Did a bit of running around this week, dropped of radiator and heater core, drive shaft for uni's and balance, rims for polish, more bits for zincing and gave the upholster the hurry-up.
It's all getting very exciting. :-)
Marty
#648

Posted 12 June 2014 - 12:35 AM
All Good Marty, Thank's.
#649

Posted 13 June 2014 - 04:42 PM
Hi Marty,
Its looking bloody good mate.
Regards John.
#650

Posted 13 June 2014 - 07:01 PM
you've been working upside down for to long martyBloody pics, they're upright on the computer.
The jig I used to lift the rear of the car up. This hung through the petrol tank hole.photo 3.JPG
Getting some bits bolted on.photo 4-2.JPG
photo 3-2.JPG
photo 5-2.JPG
Seeing the car like this, I can sniff the finish line.photo 2-2.JPG
Did a bit of running around this week, dropped of radiator and heater core, drive shaft for uni's and balance, rims for polish, more bits for zincing and gave the upholster the hurry-up.
It's all getting very exciting. :-)
Marty
what's with the photo's?
now i've got a neck injury!
1 user(s) are reading this topic
0 members, 1 guests, 0 anonymous users







 View Garage