#651

Posted 13 June 2014 - 07:17 PM
#652

Posted 13 June 2014 - 09:35 PM
#653

Posted 13 June 2014 - 10:06 PM
I'm saving the 1% for , I don't know what..
#654

Posted 14 June 2014 - 11:07 AM
Love this build thread,really inspirational stuff.
So much so I just purchased my first spray gun.
Total newby to the world of spray painting but having a go starting very slowly just with engine parts.
Where did you buy the new heater box from.
Keep up the great work.
Cheers Graham .
#655
 _greg2240_
Posted 14 June 2014 - 11:56 AM
well done Marty, lovely job so far, a lot of real quality work coming out of W.A I see on this forum, I'd better pull my finger out, keep up the good work, it's inspiring cheers Greg
#656

Posted 23 June 2014 - 10:16 PM
Looks good marty but its a bit early for grill id be shit scared i would damage it before the driveline goes in but i know i man with your patience it should be ok
Hi Gene, I'm shit scared of damaging everything! It's all or nothing.
as someone who could/would ever have the skill to do this.....I'm marking you at 99/100 Marty.
I'm saving the 1% for , I don't know what..
Thanks Col, I'd be happy with 90%, your very generous.
Hi Marty,
Love this build thread,really inspirational stuff.
So much so I just purchased my first spray gun.
Total newby to the world of spray painting but having a go starting very slowly just with engine parts.
Where did you buy the new heater box from.
Keep up the great work.
Cheers Graham .
Hi Graham,
Good move getting a spray gun, I've now got 4, they're addictive. Use quality products, get good advice, take your time and the result is so rewarding.
Got the heater box from a Rares agent about a year ago, club price was $250 but they sold out quickly.
well done Marty, lovely job so far, a lot of real quality work coming out of W.A I see on this forum, I'd better pull my finger out, keep up the good work, it's inspiring cheers Greg
Hi Greg, Thanks mate. Hope to be cruising with you one day so yeah! Pull your finger out :-)
Car update pics on the way
#657

Posted 23 June 2014 - 10:32 PM
 <br /><br />Had issues with the caps coming off so I took the pivots out again and pinned the ends.<br />
 <br /><br />
 <br /><br />Drive shaft picked up from balance and uni's. I asked for unpainted so I can do my thing.<br />
 <br /><br />
 <br /><br />
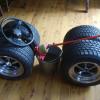
 <br /><br />Got a rim polished as a test cause these guys were recommended and cheap. Top job and only $45. I've just given them another 6 to do.<br /><br />
 <br /><br />Radiator with new core, heater core cleaned and tested.<br /><br />
 <br /><br />
 <br /><br />Getting the front springs in was interesting. Didn't realise old springs were round top and bottom but the new ones are ground flat at top. This meant modifying the top spring plastic by heating and re moulding.<br />
 <br /><br />Knocked bearing caps in using an old one with a slit cut in it.<br /><br />
 <br />How a split pin should be installed.<br />
 <br /><br />Caliper and pads in.<br />
 <br /><br />Marty
Edited by sibhs, 23 June 2014 - 10:44 PM.
#658

Posted 23 June 2014 - 10:50 PM
Thats a mess, please edit all those friggin' <br>/ shite things for me Datto. I tried but timed out.
Cheers
Marty
#659

Posted 23 June 2014 - 10:58 PM
#660

Posted 24 June 2014 - 02:23 AM
Just read this entire thread in one sitting. Just couldn't stop.
Very thorough work indeed and I love the shine on that paint. I intend to paint mine in a solid colour so wasn't going to clear coat but now I think I might after looking at those photos.
Just wondering how deeply did you scuff the paint before painting the blackouts.
I've just gotta say very nice work there Marty.
#661

Posted 24 June 2014 - 10:32 AM
Hi Greg, writing isn't my strong point so I tend to keep it short with lots of pictures. Thanks for compliments.
Before blackouts went on all paint was rubbed back with 2000 then compounded, masked out, wax and grease remover then painted.
Because it's acrylic it will melt into the previous coat. Just using enough paint to cover and not build up too big a lip.
Cheers
Marty
Edited by sibhs, 24 June 2014 - 10:34 AM.
#662
 _greg2240_
Posted 24 June 2014 - 11:12 AM
hi Marty, could you let me know who did your rims also plz, I was going to do my own but not after seeing yours, they look lovely, Greg
#663

Posted 24 June 2014 - 11:21 AM
Hi Marty,
Its looking good mate,its hard too put front coil springs with no weight on k frame.
But its comming together nicely,and rolling soon,fantastic workmanship your doing.
Regards John.
#664
 _Agent 34_
Posted 24 June 2014 - 07:45 PM
mate, it's been a great ride and this thread has had it all. - nice go bro go !!!
#665

Posted 24 June 2014 - 09:04 PM
Hey Marty,
I just caught up on your work and it's looking awesome - top job mate. Very tidy work. ![]()
Cheers,
Jeff
#666
 _greg2240_
Posted 25 June 2014 - 09:13 PM
hi Marty, what black did you use for the engine bay, it looks nice, Thnx again Greg
#667

Posted 25 June 2014 - 10:27 PM
Hi Marty,
Its looking good mate,its hard too put front coil springs with no weight on k frame.
But its comming together nicely,and rolling soon,fantastic workmanship your doing.
Regards John.
Hi John, yes, putting springs in and out is much easier on the car. I had to clamp the Kframe to the bench while jacking up the lower wishbone.
mate, it's been a great ride and this thread has had it all. - nice go bro go !!!
Hi Grant, I might not have started this resto if not for guys like you. Reading your thread gave me the confidence to have a go and seeing your dramas with panel and paint convinced me to do-it-myself.
Hey Marty,
I just caught up on your work and it's looking awesome - top job mate. Very tidy work.
Cheers,
Jeff
Thanks Jeff, wish someone on here could see it first, photos can be deceiving but I think it's good for a backyard job.
hi Marty, what black did you use for the engine bay, it looks nice, Thnx again Greg
Hi Greg, I had 4 litres of 2K Satin black which I used a couple of litres on the underbody, then for boot added a bit of white to it. For the engine bay some Matting agent was added. This Matting agent was given to me and did make the paint bitty (took a couple of goes to get it right). When I bought the black Acrylic for black-outs the shop added Matting agent and I found it to be a lot smoother.
Hope that makes sense.
Marty
#668

Posted 25 June 2014 - 10:52 PM
#669

Posted 25 June 2014 - 11:00 PM
#670

Posted 25 June 2014 - 11:11 PM
I will come round on the weekend and suss this beast out and remember where im gunna run my hand under lol
Better keep my back to the wall then. LOL
quite sensational marty
Thanks Dave, you should bum a lift with Gene when he comes over, just be careful I think he's in the feely touchy mood.
Marty
#671
 _2ELCS_
Posted 25 June 2014 - 11:16 PM
Just keep him away from the Passion Pop Marty ....
#672

Posted 25 June 2014 - 11:28 PM
Or 2
#673
 _2ELCS_
Posted 25 June 2014 - 11:29 PM
![]()
#674

Posted 25 June 2014 - 11:51 PM
#675

Posted 26 June 2014 - 12:12 AM
Marty, the workmanship and attention to detail is a real credit to you!. Well done and i can't wait to see the finished product in the flesh.
Also I am eager to see how the seat belts look once done, specifically the caps. From my experience it's difficult to prep/ satin chrome the caps to look like the originals.
1 user(s) are reading this topic
0 members, 1 guests, 0 anonymous users


