Thanks for that, much appreciated. ![]()

#76

Posted 29 March 2013 - 05:42 AM
#77
 _Linesy_
Posted 29 March 2013 - 06:45 AM
Top Job your doing there. Well done mate!
#78

Posted 29 March 2013 - 09:56 PM
Thanks Linesy, that's more motivation to keep going...
Been sourcing more parts, finally got a major part. The boot floor.
Took a couple of hours of careful extraction but more than happy.
 IMG_2544.jpg 52.84K
29 downloads
Also got the RH rear chassis, mine had been butchered and was missing the rear muffler hanger bracket. IMG_2595.jpg 33.43K
28 downloads
Cut the rust out of the boot catch brace
 IMG_2597.jpg 63.29K
32 downloads
Made a section to reinforce the new chassis.
 IMG_2598.jpg 45.02K
31 downloads
Below is the bits and some rust repair starts
 IMG_2619.jpg 52.32K
30 downloads
 IMG_2625.jpg 63.93K
30 downloads
 IMG_2631.jpg 72.31K
29 downloads
Started cleaning up the ID tags and was pissed off to find the Body ID Tag was off a 4 door. When I bought the car the tags weren't a big concern being an "S" I noted that all rivets hadn't been removed but couldn't make out the numbers due to dirt. I did note the car had been in a bingle and another half inner and full outer LH guard had been fitted. Once I stripped the paint I found the true extend of damage, the whole corner had been changed with staggered weld joins in the nose cone, beaver etc. No damage to chassis but I gather the original tag could of been damaged or just a lazy panel beater.
I'm not going to drive/show my car with a 4 door tag on it and don't like the idea of no tag, this may only lead people to believe I have a genuine GTR with the tags in the safe.
So if anyone has a 2 door S tag from late 72 early 73 Adelaide I would like to chat. Obviously I'm not trying to pass the car off as something it isn't. Infact it's the complete opposite.
Marty
#79

Posted 29 March 2013 - 10:09 PM
I've said it before, and I'll say it again.
THAT'S HOW REPAIRS WERE DONE BACK IN THE DAY!
Nothing illegal about it back then.
#80
 _Agent 34_
Posted 30 March 2013 - 07:04 AM
Marty,
keep hammering away man.
#81

Posted 30 March 2013 - 06:18 PM
Cheers Dave
#82

Posted 10 April 2013 - 10:42 PM
Hi Marty not that it matters too much but do away with the sleeve you have made for the chassis more trouble than its worth. It will only act as a rust trap if you need to line the rails up use it for that with vice grips then remove.
Cheers Dave
Thanks Dave, I took your advice and very happy with the chassis rails now. See below
This is the new rail cleaned up, against the old,
 IMG_2666.jpg 68.73K
35 downloads
Filled the old holes from where the tow bar bolted through. Used a brass heatsink (thick piece of flat bras, copper,ali) to block the holes, then welded away, worked a treat.
 IMG_2667.jpg 53.14K
33 downloads
 IMG_2668.jpg 58.02K
33 downloads
 IMG_2670.jpg 53.88K
33 downloads
The left hand rail had about 5mm trimmed of the lip for the drop tank. That had to be fixed, so I cut the spare one of my original rail and welded it into place. I found the best way was to line up and tac weld holding by a gloved hand a bit at a time and adjusting the new piece as I go. Just couldn't use clamps or pliers, very happy with result.
Once the RH rail and the LH were ready I Rust Blasted (KBS product) the insides then painted on the KBS gloss black. Very satisfied with the result.
 IMG_2694.jpg 58.81K
35 downloads
 IMG_2695.jpg 53.59K
31 downloads
 IMG_2707.jpg 57.8K
32 downloads
While at my Dads I come across some old printing brass letters, ideal for heat-sinks.
 IMG_2652.jpg 44.81K
29 downloads
Picked up Bertha on Monday, took about 2 hours for me to get it off the trailer and into position. Would of been easier if I hadn't lent my engine lifter to a mate. You can see the difference between the old and new in size.
Tested Bertha on the sandblaster and even with 447 litres of free air, it's only just enough.
 IMG_2686.jpg 63.89K
29 downloads
 IMG_2687.jpg 55.73K
31 downloads
 IMG_2688.jpg 58.61K
32 downloads
 IMG_2689.jpg 43.45K
30 downloads
 IMG_2690.jpg 63.4K
28 downloads
Measured and drilled the extra holes required for the brake booster.
 IMG_2662.jpg 56.07K
31 downloads
 IMG_2665.jpg 60.43K
28 downloads
Cut the hole for the 4 speed.
 IMG_2615.jpg 42.31K
32 downloads
Cheers
Marty
#83

Posted 11 April 2013 - 01:41 AM
Great Job you are doing Marty. Dave I
p.s. all your tricks work like a treat
#84
 _woosha_
Posted 11 April 2013 - 07:51 AM
Cheers woosha
#85

Posted 11 April 2013 - 09:37 AM
Great Job you are doing Marty. Dave I
p.s. all your tricks work like a treat
Thanks Dave, most tricks picked up from you guys, some I make up myself.
Nice work marty fairly hooking into her mate. Howz the welding going must be getting better with all the work you been doing?
Cheers woosha
Hi Woosha,
I'm glad I started learning on the boot and rear repairs, definitely getting better and feeling confident about fitting the flutes. Next will be the boot floor which will be interesting, I've got a bit of warpage from all the repairs to the floor but should be able to sort it.
Marty
#86

Posted 11 April 2013 - 09:54 AM
Thanks Dave, most tricks picked up from you guys, some I make up myself.
Hi Woosha,
I'm glad I started learning on the boot and rear repairs, definitely getting better and feeling confident about fitting the flutes. Next will be the boot floor which will be interesting, I've got a bit of warpage from all the repairs to the floor but should be able to sort it.
Marty
BFH should sort that out Marty ![]()
#87

Posted 22 April 2013 - 10:05 PM
BFH should sort that out Marty
Didn't need the BFH thanks Potta, I had a buckle which I cut a slit in and welded, all good.
Here are the picks of the boot floor being welded in, lined up really well and tacked it all the way around.
 IMG_2727.jpg 56.68K
30 downloads
 IMG_2728.jpg 58.58K
28 downloads
 IMG_2729.jpg 63.84K
29 downloads
Test fitted the tank and all the screw holes line up and it sits nice and flat.
 IMG_2730.jpg 55.27K
29 downloads
Bashed up Salmon
 IMG_2732.jpg 96.22K
28 downloads
Once the bumper support brackets were fitted I could put the car back on the rotisserie and finish off the welding from below. Plan is to use the heatsink and slowly fill the join a bit-at-a-time.
After welding over the KBS and it spitting and carrying on I think I'll do my welding the old school way with clean metal then protect after welding with primers and fish oil.
 IMG_2740.jpg 37.32K
29 downloads
 IMG_2741.jpg 37.38K
27 downloads
 IMG_2742.jpg 63.38K
27 downloads
 IMG_2743.jpg 44.2K
28 downloads
Prepped and painted the brake calipers then chucked them in the oven at 90º for one hour to cure the heat proof paint.
Re-fitted rubber seals and wrapped them up for storage.
 IMG_2733.jpg 59.84K
27 downloads
 IMG_2737.jpg 36.03K
27 downloads
 IMG_2744.jpg 44.44K
25 downloads
 IMG_2748.jpg 38.46K
27 downloads
Cleaned up the K Frame by degreasing and then high pressure cleaner, next it will need sand blasting, weld splatter ground off and re-drilling the holes lower.
 IMG_2745.jpg 75.59K
29 downloads
Sand blasted and rust blasted the suspension bits, testing out results with the KBS to get an acceptable finish.
 IMG_2746.jpg 63.8K
27 downloads
 IMG_2752.jpg 36.73K
28 downloads
Hubs sandblasted, rustblasted and awaiting paint.
 IMG_2749.jpg 45.97K
27 downloads
 IMG_2751.jpg 36.93K
26 downloads
Cheers
Marty
#88
 _LONA-CK_
Posted 23 April 2013 - 07:45 AM
great work marty
cheers gong
#89

Posted 23 April 2013 - 03:30 PM
Hi Marty,
There is great satisfaction in painting all the suspension parts individually, great time spent. Dave I
#90

Posted 23 April 2013 - 11:02 PM
Thanks Gong and Dave, good to get the encouragement and know my thread gets read.
It's really satisfying doing this resto (so far) and I'm glad I didn't end up buying a restored car.
Marty
#91

Posted 23 April 2013 - 11:22 PM
Good stuff Marty, I see a few familiar looking pieces in that lot, I'm glad they're getting put to good use.
#92

Posted 24 April 2013 - 07:45 AM
Great work! Enjoying this.
#93
 _Agent 34_
Posted 25 April 2013 - 06:04 PM
go Marty go !
smashing it.
#94
 _Liam_
Posted 25 April 2013 - 06:24 PM
Love this whole thread mate, it's awesome.
#95

Posted 04 May 2013 - 10:19 PM
Well I'd heard about the amazing Molassis so I thought it was worth a try.
Unbelievable......... if you haven't tried this stuff, do yourself a favour and give it a go. I had good results after 10 days and awesome rust removal after 2-3 weeks. Check out some results below.
 IMG_2725.jpg 65.86K
29 downloads
 IMG_2835.jpg 52.47K
28 downloads
 IMG_2783.jpg 69.75K
27 downloads
 IMG_2842.jpg 46.91K
28 downloads
More work on the boot floor, I had a wideish gap to fill at the rear of the tank lip so I made up a brass heatsink to the shape. This however failed to work and the brass actually welded to the steel. I then used a piece of copper water pipe with more success. The brass worked fine when used flat but on it's side was RS.
 IMG_2764.jpg 55.44K
25 downloads
 IMG_2763.jpg 41.84K
24 downloads
 IMG_2765.jpg 47.92K
27 downloads
 IMG_2766.jpg 92.4K
25 downloads
Painted a few more brake parts and cured them in the oven, assembled the hubs to rotors and packed 'em away.
 IMG_2785.jpg 58.27K
25 downloads
 IMG_2786.jpg 59.37K
27 downloads
 IMG_2796.jpg 51.87K
26 downloads
Rear bumper brackets were rusted so they had a dip in molassis then a clear coat.
 IMG_2788.jpg 52.94K
27 downloads
Fixed up the adjusting nut on the rat trap by welding and turning on lathe.
 IMG_2814.jpg 45.79K
27 downloads
 IMG_2815.jpg 35.74K
26 downloads
 IMG_2817.jpg 40.32K
26 downloads
 IMG_2831.jpg 42.57K
24 downloads
Noticed a bit of a lump on the shockie mount so cut this away to reveal the damage, I'll treat this and make up a new section and weld in.
 IMG_2826.jpg 61K
25 downloads
 IMG_2829.jpg 49.81K
24 downloads
#96

Posted 04 May 2013 - 10:49 PM
your doing a top job Marty, keep it coming!
#97

Posted 04 May 2013 - 10:50 PM
I bought a sill panel and have had to make a few adjustments. The one that I haven't read about here is the varying width of the outside flat edge. It starts at 20mm near the front of the door and widens to 24mm at the rear. To get this to work I cut down the length of this edge and puled it out 4mm and welded it back up. My first attempt started pulling the gap in so I had to cut my tacks and use spacers to hold the distance.
 IMG_2822.jpg 44.04K
28 downloads
 IMG_2820.jpg 52.94K
26 downloads
 IMG_2821.jpg 37.68K
25 downloads
 IMG_2824.jpg 60.34K
27 downloads
 IMG_2825.jpg 65.21K
26 downloads
Cut out the passenger floorpan and positioned the new one.
 IMG_2847.jpg 54.99K
29 downloads
 IMG_2849.jpg 56.04K
29 downloads
Assembled the pedal box, modified clutch pedal and fitted new rubbers to 2K satin painted metal.
 IMG_2853.jpg 44.37K
28 downloads
My champ of a son bought a grill emblem for me so I fitted that to the chrome. Looks sweet.
 IMG_2838.jpg 54.77K
29 downloads
Can someone tell me what this is for. I bought the firewall grommet kit and there are two of these in it.
 IMG_2837.jpg 43.44K
30 downloads
Got some epotec for priming the bare panels, I've been putting this off and just rustblasting bare metal but that only lasts about 6 weeks before the rust returns. Cost me $100 for this, thanks to Greg, great value if it's as good as they say.
 IMG_2843.jpg 57.62K
31 downloads
Having a go at making this bit for the rattrap using a high tensile bolt and turning it to size, really botching it up at the moment and need to get another cutter for the lathe. I'll get there.
 IMG_2841.jpg 56.03K
28 downloads
 IMG_2845.jpg 49.83K
27 downloads
Thanks for the support guys and Potta there's quite a few parts from your old girl going on here including, boot floor, front brakes, booster, steering column, tunnel skin,etc etc.
Marty
#98

Posted 05 May 2013 - 11:11 AM
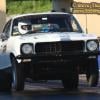
For those that haven't seen my Glory Box thread, here's a picture of my inspiration.
 S Final.jpg 53.1K
28 downloads
This is where the colour and year choice are coming from. Owned this car for ten years in the 80's and 90's and had plenty of good memories from it.
Marty
#99

Posted 05 May 2013 - 12:54 PM
Hi Marty,
Can see you have wasted no time putting your goodies to work, had a look around for your grommet query and it seems from this link ( http://www.gmh-toran...attach_id=29729 ) there are 2 of them in the kit (must be a spare). Dave I
http://www.gmh-toran...e-2#entry747275
p.s. Great Idea in recreating your Original Car
Edited by TORYPOWER, 05 May 2013 - 12:59 PM.
#100

Posted 05 May 2013 - 01:37 PM
Hi Dave, theres no mention of these grommets in that thread. There about 15mm long, they look familiar but just can't think where they go?
 IMG_2837.jpg 43.44K
32 downloads
1 user(s) are reading this topic
0 members, 1 guests, 0 anonymous users


 View Garage


