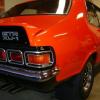
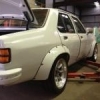
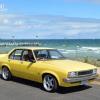
Marcelo, who's been doing all the metal work, cut it here for minimal re-welding.

Heath's Hatch
#351

Posted 19 February 2015 - 11:37 AM
#352

Posted 22 February 2015 - 09:11 PM
Hi Elmo, sorry I'm confused. Are you not the one doing the work on your hatch? Is there a build thread somewhere? I don't know who Marcelo is.
Cutting above the steering column is a perfectly fair suggestion, but mine went together nicely and I didn't need a weld on the top of the dash panel which is precisely what I wanted to avoid.
Welded up each of the holes caused by un-picking the UC dash from the steering column support:


Clamped in place:

Yes this is the lightweight dash from the ever-elusive 6cyl Persian Sand A9X sedan from Bathurst. Some of the other bits of sheet metal seemed to have jumped in there too haha.

This is the weld to put it back together in the car. Very subtle, and of course totally hidden when the car is assembled.


Worse job there is... putting the welds on the back of the dash below the base of the A pillars, so much body contortion to achieve this, lol.

#353

Posted 22 February 2015 - 09:20 PM
Holy crap, looks like someone got a new holesaw for Christmas...
But really, just how much would all those holes save in weight, it would take a lot of them to add up to a single kilo, versus how much strength is lost?
#354

Posted 22 February 2015 - 09:34 PM
When you're talking about losing strength, it's worth considering what is actually in the car for structure, and what is just there because that was the cheapest/easiest way to get a few mounting points where they needed them.
#355
 _greg2240_
Posted 22 February 2015 - 09:52 PM
great work Heath, the way you did the dash looks like the way to go, im having drama's with mine atm also, but im sure it'll be worth it, keep up the good work. did you bolt the guards on to get the holes to line up before tacking the inner guards on?
#356

Posted 22 February 2015 - 10:16 PM
The guards are glass and will need adjusting around the panel gaps anyway, so they weren't an awfully accurate reference on their own.
#357

Posted 22 February 2015 - 10:31 PM
#358

Posted 22 February 2015 - 10:57 PM
Heath,
Sorry for the confusion. I don't have a build thread as yet but I am rebuilding a hatch, but only supplying a small contribution to the metal work myself, fabricating the lower apron repair, drilling off the LX dash from a front cut and cutting the wheel arches an fitting the flares and spoilers. I don't have a build thread as yet but have an excellent panel and paint man and enjoy assisting him in fabrication of parts (where I can). I posted the picture of the dash cutting to give other readers another option for consideration when researching for there own build. I was flat out trying to work out how to compress a photo, add detail to it and post it, give me a set of Snap-on spanners anyday
#359

Posted 23 February 2015 - 08:40 PM
A man of your skills could machine up a couple of dimple dies to strengthen up those holes and to make them look cool, too....
Such a thing could be possible. Knocked these up tonight:

Result looks alright!

A lot of the holes are positioned in such a way that using a dimple die isn't really feasible, however.
Edited by Heath, 13 May 2021 - 06:13 PM.
#360

Posted 23 February 2015 - 11:25 PM
Needs more radius.
#361

Posted 07 March 2015 - 05:42 PM
Sent from my iPhone using Tapatalk
#362

Posted 07 March 2015 - 07:37 PM
Such a thing could be possible. Knocked this up tonight.
A lot of the holes are positioned in such a way that using a dimple die isn't really feasible, however.
#363

Posted 07 March 2015 - 09:27 PM
#364

Posted 07 March 2015 - 09:56 PM
Sent from my iPhone using Tapatalk
#365
 _mick74lh_
Posted 09 March 2015 - 01:23 PM
I've been kinda hoping you'd dimple die all the holes. They'll make all of this stuff look like a work of art.
#366

Posted 09 March 2015 - 08:14 PM
If work stopped sending me to Sydney then I'd be making some better progress lol... And just doing a decent job of finishing putting dash and plenum top on (and taking down all of the welds gracefully) has taken far longer than I expected.
No mega update, just steady progress.
Welding the top of the plenum back on and smoothing it out. It has taken ages but is mostly complete.


Tail Light Buckets that I bought. Specifically asked the vendor to cut them a long way in near the number plate to compensate for the length of the UC tail lights... he failed to follow that instruction lol

Started trimming them back and cleaning the junk off them:

Welded up the trim holes that I won't be using.

My mate will hopefully media blast these during the week so when I'm back in Melbourne they will be really nice to work with.
Snip snip! That was a scary move, step one of the biggest bodywork modification I've ever done:

Just overlapping them on there and inching away at getting the shape right. I will need to make my own flat areas between the bucket, and the numberplate area.

Also having to do some work behind the new tail light buckets - as many of you are aware, the sheet-metal (false floor assembly) inside the UC hatch is at a different height and is constructed differently to that in an LX. This directly fouls on the tail light assembly so you need to make clearance for that, and then some extra to actually get the globes in an out. I will try and cover this part of the build that some of the other threads have brushed over very lightly.
Edited by Heath, 13 May 2021 - 06:39 PM.
#367

Posted 09 March 2015 - 09:11 PM
Looking to see the tail light clearance like you talked about, am interested to see that.
#368

Posted 16 March 2015 - 07:45 PM
Some good work there mate, looks tops, I read that you fly up to Sydney for work, interested in repairing rust as a second job in Sydney?? ![]()
#369

Posted 17 March 2015 - 09:39 PM
If you Sydneysiders had the pleasure of living in Melbourne, you'd understand my lack of enthusiasm to spend time there! hahaha
Got my media blasted tail light buckets back:

Little repair with the TIG:

Clamped them down to the bench and used a pencil torch and scraper to pull the silver solder out of the joins:

Bit of KBS into the nooks and crannies:

So... clearance behind the tail lights. The globes hit the frame work there, simple as that.

Started cutting the heck out of it:

Now you can see how tight the brake/tail light globe holder is. Totally fouls on the edge of the false floor after that frame has been partially removed.

Shown here on the right side, I cut the floor back and clamped on a bit of small SHS and used it to form a rolled shape on the edge of the floor:

Then put a new strap in the side to hold the floor up from the rest of the body (otherwise it'll just bend away if you stand on the corner)

Made a scallop for the brake light globe holder which is the main culprit:


Rinse & repeat on the LHS:


Bit closer to welding:


So in summary...
Before:

Part way:

After:

#370
 _j.e.d._
Posted 18 March 2015 - 03:13 AM
Brilliant work there Heath. Truly motivational stuff ![]()
#371

Posted 18 March 2015 - 09:25 AM
OHS is good there.
Loved the extension lead socket a few pics back.
Awesome work Heath.
Following with huge interest.
#372

Posted 18 March 2015 - 09:38 AM
Hands up everybody who just trawled back up the page looking for Heath's extension lead... ![]()
#373

Posted 18 March 2015 - 11:41 AM
hahahaha, in my defense - when I installed that 15A plug on that 10A lead, I did not expect the internal wires to stretch that far! ![]()
#374
 _LS1 Taxi_
Posted 18 March 2015 - 02:12 PM
#375

Posted 18 March 2015 - 03:14 PM
awesome work mate.. your doing a first class job!
1 user(s) are reading this topic
0 members, 1 guests, 0 anonymous users


 View Garage


