Jump to content


Photo

I'll show you how to cut a hole in a Torana bonnet A9X style from start to finish


  • Please log in to reply
25 replies to this topic

#1 Ruts

Ruts

    How Fast!?

  • Moderators
  • PipPipPipPipPip
  • 1,118 posts
  • Location:Bargo, NSW
  • Car:Blown A9X replica, Black SS hatchback, LH SLR5000
  • Joined: 23-December 06

Posted 06 July 2013 - 08:38 PM

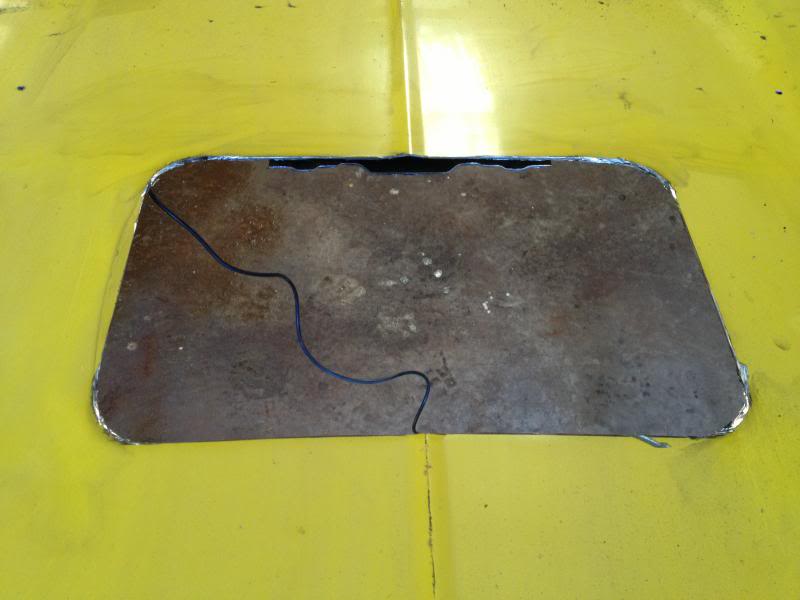
Ok so the last thread was fitting an A9X scoop to an LH/LX Torana bonnet, in this thread we will cut a hole in the bonnet under the scoop as per A9X specs. Now let me get something straight the measurements that I am using to replicate the hole in the bonnet was obtained from an original A9X race car. I am not saying that the measurements are correct as the race car may have had a new bonnet fitted at some stage and the size of the hole in the bonnet may have been altered away from factory specs. No matter what size you want the hole in the bonnet you can enlarge it according to your own needs. In this thread I wanted to replicate as close as possible an A9X hole so that if someone (like me) is building a replica they can go by these specs. I have received a lot of emails about this one so I thought now was a good time throw this together.


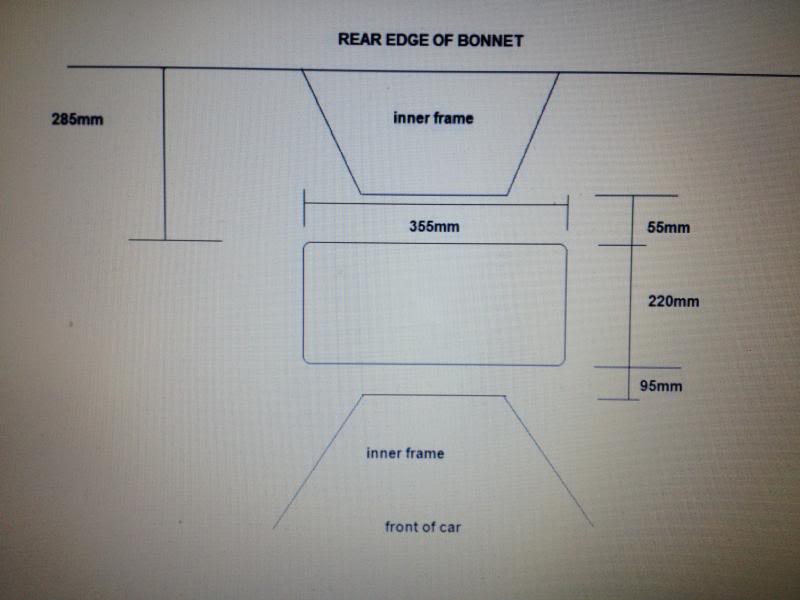
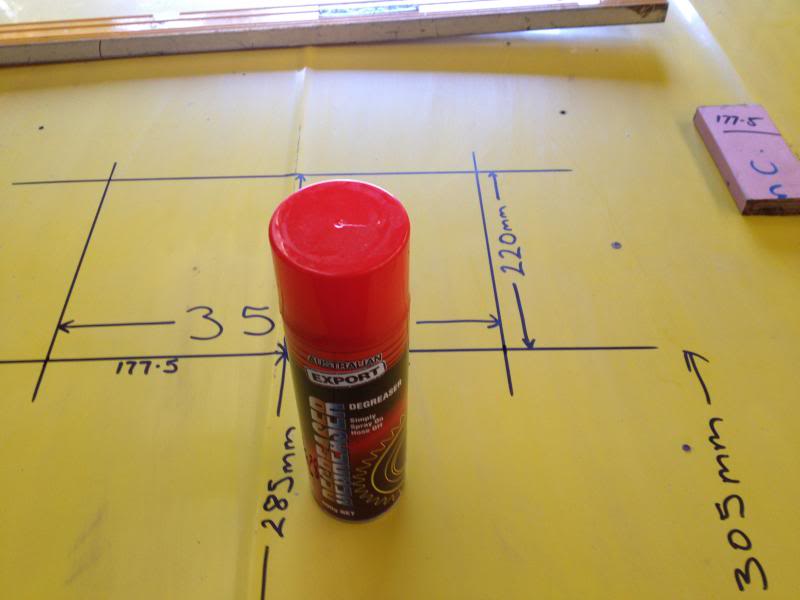
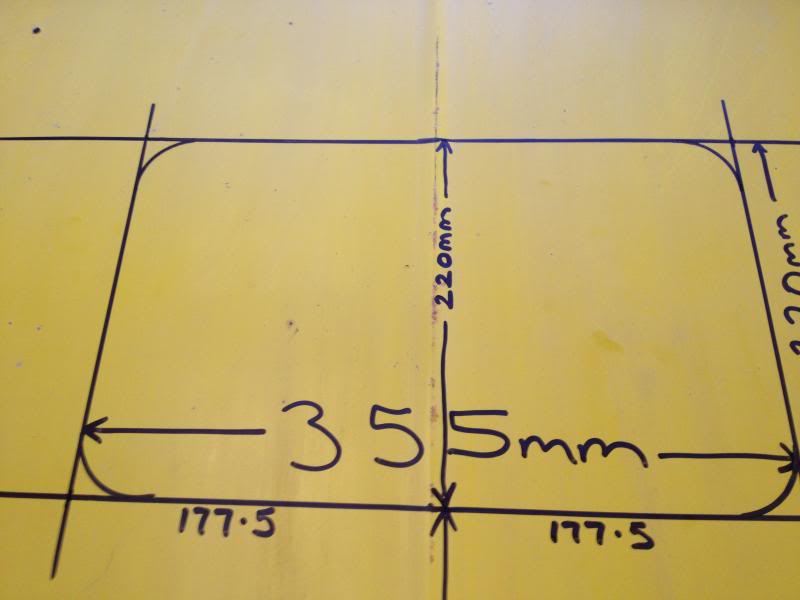
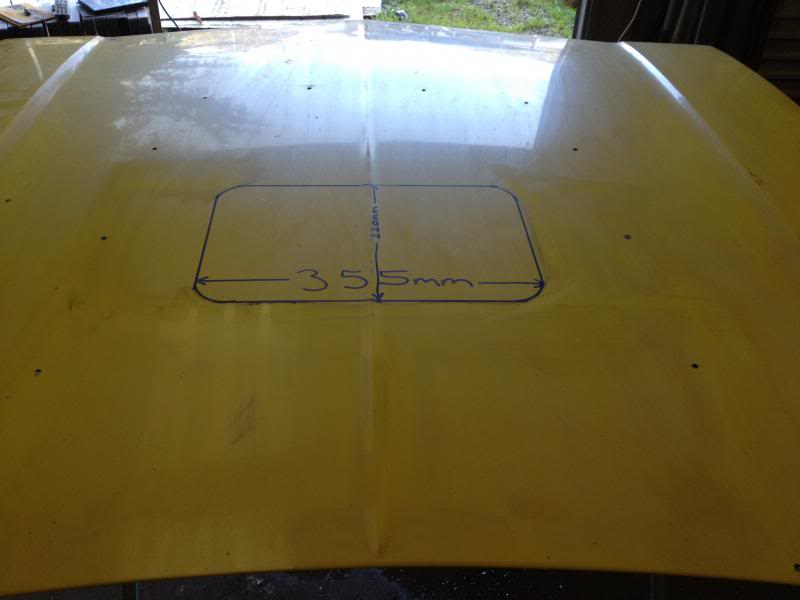
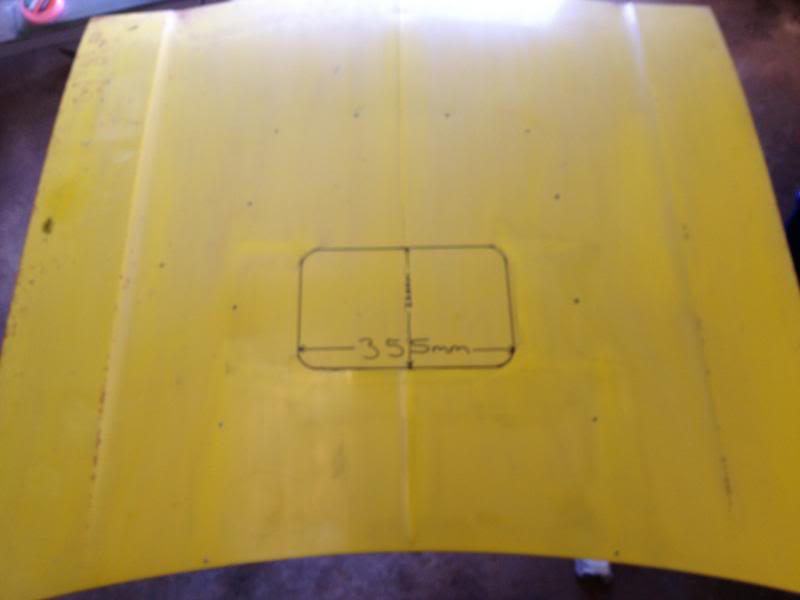
So while I was at the Muscle Car Masters a few back a mate of mine allowed me to trace the outline of the hole in the bonnet of his race car along with the position of the hole in the bonnet. These are the measurements I came up with and I made a drawing to record the measurements. Please note that the drawing isn't drawn correctly but if you follow the measurements all will work out.


Here is the drawing.

IMG_0576_zps625721ce.jpg


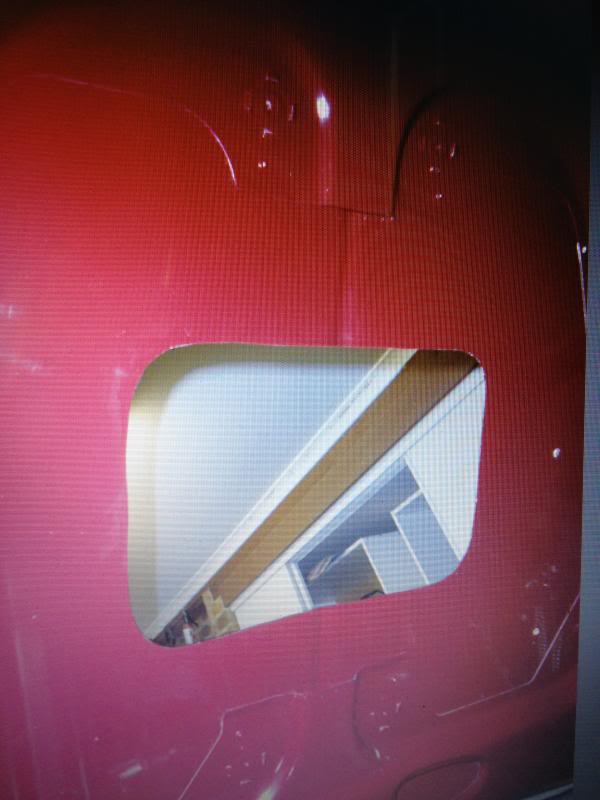
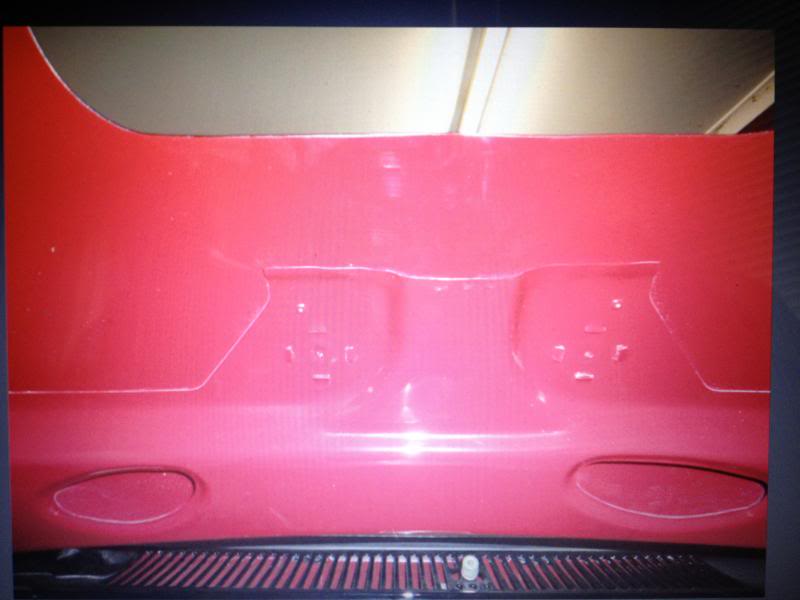
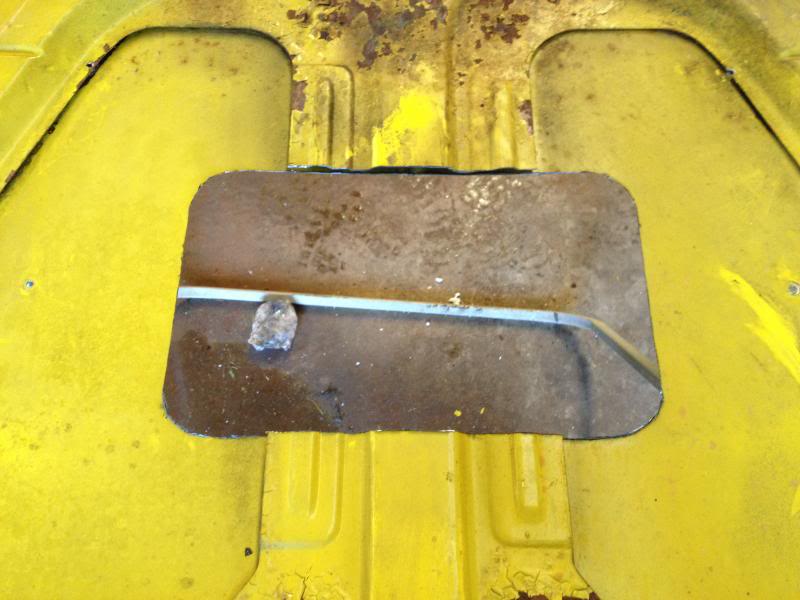
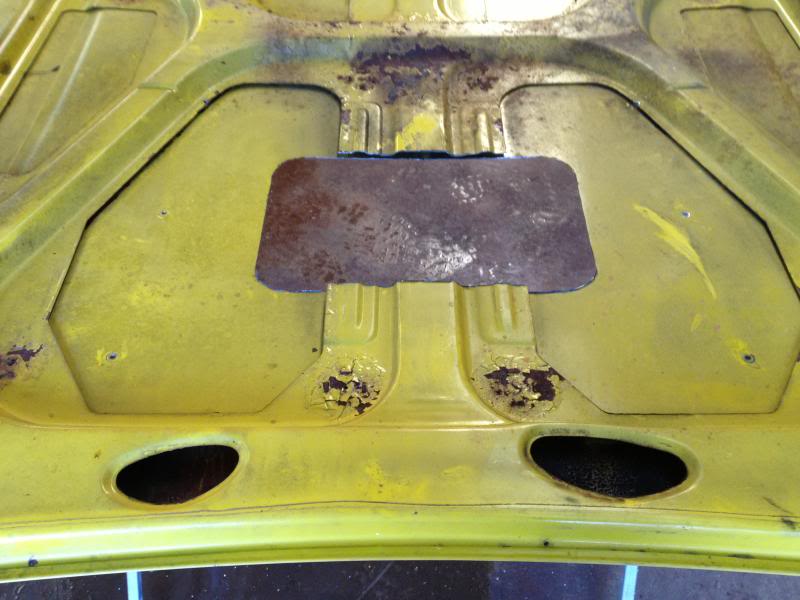
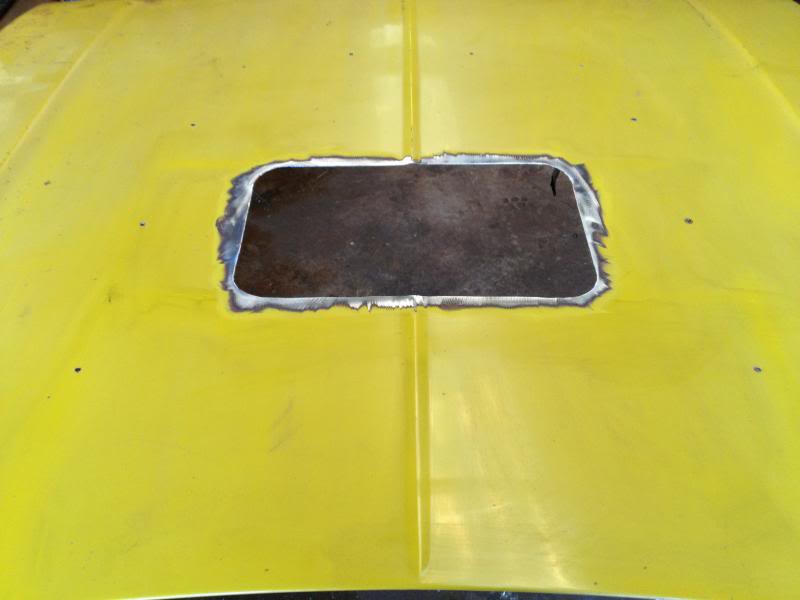
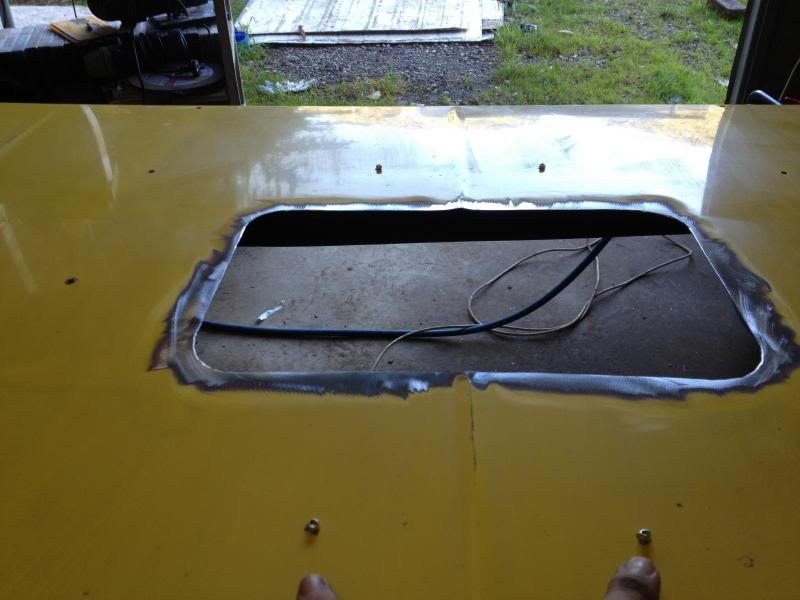
when finished it should look something like this.

IMG_0578_zps3c894db4.jpg


IMG_0577_zps17f56962.jpg


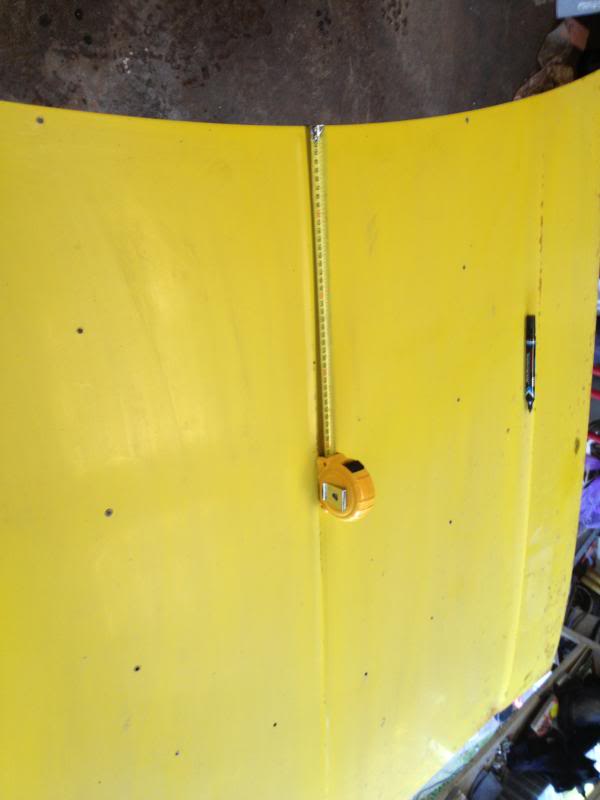
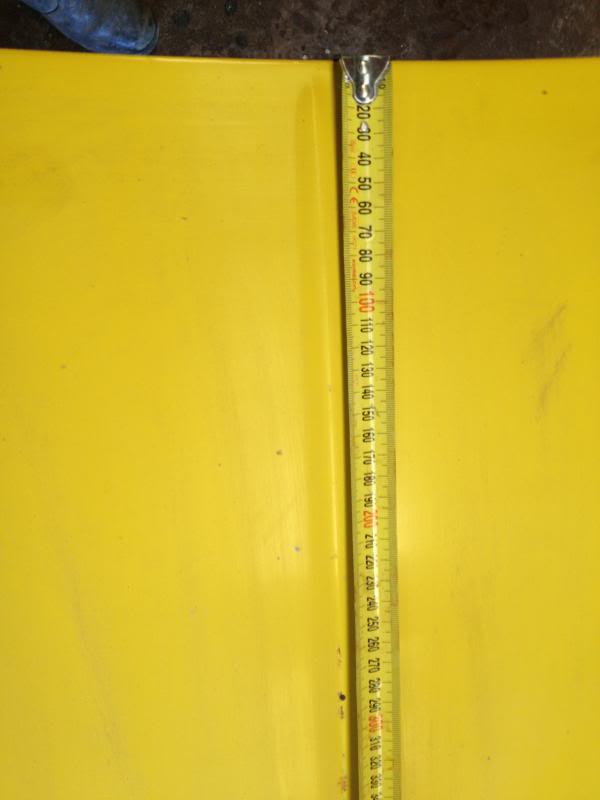
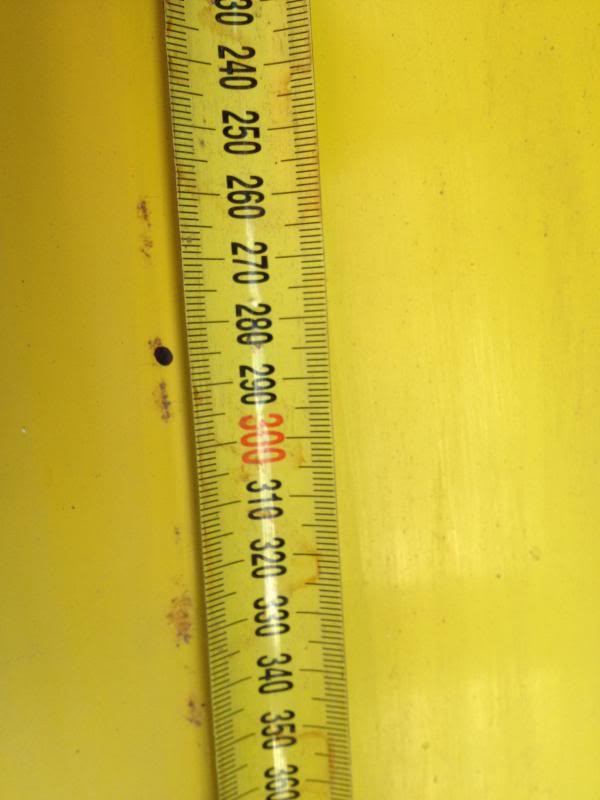
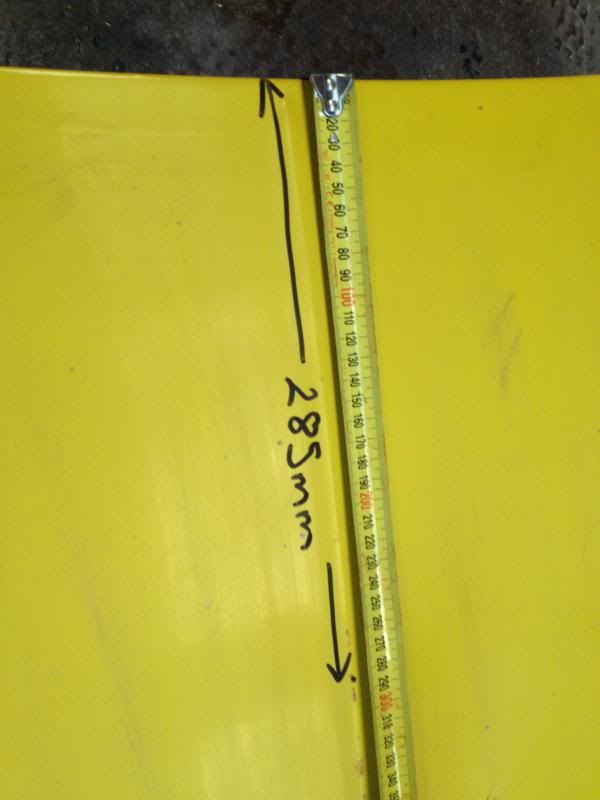
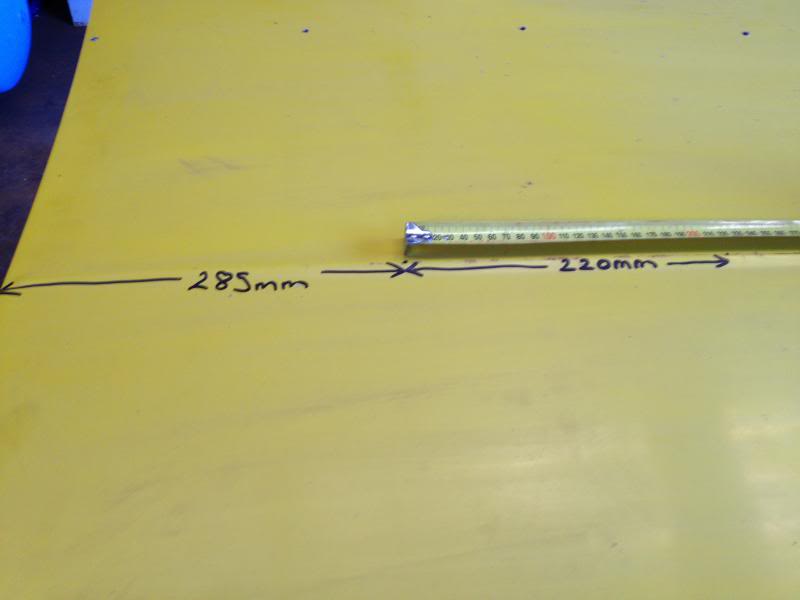
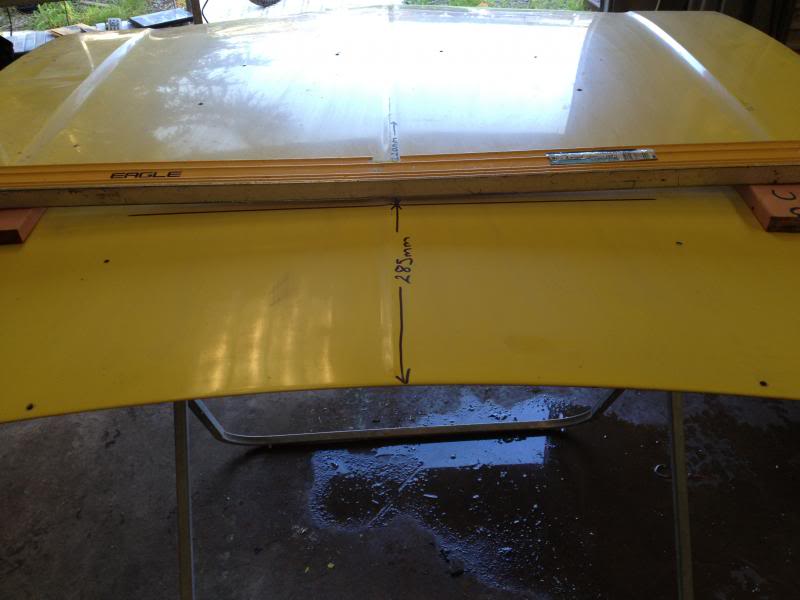
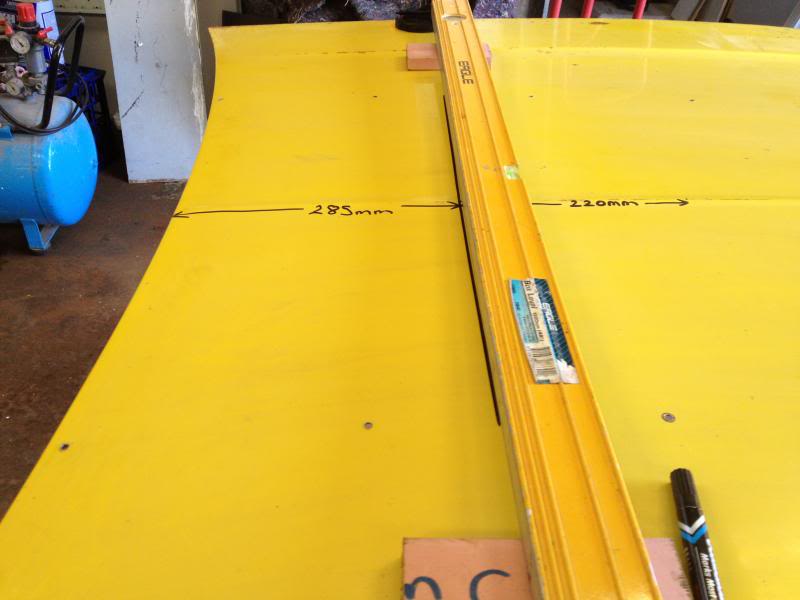
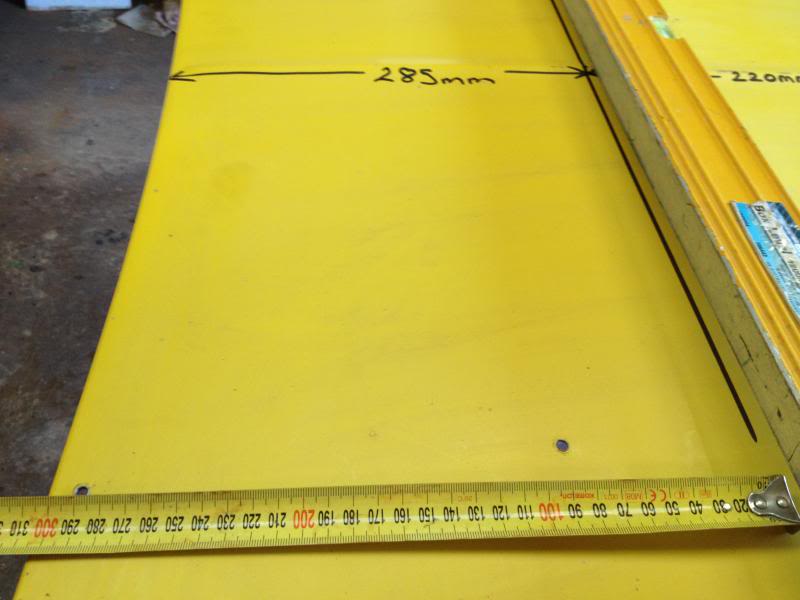
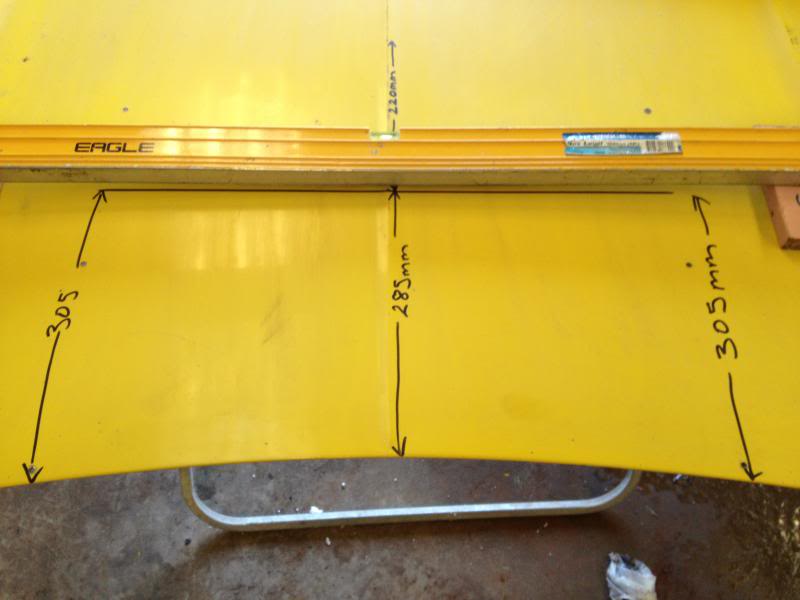
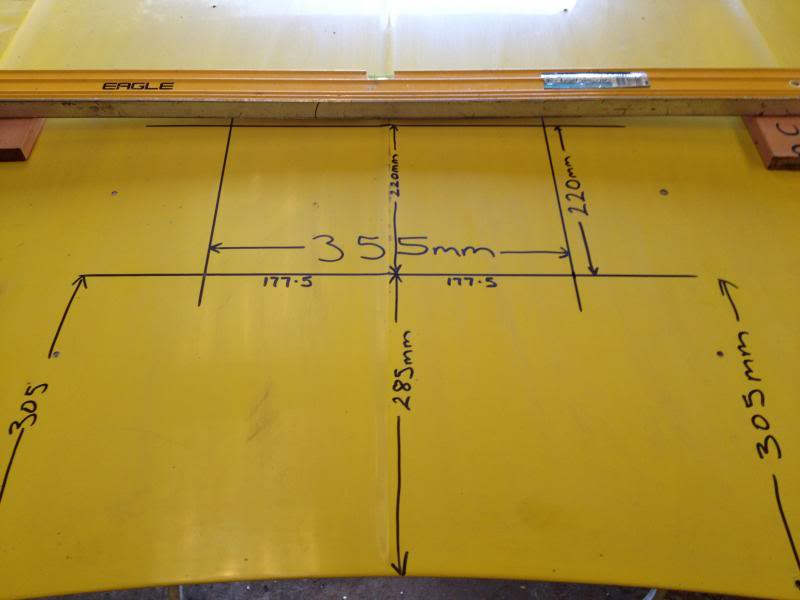
So to start we need to measure how far the rear of the hole is from the rear edge of the bonnet as per the drawing which shows 285mm

IMG_0629_zpsb4fac2a2.jpg


IMG_0630_zpse5e27d86.jpg


IMG_0631_zpsbe954d83.jpg


IMG_0632_zps85f2c604.jpg


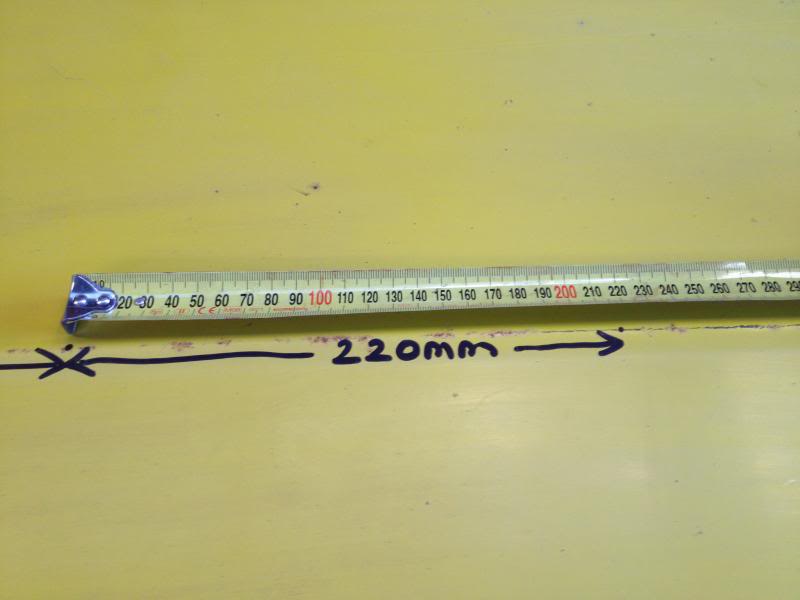
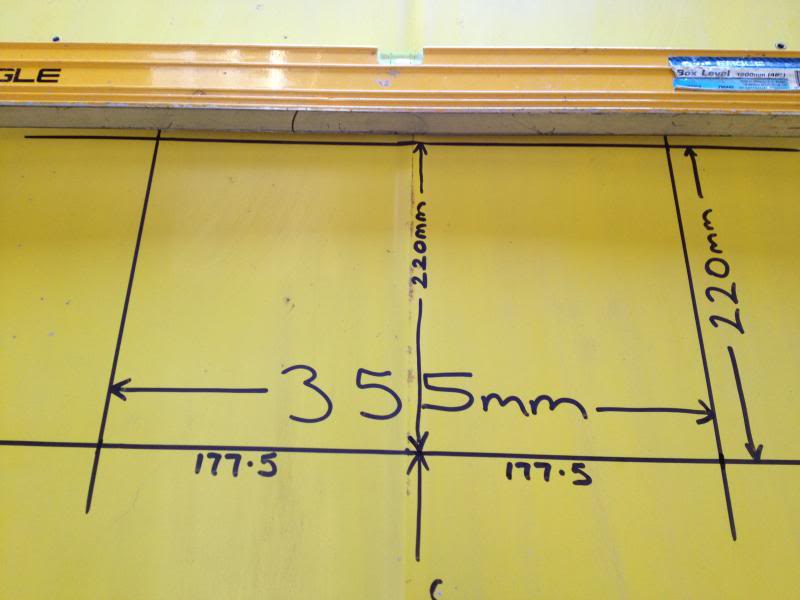
From that mark I then measure a further 220mm which will be the front edge of the hole.

IMG_0633_zps456c2004.jpg


IMG_0634_zps014a45aa.jpg


To get the rear edge of the hole square I set up a straight edge to help measure from the rear of the bonnet.

IMG_0635_zps17185d42.jpg


IMG_0636_zpsc5f5c05f.jpg


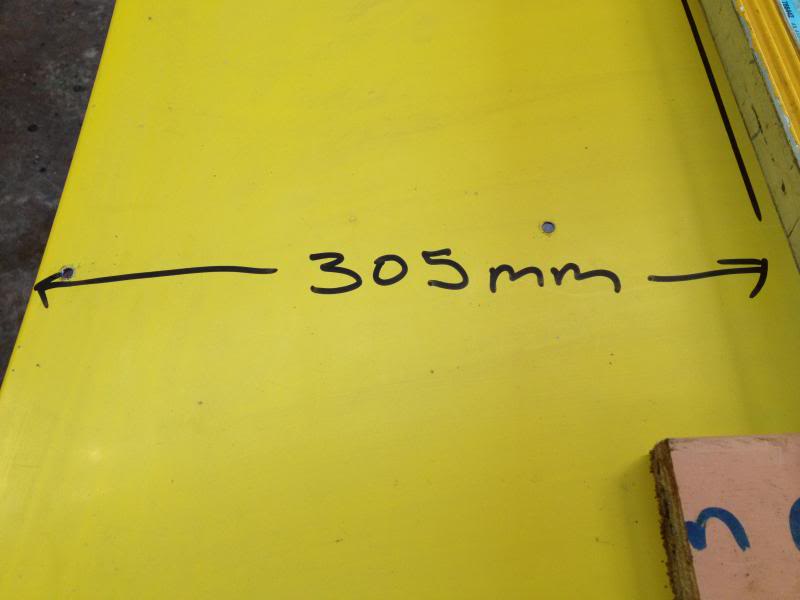
By the time it was square I had to make sure I had 305mm on each side from the straight edge straight back to the rear edge of the bonnet in line with the rear bonnet scoop mounting holes. Once the square was level I marked the rear edge of the hole.

IMG_0637_zps488eb54b.jpg


IMG_0638_zps921d32af.jpg


IMG_0639_zps43378439.jpg


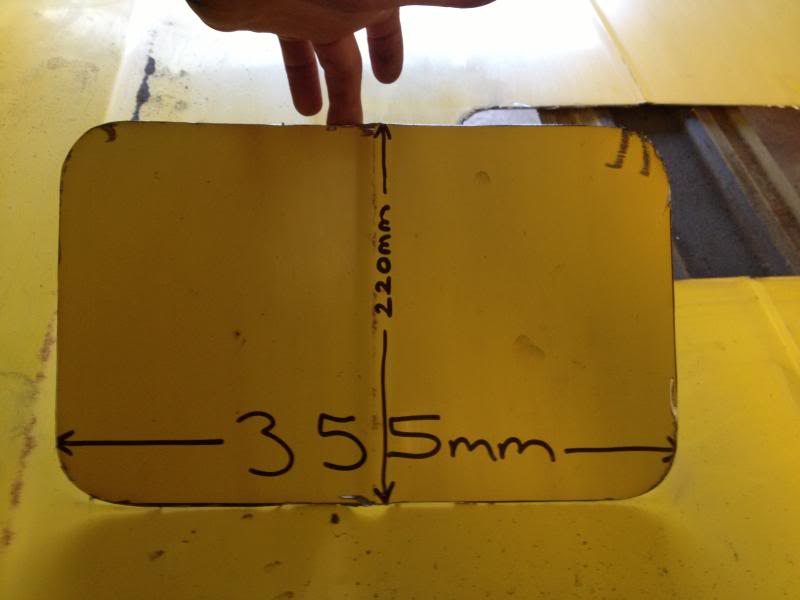
Once I had the rear edge square I was able to mark the front edge of the hole and the sides. Remember, get the rear edge square and the rest will fall into place, and always measure twice cut once. follow the measurements and should end up with a rectangle measuring 355mm wide and 220mm deep.

IMG_0640_zpsea308ef6.jpg


IMG_0641_zps178caa48.jpg


#2 Ruts

Ruts

    How Fast!?

  • Moderators
  • PipPipPipPipPip
  • 1,118 posts
  • Location:Bargo, NSW
  • Car:Blown A9X replica, Black SS hatchback, LH SLR5000
  • Joined: 23-December 06

Posted 06 July 2013 - 08:57 PM

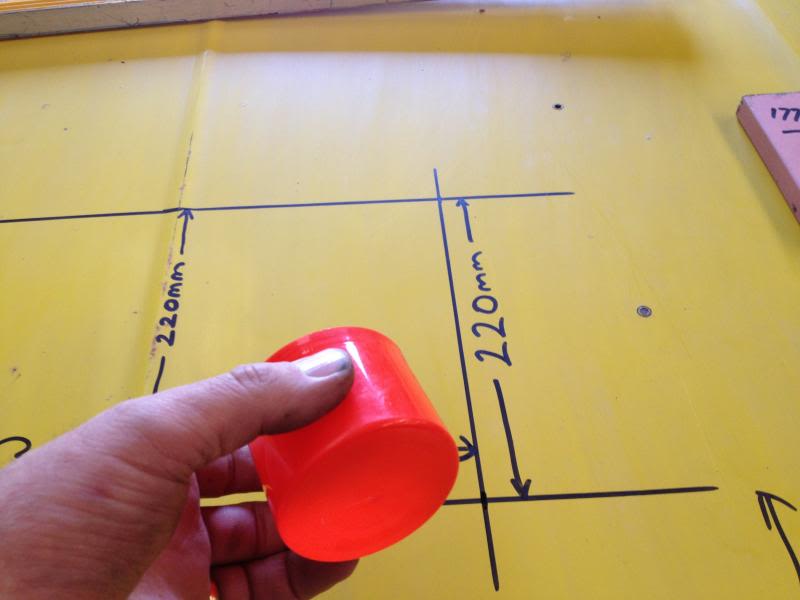
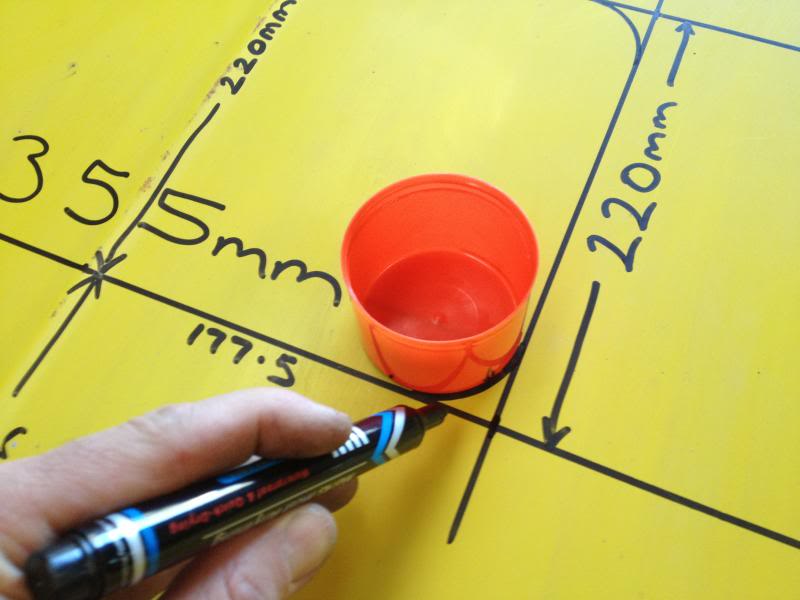
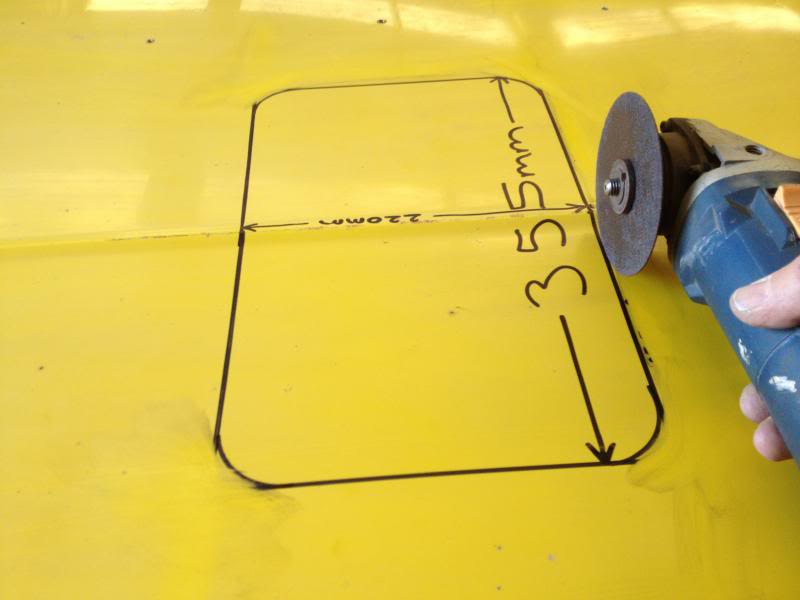
Once we have the rectangle marked on the bonnet I used a lid from a large pressure pack can to trace the corners. This is because the corners of the hole are rounded as per A9X specs.
IMG_0642_zps939fb38b.jpg


IMG_0643_zps9a55b732.jpg


IMG_0644_zps3ba2eb27.jpg


IMG_0645_zps73655c0e.jpg


I cleaned up all the markings once the hole was traced and this is what you should end up with.

IMG_0646_zps82a56677.jpg


IMG_0647_zpsee6337d7.jpg


Now there are a number of ways you can cut the hole but I like to use my trusty angle grinder with a cutting wheel AND A GUARD.

IMG_0648_zpsa5eba7f0.jpg


When you cut through the bonnet skin leave the frame work in place for the time being. TAKE YOUR TIME.

IMG_0649_zpsb571b12a.jpg


IMG_0650_zps18ebc86e.jpg


IMG_0651_zpsf0bacca3.jpg


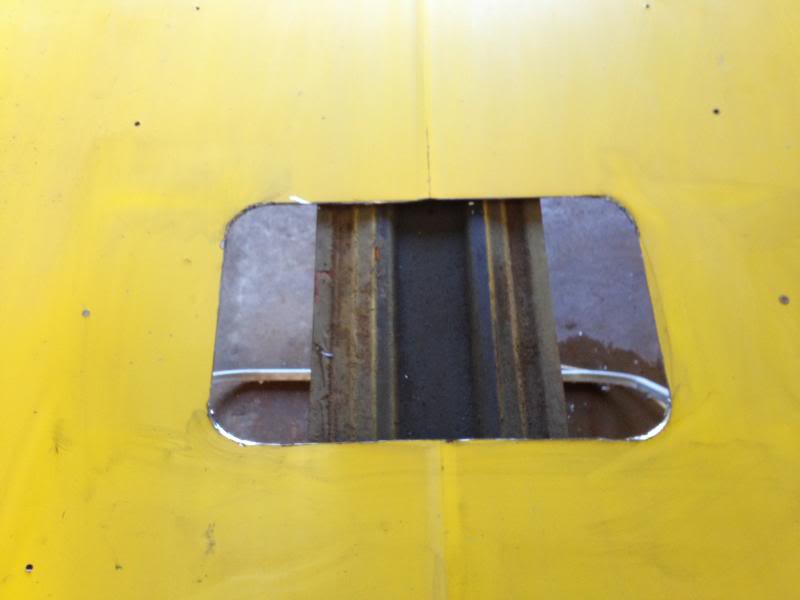
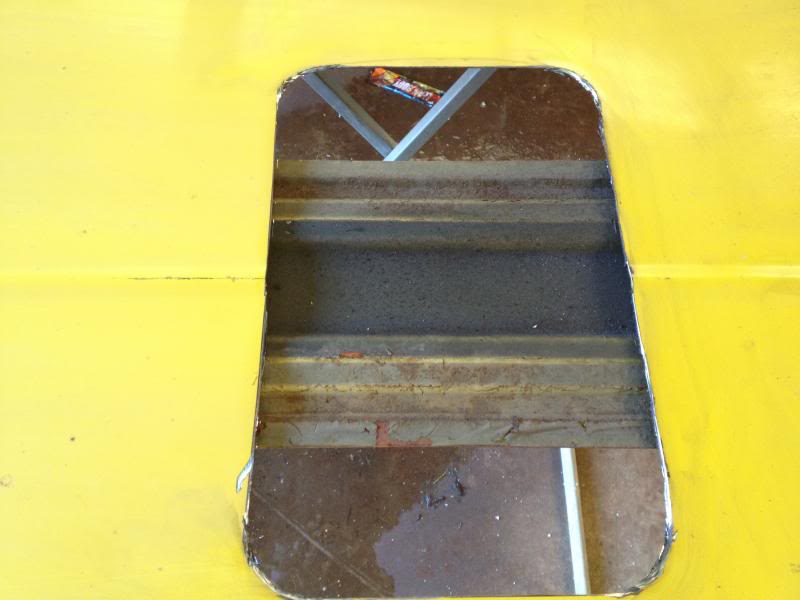
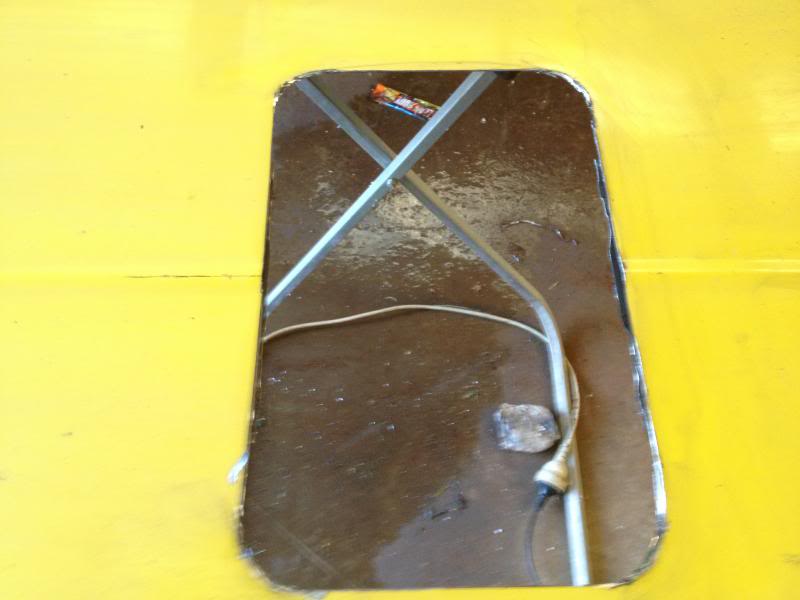
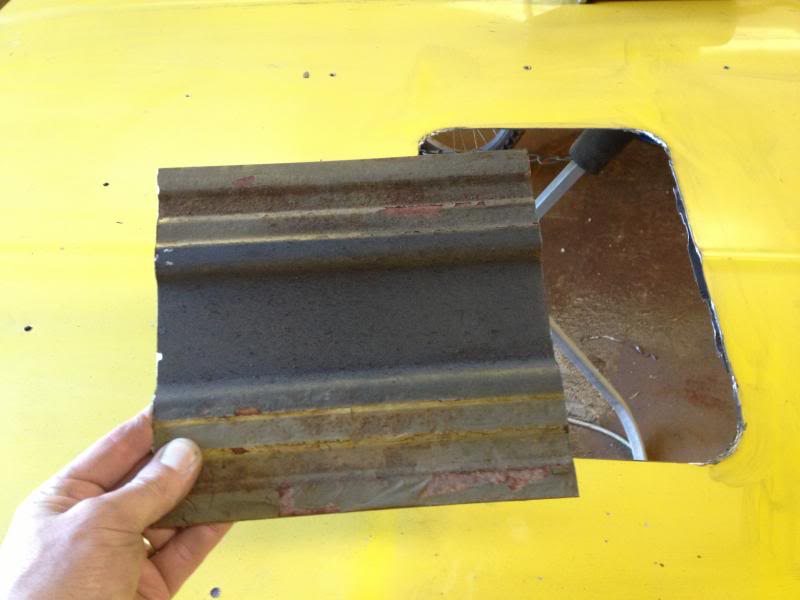
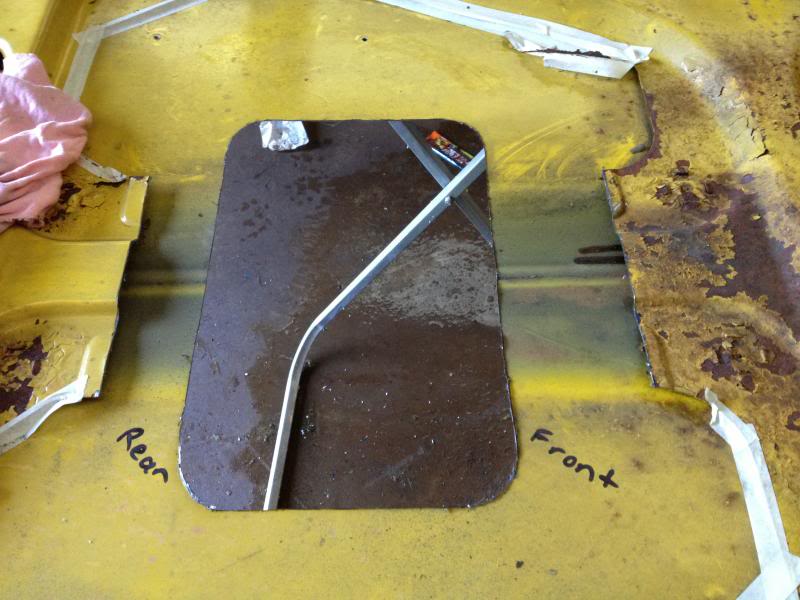
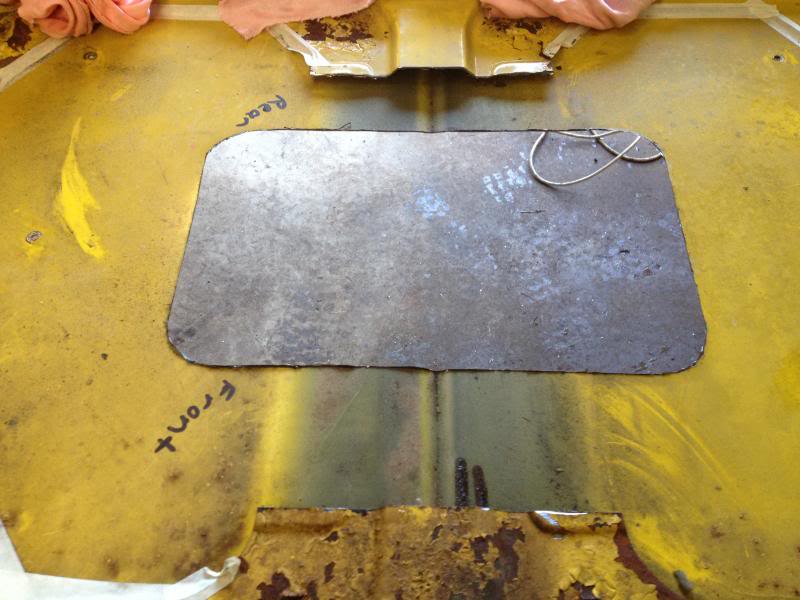
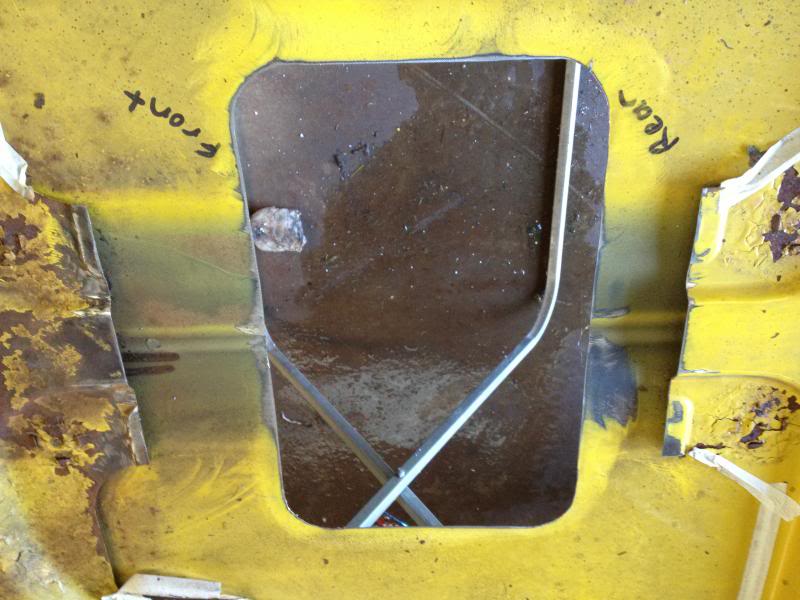
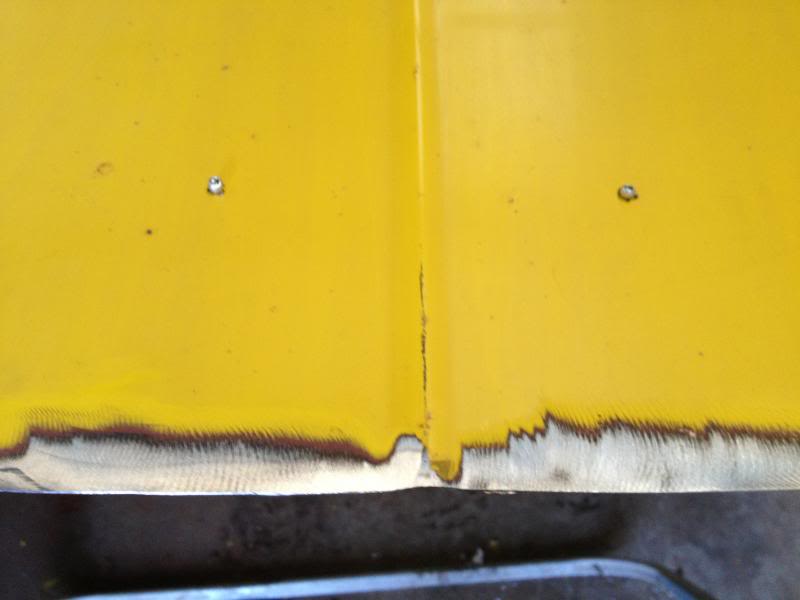
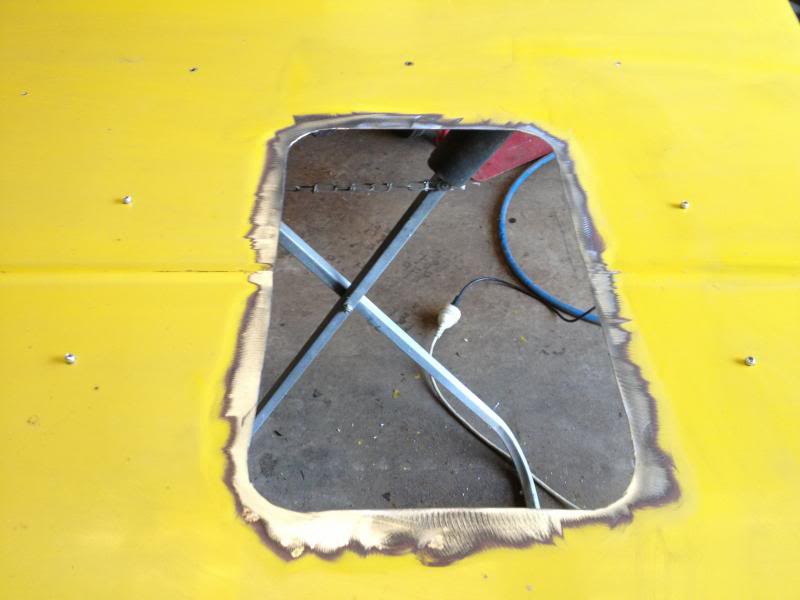
Once the skin is cut away then you can cut the frame away. Cut it along the same edge as the hole.

IMG_0652_zpsf01ebbae.jpg


IMG_0653_zps7f3cb3d0.jpg


IMG_0654_zpsda44a73d.jpg


View of hole from underneath.

IMG_0655_zps58d92d30.jpg


IMG_0656_zps400a75cb.jpg


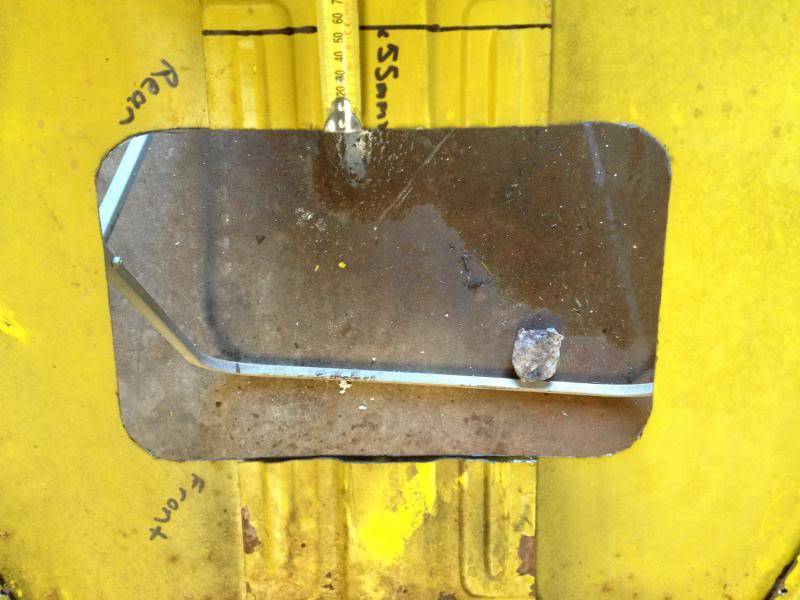
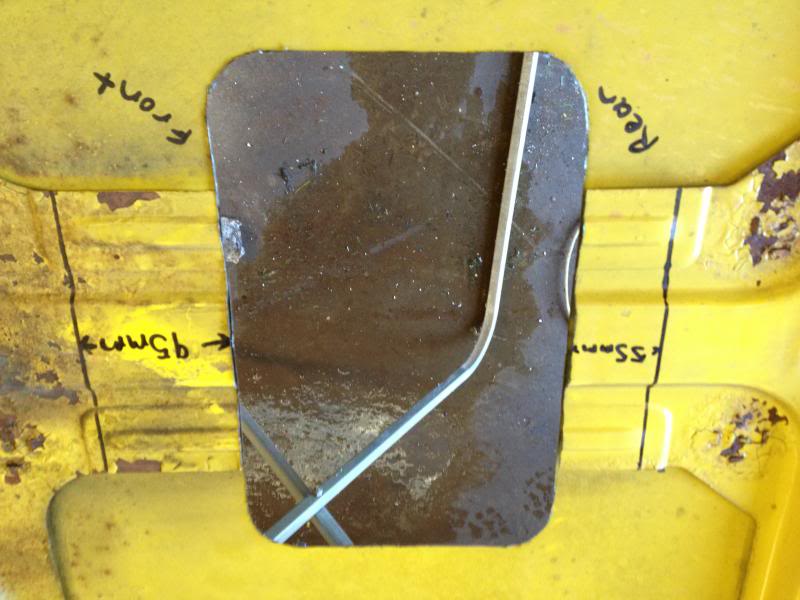
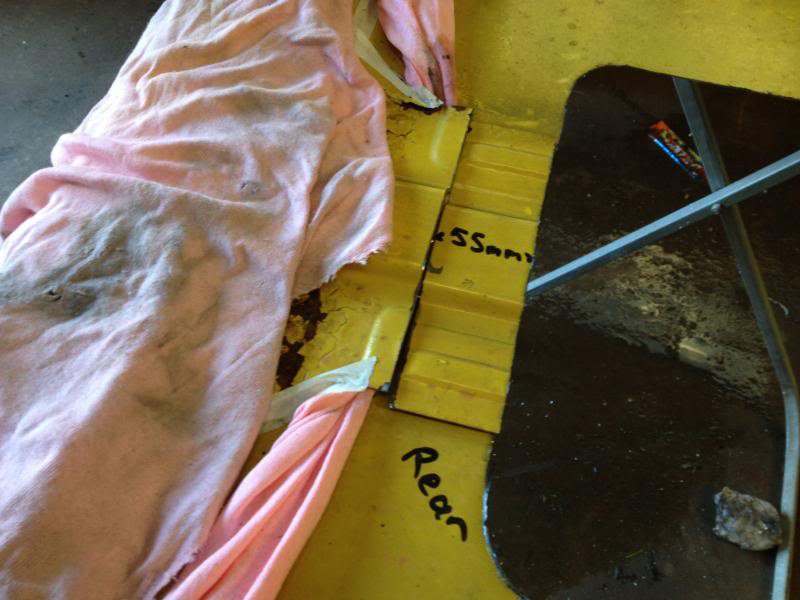
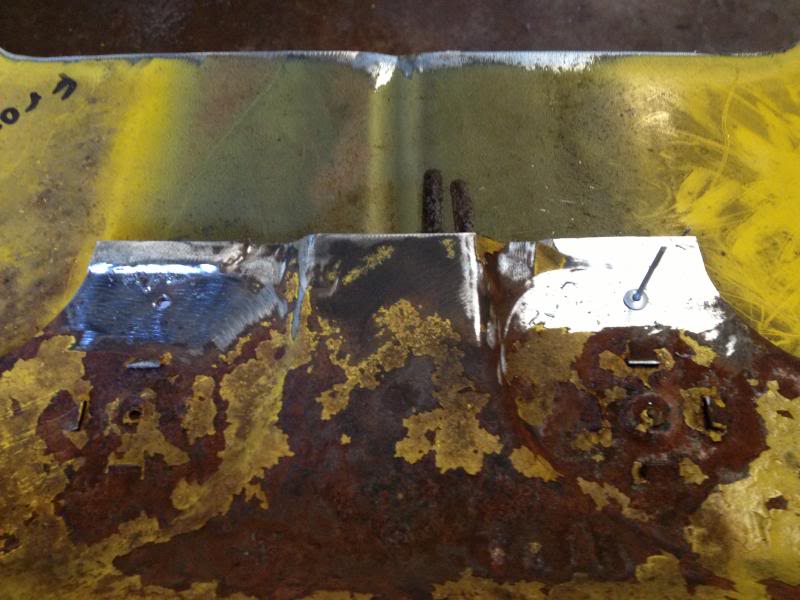
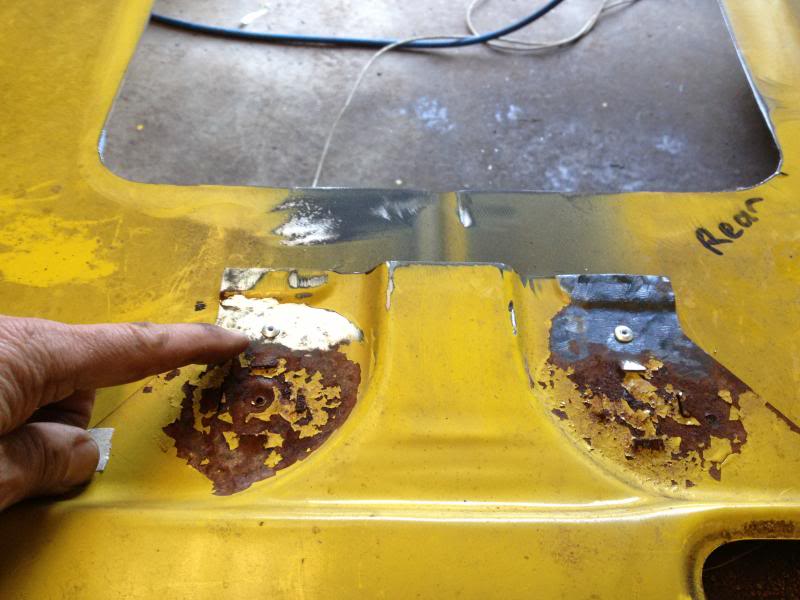
Now the hole is cut we want to trim the inner frame as per the A9X style. The rear frame is cut back 55mm from the edge of the hole.

IMG_0657_zps7380a90d.jpg


The front of the frame is cut back 95mm from the edge of the hole.

IMG_0658_zps1442a0a1.jpg


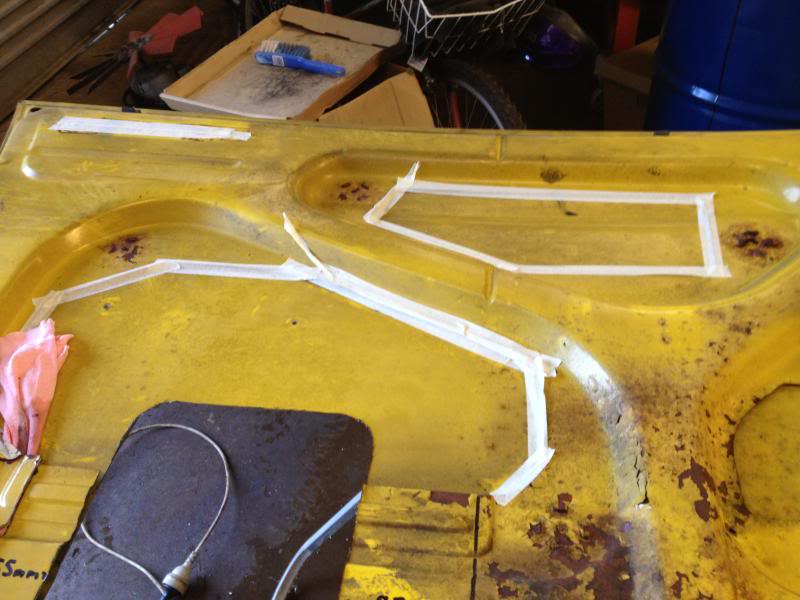
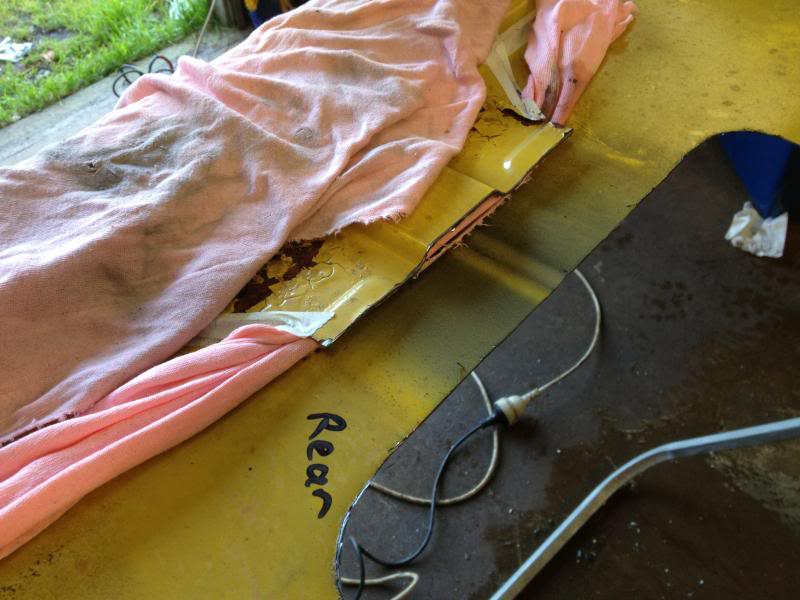
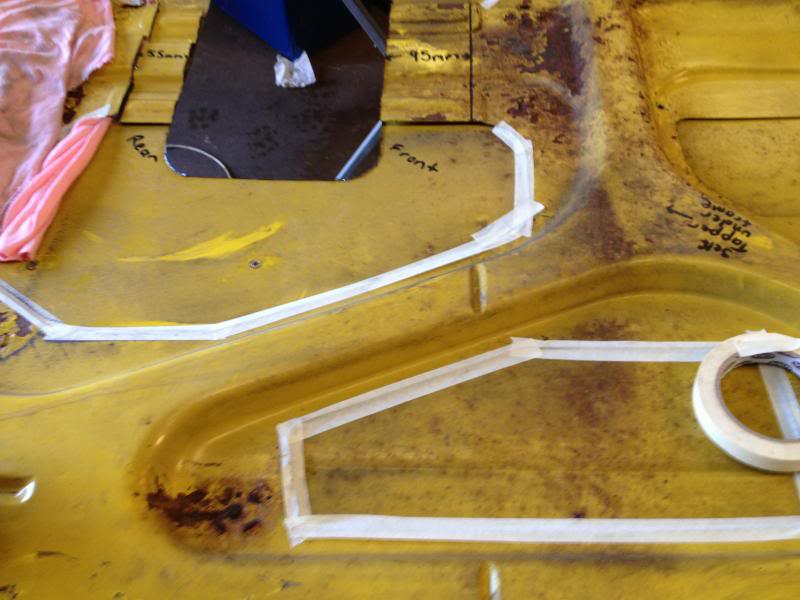
Ok what I like to do before I cut the frame is put tape in the grooves between the bonnet skin and the frame and a rag near where the frame is going to be cut. The reason for this is to stop as much as the grinding sparks and filings from being thrown under the frame which may help cause rust to form at a later date if you don't clean it out properly. 

IMG_0659_zps641ca131.jpg


IMG_0660_zps1c5f46bc.jpg


IMG_0661_zps1f0f3992.jpg


IMG_0662_zps60b578f5.jpg


#3 Ruts

Ruts

    How Fast!?

  • Moderators
  • PipPipPipPipPip
  • 1,118 posts
  • Location:Bargo, NSW
  • Car:Blown A9X replica, Black SS hatchback, LH SLR5000
  • Joined: 23-December 06

Posted 06 July 2013 - 09:16 PM

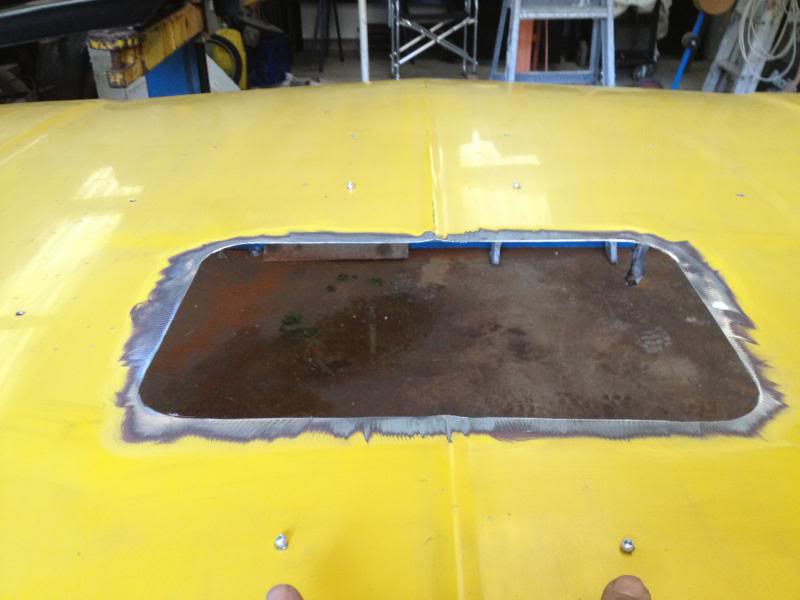
Once all the framework is cut this is what it should look like.

IMG_0663_zps16340adb.jpg


IMG_0664_zps25becb9b.jpg


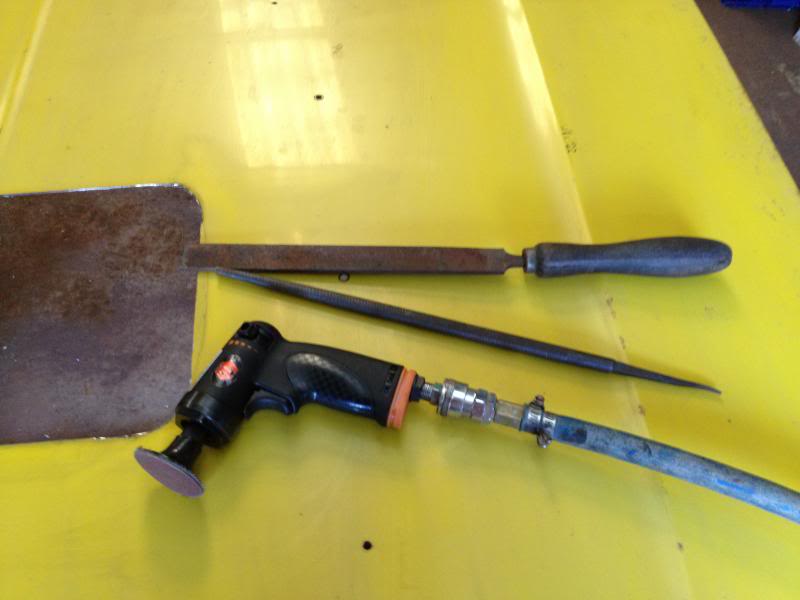
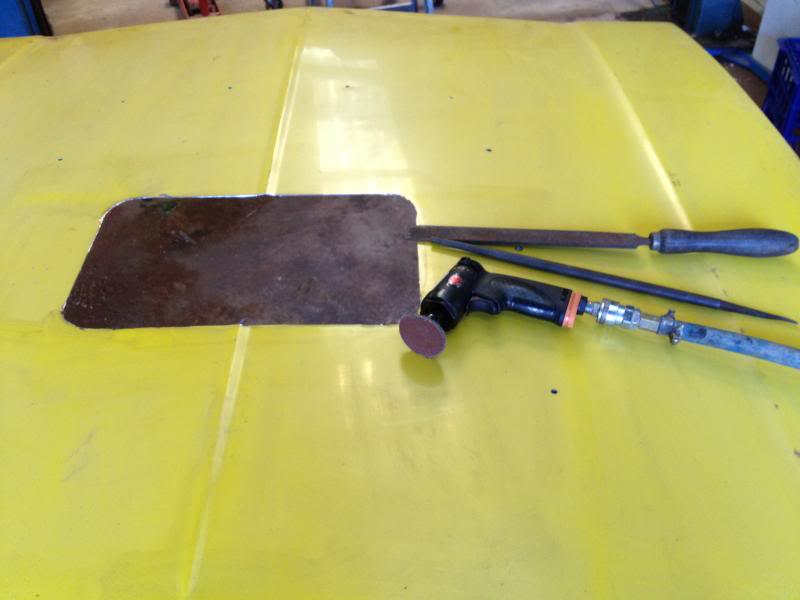
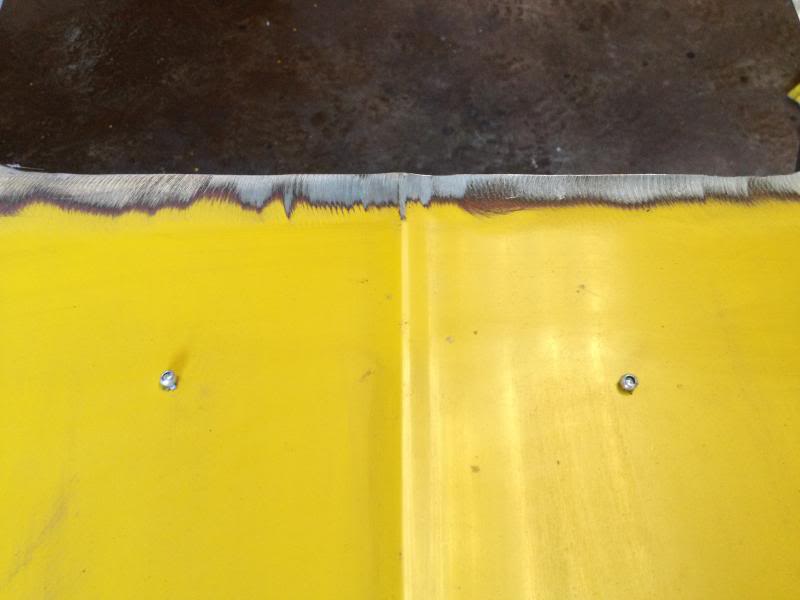
Once the frame was cut I used these tools to clean up the edge of the hole.

IMG_0666_zps2d7cabc2.jpg


IMG_0667_zps21710996.jpg


IMG_0665_zpsacd7548b.jpg


IMG_0668_zps502c18d0.jpg


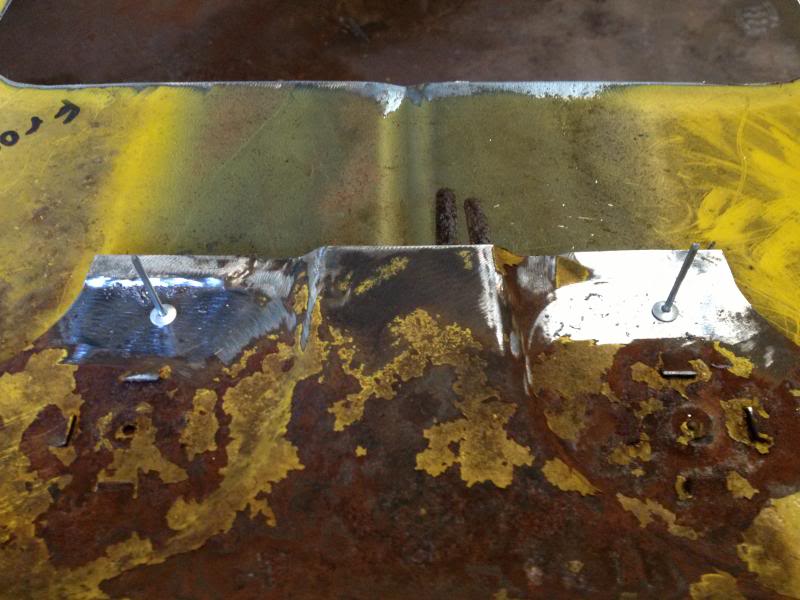
Now what some people might not know is that the A9X had the inner frame popped riveted to the outer skin. I placed the pop rivets in the same spot (well close enough) as per the A9X.

IMG_0669_zps28432737.jpg


IMG_0670_zps20620f09.jpg


IMG_0671_zps6470f7b6.jpg


IMG_0672_zps380f386e.jpg


IMG_0673_zps7212cdfc.jpg


IMG_0674_zps0bbb80a2.jpg


IMG_0675_zps94287c4e.jpg


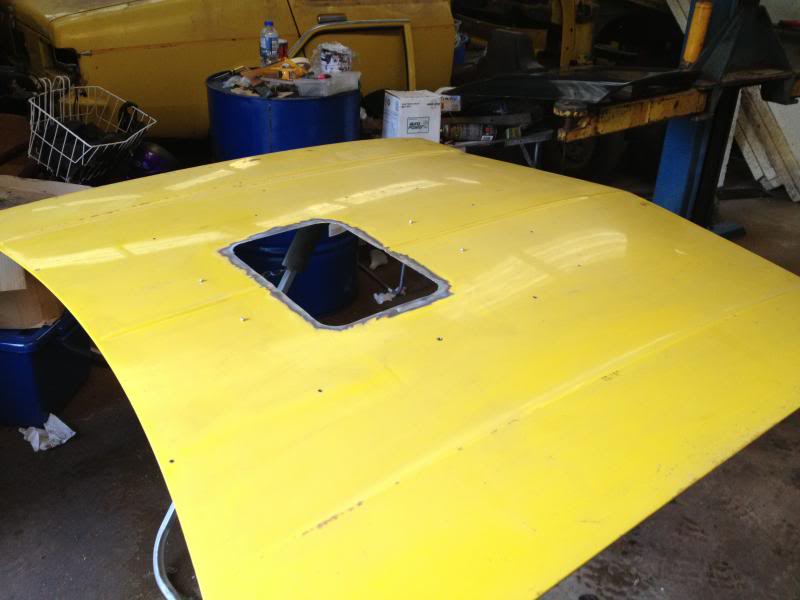
And this is the finished product.

IMG_0676_zps66a18cf3.jpg


IMG_0677_zps09ba9982.jpg


So there you have it, a hole cut in the bonnet as per A9X specs (I hope). If anyone has any questions or needs things clarified then feel free to ask. If anyone has a better idea that what I have done then please let me know as I am always willing to learn more. I want to thank all those for supplying me with the pictures and specs to help piece this thread together including MYSS427 and REDA9X. If my measurements are incorrect then I apologise but this gives you an idea on how's it done.


Ruts 


#4 _SS Hatchback_

_SS Hatchback_
  • Guests

Posted 06 July 2013 - 09:27 PM

Another informative thread , well done Ruts , great instructions and pics as usual


#5 Ice

Ice

    Cool

  • Members
  • PipPipPipPipPipPipPip
  • 15,175 posts
  • Name:Gene
  • Location:Galaxy's away from Ipswich
  • Car:77 HZ Sandman Van
  • Joined: 03-January 07

Posted 07 July 2013 - 01:42 AM

Great work dennis but those pop rivets look woeful there has to be a better way surely

#6 warrenm

warrenm

    Forum Fixture

  • Members
  • PipPipPipPipPip
  • 2,114 posts
  • Location:Central West NSW
  • Car:1972 LJ Torana
  • Joined: 08-November 05
Garage View Garage

Posted 07 July 2013 - 08:00 AM

Great work dennis but those pop rivets look woeful there has to be a better way surely


You could use "Sikaflex" or similar instead of the rivet, but may not look "genuine".


#7 _uctorry_

_uctorry_
  • Guests

Posted 07 July 2013 - 08:53 AM

Another great detailed thread

thanks mate

keep up the great work


#8 a9x868

a9x868

    maurice mead of hatchbacks

  • Members
  • PipPipPipPipPip
  • 1,417 posts
  • Name:facebook dave
  • Location:perth miles n miles from shiney
  • Car:valencia holden torana a9x hatch ultimate improvement on the barbados L34
  • Joined: 24-July 11

Posted 07 July 2013 - 11:21 AM

Great work dennis but those pop rivets look woeful there has to be a better way surely

gene pop rivets were originally used on a9x's
as dennis is doing the thread as per original
that's what you get!
there may well be a better way available now
but i wouldn't have it any other way

#9 _The Baron_

_The Baron_
  • Guests

Posted 07 July 2013 - 01:35 PM

There is a GMH drawing for the hole.


#10 _Skapinad_

_Skapinad_
  • Guests

Posted 07 July 2013 - 03:00 PM

Th rivets wont be seen anyway....

#11 Stinga

Stinga

    .

  • Members
  • PipPipPipPipPip
  • 2,114 posts
  • Name:Stinga
  • Location:Wollongong, NSW
  • Car:HD Holden ute, and sedan, UC torana
  • Joined: 05-December 05

Posted 07 July 2013 - 03:45 PM

good write up Ruts, makes me want to cut a hole in the uc's bonnet  :stirpot:  you would be doing well to see the tail end of the rivet with the scoop on anyway? 


#12 Ruts

Ruts

    How Fast!?

  • Moderators
  • PipPipPipPipPip
  • 1,118 posts
  • Location:Bargo, NSW
  • Car:Blown A9X replica, Black SS hatchback, LH SLR5000
  • Joined: 23-December 06

Posted 07 July 2013 - 06:11 PM

Thanks for all positive comments. I know the pop rivets looks very ordinary but as stated I wanted to do this one as per A9X specs....GENE!!!. I will be doing a bonnet hole in the future which will look a lot better when I do the one for the hatch which will have the blower poking through. 


More threads to follow soon.


Ruts.


#13 _petehol1972_

_petehol1972_
  • Guests

Posted 07 July 2013 - 08:34 PM

Well done ruts.One question when you riveted the bonnet to the support panel did it distort the the bonnet skin at all ? The reason I ask is my bonnet skin seems to be about 10 mm away from the support in places probably due to the old glue that holds the skin to the support has gone brittle and broken.

Cheers Pete.


#14 Ruts

Ruts

    How Fast!?

  • Moderators
  • PipPipPipPipPip
  • 1,118 posts
  • Location:Bargo, NSW
  • Car:Blown A9X replica, Black SS hatchback, LH SLR5000
  • Joined: 23-December 06

Posted 07 July 2013 - 08:54 PM

Your spot on Pete, mine was the same. The bonnet skin was sitting off the frame about 10mm so what I did was get a hacksaw blade and slice the old glue away. It came out as one large piece about as round as a 50 cent piece and about 10mm thick. Once it was gone (2 pieces) the bonnet skin sat against the frame with no gaps. When it was riveted there was NO distortion on the skin.


Ruts


#15 _Waldorf_

_Waldorf_
  • Guests

Posted 07 July 2013 - 09:03 PM

Dennis.....Mum is gonna be really pissed at you,that was her good bonnet you just destroyed


good job m8

#16 Ruts

Ruts

    How Fast!?

  • Moderators
  • PipPipPipPipPip
  • 1,118 posts
  • Location:Bargo, NSW
  • Car:Blown A9X replica, Black SS hatchback, LH SLR5000
  • Joined: 23-December 06

Posted 07 July 2013 - 09:08 PM

Dennis.....Mum is gonna be really pissed at you,that was her good bonnet you just destroyed


good job m8

LOL, don't worry Ian there are another 8 in the shed.


#17 _sting_

_sting_
  • Guests

Posted 08 July 2013 - 08:09 PM

Well done ruts  :spoton: i think this should be pinned what do you guys think.

cheers sting 


#18 _petehol1972_

_petehol1972_
  • Guests

Posted 08 July 2013 - 10:01 PM

Ok Ruts I'll try that.Sounds like the go.

Cheers mate


#19 Clearshield

Clearshield

    Forum Participant

  • Members
  • PipPip
  • 42 posts
  • Name:Jamie
  • Location:Perth
  • Car:Lx ss
  • Joined: 07-August 11
Garage View Garage

Posted 29 July 2013 - 10:46 PM

Good job, the only thing I would do is maybee use Stainless Rivets . They look ally in the pics .

#20 350mick

350mick

    Forum Participant

  • Members
  • PipPip
  • 12 posts
  • Name:Mick
  • Location:Karratha
  • Car:Lx Torana
  • Joined: 25-February 14

Posted 26 February 2014 - 11:52 PM

Very good stuff
Now how do we make it seal so the scoop works as it should

#21 a9x868

a9x868

    maurice mead of hatchbacks

  • Members
  • PipPipPipPipPip
  • 1,417 posts
  • Name:facebook dave
  • Location:perth miles n miles from shiney
  • Car:valencia holden torana a9x hatch ultimate improvement on the barbados L34
  • Joined: 24-July 11

Posted 27 February 2014 - 12:36 AM

Very good stuff
Now how do we make it seal so the scoop works as it should

mick one option here
a honda thermo fan shroud inside an original aircleaner base
did i say honda?
centre cut out correct diameter to fit inside orig aircleaner base
some cut outs for snorkel entry and left rear rocker cover breather
correct angle for forward sloping bonnet on an LX
does not interfere with any of the original anti pollution bullshite in my case
aluminium frame around the outside to retain the high density foam seal
easily changed over to factory aircleaner element and top cover
sucks through the top of the carby like a bitch
awesome sound on the induction with the secondaries open
i run a taller K&N filter top and bottem
and carry the factory aircleaner and top with me if i need it
as i must keep up appearances being an A9Xhatch
changed over to stock in 2 mins
everyone who has seen mine has been amazed by it's simplicity!
my design and i love it!
cheers
davemc

Edited by a9x868, 27 February 2014 - 12:45 AM.


#22 a9x868

a9x868

    maurice mead of hatchbacks

  • Members
  • PipPipPipPipPip
  • 1,417 posts
  • Name:facebook dave
  • Location:perth miles n miles from shiney
  • Car:valencia holden torana a9x hatch ultimate improvement on the barbados L34
  • Joined: 24-July 11

Posted 27 February 2014 - 12:40 AM

Attached File  Photo0045.jpg   212.77K   33 downloadspic

since this pic is old!

right hand rocker cover corrected
not a commodore one

washer bottle cap correct now

new pcv valve to carby hose fitted

but!
still a work in progress

cheers
davemc

Edited by a9x868, 27 February 2014 - 12:54 AM.


#23 _j.e.d._

_j.e.d._
  • Guests

Posted 27 February 2014 - 06:45 AM

That's a bloody awesome idea Dave - thanks for sharing!  :spoton:


#24 a9x868

a9x868

    maurice mead of hatchbacks

  • Members
  • PipPipPipPipPip
  • 1,417 posts
  • Name:facebook dave
  • Location:perth miles n miles from shiney
  • Car:valencia holden torana a9x hatch ultimate improvement on the barbados L34
  • Joined: 24-July 11

Posted 28 February 2014 - 08:43 PM

That's a bloody awesome idea Dave - thanks for sharing!  :spoton:

your welcome jase

#25 _lxsnatch_

_lxsnatch_
  • Guests

Posted 11 April 2020 - 01:34 PM

will this pass license inspection ? 


im in Wa


2 user(s) are reading this topic

0 members, 2 guests, 0 anonymous users