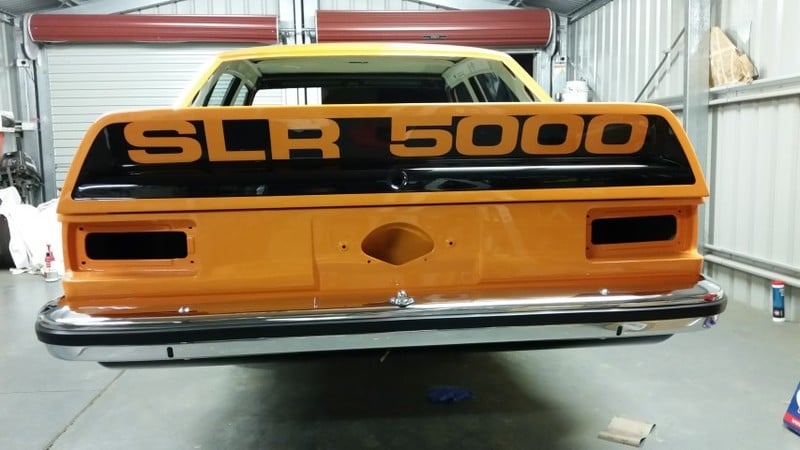
Awesome build AL, top notch effort the paint sure went on well and the stencils look great.
Rusty Lx 4 door rebuild.
#176
 _AD_75_
Posted 02 April 2015 - 09:58 PM
#177

Posted 03 April 2015 - 12:16 PM
#178
 _Tucks123_
Posted 05 May 2015 - 12:00 PM
This thread is great and it inspires me to keep working on mine. Great colour and fantastic attention to detail. looking forward to more posts.
#179

Posted 08 May 2015 - 09:50 PM
OkiDoki....been away from here for a while so I thought it might be time for another update on Rusty the Torana.
Been working on Rusty every weekend and Im slowly making progress and I mean slowly lol......so heres some pics of what Ive been up to.
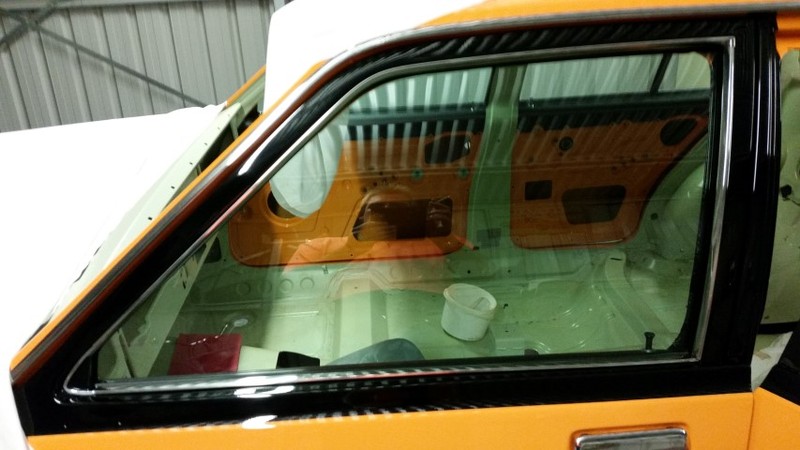
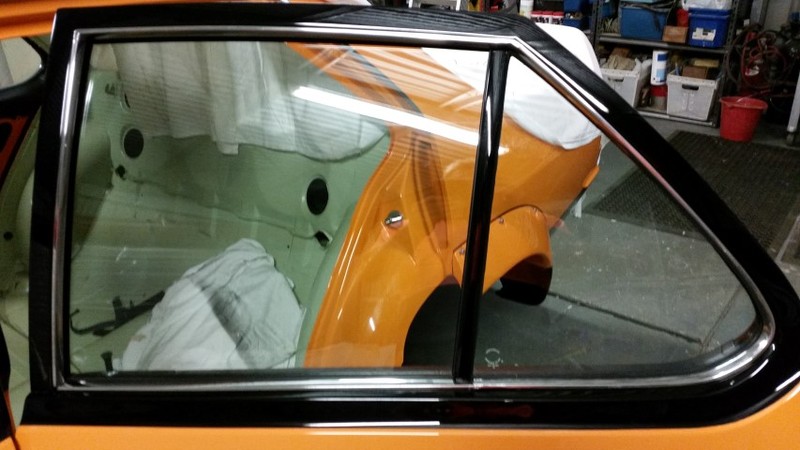
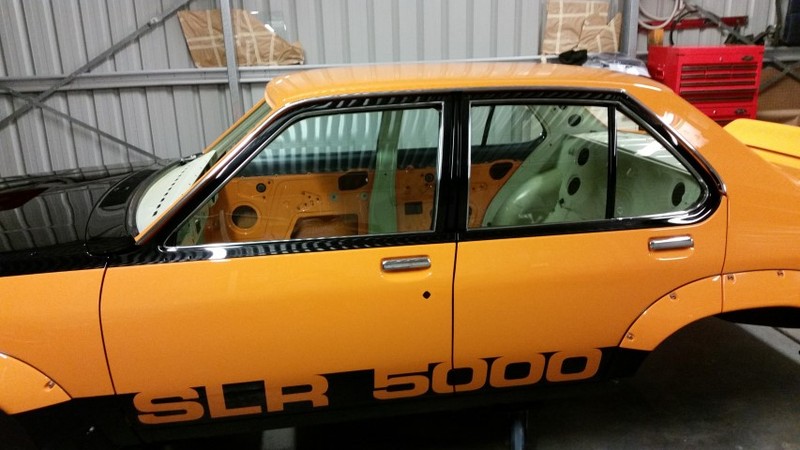
Finally got the new side glass and internals installed in the doors. Bought the new glass from Classic Glass in Queensland.....tinted and fits perfect.
Also installed all the side stainless and gutter trim.....used the rivet type clips for this....but easy to do
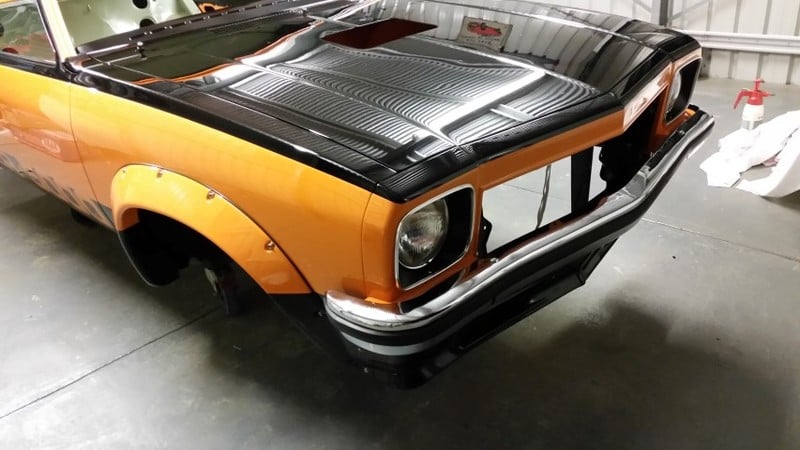
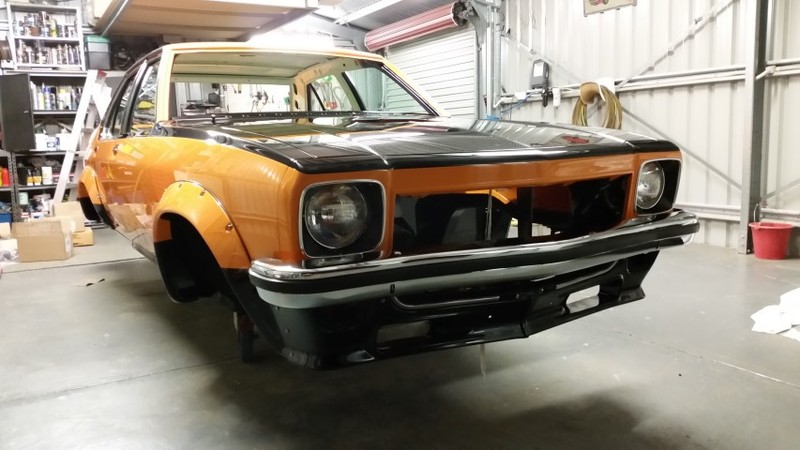
Ok next bumpers and headlights
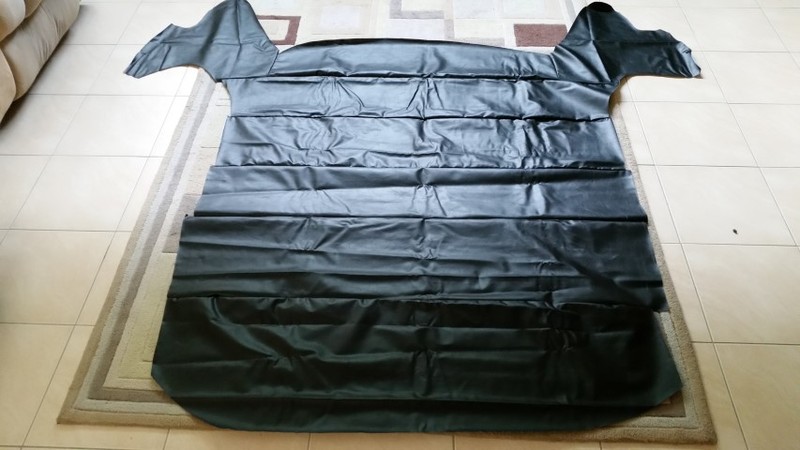
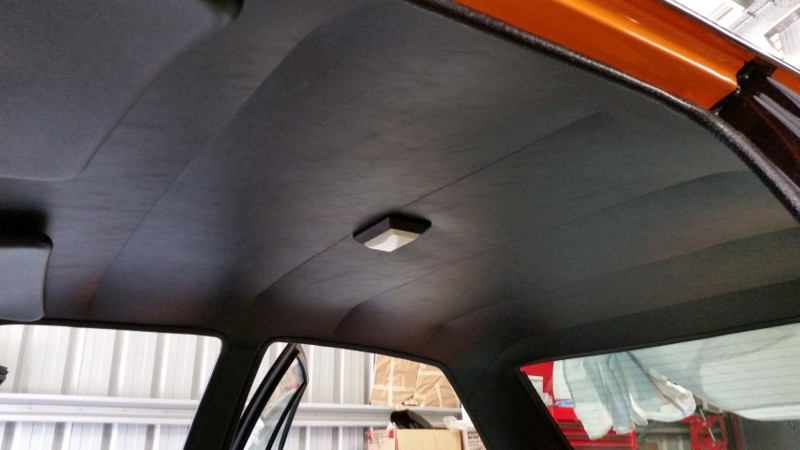
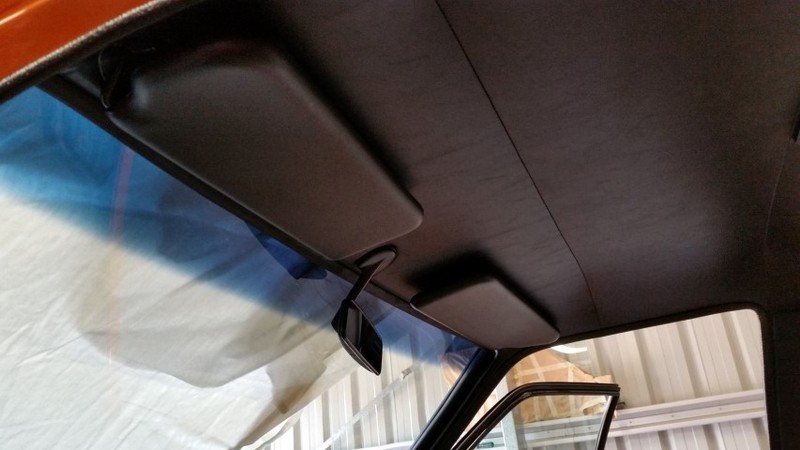
Then onto the interior.....starting with the head lining.....bought that from Boomfunk......looks nasty but is actually perfect.
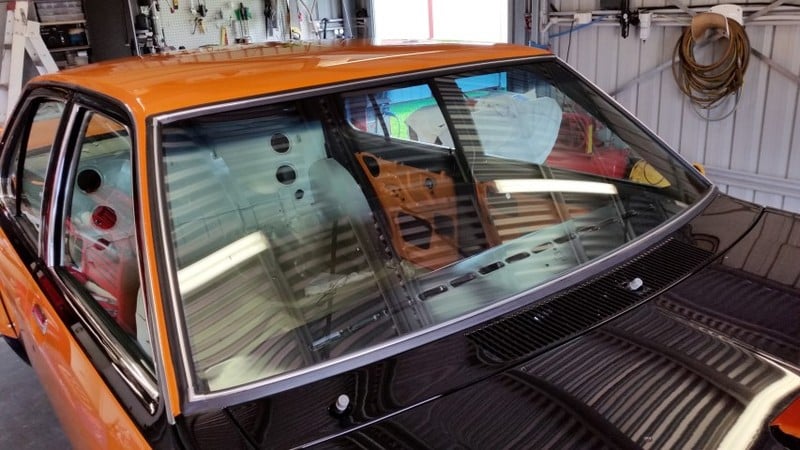
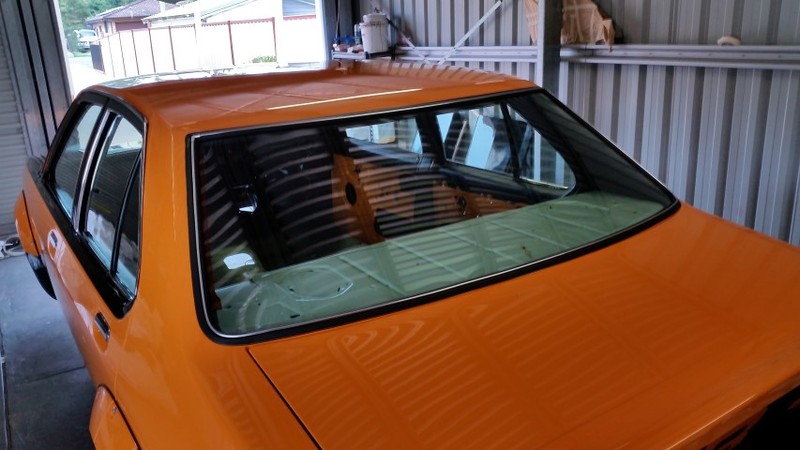
Front and rear screens are in.......mylar strip inserted with all the usual problems....but got it sorted
Thanks to Graham Price (Lx5008) for the rear screen....its perfect.
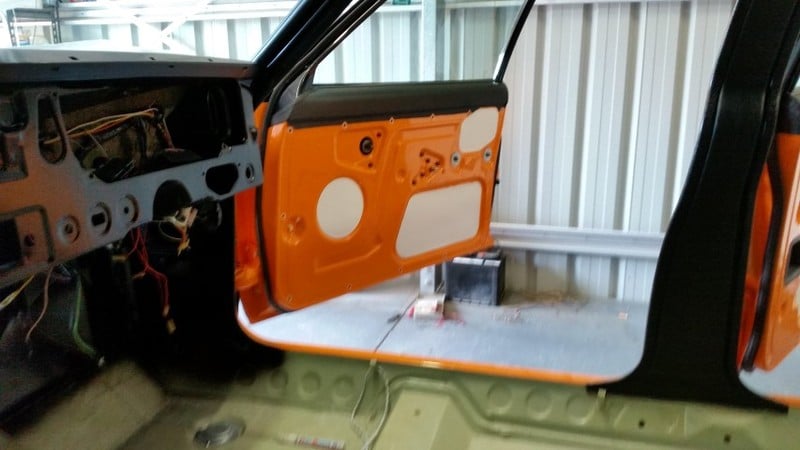
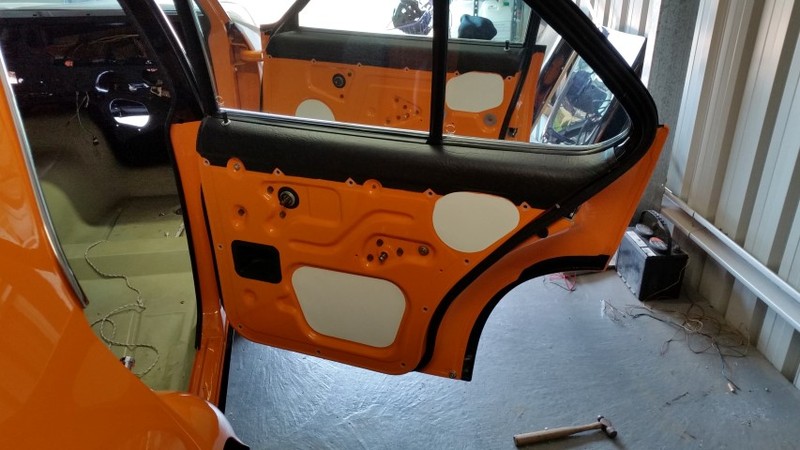
Made up some dust covers for the internal doors and sealed them up with butyl mastic
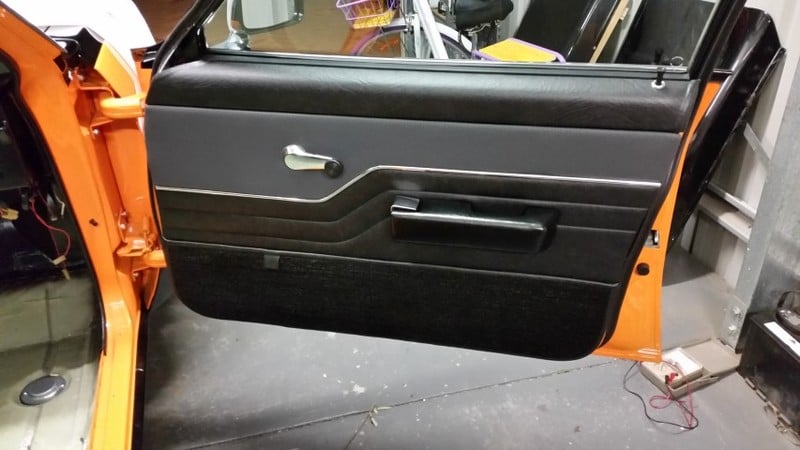
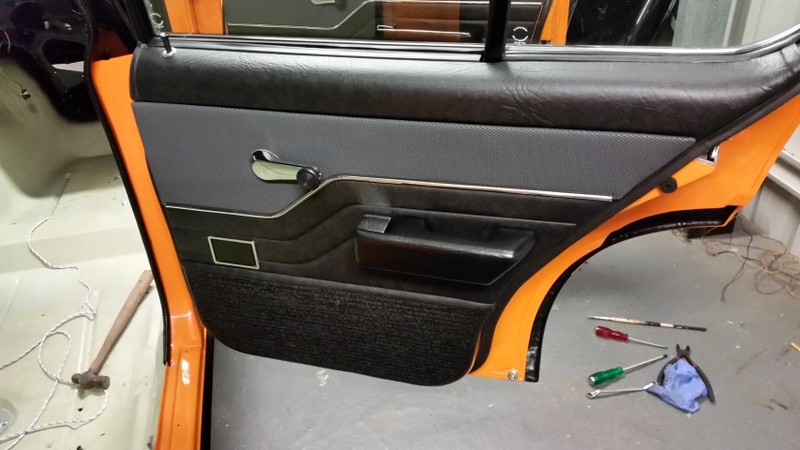
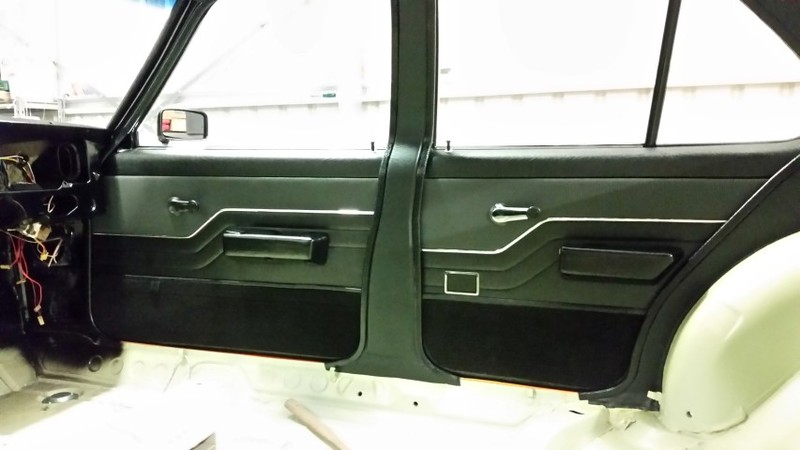
Got the door trims on
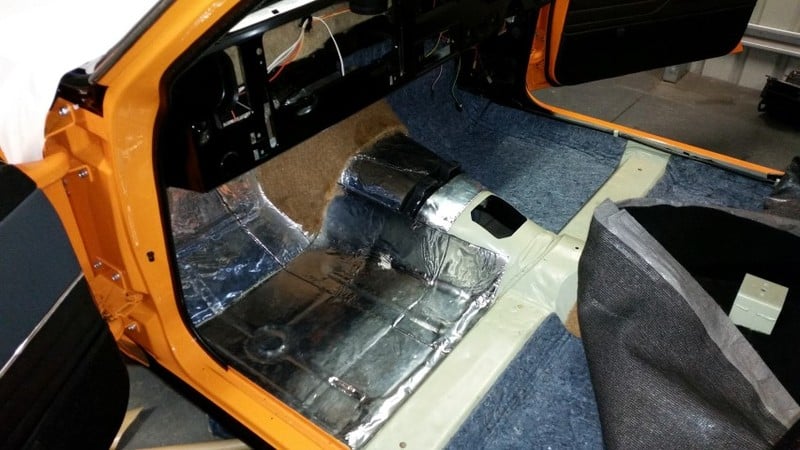
sound deadened the floor ready for carpets
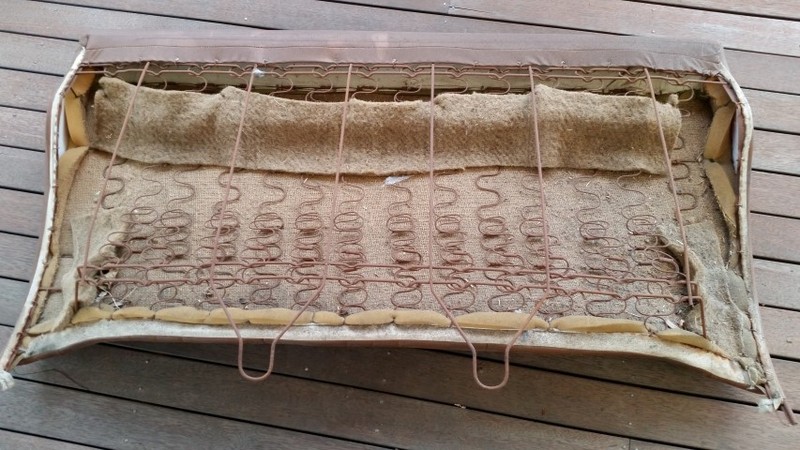
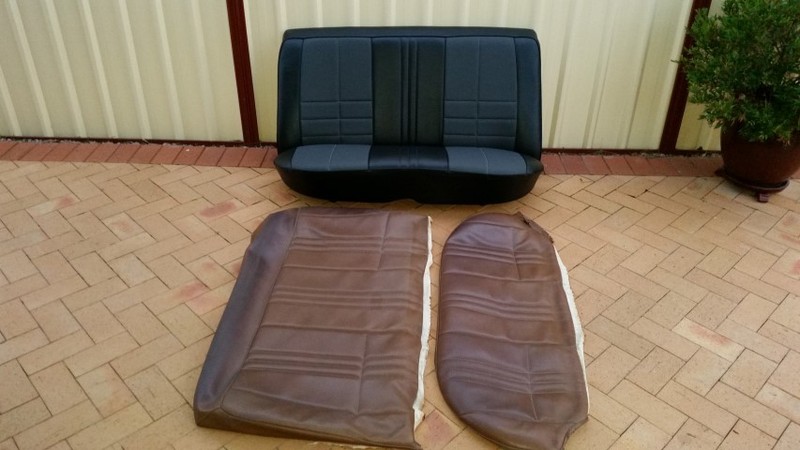
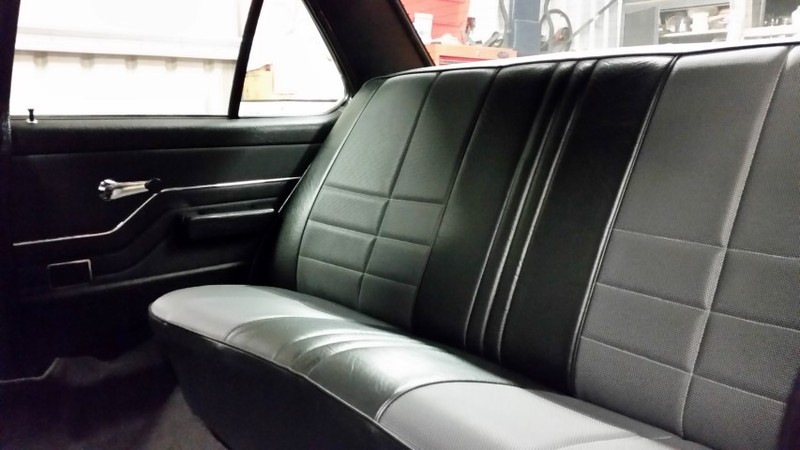
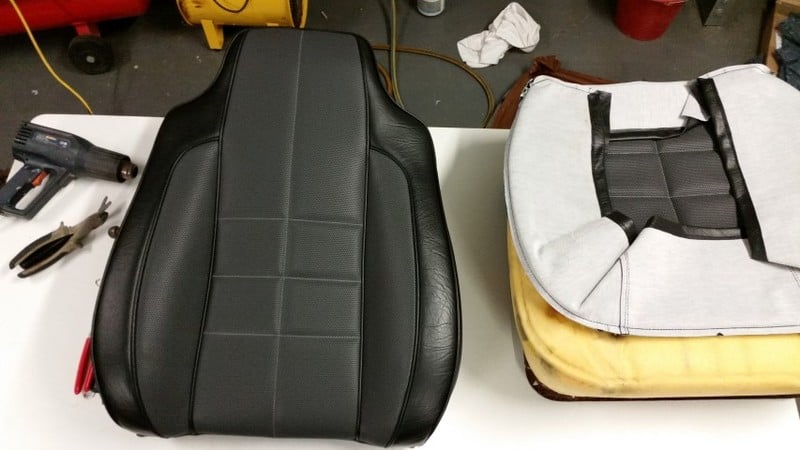
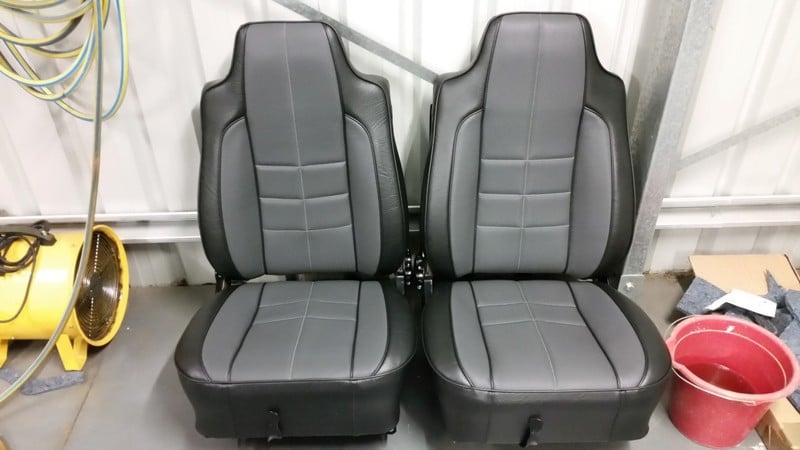
Got started on the seat upholstery
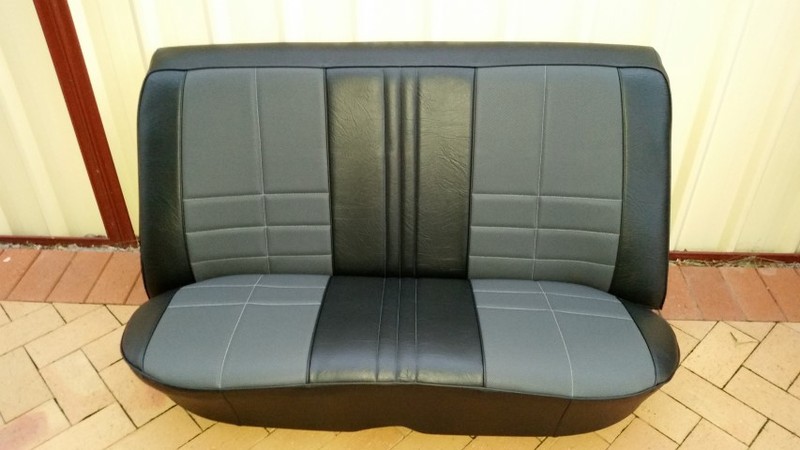
Back seat done and in the car.....Nice!!!
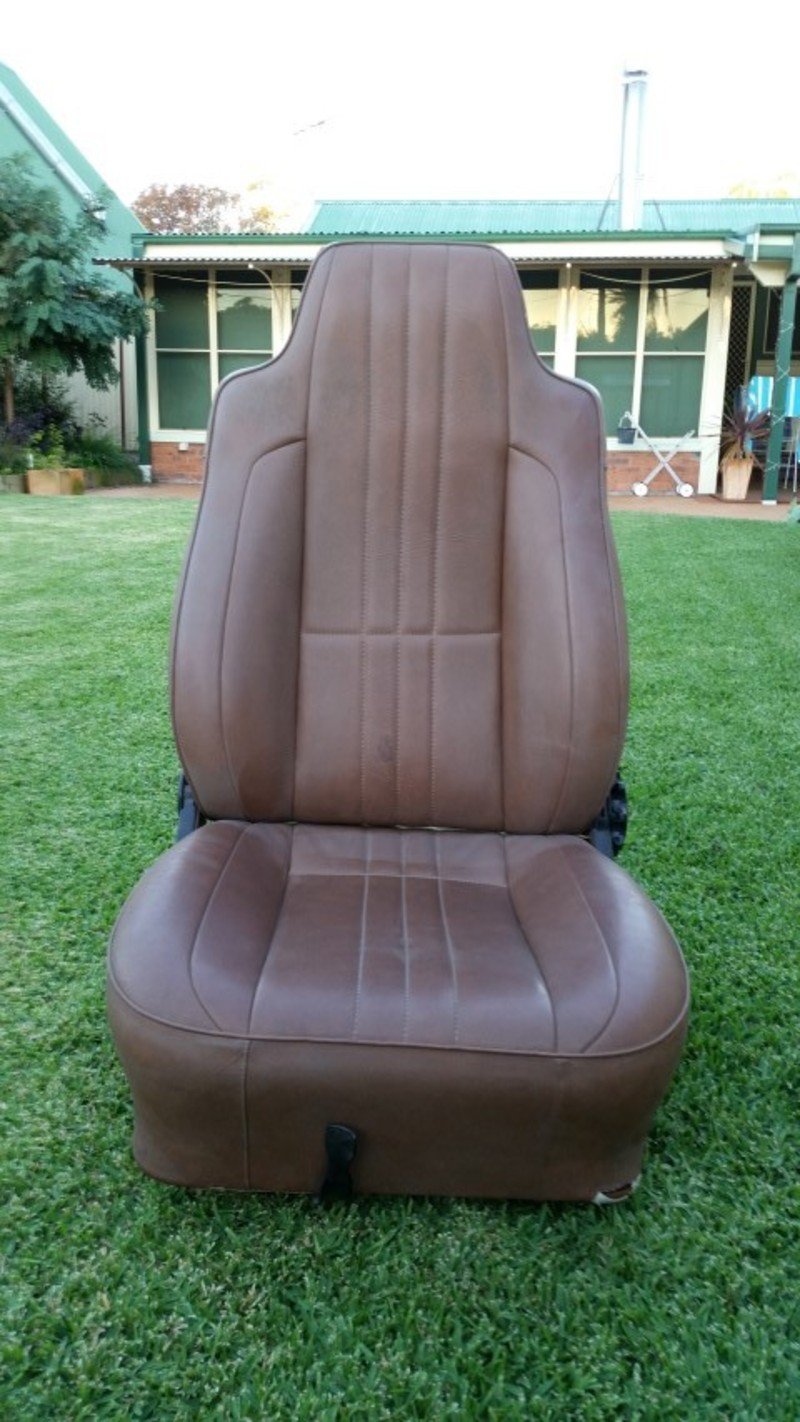
Started on the front seats......my seats where in pretty good shape to start with so all should go well.
Got one seat back done during the week....hitting the rest on the weekend
Ok thats it for now.....enjoy
Al
#180

Posted 08 May 2015 - 10:15 PM
That's a hell of an update Al, makes mine below look a bit ordinary. Is there anything you can't do..? :-)
Everything looks perfect. What did you use on the floor there - the foil doesn't look like Dynamat? And I haven't seen anyone re-seal up the doors like that before, whats the purpose of that? I was just going to leave mine open...
I like how you made the roof lining look easy... Was it?
Edited by SmacT, 08 May 2015 - 10:21 PM.
#181

Posted 08 May 2015 - 10:34 PM
Hey Sam....you have to seal the doors from the inside mate to stop the splash from water drops that pass the window seal belts and to stop dust migration into the car.
They were sealed from factory......i used a similar material as original that is waterproof but most people just use plastic.
No its not Dynamat....to expensive for me......it is aluminium covered butyl mastic sheets with peel off sticky backs....pretty thick and works excellent.....I know a car sound guy and he reckons its much of a muchness....he uses this unless a customer demands Dynamat......completely took the drum effect out of the floor and Im very happy with it.
Roof lining wasnt to hard....done it by myself in about 5 hours from start to finish.......the lining was cut with a lot of extra material around the edges so stretching it to shape was relatively easy if you take your time and think about it.
#182

Posted 08 May 2015 - 11:11 PM
#183
 _barty_
Posted 11 May 2015 - 04:50 PM
What an absolutely amazing job. Rusty sure is a beauty you make me feel like an amateur Ha Ha ![]() well done she is a credit to ya
well done she is a credit to ya
#184

Posted 11 May 2015 - 06:05 PM
Nice work as usual & you have set a very high standard
Az
#185
 _Keiron_
Posted 11 May 2015 - 06:41 PM
Love your work mate.
Love your spray booth idea,I have 2 and a half booths stacked up in the shed that I rent but no point putting them up in a rental shed........ But im tempted to run with your little temp booth set up.
Your paint job looks the goods
Did you cut and buff it by chance or is she strait off the gun?
#186

Posted 11 May 2015 - 06:47 PM
What an absolutely amazing job. Rusty sure is a beauty you make me feel like an amateur Ha Ha
well done she is a credit to ya
Thanks Paul.......been a long slow slogg thats for sure....welcome to the forum......no amateurs here...we are all professional Torana lovers.
Absolutely stunning AL, who did you use for the seat covers....they fit perfectly not even a ripple
Nice work as usual & you have set a very high standard
Az
Hi Aaron....thanks for the comments.....the seat covers I bought from Auto Reproduction Trim In Melbourne but I just Googled them and they seem to be no more or they have changed their name......I bought them in 2011 and have been in storage for years.......I collect what I need for my project way in advance...project management lol
#187

Posted 11 May 2015 - 06:55 PM
Love your work mate.
Love your spray booth idea,I have 2 and a half booths stacked up in the shed that I rent but no point putting them up in a rental shed........ But im tempted to run with your little temp booth set up.
Your paint job looks the goods
Did you cut and buff it by chance or is she strait off the gun?
Hi Keiron..... Its been cut and buffed now since its been a while since it was painted but if you go back through my thread you will see pics and videos of every stage.....all the pics and videos of the panels in the booth are straight off the gun.....I got a really good finish in that home made booth....very happy.
#188

Posted 16 August 2015 - 09:13 PM
#189

Posted 17 August 2015 - 03:41 PM
^^Yeah Al, I need some motivation! Totally lost it.
#190

Posted 18 August 2015 - 01:18 PM
Gonna do a step by step reco of a banjo lsd showing all the internal stuff associated with these diffs as theres not much on here about them.
Update coming soon....lots to catch up on.
Thanks for taking an interest.
Cheers
Al
#191

Posted 22 August 2015 - 10:16 PM
Oki doki......finally found some time to update this thread....so here I go.
Finally finished the front seats without any problems......all went well and look good
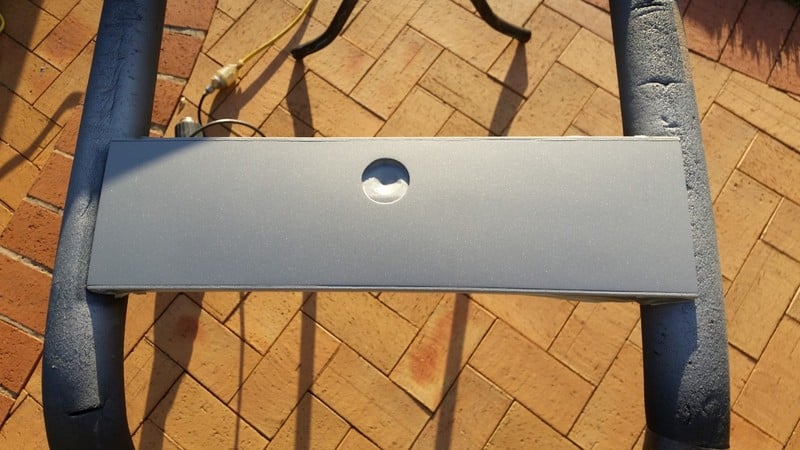
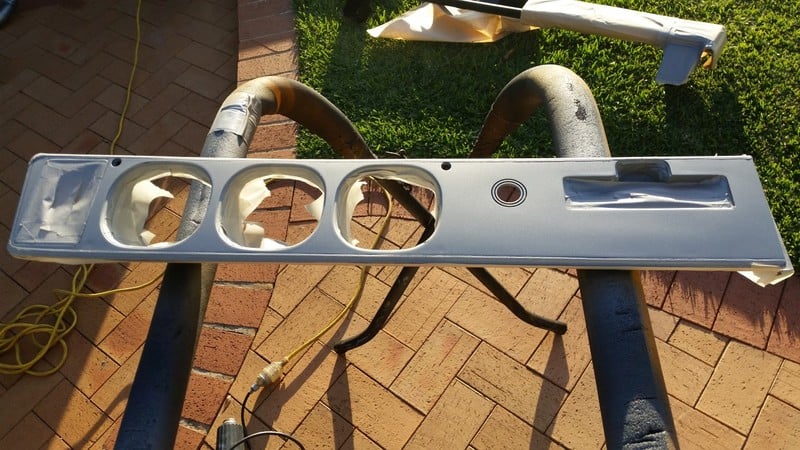
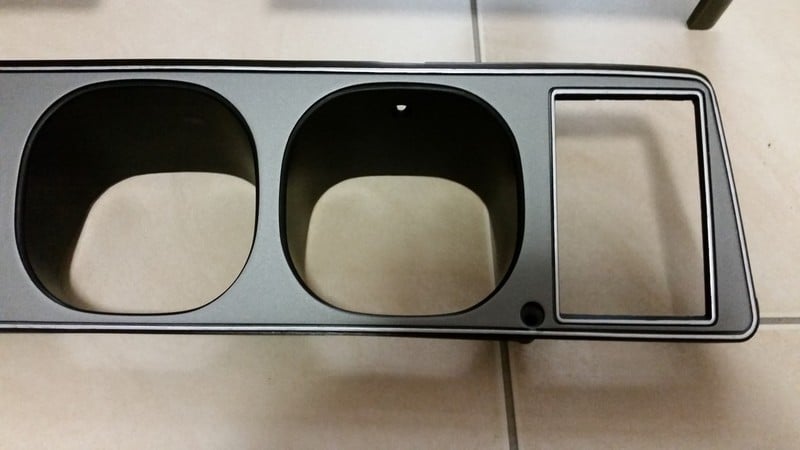
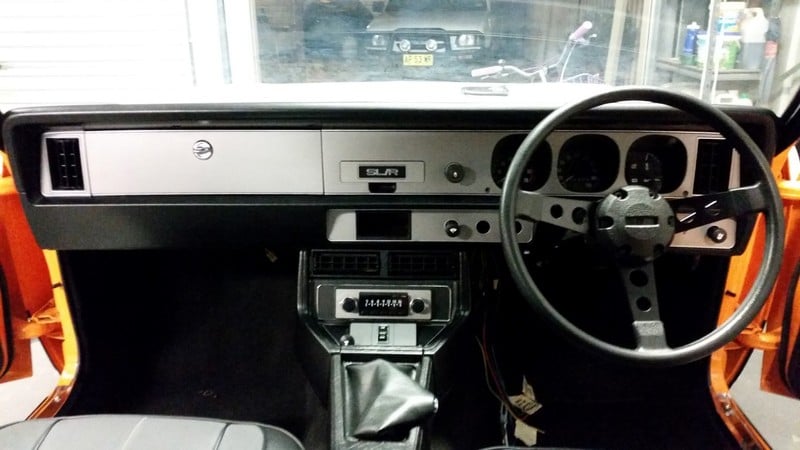
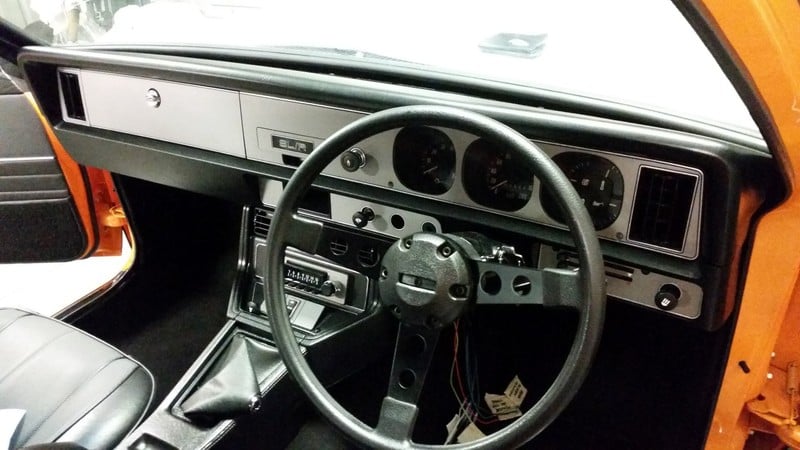
Next I started on recoing the dash facia......was wood grain so I changed it to portland grey.
Taping it up was a bit of a pain but worked out well
Done the silver edging with a paint pen.....happy but what a tedious job
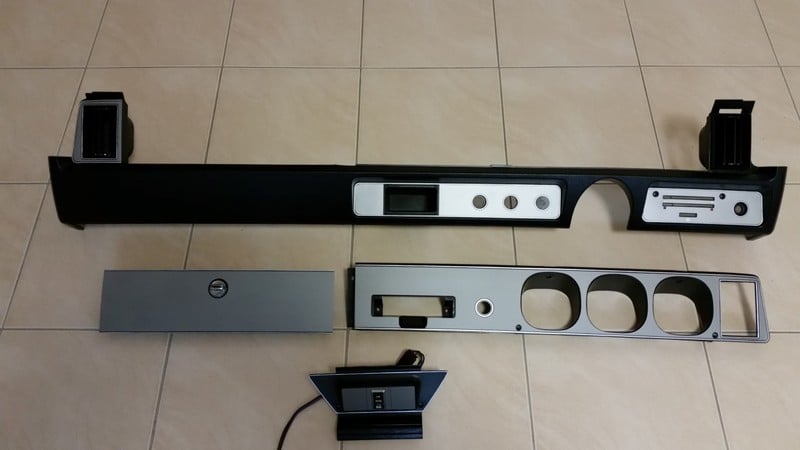
Sprayed the rest of the facia panels with 2k satin black and all looks very nice.
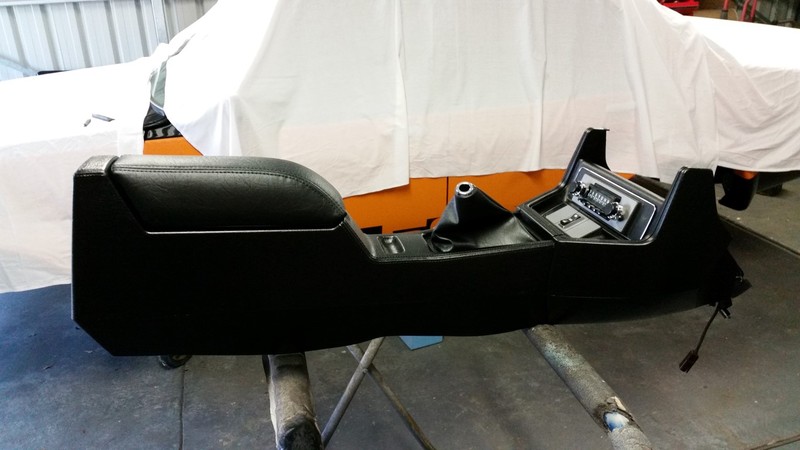
Ok with all that done it was time to hit the center console....same treatment as above
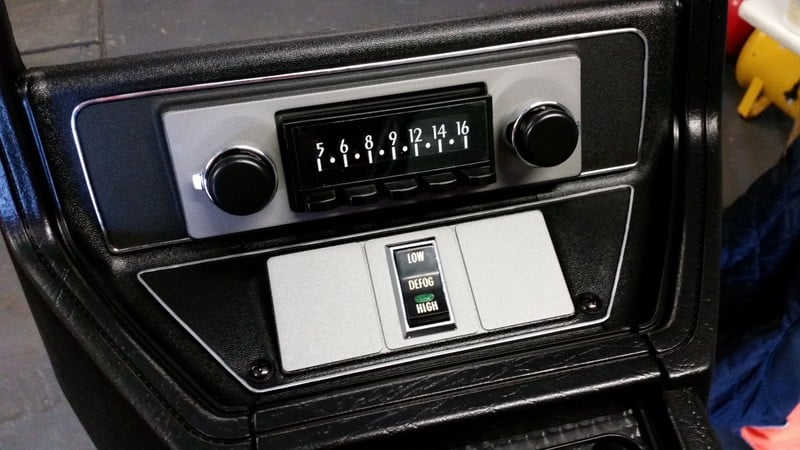
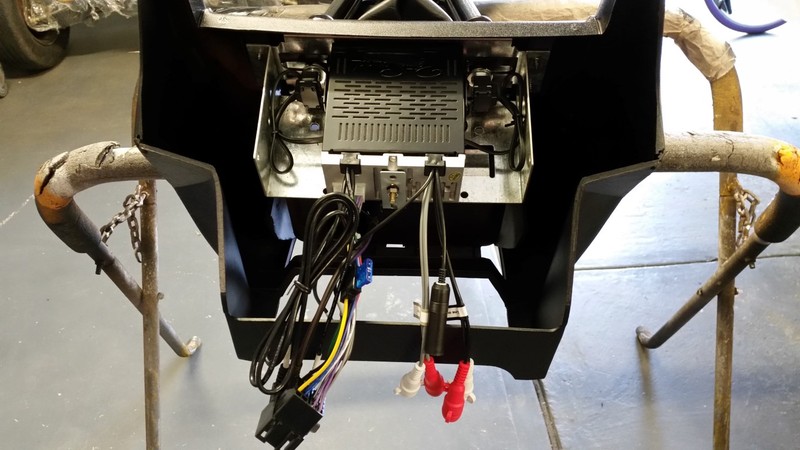
Installed my new Retro Sound Stereo......nice fit into original position and used original radio bracket as well....perfect
Ok all installed and looking smick....everything lined up well and colour match was very good.
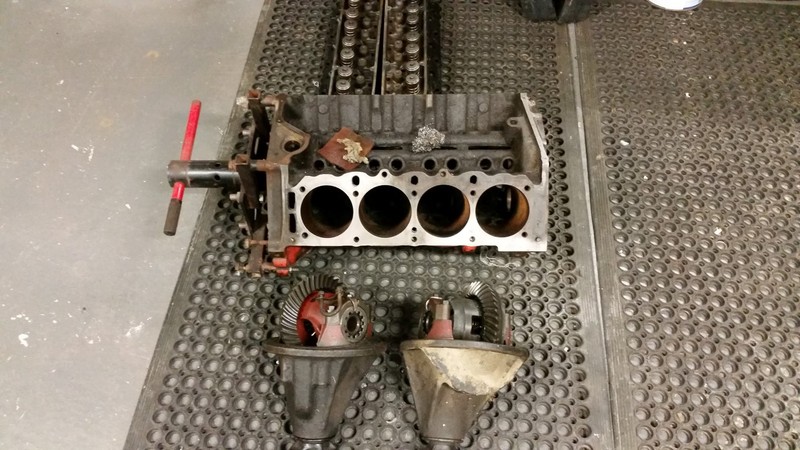
Currently working on the engine and driveline so it was time to drag all the bits out and see what what Ive got.
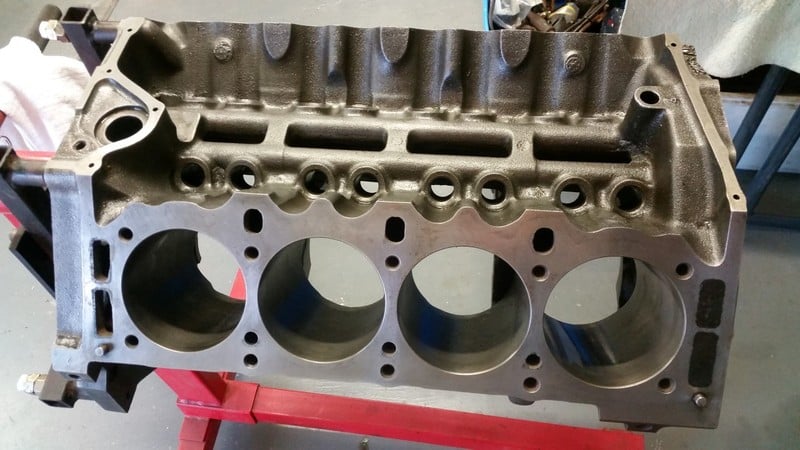
The block in the pic was no good as it has a crack across the back of the gearbox mounting face near the alignment dowels.
Scrapped it and bought a 304 VN block in perfect virgin condition. No pic of this yet
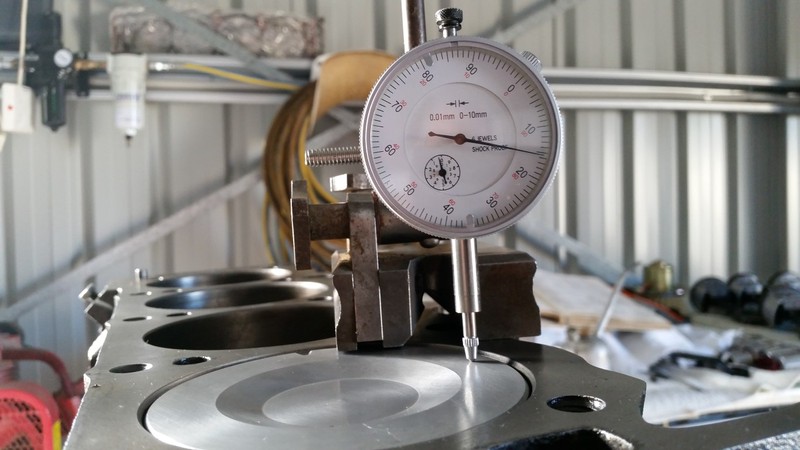
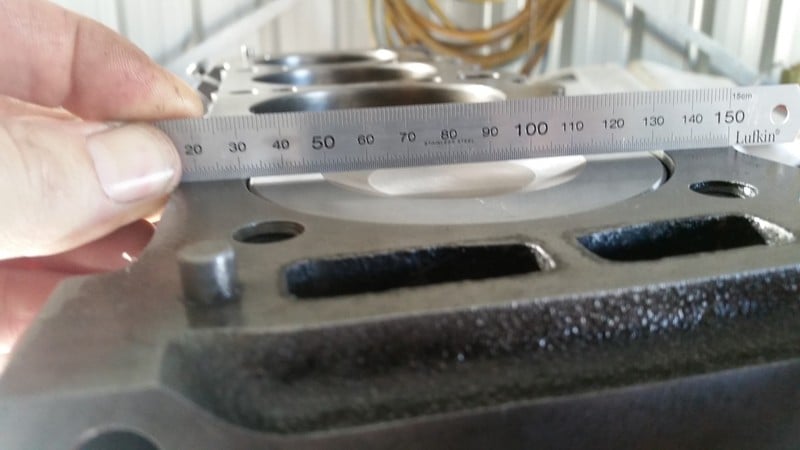
Checking out the compression height of the original pistons in the VN block.....a lot of info on here suggested that on a VN 5.0L the pistons are at deck height....well I can assure you that this is not correct....if you read the dial indicator backwards from zero you will see that the pistons are 0.85mm below deck or 33 thou......this engine has never been disassembled.
So plenty to play with if I up the compression a bit.
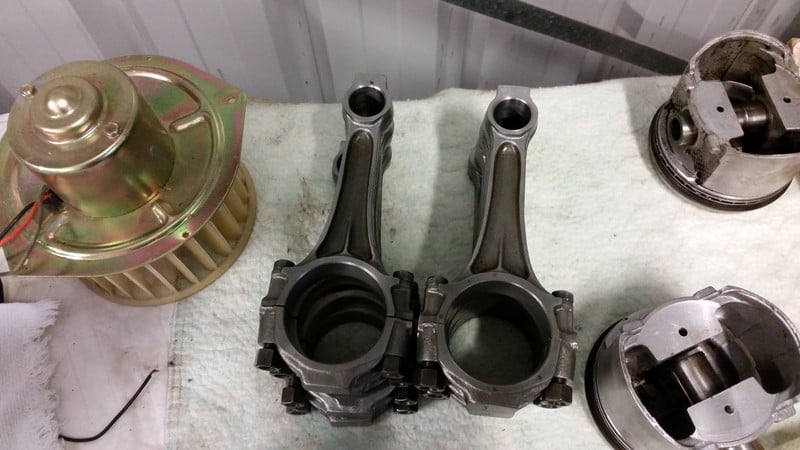
Pressed out the gudgeon pins from the A9L rods and all looks good ready for a bore and rebuild.
Engine on hold for a bit while I decide what to do with it.
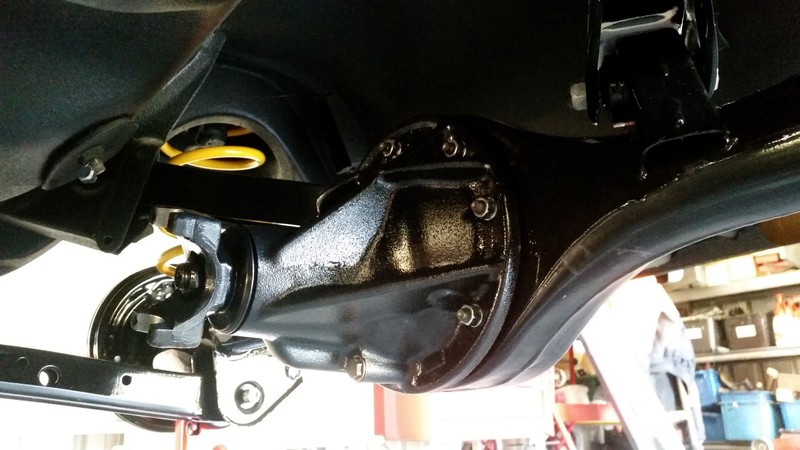
So I decided to reco the diff and brakes on the rear.
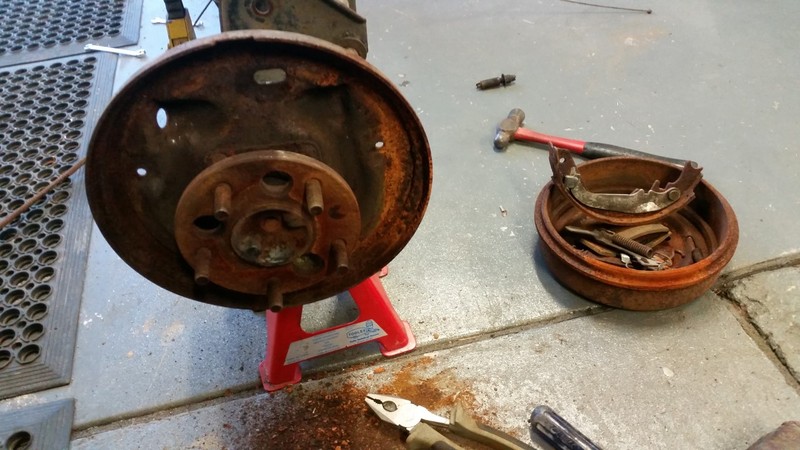
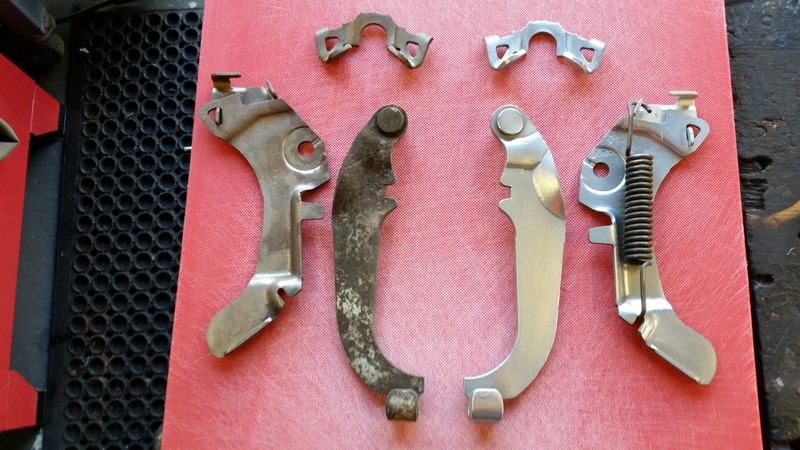
What a night mare trying to get the rusted drums off the diff.....adjustment star wheels where corroded and locked solid so the only alternative was the hammer and this is what I found....mmmmm
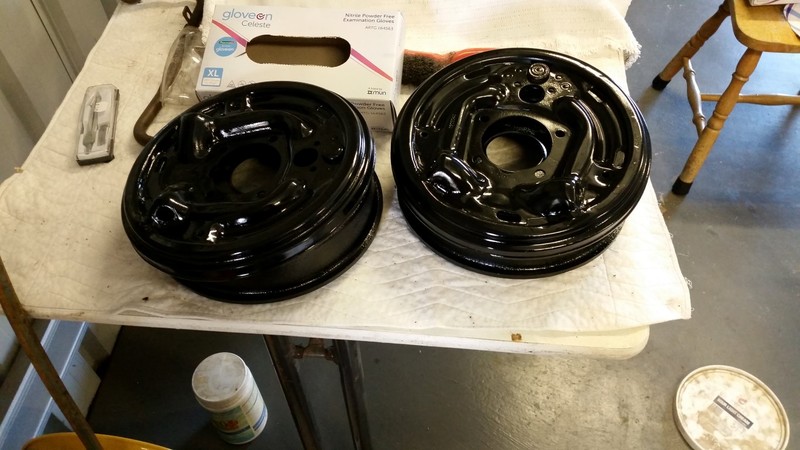
Sand blasted and soaked every thing in phosphoric acid for a bit to remove all rust.
Gave them a paint and all looks fine.
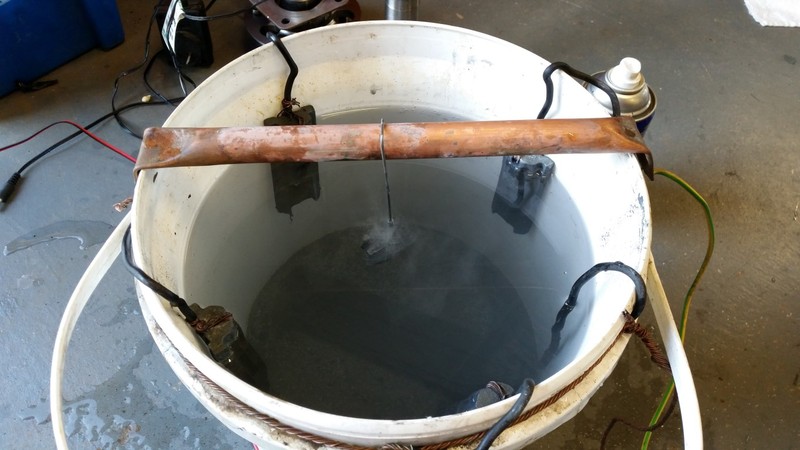
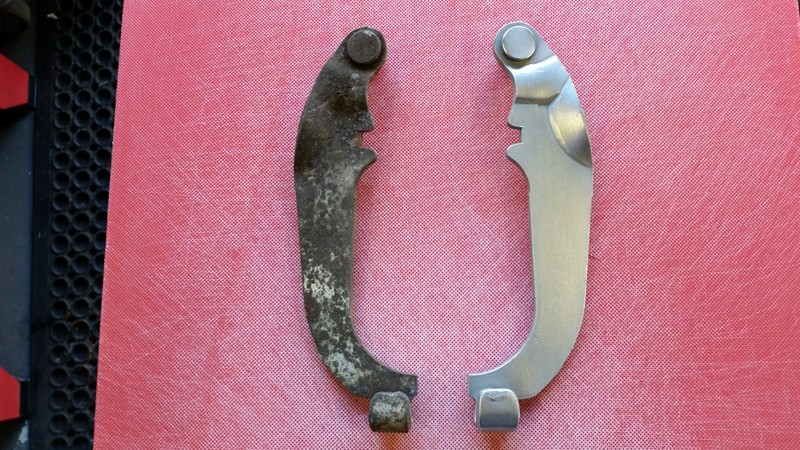
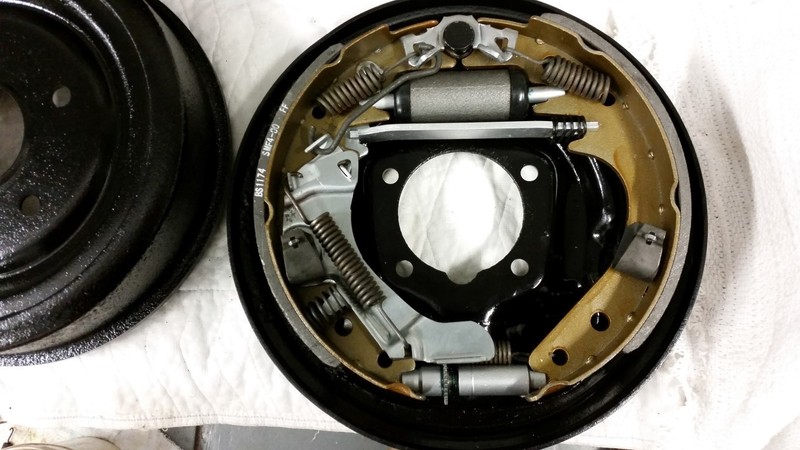
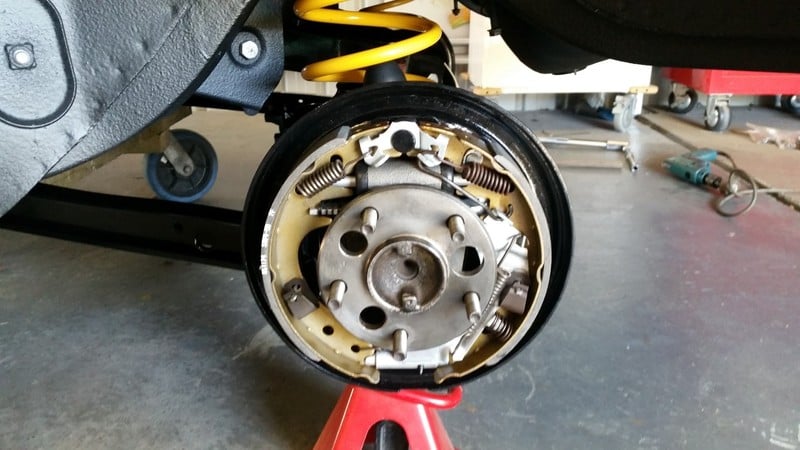
The brake drum internals where equally corroded and look bad.....saved what I could by Zinc plating all the parts in my home made Zinc plating rig.
This is the result
A big thanks to Kirk (forum member) for sending me the extra bits I needed like springs and adjustment wheels.
It all cleaned up nice and here is the finished drum set up
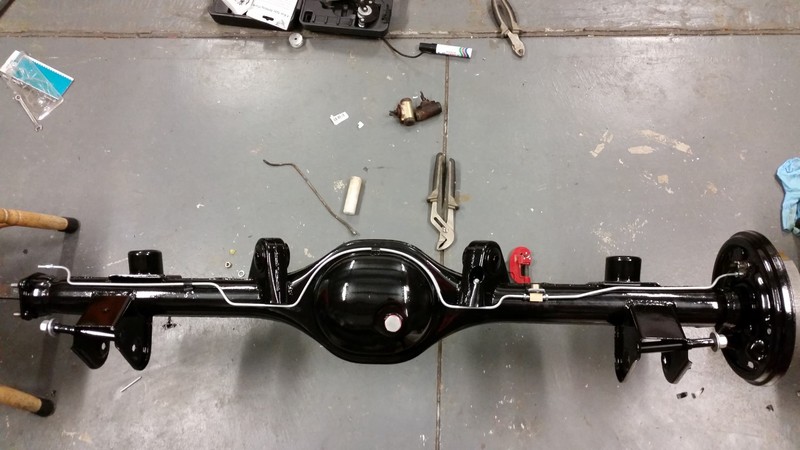
Cleaned up the diff housing and gave it a coat of paint.
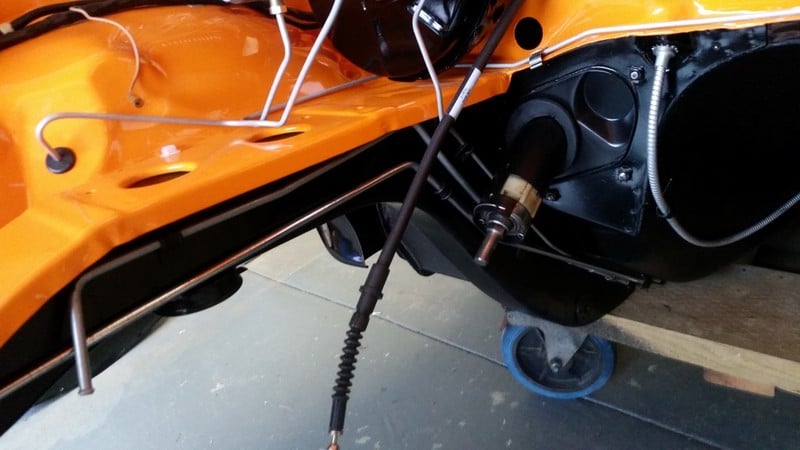
Made up new brake lines yesterday evening and installed them ready to be put back under the car in the near future.
Ok thats it for now......starting on the LSD center as of now so will post up how that goes soon
Enjoy
cheers
Al
#192

Posted 22 August 2015 - 10:22 PM
i bloody commend you
cheers Gene.
#193

Posted 23 August 2015 - 07:55 AM
Please explain Al
The finish is all top work
#194

Posted 23 August 2015 - 08:21 AM
#195

Posted 23 August 2015 - 01:40 PM
Home made Zinc plating ?????
Please explain Al
The finish is all top work
There are a couple of threads floating around here with details on DIY zinc plating Kev, this is just the first one I found:
http://www.gmh-toran...e-zinc-plating/
Edited by Bigfella237, 23 August 2015 - 01:41 PM.
#196

Posted 23 August 2015 - 07:41 PM
Yep Kev..the above link is the thread I done a while ago but I didn't know how to link it to this thread....all the info is in there
#197

Posted 23 August 2015 - 09:28 PM
#198

Posted 23 August 2015 - 09:54 PM
Ahhh. Satisfying update again - and that's for me, I can't imagine how it must feel for you Al! :-)
Top work. You make the car seat covers look easy, pretty sure they ain't!
#199

Posted 07 October 2015 - 06:56 PM
Small update time.
Haven't updated for a while so i thought I'll put up where I'm at at the moment.
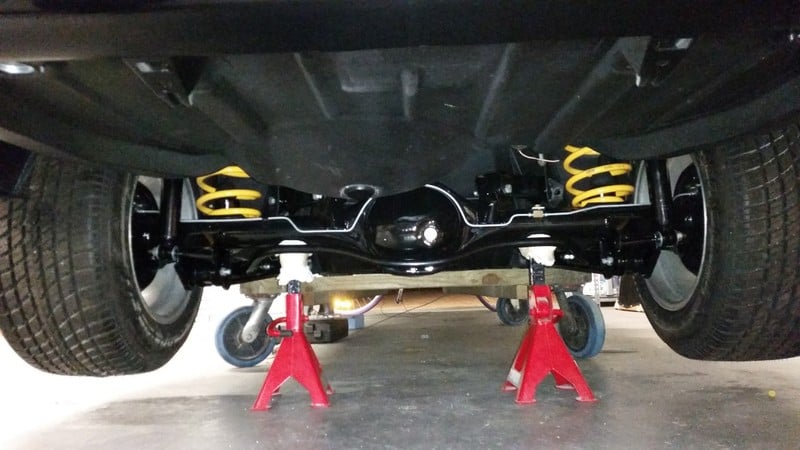
Ok got he diff finished and in the car...new brake lines, new brakes, new bearings, diff center rebuilt, new shocks, sway bar and lowered springs.
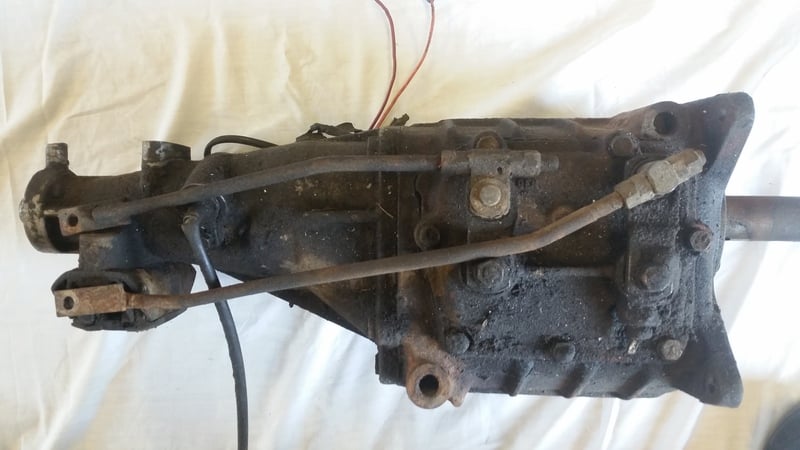
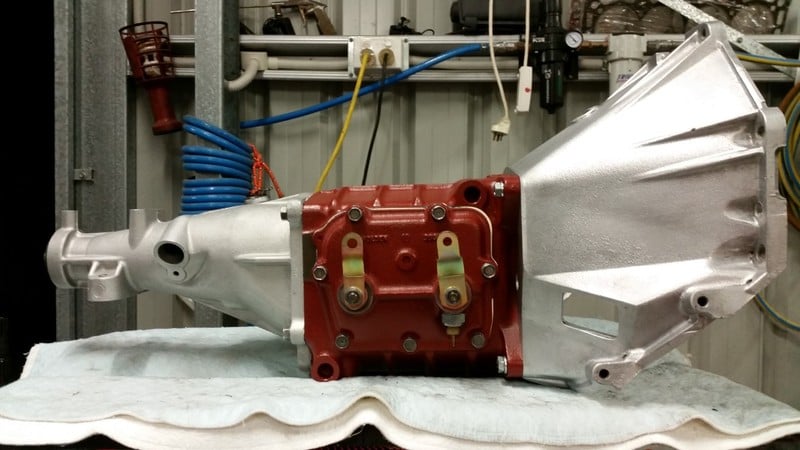
Now thats done its time for the old aussie box to come back to life.
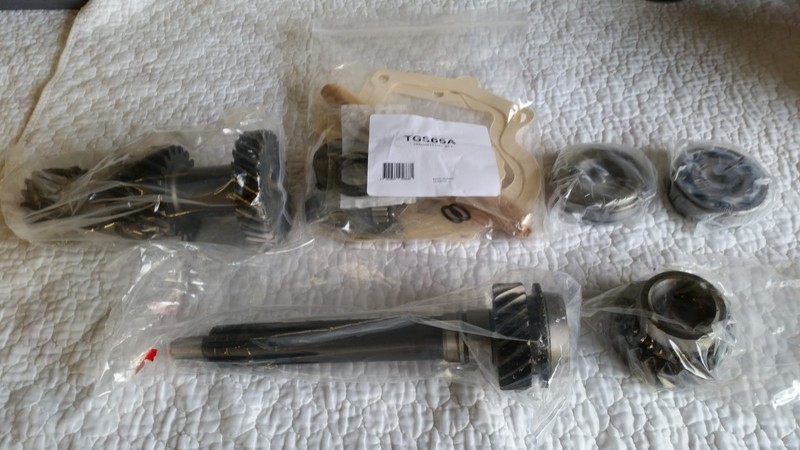
New M21 parts arrived
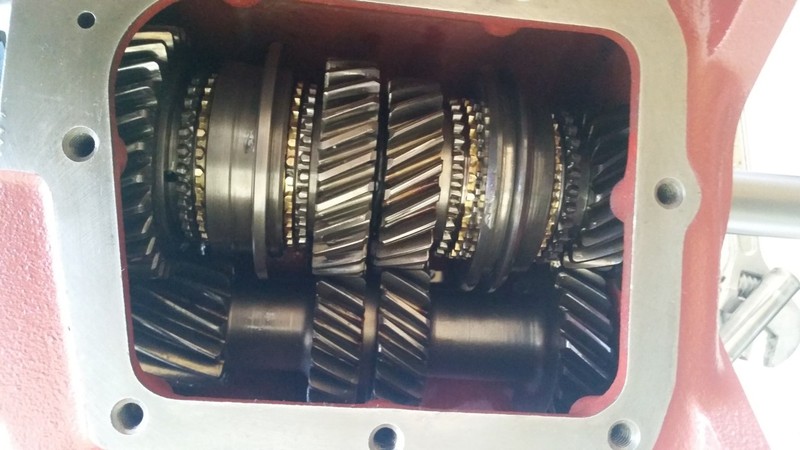
Started with this
finished up with this
New input shaft, new third gear, new cluster, new syncro's and a full bearing and seal kit....tricky job but fun
Sneek peek
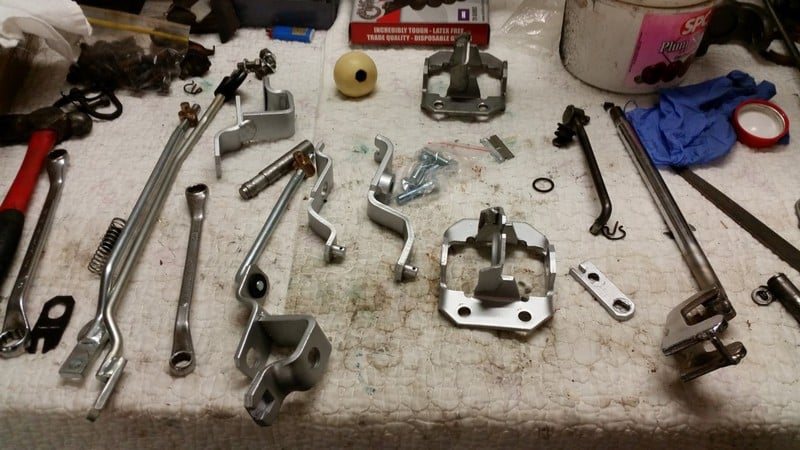
Got all my shifter bits out and reconstructed a new one....new shim and rebuild kit and all was very good
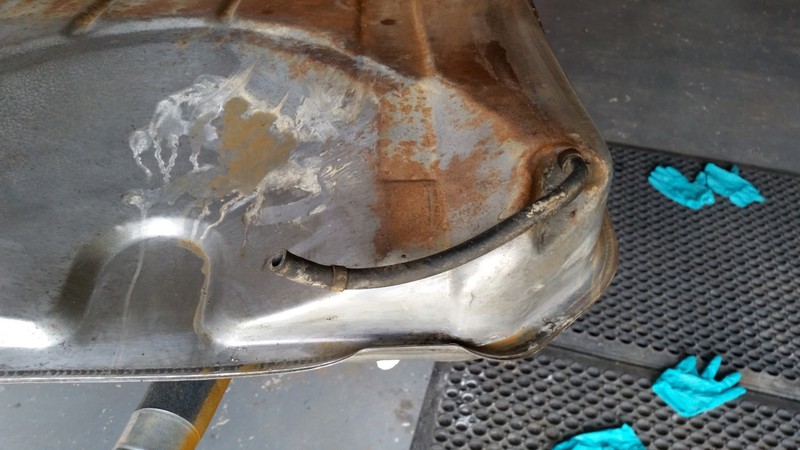
Moving onto the Rusty's old fuel tank...sad...
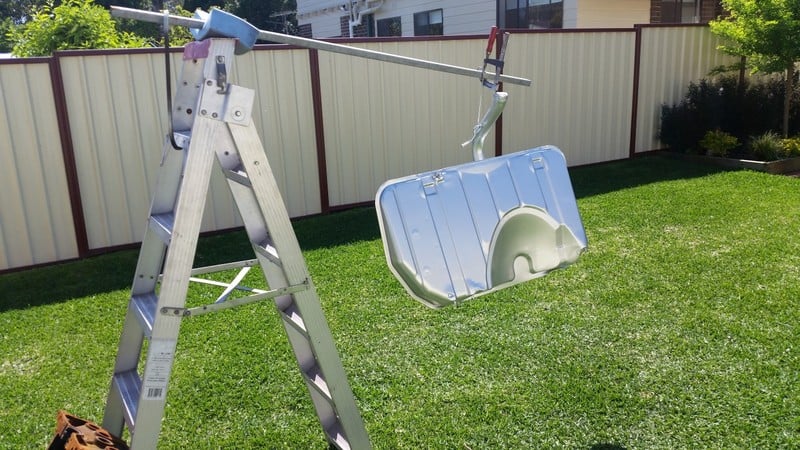
But came up beautiful with a bit of effort and a 2k paint job
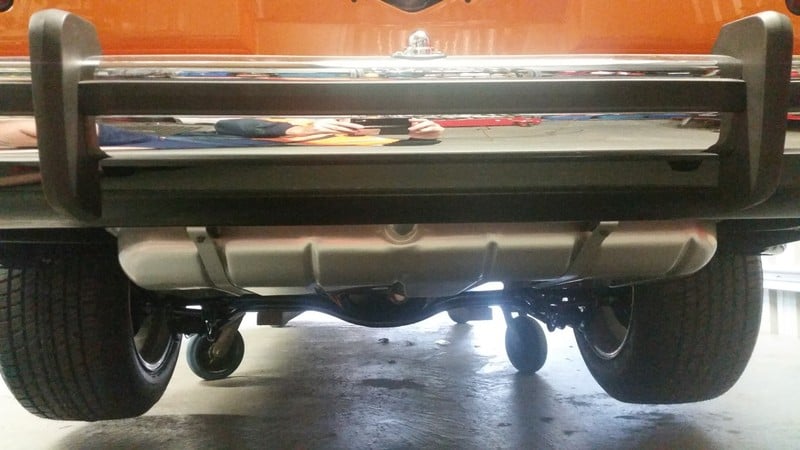
Tank in and plumbed
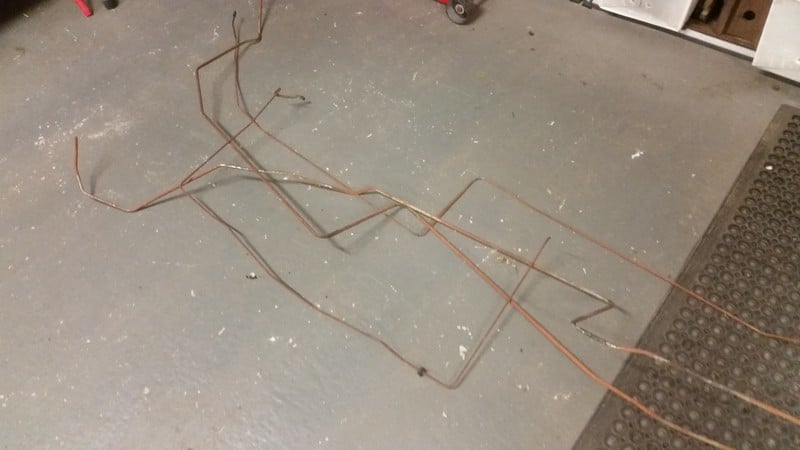
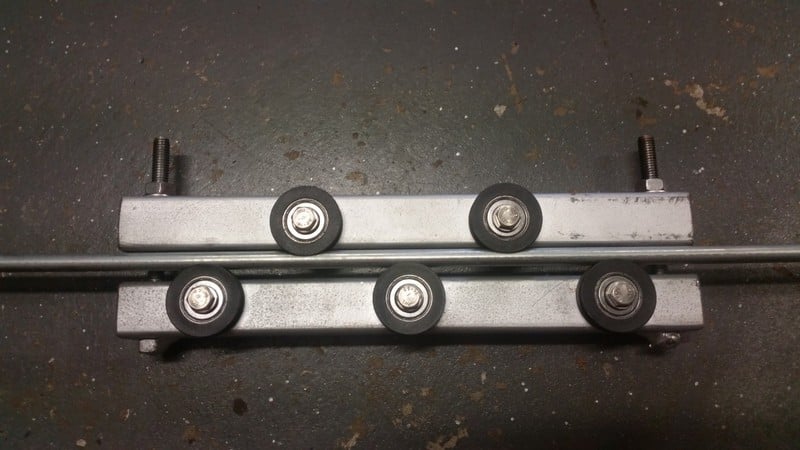
Spaghetti time...bundi tube is a real pain
But managed to solve the straightening problem by building a tube straightener out of sliding door rollers
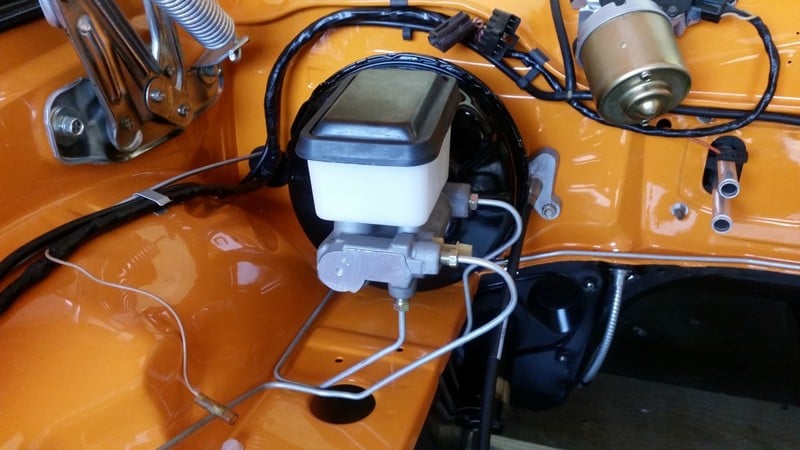
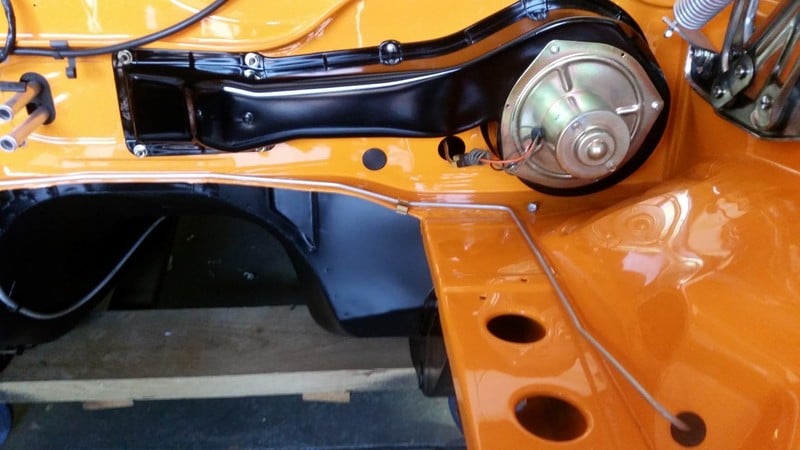
Managed to plumb it all back to original
Going to make a new right front brake line...not happy with the shape of this one....not quite tight enough i think
Got fan blower cowl all painted and assembled....working
Rightio... time to hook into the donk....its a VN 304 turbo pattern.....need some feedback on what to do with it.
Should I leave it as a 304 or stroke it to 355.....running VN heads with carby manifold....comments welcome.
I know the drive train isn't really up to a 355 but this car isn't going to be flogged.
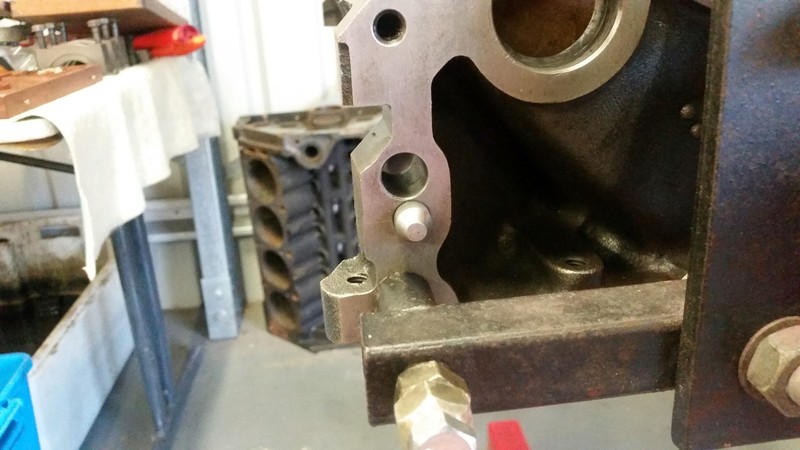
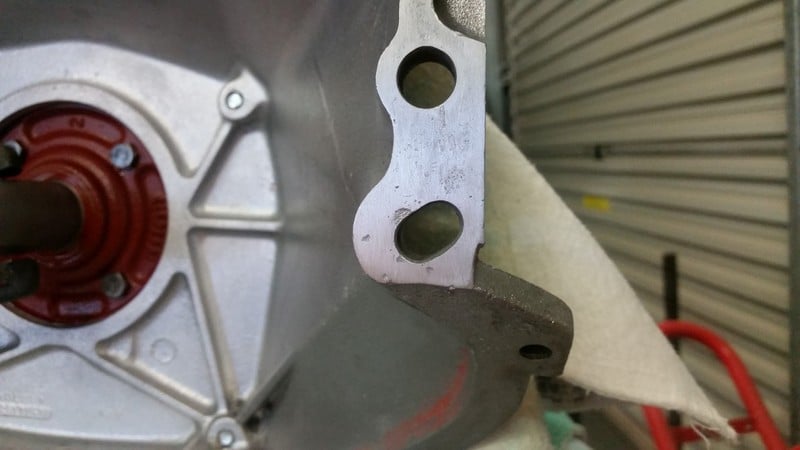
I wanted to run the aussie 4 speed behind this engine but as everyone knows VN V8's are turbo pattern.....so after a lot of careful and accurate measuring using my spare 308 trimatic pattern as a template, I marked out and redrilled the alignment dowels to trimatic pattern.
Slipped the bellhousing on and was a perfect fit and alignment.
Ok I know what your all going to say...I have to re drill the block to suit the aussie pattern bell housing.
Well I did re drill the blank top 2 holes but after careful consideration I decide to elongate the bell housing holes as there is plenty of meat to do this and doesn't seem to be a problem. I researched this and found quite a few people have done it this way without issue....guess time will tell.
I will also have to elongate my clutch pivot bracket however seems to be no problem there either...what do ya's think.
Ok that's it for now
cheers
Al
#200

Posted 07 October 2015 - 08:27 PM
Your 'small update' puts us all to shame as usual, Al... absolutely first rate!
Seeing as I'm not paying for it I say go the stroker! ![]()
But realistically I wouldn't bother, even a standard 308... err sorry, 304 will still be a lot of fun to cruise around in (and more than capable of rendering an M21 and banjo unto scrap if you really wanted to).
Back in my HQ days I had it down to about twenty minutes between positioning the hoist arms to having an M21 in pieces on the bench, you'd think it would've taught me to go easy on the loud pedal, but no.
I used to mod all my M21 shifters by welding extra 'tabs' on the sides of the 1-2 gate to stop the dreaded 'dead stick' when changing second to third in anger too, doesn't take too many times crawling around under the car on the side of the road to do something about that I can tell ya! But with all new bushes etc. your shifter will hopefully be tight enough not to do it.
I think I've still got a Dellow bellhousing around here somewhere that's Chev pattern --> Aussie 3/4 speed too, PITA having two different patterns, we used to change motors like undies back in my misspent youth as well, back when you could afford to play those games on an apprentice's wage!
2 user(s) are reading this topic
0 members, 2 guests, 0 anonymous users


 View Garage