Clintoris - The lover of all things rust
Love your work mate

Forum Fixture


Posted 04 June 2014 - 11:59 PM
Clintoris - The lover of all things rust
Love your work mate

Posted 06 June 2014 - 09:36 PM
Thanks Dan, I wouldnt say I love Rust... But I sure like seeing the cars all smooth, solid and clean steel after the rust is cut out.
This was actually one of the first repairs we did on the car (hard to keep track of all the pics)
 tail rust.jpg 197.89K
4 downloads
tail rust.jpg 197.89K
4 downloads
tail rust weldd.jpg 218.17K
2 downloads
tail rust gone.jpg 172.02K
2 downloads
As was the removal of the side indiators, someone had done it before at some stage but uh not really neat... They must have had a go at the drivers side first then gave up with welding as the passenger side was just bog.


Here was the parcel shelf before:

All finished now, Didnt have an original car around to copy exactly just tried to make it look original enough. I imagine there was possibly a 4th round indent? Which we can add if John wants it there but its going to be covered by trim anyway.

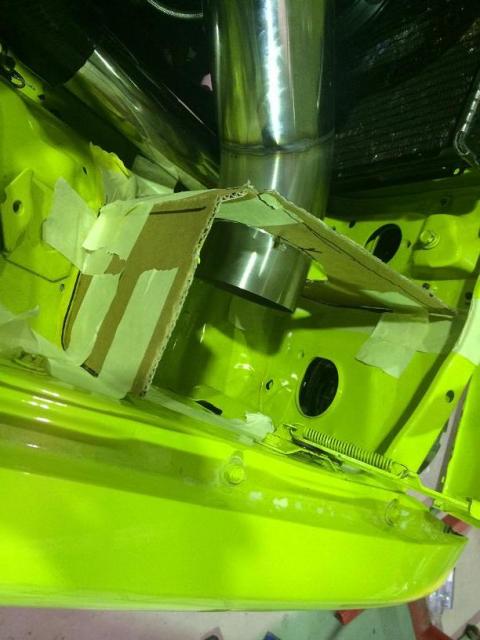
Last but not least was the tunner, at some stage had been modified so suit a different gearbox, That silver rectangle is a piece of alloy stuck over a hole with sikaflex

One quick and easy way to make a template is with some masking tape

Mark your lines, un-peel it and lay it over your new steel, cut it out then abit of rolling on the english wheel and shazam one tunnel patch peice.
 \
\
All we had to go off for the shifter hole was this image from "The Marty Report" thread:
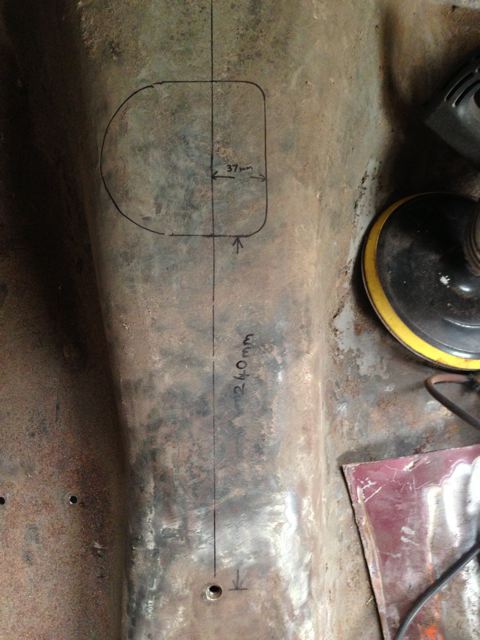
Was actually going to just leave it blank for now but Rob wanted a hole so he could reach under the tunnel with the dolly and knock the warpage out from the welding, so using the above measurements to create a sort of scale we marked out a guesstimate of the hole, then actually cut it out 10mm smaller. Once we have some better measurements we can trim to suit.

All done!

So there you go, is now one awesome Torana with no more rust left for us to fix! like most of the cars we get the chance to work on with this standard of quality they really start to grow on me and knowing all the metalwork has been done properly I cant help but want them for myself! I Wonder if John will notice if it goes missing?
Forum Fixture
Posted 06 June 2014 - 10:01 PM
Oh My, Don't you post alot

Posted 07 June 2014 - 12:36 AM
Yeah very nice Clint.
I'm guessing that tunnel hacking is pretty common, the one in my GTR looks pretty similar to the first pic of this one except they've use rivets instead of sikaflex.
I'm gonna have to get that fixed one day......
CABIN ENGINE CONTROLS GALORE

Posted 07 June 2014 - 11:23 AM
Great work Clint from me as well,
I also am impressed how you re-did the indicators,
even though one was already welded in.
Just tell John,
that you had a break-in overnight and claim on insurance.
John gets Cash back, and you will have a Torana plus the extra Cash lefted over to finish her off. ( only joking )
I gave you a Like Button for the detailed Thread
I like cars.

 View Garage
Posted 07 June 2014 - 03:19 PM
Damn that is some neat work!
Nicely done.
Posted 13 June 2014 - 06:31 PM
Thanks Heath, Just to clarify the last couple posts work was done by Rob (The Panel Beater) This next bit was Done by Cam (My business partner)
Was Time to do the leadwork around the rear section:


Posted 19 June 2014 - 07:01 PM
Time for a new project... 1960something Ford LTD Wagon. Even with a shit tonne of rust Lindsay, the owner was not to be discouraged...

After we stripped out all the interior and windows it was apparent just how much rust there was, we decided to start at the rear, this was the inner Passenger D-pillar, can see the many rust holes.

Center panel will need to be removed also

Drivers side inner D-pillar wasnt bad... relatively speaking.

With the Drivers innder D-pillar skin Removed it wasnt looking any nicer!

This is whats left from the Inner skin, not much to salvage, whole section will need to be made from scratch.

Outer Drivers D-pillar skin was showing bad signs

Inside wasnt much better

At this point both the inner and outer of the D-pillars on both sides have been removed as well as the section across the bottom.

Time for some bracing before we cut out the bottom of the D-pillars... well what was left of them anyway.

This inner lower section had to go.

Bottom of the D-pillars gone as well as the inner lower section, all was destined for the scrap bin.

Now we are back to a sound base we can start to rebuild, was sandblasted first and primed in epoxy or weldthru primer where applicable

Had a new section bent up, ait of triming then in for a test fit

The beginnings of a captive nut setup to replace the body to chassis mounting point

Captive Nuts in place

First patch panel, easier to remake from sheet metal then patch the original

First patch welded in.

First patch welds ground back and cleaned up (pic taken from other direction)

Second patch section is the lower part of the passenger D-pillar

Second patch's first test fit

Third patch panel

Third patch panel test fit

So much work already! This is going to be a big project....
Cool

Posted 19 June 2014 - 07:13 PM
Posted 19 June 2014 - 08:40 PM
Time for a new project... 1960something Ford LTD Wagon. Even with a shit tonne of rust Lindsay, the owner was not to be discouraged...
So much work already! This is going to be a big project....
WHY? I'm sure there have been uglier cars produced over the years but none spring mind.
Oh My, Don't you post alot
Posted 19 June 2014 - 08:51 PM
WHY? I'm sure there have been uglier cars produced over the years but none spring mind.
It must be love.
Ford Taurus is still the ugliest car I've seen.
Do I feel lucky? Well, do ya, punk?

Posted 19 June 2014 - 09:02 PM
Looks more like 72-3 ish
Anyway... big job
Posted 19 June 2014 - 09:14 PM
Posted 19 June 2014 - 09:35 PM
Looks more like 72-3 ish
Oops Typo, I think its a 76 actually but not sure (no id plates) But thats what the owner said from memory...
Indeed its a odd car to do up, But its not our place to Ask why... I think once its on bags and on the floor it will be pretty cool. Trying to convince him to do other mods while we are at it 
Basically the whole roof has to come off, the roof itself is in decent nick but the structure on the inside or pretty bad and we cant get access to it with the roof in the way... This whole car has seemed to rust from the inside out :S The floors are pretty bad also... Plenty more pics to come.
Posted 16 July 2014 - 11:57 PM
Well been awhile, we have been busy just not had time to go through the photos. But here is some from our 32 Hotrod project which is just worked on every now and then.
It was a original body but it has been chopped and changed abit and new chassis from the states.
Here is how we received it:

Stripped all the paint off as well as a fair bit of bog!

Then dropped it onto the chassis:

We were provided with aftermarket doors, not sure wether the doors were a different size or if somewhere along the line the body had been changed but the doors didnt fit, As in the Gap for the door was smaller then the door itself, so was decided to cut the front section off the body and set it forwards.

Then using 5mm Flatbar as spacers we tacked the doors in place

Then 5mm spacers again tacked the front section in place:

Then before welding anything in place permanently we fit everything else up to make sure all was well.

There was a few gaps here and there!

Both the A and B pillers had been chopped up a few times in the past and were abit flimsy, So new pillars were to be made:


New pillar


Was Ditto on the passenger side and ended up with a nice Gap:

B-pillar cut out:

New B pillar

In place:

Filling in the Section between B pillar and body:

Finishing off the top:


Passenger side had a funky spot

Patch


More to come...
Posted 17 July 2014 - 06:58 PM
You guys are insane!!!!!!!! im hating the small amount of rust ive gotta fix in mine, but that wagon looks like its bee carting sea weed for the last 10 years!! great work love it.
Cheers jake
Posted 17 July 2014 - 07:11 PM
I dont know how you go home each night, i'd just sleep at work.
Cheers.
Oh My, Don't you post alot
 View Garage
Posted 17 July 2014 - 07:13 PM
Super impressive stuff.
Lotsa Posts!

Posted 17 July 2014 - 07:40 PM
All we had to go off for the shifter hole was this image from "The Marty Report" thread:
Was actually going to just leave it blank for now but Rob wanted a hole so he could reach under the tunnel with the dolly and knock the warpage out from the welding, so using the above measurements to create a sort of scale we marked out a guesstimate of the hole, then actually cut it out 10mm smaller. Once we have some better measurements we can trim to
Posted 17 July 2014 - 10:18 PM
Ive considered getting a Hammock DJ, work back quite late some nights... seems silly to drive all the way home just to goto bed then get up and drive back!
Thanks Laurie and Jake
Hey Marty, Yea cheers for those measurements... The measurements for the location for the hole were all good but there was no measurements for the dimension of the actual hole itself. We just used the measurements on the pic and scaled it as best we could for the shifter hole. If you have the measurements for the hole itself thatd be great as it sounds like we will have another LJ needing the same treatment in the shop soon 
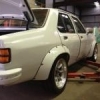
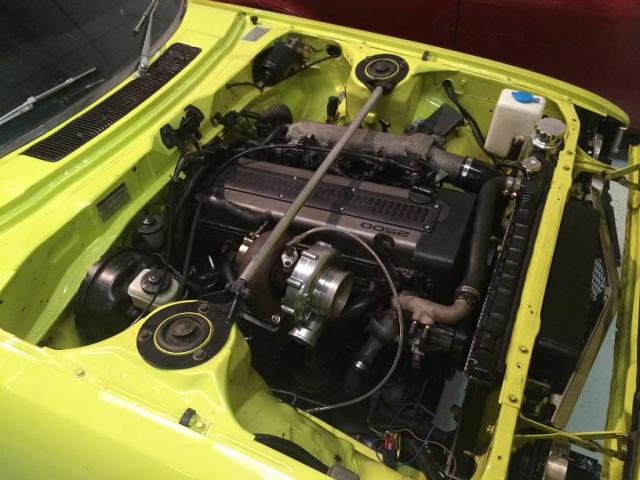
Posted 05 August 2014 - 11:31 PM
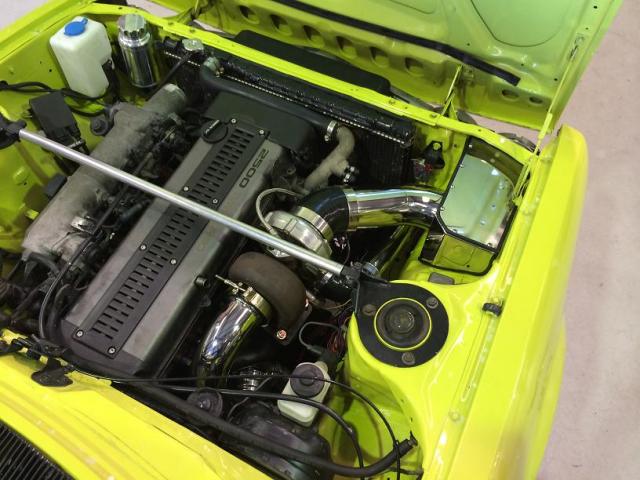
Little project I worked on Recently...
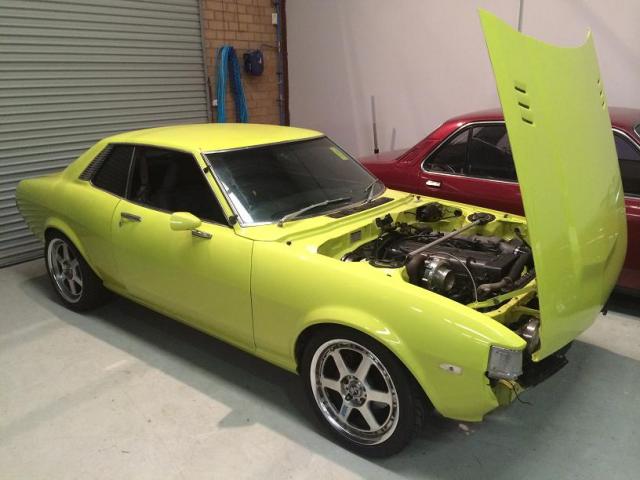
1977? Toyota Celica, has had a Toyo 1JZ 2.5L Straight 6 conversion, had the original twin turbos on it before and made 260rwhp. He removed the twins and fitted a single large turbo. Which is where I came in to match everything up with the new Turbo. He also just got a Yellow sticker a few days before while the cops were having their Hoon blitz, was just cruising along and got pulled over, first thing the copper said to him was the wheels are too big and the car is illegal, then picked on the seatbelt being twisted. Copper asked him to pop the bonnet and since it was already obvious he was getting a sticker he refused so the cop just wrote that his washer bottle didnt work (without even checking it) and gave him the sticker.... He made a complaint to the police not that I think that will get anywhere... Hah sorry going a little off topic here but annoys me, Yes this car is indeed 100% defectable with the engine conversion not being engineered but the cop didnt even know about the conversion and seems he decided the car was getting a sticker before he even got out of his car. He even checked with his engineer (as he was actually already in the process of getting it engineered) and the wheels are perfectly legal size...
Anyway..
So here is what I started with
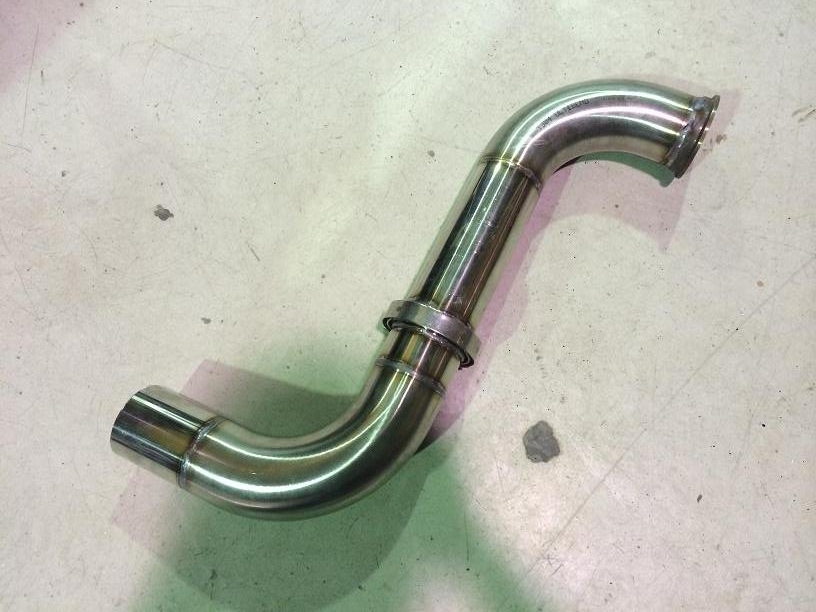
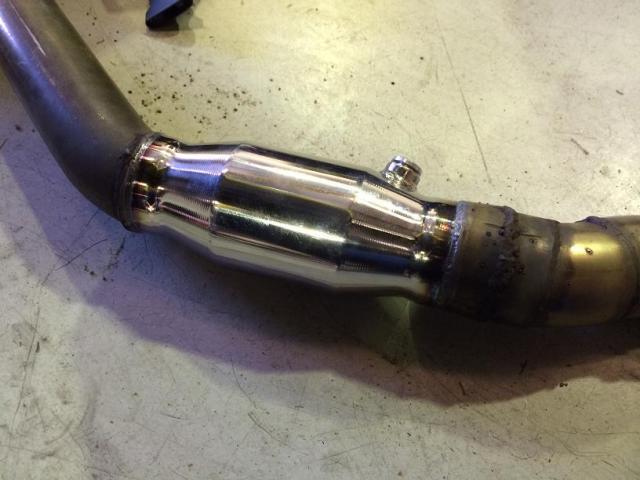
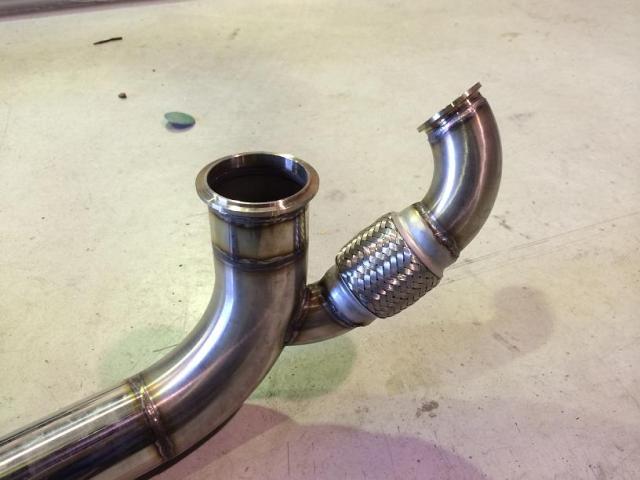
Made up a new dump pipe and section to match up with the existing exhaust:
Since he needs to pass engineering (and a polution test) his old Cat Converter was not going to cut it...
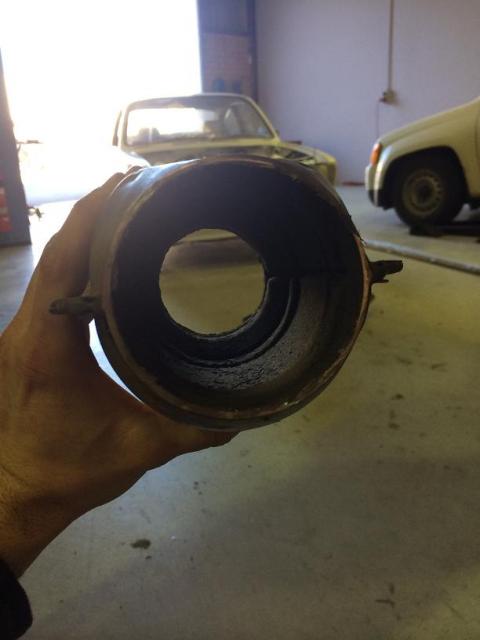
New EURO IV Cat in place.
Also made a section to join up the new external wastegate with the exhaust.
Personally I Would have liked to have the Cat closer to the engine (they work better when hotter) but the floorpan didnt really accommodate it, plus he just said to put it where the old one was.
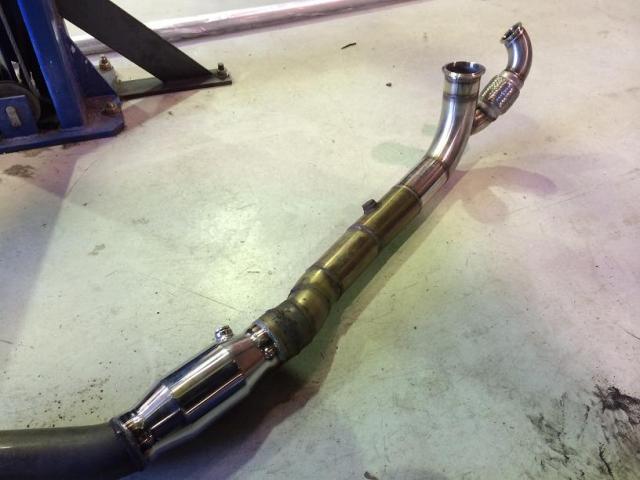
Dump pipe in place and showing where the wastegate is:
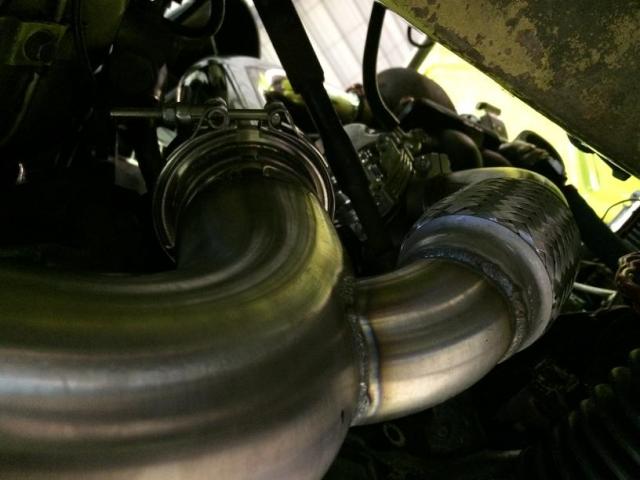
Bits you can see of the exhaust were polished:
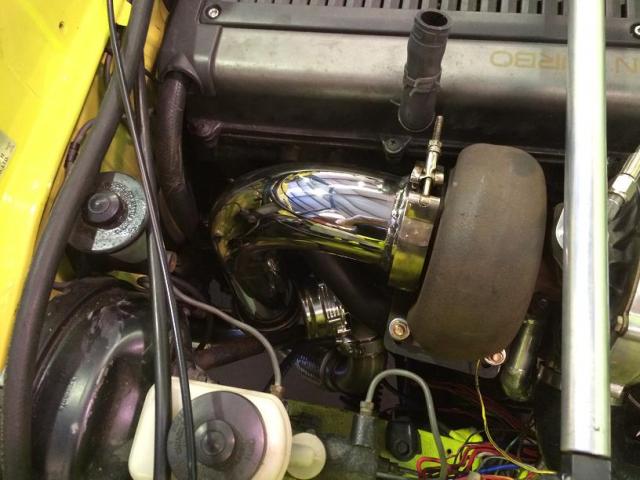
Next I did the Turbo to intercooler pipe, altho Seems I didnt take any pics of it, probly because it was pretty much a straight pipe so pretty boring...
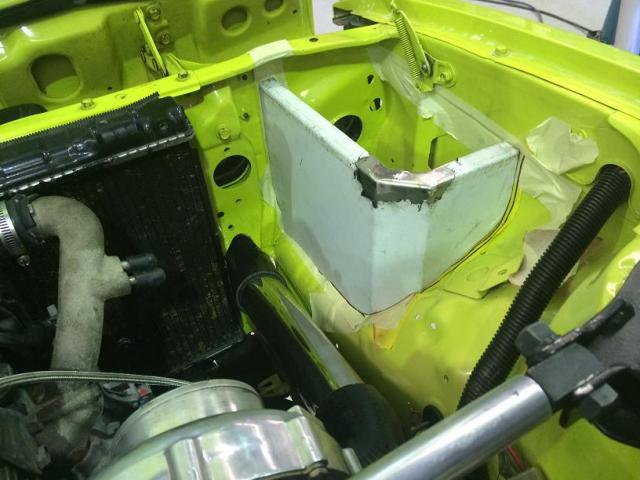
But after that I started mocking up the custom airbox using CAD (Cardboard Aided Design)
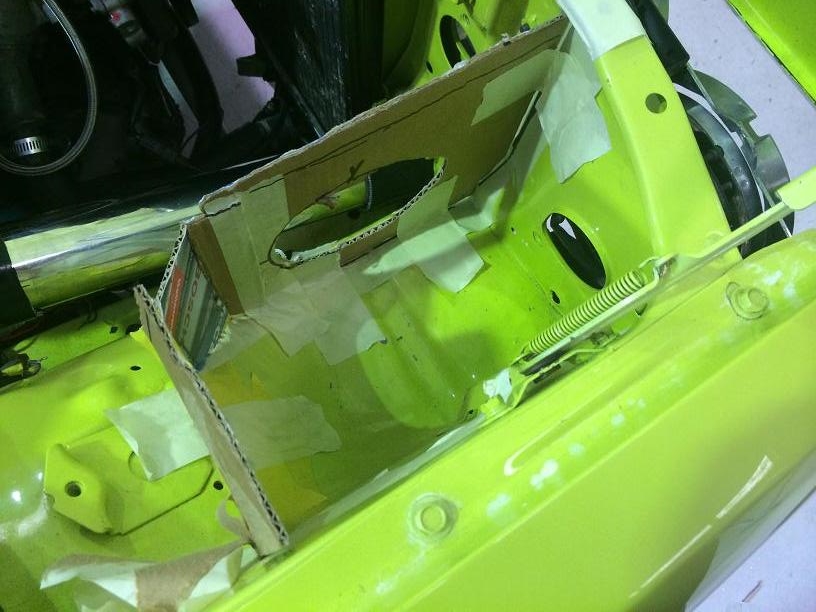
Then transferred it to something abit more accurate and double checked the fitment and so I can plan my cuts/folds
Then cut it out of 1.2mm Stainless and bent it up (The stainless comes with a white plastic protective coating)
Weld up the Gaps in the top flange, Making sure its square:
Test fit:
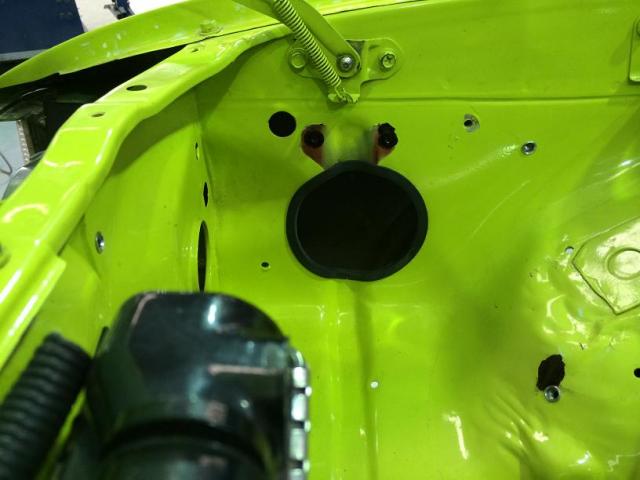
I was leaning towards cutting the hole behind the headlight larger for the air inlet to the box to create a high pressure zone within the box (could remove the headlight at the drags) and add abit of a rammed air effect (not that you really need it with a turbo but still helps) but it was decided to cut the hole into the wheel well.
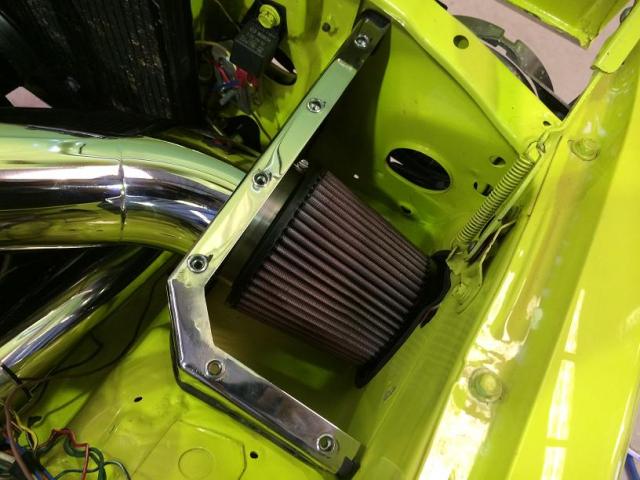
K&N Filter in place and Nutserts ready to accept the lid, Cant really see but there is also 3 mounting tabs on the inside of the airbox with nutserts in the body to hold the box in place.
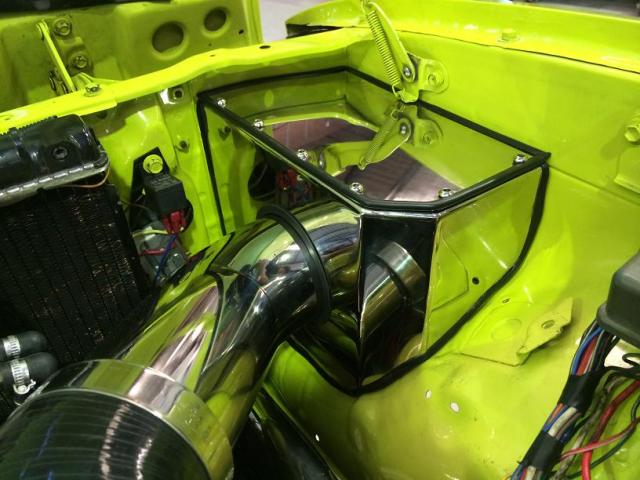
Lid on, As well as the intake pipe I made and polished:
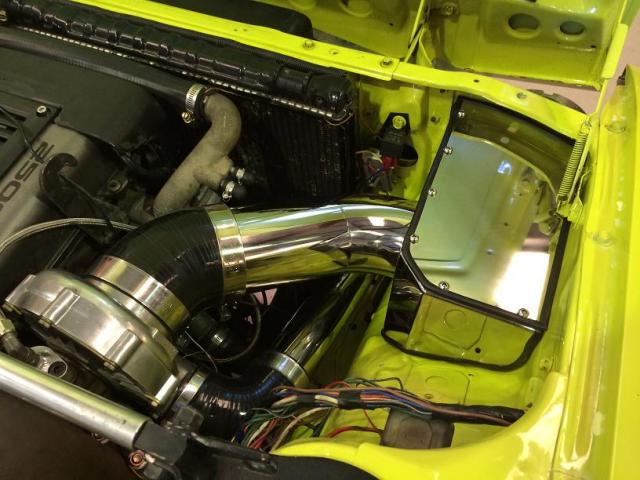
And a sneak peak of the next car Im working on... HJ Ute with a Toyota 1UZ V8 Twin Turbo conversion. Similar to the previous job, I have to re-make the exhaust as atm it hits in all sorts of places, plus he wants shiny stainless

Edited by Viper, 05 August 2014 - 11:37 PM.
Do I feel lucky? Well, do ya, punk?
Posted 05 August 2014 - 11:37 PM
Wish I knew you had that in there
Mason was supposed to come and quote doing the electricals for my shed but the bugger never showed up
Cool
Posted 05 August 2014 - 11:42 PM
Posted 06 August 2014 - 12:09 AM
Well he needs some more cash to do more on the car so maybe give him another call haha.
Cant forget your pretty face Gene! altho I did forgot when I told you to check back in with me?
Cool
Posted 06 August 2014 - 12:15 AM


0 members, 2 guests, 0 anonymous users

