Jump to content


- - - - -

LH TORANA PROJECT


  • Please log in to reply
58 replies to this topic

#1 _LH SLR 3300_

_LH SLR 3300_
  • Guests

Posted 29 September 2015 - 09:21 PM

DSCF7601_zpsucg6nbfe.jpg

DSCF7607_zpsu4fpb9wh.jpg

DSCF7602_zpsm9d7kcyv.jpg

DSCF7600_zpsujv951yf.jpg

DSCF7609_zpsofjuanpv.jpg

DSCF7608_zpsop0qqrs0.jpg

Picked this up a few months back for a couple of grand. Needs some rust repair, but overall solid car with good floors, boot & surprisingly no rust under the wiper plenum where these cars normally rot out. 


I have most of the replacement panels I need to repair it, just waiting on the lower tie rail from Rare Spares.


Hadn't been going in years, put a battery in it, some fresh fuel, a set of spark plugs & it fired up & ran. Top up the leaking transmission & it now moves under it's own power.


Boss has kindly agreed for me to use the workshop complete with hoist to do most of the heavy stuff like welding in the lower beaver panel, hoping to make a start on it sometime next month.


#2 _Macca97_

_Macca97_
  • Guests

Posted 29 September 2015 - 09:23 PM

looks the goods, be cool if you could get it rego'd with the original number plates


#3 _LH SLR 3300_

_LH SLR 3300_
  • Guests

Posted 29 September 2015 - 09:28 PM

It's actually a lot better than it looks, I looked at far worse that were going for double or more than what I paid for this. 


#4 _LS1 Taxi_

_LS1 Taxi_
  • Guests

Posted 29 September 2015 - 09:30 PM

What is the end game? What do you vision it to become?
Appears a great start!

#5 Ice

Ice

    Cool

  • Members
  • PipPipPipPipPipPipPip
  • 15,196 posts
  • Name:Gene
  • Location:Galaxy's away from Ipswich
  • Car:77 HZ Sandman Van
  • Joined: 03-January 07

Posted 29 September 2015 - 09:32 PM

Another one jesus you breeding them over there looks like a good solid car Matty
and if i know you well which i think i do by now it will be a first class resto
cant wait to see this one finished
cheers Gene.

#6 _LH SLR 3300_

_LH SLR 3300_
  • Guests

Posted 29 September 2015 - 09:35 PM

I haven't formed a solid plan yet, will fix the body & go from there. Thinking of a LS1 conversion with a twist.


#7 _LS2 Hatch_

_LS2 Hatch_
  • Guests

Posted 29 September 2015 - 09:36 PM

Ok, so it needs some work, all of which from what we have seen, you are very capable of doing to a high standard.
What are the plans, as in, what's the big picture?
Stock 6 cylinder drive line, standard SL interior?
Again from what we have seen, I think not!!!

Regardless, I'm looking forward to watching your progress and learning as you go

#8 _LS2 Hatch_

_LS2 Hatch_
  • Guests

Posted 29 September 2015 - 09:38 PM

Damn, took me too long to respond, got beaten to the punch

#9 _LH SLR 3300_

_LH SLR 3300_
  • Guests

Posted 29 September 2015 - 09:43 PM

I have a good 202 I'll fit to move it around while I'm doing the body/paint. Whatever I fit to it, it'll be something different to the usual Holden V8 based drivetrain I've done in the past. Main thing is it'll be 100% street driven, may even become a daily driver.


#10 Redslur

Redslur

    Has been Torana owner

  • Members
  • PipPipPipPipPipPip
  • 3,536 posts
  • Name:Gerry
  • Location:Canberra
  • Car:HQ GTS Replica 350.
  • Joined: 08-November 05

Posted 30 September 2015 - 12:18 PM

Will be watching this one closely too Matty :-)


Think I have mine sorted now. Have booked it in for a good tune and she will be right to go...


#11 SmacT

SmacT

    Forum Fixture

  • Members
  • PipPipPipPipPip
  • 973 posts
  • Name:Sam
  • Location:Sydney
  • Car:LX 4dr 383, TKX, BW
  • Joined: 24-December 08

Posted 30 September 2015 - 12:34 PM

Hooray - love your builds. Look forward to seeing it grow.


#12 tsn007

tsn007

    Forum Fixture

  • Members
  • PipPipPipPipPip
  • 1,018 posts
  • Name:Tony
  • Location:LIVERPOOL, NSW
  • Car:LX hatch, LX sedan
  • Joined: 25-April 07

Posted 30 September 2015 - 08:04 PM

hey Matty


looks good, was this the central coast car ?


what is the orignal colour and trim


I am sure is going to look perfect when you finish it


#13 _LH SLR 3300_

_LH SLR 3300_
  • Guests

Posted 30 September 2015 - 09:40 PM

I bought it from Wyee. Original colour was Glacier white with tan/brown trim, 8/1974 173 column auto. My cars don't appeal to show judges so I see no point in chasing perfection with it, as long as it looks neat I'll be happy.


#14 wot179

wot179

    Green Eggs and Spam

  • Members
  • PipPipPipPipPipPipPip
  • 6,784 posts
  • Name:Jesus Bloody Christ
  • Location:Sunny Santa Maria
  • Car:Goon
  • Joined: 06-February 09

Posted 01 October 2015 - 12:37 AM

lol...neat...yeah right. :)

Looking forward to this one too.

#15 _LH SLR 3300_

_LH SLR 3300_
  • Guests

Posted 25 October 2015 - 04:35 PM

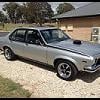
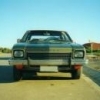
Had my Torana towed into work yesterday afternoon to begin the rust repairs. My boss has been good enough to allow me the use of the workshop after hours as this car needs a fair bit of work that would be difficult to do at home with noise etc. Don't want to upset the neighbours.


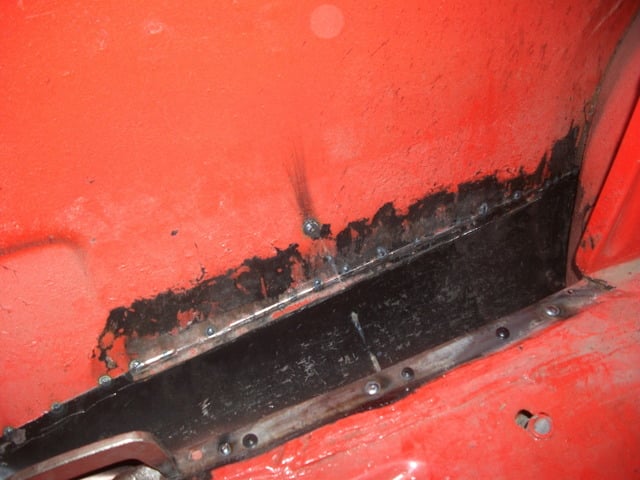
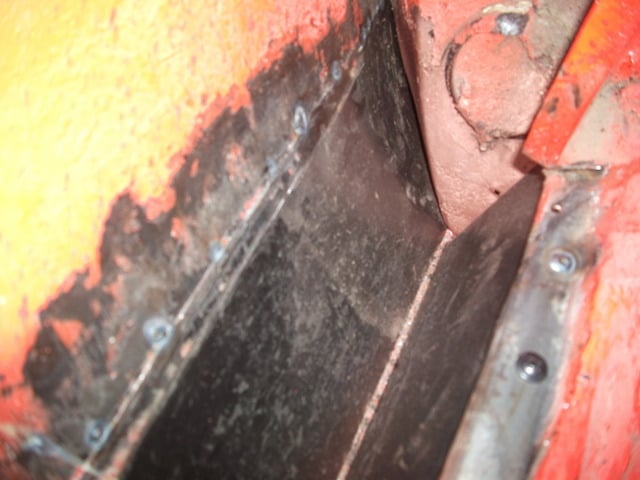
 Started off today with the lower rear screen aperture. Previous owner had cut most of the rusty part away & started to trial fit the new section, although Rares do an OK job making the repair sections, they still need a fair bit of mucking around to make them fit properly.

DSCF7636_zpsatcjyjhk.jpg

DSCF7637_zpsndia6dxy.jpg

DSCF7638_zpsz68mmncb.jpg

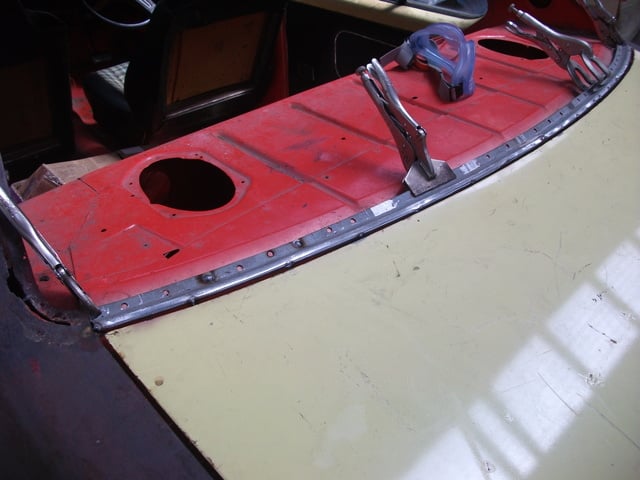
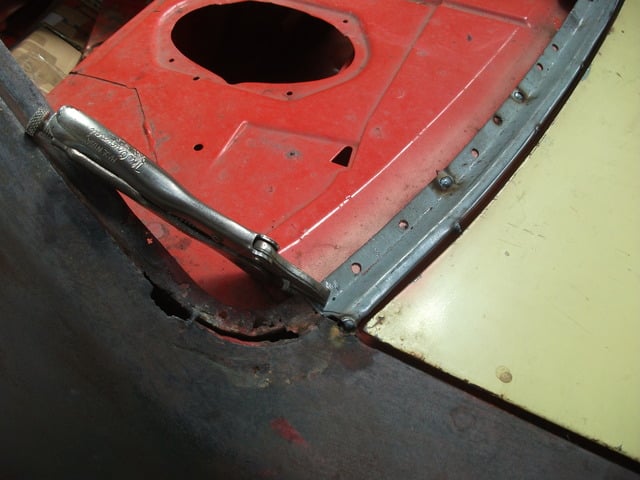
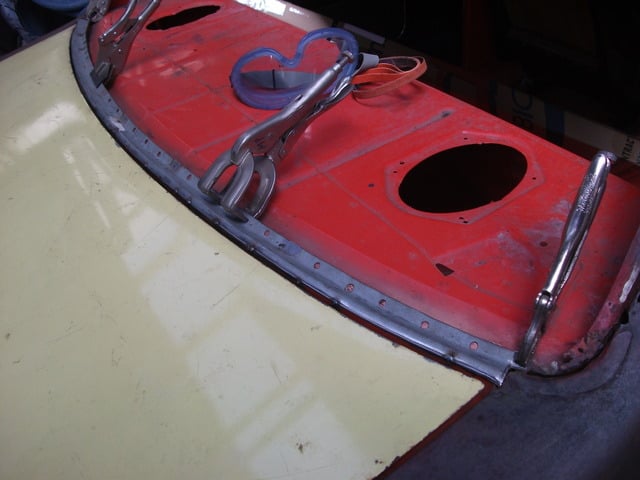
Got as far as removing the rest of the rusty parts & tacked the new panel in. Took ages as I wanted to make sure it was flush with the bootlid & gaped up OK. Will lightly sand the tacks & trial fit the rear screen & rubber & if all is OK, finish welding.


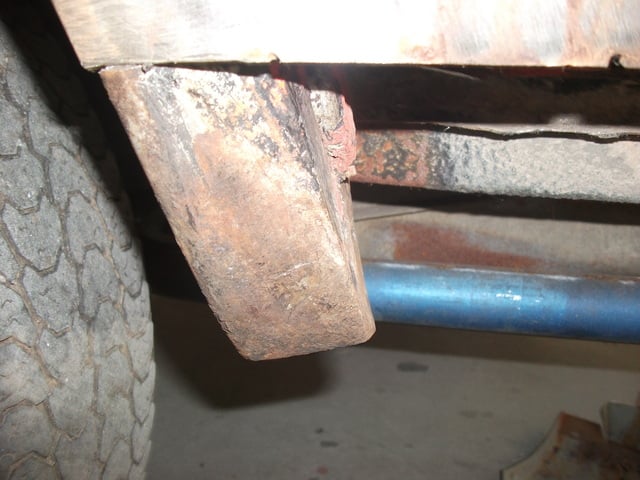
As with the screen aperture, the previous owner had cut most of the rusted left rear quarter out & self tapered a new section in place. It was a little mangled, so I bought another one to use. He'd overlapped the panel over the original wheel arch part, which was rusted, not the way I wanted to do the repair, so I started by removing this part along with some other bits he'd left.


Again, Rares do a pretty good job with these repair panels, but they still need work to make them fit properly.

DSCF7639_zpsqdqtjqeu.jpg

DSCF7640_zpsec1x3xny.jpg

DSCF7641_zpsnf5x0uxy.jpg

DSCF7642_zpslwkxs2ab.jpg

DSCF7643_zps2ljt3ws9.jpg

DSCF7644_zpsnkmmr3ni.jpg

DSCF7645_zpsptetcwsz.jpg

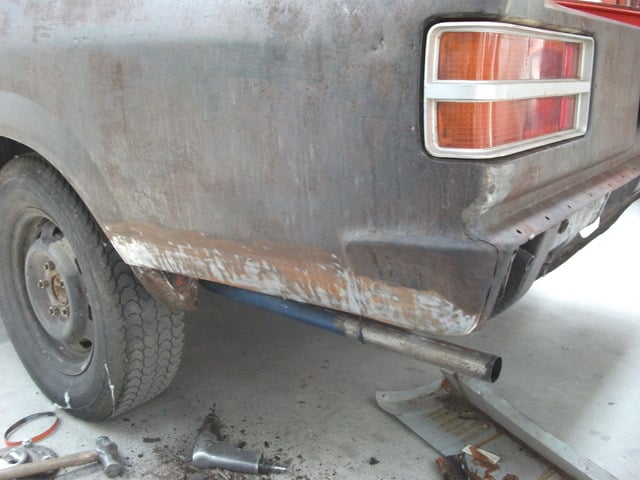
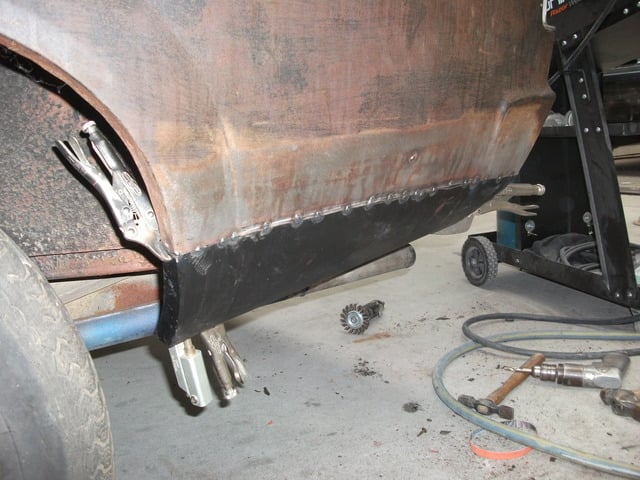
After a few hours of trial fitting, hammer & dolly work & trimming, managed to tack the new panel in place. doesn't look like much work in the pics, but I don't want to shape the lower quarter with bog, after I finish welding & dress up the panel in a few spots, it should hopefully only need a light skim of bog to finish off. 


#16 HIBERN8

HIBERN8

    Forum Member

  • Members
  • PipPipPip
  • 131 posts
  • Name:Mark
  • Location:SA
  • Car:1974 LH S
  • Joined: 05-July 12

Posted 26 October 2015 - 12:14 AM

Great to see this project get started. Look forward to seeing more progress. Nice work on what you've done so far, seems you've planned well and made good use of your time.

#17 _LH SLR 3300_

_LH SLR 3300_
  • Guests

Posted 31 October 2015 - 09:21 PM

Spent the afternoon fitting the lower beaver tail panel, had to make & fit repair sections on the sides where the beaver meets the quarter panel before I could fit the beaver. Will hopefully finish welding tomorrow & start on the battery tray & radiator support tie rail.

DSCF7646_zpsjqr2qnkt.jpg

DSCF7650_zps28ctf5t4.jpg

DSCF7648_zpsseajevdi.jpg

DSCF7647_zpsiowetist.jpg

DSCF7652_zpspnicebzp.jpg

DSCF7653_zps5nerkiws.jpg

DSCF7654_zpshrgggccf.jpg

DSCF7651_zps1vatqqgk.jpg

The dimples on the edges where the beaver meets the quarter panel are spot welds, not dents from hammering the panel on. The original panel was spot welded here, so as I had access to a spot welder, I spot welded the new panel rather than MIG.


New beaver also joins to the floor as per original. I have to fully weld the join along the top, so rather than fully weld along the bottom as is needed with some aftermarket panels, I paid extra for one that only needs plug welding to the boot floor in a few spots.


#18 tsn007

tsn007

    Forum Fixture

  • Members
  • PipPipPipPipPip
  • 1,018 posts
  • Name:Tony
  • Location:LIVERPOOL, NSW
  • Car:LX hatch, LX sedan
  • Joined: 25-April 07

Posted 01 November 2015 - 07:51 AM

nice work matty

how many hours are involved in the rear beaver & qtr panels


#19 _LH SLR 3300_

_LH SLR 3300_
  • Guests

Posted 01 November 2015 - 09:30 AM

So far, all repairs have taken me around 20-25 hours. The repair panels are multi tacked in place & I need to finish welding & grind the welds.


I expect this will take another 10-12 hours, I like to take my time grinding down MIG welds as the metal can become too thin & brittle if you go too fast & grind too much out. This can lead to cracks appearing along the weld joins, usually after the car is painted.


I also swap from various tools while doing this for certain areas such as belt sander, mini air sander etc & for a final finish that doesn't take too much filler.


#20 _LH SLR 3300_

_LH SLR 3300_
  • Guests

Posted 08 November 2015 - 02:46 PM

Spent a few hours on the car this weekend. Finished off the lower quarter repair & sealed it.

DSCF7655_zpsnvoiz3er.jpg

DSCF7656_zpscagtrjdx.jpg

Could not buy pre made sections for the lower corners of the rear screen aperture, so I had to make my own. Fitted them & finished welding the section that runs along the base of the screen where it meets the boot lid.

DSCF7658_zpshnyoey4d.jpg

DSCF7657_zpsodynnavz.jpg

DSCF7659_zpsr1upyn0m.jpg

As the entire lower section including both corners of the screen aperture have been replaced, I didn't want to chance the screen not fitting after painting the car, so I trial fitted the screen to see if there were any areas I stuffed up. Considering the corners were hand made & the main repair panel needed plenty of work to fit half what reasonable, I'm pretty happy with how the screen fits.

DSCF7661_zpshyqa9jox.jpg

DSCF7662_zpsx88tzibv.jpg

DSCF7660_zpszhwwkxlo.jpg

DSCF7663_zpskxmeczmy.jpg

It's not a perfect job, but good enough for this car & what I plan to do with it.

None of the bolt on panels are original to this car & as such, three of the four doors have stainless steel moulds fitted around the windows as per LH SL & SL/R. I have decided to keep these on the car, so I had to work out how to fit them to the one door that didn't have them originally.

DSCF7664_zpsdvsm7osp.jpg

DSCF7665_zpslnnnomtg.jpg

I didn't want to use screws or pop rivets to attach the retaining clips, so I sourced some OEM type studs & using an Easy beat electric dent puller with a special attachment, I welded the studs to the door frame.

DSCF7666_zpslwlqke71.jpg

Trial fitted the stainless trims to make sure I welded the studs in the right spot & that is more or less where I called it quits for the weekend.

DSCF7669_zpsdjtfxk7k.jpg

DSCF7667_zpsccpl7s6n.jpg

DSCF7668_zpsfmigxvjw.jpg

DSCF7670_zps8kop7oi0.jpg


#21 BIG KEV

BIG KEV

    Forum Fixture

  • Members
  • PipPipPipPipPip
  • 1,218 posts
  • Name:Kevin
  • Location:SYDNEY
  • Car:LHSLR5000 and The 6LT Project
  • Joined: 02-January 12

Posted 08 November 2015 - 03:34 PM

Looking good Matt

#22 LHSL

LHSL

    Forum Fixture

  • Members
  • PipPipPipPipPip
  • 995 posts
  • Name:Phillip
  • Location:SYDNEY
  • Car:1974 LH SL; 2 x 1975 LH S Toranas
  • Joined: 30-March 07

Posted 08 November 2015 - 05:03 PM

You always make it easy and never give yourself enough credit. Don't lose your love of LHs.

#23 _LH SLR 3300_

_LH SLR 3300_
  • Guests

Posted 08 November 2015 - 05:27 PM

Thanks, it is by no means easy to do this type of work. I have spent around 40 hours so far & I could've spent more time perfecting these repairs, but near enough is good enough for me. I'm very fortunate to have the use of the workshop & hoist to do the work, but my boss has sacrificed much needed space for this & I don't want to take advantage of his generosity by storing the car here any longer than it needs to be.


Don't think I'll ever lose my passion for LH Toranas, I do admit to getting a degree of satisfaction resurrecting another one that was abandoned by it's previous owner for a better example in need of far less work than this one.


#24 _LH SLR 3300_

_LH SLR 3300_
  • Guests

Posted 14 November 2015 - 08:53 PM

Spent a few more hours on my car, started last night by replacing the lower radiator support tie rail that had the common rust these cars suffer from.


The rear part wasn't rusted through, only the front. 

DSCF7677_zps42o1b8fi.jpg

DSCF7678_zps7iiwrvnr.jpg

I purchased a Rare Spares replacement section & unpicked the front part. Then using a spot welder, fitted it to the main support panel.

DSCF7674_zpstgkvodal.jpg

DSCF7675_zpsudff7vjg.jpg

DSCF7676_zpsnnroji8t.jpg

Very happy with the fit, Rare Spares do a great job making these panels. Next job was to fit the Rare Spares replacement battery tray. Someone had cut most of the original rusted one away, but butchered the tops of the rails & the engine bay skirt, so I had to do some extra work here as well as remove the remaining bits of the original tray.

DSCF7679_zpsnaz8dnbw.jpg

One of the bits I had to make & fit before welding in the replacement panel. I will finish grind the welds later when the car is back home.

DSCF7684_zpsz4fizbbd.jpg

As with the radiator support panel, I spot welded the battery tray in to make the repair look original & to save time MIG welding & grinding.

DSCF7680_zpsnp79jqva.jpg

DSCF7681_zpsrmnnwkon.jpg

DSCF7682_zpsi9jsnw3n.jpg

Instead of drilling through the radiator support panel, I unpicked what was left of the old battery tray from behind. That way I could spot weld the new panel in over the factory welds so the repair is almost undetectable.

DSCF7683_zps5tlkiiiy.jpg

DSCF7683_zpszczrynok.jpg

Now I can clamp the battery in as it is supposed to be instead of using hockey straps.

DSCF7688_zpsbqogs2pm.jpg

DSCF7687_zpse50ggsui.jpg

Refitted the front panels to check everything fits as it should & ready for the next stage of repairs.

DSCF7686_zpsr8b2vffg.jpg

DSCF7685_zps3sxjk3p8.jpg


#25 SmacT

SmacT

    Forum Fixture

  • Members
  • PipPipPipPipPip
  • 973 posts
  • Name:Sam
  • Location:Sydney
  • Car:LX 4dr 383, TKX, BW
  • Joined: 24-December 08

Posted 14 November 2015 - 09:00 PM

Ha ha, I have done all those repairs on my weapon - except for D/S rear quarter - however you have done it in 1/millionth of the time and much neater. :-) Top work as always.


What's next? 


1 user(s) are reading this topic

0 members, 1 guests, 0 anonymous users