Jump to content


- - - - -

LH TORANA PROJECT


  • Please log in to reply
58 replies to this topic

#26 _LH SLR 3300_

_LH SLR 3300_
  • Guests

Posted 14 November 2015 - 09:09 PM

It helps to have a trade background when doing this type of work. Hats off to anyone not in the trade who has a go at doing these repairs themselves. Must admit the best thing I did was go from doing restoration back to smash repairs for a living. I enjoy working on the old cars much more now.


I have some rust behind the bonnet hinges, a small section beneath the driver's tail light to repair & that's about it. Once they're done & the car is back home, I'll strip the car down & send it off for media blasting so I can start on the cosmetic side of the body work.


#27 Ice

Ice

    Cool

  • Members
  • PipPipPipPipPipPipPip
  • 15,196 posts
  • Name:Gene
  • Location:Galaxy's away from Ipswich
  • Car:77 HZ Sandman Van
  • Joined: 03-January 07

Posted 14 November 2015 - 09:18 PM

Some how im gunna kidnap you and bring you over to the west Matty

#28 Covert

Covert

    Forum Fixture

  • Members
  • PipPipPipPipPip
  • 1,987 posts
  • Location:In my LH
  • Car:LH
  • Joined: 08-November 13

Posted 20 November 2015 - 01:15 AM

Doing a great job with the repairs. I also have a passion for the LH and look forward to watching yours progress.  :spoton:


#29 tsn007

tsn007

    Forum Fixture

  • Members
  • PipPipPipPipPip
  • 1,018 posts
  • Name:Tony
  • Location:LIVERPOOL, NSW
  • Car:LX hatch, LX sedan
  • Joined: 25-April 07

Posted 04 April 2016 - 09:42 PM

hey Matt


any updates on the project


#30 _LH SLR 3300_

_LH SLR 3300_
  • Guests

Posted 16 April 2016 - 08:05 PM

No updates to speak of. One small job i have started was fixing the rusted front apron panel. It was straight but but had the usual rust between the turn signal lamps & front number plate.

IMG_0211_zpsqhu2qth3.jpg

IMG_0221_zps9prn3f8m.jpg

IMG_0220_zpsd2bowugy.jpg

IMG_0222_zpsw7wawjl4.jpg

Started with the easier part, small area on driver's side.

IMG_0212_zpsxh1e71a3.jpg

IMG_0214_zpscu1tmoif.jpg

IMG_0215_zpstdo2jdm1.jpg

IMG_0216_zpsqw3xmfmq.jpg

I decided from the start I would Oxy butt weld these sections in place for several reasons. MIG would be quicker & easier, but you cannot planish or file finish MIG welds. These repairs will be metal finished with no body filler needed.

IMG_0217_zpsgrh1w9z5.jpg

IMG_0218_zpsoepfve7a.jpg

IMG_0219_zpsfro9ewng.jpg

Because oxy welding doesn't change the molecular structure of the steel like MIG, I can easily dress & planish any distortion without cracking the welds. Plus they are a lot easier to sand & file than MIG. Next was the left side. Only way was to cut the whole section out & replace it with fresh steel.

IMG_0223_zpsle6r9thp.jpg

IMG_0224_zpsfuzu1xwg.jpg

IMG_0225_zpsmkgaipva.jpg

IMG_0229_zpsskfidexq.jpg

IMG_0227_zpsqmijwjtu.jpg

IMG_0228_zpsd8qtbeve.jpg

IMG_0231_zpsitmb5gau.jpg

Starting to file finish.

IMG_0230_zpsoi6exrg6.jpg

By now I'd spent around four hours on this panel & was starting to get over it, so I sprayed some etch & base coat to seal it until I could be bothered finishing it  :)

IMG_0233_zpscsnkx43a.jpg

IMG_0232_zpsenmrnnhs.jpg


Edited by LH SLR 3300, 16 April 2016 - 08:07 PM.


#31 Ice

Ice

    Cool

  • Members
  • PipPipPipPipPipPipPip
  • 15,196 posts
  • Name:Gene
  • Location:Galaxy's away from Ipswich
  • Car:77 HZ Sandman Van
  • Joined: 03-January 07

Posted 16 April 2016 - 08:28 PM

Good stuff Matt hope to see it Tfest next year

#32 _LH SLR 3300_

_LH SLR 3300_
  • Guests

Posted 16 April 2016 - 08:31 PM

Still undecided what engine to run in this car, have a few options including this.

DSCF7695_zpswcws8mgr.jpg

LS1 with forged pistons, CNC port/polished 70cc chamber heads, lumpy cam, VCM tune & W2A intercooled Harrop HH122 supercharger backed with a built 4L60e with TCE 8inch 3000rpm convertor.

In a 1600KG VY Commodore it's a wheel spin machine, don't know what power it makes, but previous owner claimed well over 500HP at the tyres. 


#33 Ice

Ice

    Cool

  • Members
  • PipPipPipPipPipPipPip
  • 15,196 posts
  • Name:Gene
  • Location:Galaxy's away from Ipswich
  • Car:77 HZ Sandman Van
  • Joined: 03-January 07

Posted 16 April 2016 - 08:38 PM

Do it

#34 _LH SLR 3300_

_LH SLR 3300_
  • Guests

Posted 16 April 2016 - 08:42 PM

The only thing that puts me off is the BS I'd have to go through to get rego for it. Just trying to get a 308 passed for blue slip in NSW has given me headaches in the past.


#35 _LS2 Hatch_

_LS2 Hatch_
  • Guests

Posted 16 April 2016 - 11:54 PM

That would be a hell of a lot of fun to drive!
No fun at all getting it to fit. You would need to bring the engine a long way forward for the rear pulley/shaft to miss the firewall. Then you have the rest of the issues that go with that: sump hump, engin mounts, radiator and fan clearance.
I'm sure you have already thought of all this, and with your skills I'm sure you could cope with it too.

Your work is amazing. It's a treat to watch. Your update above may be "nothing to speak of" but I love to watch.
Keep up the good work!

#36 _LH SLR 3300_

_LH SLR 3300_
  • Guests

Posted 01 May 2016 - 02:38 PM

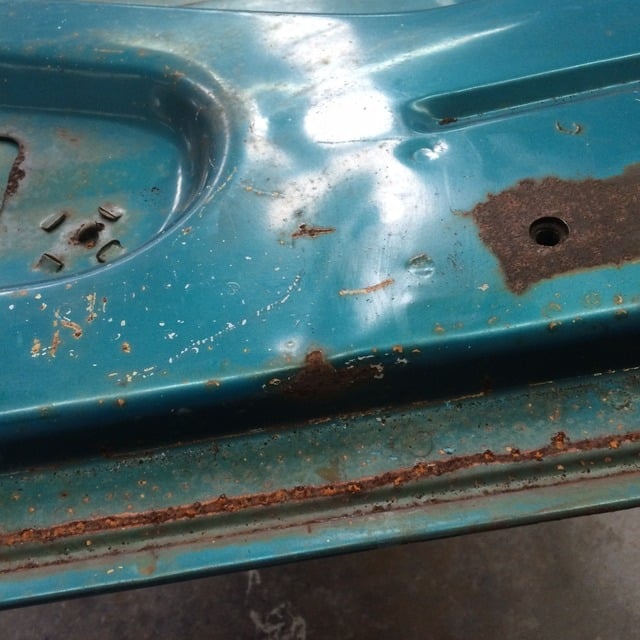
Out of boredom I started another small job on this car today, repairing a damaged bonnet. I picked this up cheap due to the damage, it looks like it either lifted open while the car was in motion, or someone tried to close it on seized hinges. Either way, the frame was twisted & bent where the hinges bolt.


The rest of the bonnet looked OK, had the standard dent right in the front center & large lows in the rear corners from the frame being twisted, but as I plan to cut a hole in, well worth fixing rather than cut a mint one.


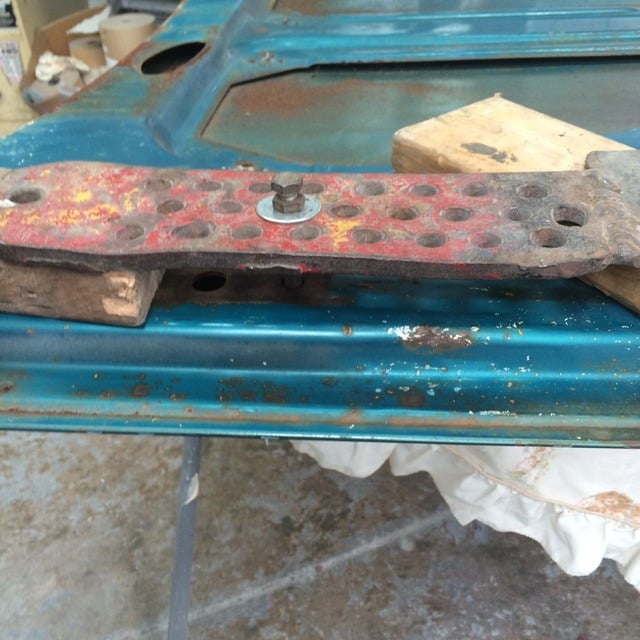
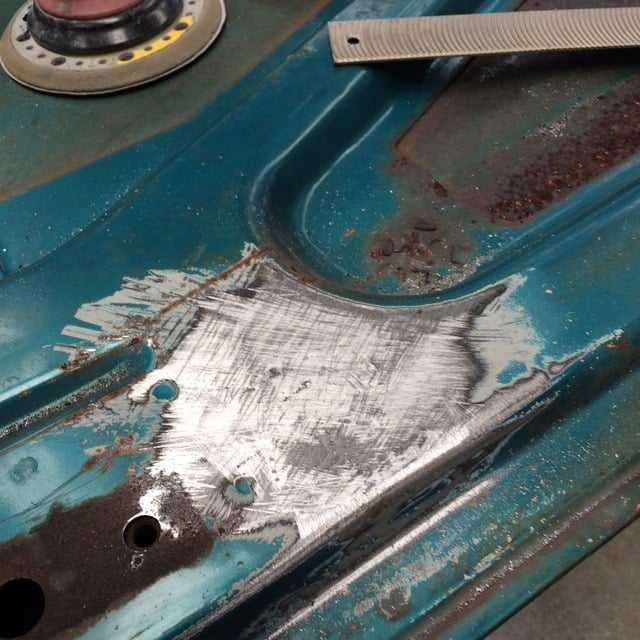
Using some blocks of wood, a large thick piece of steel & a long threaded bolt & nut, I started by reversing the damage by winding the bolt into the hinge thread, holding it in position with one spanner while turning the nut with another to slowly pull the frame back into shape, dressing the creases with a panel hammer at the same time.

IMG_0241_zps5hjh0hgm.jpg

IMG_0243_zps435hukq0.jpg

After doing this, there were still low spots in front of the hinge bolt holes.

IMG_0244_zpscxbtzbhb.jpg

IMG_0245_zpscwmkfwv4.jpg

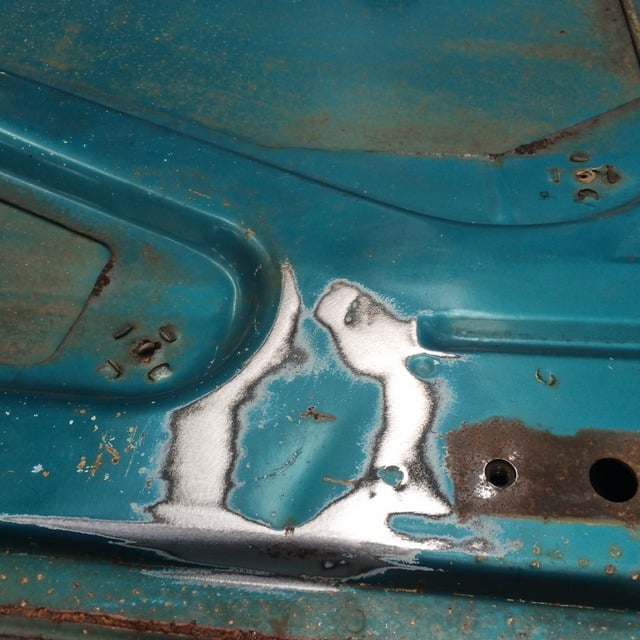
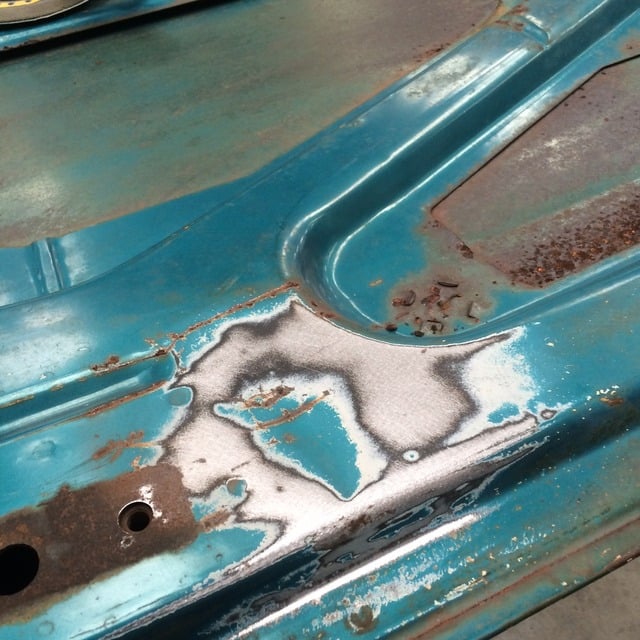
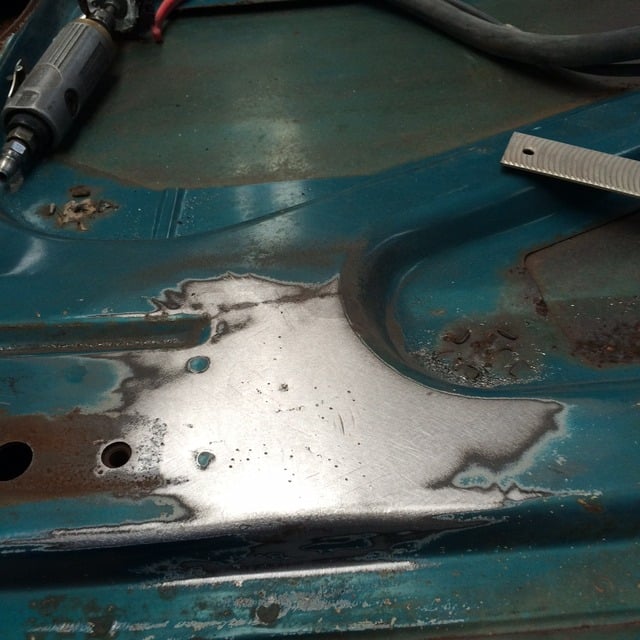
Using an electric dent puller, I slowly pulled the lows up & ran a body file over the repaired area to minimize the need for filler which would more than likely crack in this area from panel flex every time the bonnet is opened or closed. The small pit marks left by the dent puller would more than likely only need a couple of coats of hi-fill.

IMG_0246_zpsz77urk4d.jpg

IMG_0247_zps5firsdyw.jpg

IMG_0248_zpssiucvoju.jpg

IMG_0249_zpshlfc9hpq.jpg

IMG_0250_zpsr7qg0hpp.jpg

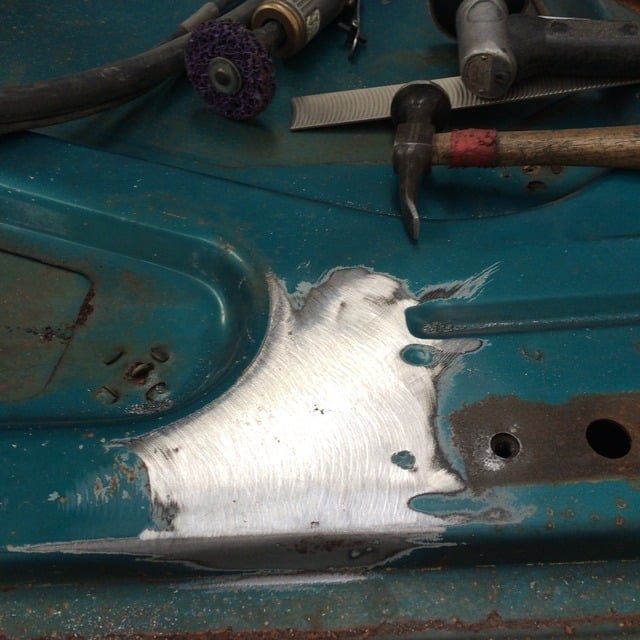
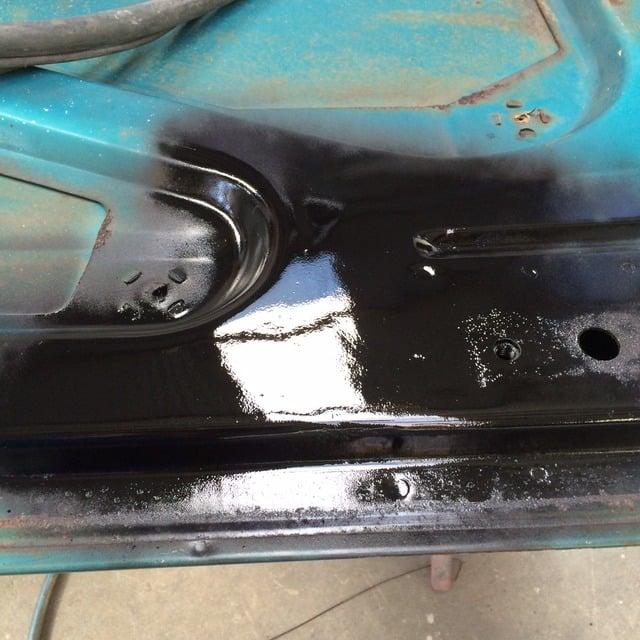
Not earth shattering work, but I'm satisfied I was able to save a panel that a lot of people would've binned.


#37 tsn007

tsn007

    Forum Fixture

  • Members
  • PipPipPipPipPip
  • 1,018 posts
  • Name:Tony
  • Location:LIVERPOOL, NSW
  • Car:LX hatch, LX sedan
  • Joined: 25-April 07

Posted 13 June 2016 - 09:23 PM

hey Matty


and news on the project


#38 WA1TNC

WA1TNC

    Forum Fan

  • Members
  • PipPipPipPip
  • 358 posts
  • Name:Nig
  • Location:Cranbourne
  • Car:HX ute(daily) LH Torana(Harrop Blown LS1) in the build
  • Joined: 06-October 09

Posted 18 June 2016 - 10:58 PM

Do it, it's a bit tight but I got mine in there with well over 10mm clearance everywhere.
photo-11.jpg
Cheers, nig.

#39 _LH SLR 3300_

_LH SLR 3300_
  • Guests

Posted 09 July 2016 - 08:19 PM

Back home from being garnet blasted.

IMG_0295_zps0amepf4z.jpg

Some more rust repairs. Left front screen pillar.

IMG_0305_zpsbvkmbzwd.jpg

IMG_0311_zpsblngc8my.jpg

IMG_0312_zpsqhhywnao.jpg

IMG_0313_zpsqvbbdy89.jpg

IMG_0314_zpswuvt3cdj.jpg

Right rear tail light bucket/beaver panel.

IMG_0318_zpsbddlniln.jpg

IMG_0319_zpsh6trlwew.jpg

IMG_0321_zpsivkndsri.jpg

IMG_0320_zpsgwxon51z.jpg

IMG_0322_zpsubxkxdb7.jpg

Right rear screen pillar.

IMG_0325_zpsufcqn0f2.jpg

IMG_0326_zpsyt2ptbyg.jpg

IMG_0327_zpse67fikpl.jpg

IMG_0329_zpsmnt7woze.jpg

IMG_0330_zpsopietevx.jpg


#40 Covert

Covert

    Forum Fixture

  • Members
  • PipPipPipPipPip
  • 1,987 posts
  • Location:In my LH
  • Car:LH
  • Joined: 08-November 13

Posted 09 July 2016 - 08:26 PM

impressive work


#41 _LH SLR 3300_

_LH SLR 3300_
  • Guests

Posted 09 July 2016 - 08:38 PM

Re-skinned two of the doors with NOS skins left over from other projects.

IMG_0332_zpsljgiso1d.jpg

IMG_0335_zpssuiol0es.jpg

IMG_0336_zps85gccjc5.jpg

IMG_0339_zpsflmcsvqu.jpg

IMG_0340_zpskou6ux2m.jpg

IMG_0345_zpsh1zvbrxn.jpg

IMG_0342_zpsvzxpvk6i.jpg

More rust repairs, right rear door frame.

IMG_0346_zpskbuiwpai.jpg

IMG_0347_zpsep3kowqb.jpg

IMG_0350_zpscotf5v6b.jpg

IMG_0352_zpsov6lzzbs.jpg

Epoxy urethane etch primed front guards & apron.

IMG_0304_zpszuhxxnvx.jpg

IMG_0303_zpspvszsjdz.jpg

IMG_0302_zpsqpu8nzay.jpg

Epoxy urethane etch primed body shell & boot lid.

IMG_0358_zpsnggzqwtj.jpg

IMG_0357_zpsin4qbruv.jpg


#42 _LH SLR 3300_

_LH SLR 3300_
  • Guests

Posted 09 July 2016 - 08:52 PM

Epoxy urethane etch primed doors.

IMG_0368_zpslsiul4qm.jpg

IMG_0374_zpsssmun0k7.jpg

IMG_0369_zpswfmscqnb.jpg

IMG_0373_zps6i6vye4z.jpg

IMG_0366_zps1gudkl5f.jpg

IMG_0363_zpsadd3p5zu.jpg

Whole car in epoxy urethane etch primer ready for body filler work.

IMG_0379_zpslb3ifmm1.jpg

IMG_0382_zpsydknmswt.jpg

IMG_0387_zpswosylzjb.jpg

IMG_0388_zpsirp0oowh.jpg

Skim of filler on roof turret followed by three coats of polyester spray filler.

IMG_0395_zpsmuvx1vb3.jpg

IMG_0396_zpsrbmlwbc2.jpg

Half way through blocking spray filler with P120 followed by P180.

IMG_0398_zpscikclye3.jpg

Couple of small jobs in between, heater box rubbed back with P800, plastic primed & painted with 2K satin clear over raw plastic finish.

IMG_0362_zpsx0ntqb8n.jpg

IMG_0361_zpsst3kkpyd.jpg

Heater fan stripped back, epoxy primed & painted with satin black 2K.

IMG_0359_zpsucptmqbn.jpg

IMG_0360_zpsm9qrzapy.jpg


#43 tsn007

tsn007

    Forum Fixture

  • Members
  • PipPipPipPipPip
  • 1,018 posts
  • Name:Tony
  • Location:LIVERPOOL, NSW
  • Car:LX hatch, LX sedan
  • Joined: 25-April 07

Posted 09 July 2016 - 10:13 PM

great work as usual Matt


you make the rust repairs look so easy, which i know takes lots of experience and time to do


#44 GMHAz

GMHAz

    Driving the Dream

  • Members
  • PipPipPipPipPip
  • 1,174 posts
  • Name:Aaron
  • Location:The Garage
  • Car:1977 Hatchback
  • Joined: 26-November 13

Posted 10 July 2016 - 12:01 AM

Coming along nicely Matt

#45 Ice

Ice

    Cool

  • Members
  • PipPipPipPipPipPipPip
  • 15,196 posts
  • Name:Gene
  • Location:Galaxy's away from Ipswich
  • Car:77 HZ Sandman Van
  • Joined: 03-January 07

Posted 10 July 2016 - 02:35 AM

Top work Matt but then again all your work is keep at it mate

#46 _LH SLR 3300_

_LH SLR 3300_
  • Guests

Posted 10 July 2016 - 08:35 AM

Workmanship is OK, this car will never be a show winner. Right from the beginning I only ever wanted it to be something I can have a bit of fun with & not get overly carried away with. If I wanted to build a concourse show winner I would've paid more for a better car to start with.


#47 Heath

Heath

    I like cars.

  • Administrators
  • PipPipPipPipPipPipPip
  • 18,380 posts
  • Name:Heath
  • Location:Eastern Suburbs, Melbourne
  • Car:Heavily Modified UC Sunbird Hatchback
  • Joined: 07-November 05
Garage View Garage

Posted 10 July 2016 - 10:19 AM

This project involves a lot of exceptional quality repair work. Very much enjoying the read.

#48 _LH SLR 3300_

_LH SLR 3300_
  • Guests

Posted 10 July 2016 - 10:30 AM

Thanks but it is far from my best work. My boss has been generous in allowing me to use the workshop, however it's a small shop & being an NRMA preffered repairer, it's always full to capacity with work. As such I'm trying to do reasonable work without taking years to do it. To get to this stage has taken around six weekends working around 8-10 hours each day. 


#49 Statler

Statler

    Heckler Extraordinaire

  • Administrators
  • PipPipPipPipPipPipPip
  • 6,310 posts
  • Name:Col
  • Location:Mackay Qld. Whitsundays for all you back packers!
  • Joined: 20-May 06

Posted 10 July 2016 - 04:33 PM

60hrs @ $100/hr. 

Doesn't take long for the dollars to add up if you had to pay someone to do it. 


Following. :)


#50 Redslur

Redslur

    Has been Torana owner

  • Members
  • PipPipPipPipPipPip
  • 3,536 posts
  • Name:Gerry
  • Location:Canberra
  • Car:HQ GTS Replica 350.
  • Joined: 08-November 05

Posted 10 July 2016 - 05:49 PM

Nice work Matty.  Looking forward to seeing which way you go engine wise :-)


2 user(s) are reading this topic

0 members, 2 guests, 0 anonymous users