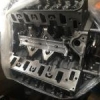
I consider the damage to the dash pad to be moderate with some large sections on the left and right corners exposed with the under foam and a few hair line cracks throughout the rest of it. Ive seen better and seen worse.


Step 1: Use the dremel to grind out and head off any cracks and holes. I took the foam back to just under original height. I rounded off any sharp edges and removed any peeling plastic/vinyl.
Step 2: I mixed up some standard body filler and filled all of the imperfections, cracks and holes to above original height to allow for sanding. One again, all sanding was done with the dremel.

Step 3: Once i had the rough level sorted, i mixed up another batch and did a final layer to tidy up the edges etc. this time i used some 80 grit wet and dry to knock off the high points and then finished with 180 and then had some 2000 lying around and used this.


Step 4: Thoroughly clean the whole dash pad with prep wash. Do this a couple of times to help remove 40 years of silicone spray and to help the paint stick.
Step 5: I applied a couple of light coats of VHT vinyl dye in gloss black.
Step 6: Now here is the detail bit...i had a piece of grained vinyl lying around and its grain matched pretty closely to the original grain. I put a thicker coat of paint on the sections i had repaired and then carefully laid the vinyl offcut on them and pressed down lightly. I removed it immediately and it left a pretty good grain on repaired sections.

Step 7: I let this dry for about 5 mins then applied another couple of light coats to the while dash pad to finish it off.


All up it took me just over 5 hours start to finish and cost me $16 for the VHT paint can.
Now, i know its not perfect and i know that a professional would do better but for $16 i am pretty happy with result. The other advantage is that there was no wait time.
Now i can spend that dash money on some other bits and pieces.
Sent from my iPhone using Tapatalk