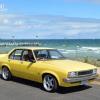
Hawks Torana dream lives on
#51
Posted 24 December 2020 - 09:54 PM
Sounded pretty healthy other than the timing being a bit out.
Got the K frame and 173 out too. passengers side rail us worse than I initially thought sadly.
FB_IMG_1608809964752.jpg 104.2K 11 downloads
FB_IMG_1608809968688.jpg 94.48K 11 downloads
FB_IMG_1608809971592.jpg 66.38K 12 downloads
FB_IMG_1608809975118.jpg 56.83K 11 downloads
#52
Posted 25 December 2020 - 10:44 AM
#53
Posted 25 December 2020 - 01:57 PM
Hi Steve, great project.
Don't be scared of the damage to the rail, it needs corking at the fold from inside the rail. A home made tool that will fit through the bolt access hole and placed at the fold with a dolly of some sorts on the other side. I definitely wouldn't be replacing that rail from the pictures you have posted.
Merry Christmas
#54
Posted 26 December 2020 - 02:50 PM
Deffinitly had a front ender, the rad support has been replaced at some point and poorly too.
I have an idea of how to straighten the rail. May need to convince work to let me make a couple of components to help with it.
I'll get the front end finished first then try to tackle the rail. I don't plan on any panel work or painting the car properly at this stage. Aim is to get it regoed and enjoy it for a while.
#55
Posted 27 December 2020 - 01:06 PM
I used my engine lifter bits and pieces to straighten a rail before.
A chain block can be handy as well depending on which way it has to go.
Check your roof for a dimple about palm sized around the B pillar area.
They usually dimple there with a bent rail.
Once you get it all square the dimple disappears.
Check the seam going across above the tunnel as well.
Sometimes they will get a bit of a gap there as well.
Again, it closes when square. Just need to redo the seam sealer.
Cheers
Rob
#56
Posted 27 December 2020 - 02:43 PM
Thanks heaps for the advice, it explains the bog in the roof on the passengers side. to see if its a dimple I'd have to strip the roof.
FB_IMG_1609044063884.jpg 99.42K 8 downloads
To be honest this sort or work is beyond my ability and equipment available at home. Dependant on the cost to get it done properly by a professional, I may be better off getting another shell.
#57
Posted 29 December 2020 - 08:11 AM
I don't think you should make a big deal about the rail at all.
I would just make some simple tools to straighten that area up a bit as Mick said (like... it's a few minutes with a hammer and dollies once you have something that fits nicely into that fold on the inside), and continue with the work you're doing.
As long as you can align the panels, and get the front end aligned how you want it, within reason, who gives a shit if it's got a bit of a wave in it.
#58
Posted 29 December 2020 - 01:49 PM
Find the chassis measurement diagram on here.
Im sure someone knows exactly where it is and will post it for you.
Get some brickies string, set out some lines and see how far out it is.
The rails will often move up as well as sideways if the hit was decent enough.
Check it all then let us know how it is and we may be able to suggest how to fix it.
Cheers
Rob
#59
Posted 29 December 2020 - 08:53 PM
I just want to be sure its right. They are bent/ pushed in at the lower k frame mounts too. Plan is to save a bit and get it to a panel shop and have the harder bits done there.
K frame is all stripped and ready to be blasted and painted. Will have to get some new V8 springs now as the original plan was to keep the 6.
the below front end came with the motor I bought and has hq brakes can anyone tell what the callipers are and if they are torana or kingswood stubs?
Should I use these or just buy a hoppers kit?
FB_IMG_1609226169412.jpg 92.96K 11 downloads
FB_IMG_1609226165981.jpg 82.45K 8 downloads
FB_IMG_1609226163340.jpg 80.04K 7 downloads
FB_IMG_1609226152748.jpg 117.92K 7 downloads
FB_IMG_1609226135388.jpg 77.36K 10 downloads
FB_IMG_1609226148465.jpg 66.39K 12 downloads
#60
Posted 29 December 2020 - 09:05 PM
Looking at the location of the tie rods compared to the caliper closest bolt, they seem to be in a weird location than I remember them being with UC steering arms. I wonder if they are HQ steering arms?
Edited by yel327, 29 December 2020 - 09:10 PM.
#61
Posted 30 December 2020 - 12:46 PM
so I took some measurements today based on the image below.
FB_IMG_1609295669852.jpg 55.04K 18 downloads
Had to take the diagonals without droppers as the floor is pretty uneven.
front bar to front bar bolt holes centre to centre was 785mm
drivers side front to passengers rear gearbox mount was 1750mm and passengers front to drivers rear gearbox mount was 1730mm.
Found more suprises while under there today. Drivers rail is cracked at the lower k frame mount and passengers rail is cracked in 3 spots near the gearbox crossmember where it was pushed upwards.
FB_IMG_1609295652682.jpg 74.59K 12 downloads
FB_IMG_1609295649161.jpg 61.11K 13 downloads
Got the little guy help tear some of the motor down and put some new Welch plugs in it.
FB_IMG_1609295667264.jpg 114.01K 9 downloads
FB_IMG_1609295659506.jpg 105.34K 10 downloads
#62
Posted 30 December 2020 - 04:43 PM
Make sure the rails are the 15 inch measurement up on both sides.
Cheers
Rob
#63
Posted 01 January 2021 - 11:21 AM
Personally I would clean up and reuse as much stuff as possible.
You don’t need new front springs, the six cylinder ones will be fine.
The brakes and stub axles should fit. The calipers are HX and will do the job fine.
I would concentrate on getting it assembled.
#64
Posted 01 January 2021 - 03:43 PM
I need to wait until stuff opens up now that new years is over so I can get the old bushes removed and send everything off to be blasted and painted.
The torana callipers I have are siezed and need a rebuild. The spare front end above I was planning on putting the old discs off my car onto. then that front end in it to transport it to a panel shop if they are willing to tackle the rails.
Rockoz, I will aim to get those other measurements asap. It will be hard to get super accurate to to the damage to the rails and uneven surface im working with (dirt and gravel).
I will need some time to save to have the repairs done and will use that time to clean up the 253, paint it and replace some gaskets. While sorting out the front suspension as well.
As I thought the shell was in good condition when initially purchased, all my spare money went into the parts to do suspension and brakes. I was hoping for a quick mechanical overhaul and rego to enjoy for a while.
So moving forward the plan is:
1. Remove the bushes and ball joints from the front suspension. (do I use the uc k frame or lh/lx) Could the uc one be bent based off the rail damage?
2. send the front end and some other bits off for blasting and powder coating.
3. piece the rebuilt and painted stuff back together ready to go into the car.
4. consult with a panel shop regarding the required repairs.
5. In-between the above, put torana discs on the spare front end and re fit to the shell to get it mobile.
6. finish cleaning up the motor with new gaskets and paint. Maybe replace the inlet manifold and dizzy.
7. Decide on gearbox choice, I have 2 V8 trimatic boxes at home but really prefer to go manual. I may have to settle on the auto for the time being.
8. steering rack rebuild.
9. get the repairs done to the shell if funds permit, if not it will stay stagnant for a while as I save.
10. reassemble with the rebuilt front end and everything else. Brake choice will have to be decided at some point too.
Anything I'm missing or should do differently?
BTW Happy new year all and I look forward to sharing more as this progresses. Although I post a lot of insignificant work on the car, I enjoy sharing it and am just excited to have a torana again, no matter what the cost haha.
#65
Posted 02 January 2021 - 08:23 AM
UC front ends are much better than LH/LX ones so stick with that.
After you repair the rails and with engine out maybe tidy up and spray the engine bay?
Love what you're doing too!
#66
Posted 02 January 2021 - 09:28 AM
I got a long length of rhs tube and fixed it to the sills somehow to get the measurements.
Tek screws perhaps. It was a long time ago.
Then you just work it out from there.
Check the diagonals on the front door openings.
That can give you a good clue as to where it is at.
I got mine within 0.5mm using the engine lifter and some chains anchored to the concrete.
They were likely to be only within 5 mm tolerance when built anyway.
Cheers
Rob
#67
Posted 02 January 2021 - 10:07 AM
I remember Rob when I last spoke to Leo Pruneau at length. He told me that when they changed all body plants over for Commodore they had to replace most of the Holden and Sunbird/Torana Fisher body jigs as Commodore had far less tolerance in panel gaps. Even the Fisher body welders wouldn't work. From memory they still kept old jigs as they still made Sunbird into 1980 and Holden to the end of 1984, but they needed all new ones for Commodore. Must have cost a bit as Pagewood built the bulk of VB-VH bodies, but they were also being built in the other body plants. Then Pagewood closed in 1980.
#68
Posted 03 January 2021 - 11:08 PM
Rockoz, those measurements I took aren't the most accurate but came out at 345mm. Both sides I got the same so hopefully that's good news.
Got a busy day tomorrow getting things ready on the car before I go back to work Tuesday.
Mainly getting things ready to send to the blasters
and maybe getting the spare front end into the car for now.
#69
Posted 04 January 2021 - 03:47 PM
Degreased and cleaned up a lot of bits that are off to the blasters and started to fit the spare K frame to the car to get it rolling again.
When getting the parts blasted should I have all the bushes and such refitted before painting or after?
Also I just tape up the spindles on the stub axles? and the holes for the ball joints?
Any specific type of tape or just anything works?
Does anywhere sell new bolts for the lower K frame mounts? as one of mine is bent.
FB_IMG_1609738670086.jpg 131.24K 9 downloads
#70
Posted 04 January 2021 - 07:00 PM
#71
Posted 04 January 2021 - 07:06 PM
#72
Posted 04 January 2021 - 07:54 PM
This is the only place I've seen replacements for sale.
Otherwise measure up the old one and go to good fastener shop. You would probably get a bit cheaper but I'd say these days an oddball size like that would be an order in item.
#73
Posted 06 January 2021 - 03:00 PM
6K to repair whats there or 8k to replace the rails if I can source them. At the end of the day it's not worth spending that kind of money on this shell. Not to menion I don't have that sort of money to spend at the moment as I put it all into this.
Its essentially an expensive parts car.
#74
Posted 06 January 2021 - 03:38 PM
#75
Posted 07 January 2021 - 01:58 PM
Drill out the ends of the cracks, weld up the cracks, give it a squirt of paint, and get it on the road.
1 user(s) are reading this topic
0 members, 1 guests, 0 anonymous users