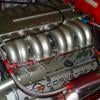
Hawks Torana dream lives on
#76
Posted 07 January 2021 - 03:32 PM
I'll cut holes in the floor pan above the rails to access the inside and know them back out. When doing these repairs is it worth strengthening the rails, especially where the crack is by welding a plate in to box it up? With a relief to allow water to escape of course.
Started on the crossmember upper Mount today, the easiest bit. Not perfect but its come a long way.
Before:
FB_IMG_1609997123481.jpg 56.17K 9 downloads
After:
FB_IMG_1609997129324.jpg 69.94K 9 downloads
#77
Posted 07 January 2021 - 04:33 PM
Damn fine work Steve. That looks as good as new.
#78
Posted 07 January 2021 - 04:55 PM
I would be hesitant to cut the floor. Why do you think you need access to the top of it? I think as heath suggested drilling the ends, weld it from the outside only getting full penetration should be sufficient to last many years to come.
#79
Posted 07 January 2021 - 05:41 PM
and the passengers side outrigger area is a lot worse than the photos show. I'm not sure how to straighten it otherwise. My main priority is to get the K frame mounts as close as possible to the correct position.
#80
Posted 07 January 2021 - 11:15 PM
For the out rigger section. Yes I hear what you're saying. Could you try tack welding some bar or small all thread on the dented area and use a slide hammer to pull it back out? I still think cutting access holes should be last resort.
#81
Posted 08 January 2021 - 11:27 AM
Access holes would be no different to replacing a section of rusty floor pan above the rails with no cut into the rail its self except of course where the crack is.
#82
Posted 08 January 2021 - 12:13 PM
Access holes make repair way easier in many instances.
Matt
#83
Posted 09 January 2021 - 08:04 PM
Today I spent the say mucking around with the motor. Timing chain is stretched and needs replacing, water pump needs to be done.
the timing cover has a chunk out of the seal area is it still good to use?
Harmonic balancer was hit with an angle grinder somehow and needs replacing.
Here's my list so far for the motor:
All prices from eagle auto parts.
rollmaster cs6000 timing chain set $175
powerbond harmonic balancer $275
Arp intake manifold bolts $110
arp timing and water pump bolts $85
arp sump bolts $85
arp head studs or bolts? $275
extractor bolts $40
water pump what type? $100 ish
Gasket kit up to $200? which rear main seal?
will probably need other bits too. I think I'll leave the intake manifold for now to save on coin and same with the electronic dizzy. Would love to get a tunnel ram eventually.
I'll pull the heads off and get a friend to lap the valves, and might get them chemically cleaned while apart.
Hopefully I can get some paint on the sides of the block tomorrow.
How does the cam look in the pics from what you can see? Lifters look relatively new.
Attached Files
#84
Posted 09 January 2021 - 08:57 PM
#85
Posted 09 January 2021 - 09:21 PM
#86
Posted 09 January 2021 - 10:17 PM
Timing cover should be OK. Someone has drilled the old seal and inserted a self tapper to extract the old seal with a prybar or claw hammer. The seal seals to the timing case around the outside of the seal with a bit of goop.
#87
Posted 09 January 2021 - 10:26 PM
Unless you’re punching out 500 HP ARP bolts are overkill and you could use that money else where
standard bolts are fine just sayin
#88
Posted 09 January 2021 - 10:54 PM
Looking at the wear pattern/oil staining on the camshaft lobes you better get new lifters and you might also need a new or reground camshaft. The bottom of those lifters are badly worn.
Edited by S pack, 09 January 2021 - 10:55 PM.
#89
Posted 10 January 2021 - 12:11 AM
Looking at the wear pattern/oil staining on the camshaft lobes you better get new lifters and you might also need a new or reground camshaft. The bottom of those lifters are badly worn.
Thats a shame, I was hoping not to touch that side of things. Is it deffinitly wear or could it be because the motor was sitting a long time?
#90
Posted 10 January 2021 - 01:22 AM
New cam and lifters by the looks of things
#91
Posted 11 January 2021 - 09:59 PM
Stop looking for problems!
Get it back together and whack it in the car and see how it runs. No point spending lots of money on it.
Reuse the head bolts. Get all the others from the local bolt shop.
How bad is the mark on the harmonic balancer?
All dollars saved now can be put forward to a nice new engine down the track.
#92
Posted 11 January 2021 - 10:17 PM
On my last UC I always did things as cheaply as possible to keep it going, it meant there was constant issues that popped up. If I'd done it properly the first time the issues wouldnt have arisen.
Trying to learn from my previous mistakes.
I need to focus my efforts on one part of the build so the motor is shelved until I've finished the front suspension and rail repairs.
I need to keep focussed on one step at a time.
The harmonic balancer was pretty bad had 3 deep grooves in different spots. Looks like someone was trying to remove a pulley with a grinder and dug way too deep.
I started removing the interior on the weekend. Floors are really solid.
Attached Files
#93
Posted 11 January 2021 - 11:58 PM
If you need any parts ask here first im sure forum members will help if they can
#94
Posted 12 January 2021 - 06:39 PM
#95
Posted 12 January 2021 - 07:11 PM
#96
Posted 12 January 2021 - 07:44 PM
I have all rebuild gear for the front end and I think I have all the steering rack rebuild stuff already too.
Parts wise all I really need is my brake callipers rebuilt, a few bolts, and whatever parts need replacing on the motor and box.
As before the only thing that is really holding me up is the work on the rails and possibly my pay rise next month as I may be going to monthly pay.
#97
Posted 13 January 2021 - 06:34 PM
Maybe the previous owner was severely overweight? haha or what could cause this?
FB_IMG_1610525162552.jpg 99.42K 7 downloads
FB_IMG_1610525158467.jpg 50.46K 9 downloads
Then marked out one section of floor to cut out. Really versus about making the cut as I don't want to accidentally cut the rails at all.
FB_IMG_1610525155296.jpg 89.58K 10 downloads
#98
Posted 13 January 2021 - 06:44 PM
Edited by yel327, 13 January 2021 - 06:46 PM.
#99
Posted 13 January 2021 - 09:00 PM
My plan for it is to remove the seat anchor from the floorpan then add a patch section to replace the cracked area.
#100
Posted 13 January 2021 - 10:30 PM
Finished pulling the rear seat and rear section of carpet tonight. Found another surprise.
Maybe the previous owner was severely overweight? haha or what could cause this?
VB Commodores (maybe more? VC VH?) were renowned for cracking the floor pan under the drivers seat. If my memory is correct? UC went into the VB build era. Was that about the time the sheet metal became a tad thinner? The dealerships just migged the floor pan on the Commodores. Dunno how many I've had on the hoist and saw the repairs.
2 user(s) are reading this topic
0 members, 2 guests, 0 anonymous users