Paint looks great Adam great effort.
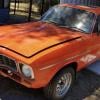
Adam’s LJ restomod
#51

Posted 16 September 2023 - 11:28 PM
#52

Posted 06 November 2024 - 05:21 PM
So, it has been a LONG time between posts.... over a year. Its been busy on the personal front and Brad can probably attest that Cairns has had a wet season that has lasted about 18 months. It seems every weekend was raining and getting a painted shell out the way so I could continue doing bits and pieces was really hard.
I took a week off last week to make a dent in reassembly, and of course the first 2 days rained, and 33/34 degrees, no wind and about 90% humidity... the rest of the week was better.
Photo heavy coming up - a years worth of updates:
installing rubbers in door tops - what a sh!t of a job. Thanks to Marty and other forum members. The inner belts need the clips stretched a little to go over the leather ( or vinyl) and THEN roll the inner felt into the clips. Took 2 weekends to work out how to do a 20 second job, once you know. Outers was the throw the clips away and polyurethane sealer to glue them on. i did make the tool and try hard, but the Rare's clips dont play nice with the Rare's door top replacement patch panel.
 IMG_1187.JPG 287.17K
3 downloads
We have glass
 IMG_4227.JPG 337.13K
2 downloads
Sound deadened
 IMG_5445.JPG 341.58K
4 downloads
Wasnt happy with the location of the rear retractable seat belt body so new seat belt anchors inboard by 20mm or so.
 REAR SEAT BELT ANCHORS (2).JPG 617.9K
3 downloads
#53

Posted 06 November 2024 - 05:45 PM
Motor and Box. And Air conditioning and alternator.
After struggling with the the T5 rebuild - I sent it off to Mal Wood to check my work and to properly install the steel cluster retainer that needs exactly the right shims, which I simply don't have.
A few weeks later in August, my motor arrived back from JB Automotive in Ayr. It took a long time, but I wasnt in that much of a rush. Sticking with the restomod theme - its still running the bunch of banana's and standard filter box and throttle body. My engineer wouldnt let me go bigger than 304. (well, rebore was ok)
Quick Motor spec.
VS 304 block .20 over, decked and tunnel bored
Bronze lifter bore conversion and oil gallery modded
Full balance of rotating assembly
Crane cams 888251 226/230 with 110LSA
Edelbrock heads stock out the box
10.4 compression
VT dizzy
Haltech 2500
Test fit below for the 100th time. Now to set up alternator and AC.
 IMG_5605.JPG 413.38K
2 downloads
JB's ran it in on the dyno, so its now a bolt in. Its a pretty healthy motor, 350hp/410lfbt or 260kw/555Nm, nice fat flat torque curve which is what I wanted.
 GOWLETT DYNO SHEET(1)2.pdf 672.36K
2 downloads
Made my own alternator bracket to tuck in tight under the throttle body. Couldn't use the normal drivers side one as the VS commodore AC bracket and pump fits and clears perfectly!
 IMG_5704.JPG 412.01K
3 downloads
#54

Posted 06 November 2024 - 05:58 PM
Next was doing the stainless steel trims
Had roof racks of course!
 IMG_5640.JPG 590.95K
2 downloads
Gentle dollying. I used an old plastic breadboard as it was very close to the gutter curve, so chopped off a couple of bits to use as different shaped dollies. I also had a hammer I had cut in half for getting inside the doors. This was perfect has it had nearly no weight. I did spend an hour or so sanding its face dead smooth before taking it to the stainless.
 IMG_5642.JPG 592.12K
3 downloads
Finished and fitted... not perfect, but better than many.
 IMG_5644.JPG 310.92K
2 downloads
 IMG_5645.JPG 280.61K
3 downloads
#55

Posted 06 November 2024 - 06:07 PM
Heater box and Wipers
 IMG_5709.JPG 400.93K
4 downloads
Hoodlining (which is out again as it wouldn't uncrease. Steamed and ironed and its probably in this weekend
 IMG_5739.JPG 296.34K
3 downloads
Rear parcel shelf, which was all done with the belt braces
 IMG_5741.JPG 341.03K
3 downloads
Rebuilt and painted column. And now Peter Nash is doing ones for little Torries with V8's that look AMAZING, billet bottom bearings, better uni's ... oh well...
 IMG_5817.JPG 632.57K
2 downloads
#56

Posted 06 November 2024 - 06:13 PM
Mal Wood Hydraulic Clutch in ... bit of stuffing around and filing, but got there without too much drama.
 IMG_5818.JPG 476.51K
3 downloads
Buttoning up the chassis kit properly and for the final time
 IMG_5824.JPG 599.66K
2 downloads
Handbrake brackets for VS Commodore rear discs, Calipers are swapped to front so its a hybrid left to right swap.
 IMG_5852.JPG 526.89K
4 downloads
#57

Posted 06 November 2024 - 06:20 PM
K Frame assembly with homemade spring compressor - worked a treat!
 IMG_5866.JPG 458.94K
3 downloads
 IMG_5875.JPG 483.45K
6 downloads
Wiring starting... Haltech wiring is huge...good thing I'm not looking for the concealed look! The wooden thing was to give the sparky a template for the underdash shelf I'll make ti hide everything and give him real estate for the Haltech and all the fuses and relays. It will hide the AC unit that is already tucked up in there. I'll piano hing it at the rear, pick up the original parcel shelf screw holes under the glove box and 2 screws, can drop down to access everything...and still have a working glove box.
 IMG_5869.JPG 495.42K
2 downloads
 IMG_5898.JPG 466.06K
2 downloads
#58

Posted 06 November 2024 - 06:27 PM
Ok - this is what you are all here for...
Last week has been big...
Getting exciting....
 IMG_5876.JPG 496.49K
3 downloads
more exciting...more nervous... this was all on my own, not even my wife to keep an eye on things....
 IMG_5883.JPG 474.31K
4 downloads
Attached Files
Edited by 4dabush, 06 November 2024 - 06:28 PM.
#59

Posted 06 November 2024 - 06:32 PM
TADDA
 IMG_5894.JPG 427.28K
2 downloads
 IMG_5895.JPG 396.92K
4 downloads
 IMG_5897.JPG 360.59K
2 downloads
still a LOOONG way to go, but now it feels like there is a light at the end of the tunnel.
Wheels are 16 x 7 (28p) and 16 x 8 (15p). Tyres are babies, 195/50/16 and 215/45/16. Adjustable trailing arms are nearly all the way forwards, they could have had another 10mm extra forward moverment but it all clears
#60

Posted 06 November 2024 - 06:34 PM
That’s gonna be magic when it’s rolling
#61

Posted 06 November 2024 - 07:44 PM
Never rolled eng/trans in under baby torrie or commodore...might have to try it one day.
That Mal Woods kit looks like it gives more room for column to come over always wondered if could hide reservoir under ashtray area.
Did rear calipers hit shock absorbers hence putting them at front?
Looks nice lots of progress.
#62

Posted 06 November 2024 - 08:08 PM
Never rolled eng/trans in under baby torrie or commodore...might have to try it one day.
That Mal Woods kit looks like it gives more room for column to come over always wondered if could hide reservoir under ashtray area.
Did rear calipers hit shock absorbers hence putting them at front?
Looks nice lots of progress.
You’ll have to try it one day… me, 3 trolley jacks of different sizes, 2 sets of axle stands, various blocks of wood, and a million burpee’s jumping up and down to check alignments and clearances. Took about 90 minutes…would have halved that with another pair of eyes.
Mal Woods kit wouldn’t say gives more room inside, certainly not less. The single braided line to the gearbox does and meant I could cut off the clutch cable boss off the bell housing. THAT gives heaps more room.
I’ll post up the brakes on the weekend. The backing plates are deleted, but the brake hose retainer drilled out and is reused.
the axle retaining plate/cup goes left to right to bring the calipers in front of the diff. The hand brake assembly stays right on right, left on left so it pulls in the normal direction. You have to completely make a new handbrake cable retainer. This and the brake line retainer were welded to some 3mm plate and new holes tapped into the axle retaining cup. I think I picked up 2 of the holes from the backing plate, just drilled and tapped them bigger. Swap calipers so the bleed nipple is on top still and it’s done. As the calipers are now in front of the diff, there is no clash with anything…misses the coils by 30mm or so. Standard Commy hoses. I’ll probably do a custom set of handbrake cables but there are some old posts on here showing the idea of the hand brake retainer and they used a commodore wagon rear cable, mated to modded Lc Lj handbrake cables at the handbrake with the Torry shorts attached to a Commy C boss thingy that centres on the cable to pull evenly.
Edited by 4dabush, 06 November 2024 - 08:16 PM.
#63

Posted 06 November 2024 - 08:08 PM
#64

Posted 06 November 2024 - 08:38 PM
Looks great Adam top job mate
2 door Torana V8 injected just perfect ![]()
#65

Posted 07 November 2024 - 09:08 AM
That's awesome. That engine spec is perfect for your car I reckon, torquey and fun - unless you are drag racing it every week, that's plenty of grunt for the road. I laughed at the burpees reference - I wonder how many burpee equivalents we all do building these things without a hoist? Many....
Keep going!
#66

Posted 07 November 2024 - 11:16 AM
Oh ok springs get in the way.
Yeah mine has whole vs ute diff narrowed down but car was mini tubbed + coilovers...used commodore cables but got shortened or new ends but did have to go with a toyota corolla handbrake as torrie touched 3 inch tailshaft when down or when on throttle cant remember.
We had dellows kit actually narrowed pedal + welded rod in it for strength just to move column over bit more even ground down block to sit flush with getrag gearbox but that Mal Wood setup looks like more room if can hide reservoir & still work fine tempted to put efi 304/getrag setup back in gtr again.
Kind of like where alternator sits looking at it again kind of hidden under engine cover/throttle body & airbox etc
#67

Posted 07 November 2024 - 01:26 PM
That's certainly an update and a half. Looks great Adam, top stuff!
#68

Posted 11 November 2024 - 05:29 PM
Oh ok springs get in the way.
Yeah mine has whole vs ute diff narrowed down but car was mini tubbed + coilovers...used commodore cables but got shortened or new ends but did have to go with a toyota corolla handbrake as torrie touched 3 inch tailshaft when down or when on throttle cant remember.
We had dellows kit actually narrowed pedal + welded rod in it for strength just to move column over bit more even ground down block to sit flush with getrag gearbox but that Mal Wood setup looks like more room if can hide reservoir & still work fine tempted to put efi 304/getrag setup back in gtr again.
Kind of like where alternator sits looking at it again kind of hidden under engine cover/throttle body & airbox etc
As promised,
here are some better photos of the VS Commodore brakes in the car.
As mentioned, the caliper/axle retainer is swapped Left to Right, but handbrake stays right on the right, left on the left, handbrake still pulls forwards.
Caliper is then at the front. Calipers swap left to right to bleed nipple is still at the top.
Mines on a 7mm shorter per side than stock Torry - 9 inch.
Rear shocks in standard location.
Brake line retainer tab drilled out of backing plate and made a bracket to bolt to caliper/axle retainer (I think they were swapped l to r to make the hoses sit nicely in the retainer)
In these photo's the brake line is not yet done up tight as I am yet to blow out the brake lines and fit pads and the brake hose retaining clips.
Just a warning, there is bugger all between the bottom of the shock and the caliper/axle retainer, so to install the shock was install the washer and 1 rubber, slide the shock on the shock bolt on diff, then maneuver it to the upright position, then fit the remaining rubber, washer and cone nut, then the top retainers, rubbers and nuts. If you have a shock with a 1 piece rubber, (if there is such a beast) you'd have to have it on before fitting the caliper/axle retainer and buttoning up the axles...that would be a PITA.
Brake line retainer
 IMG_5903.JPG 303.89K
6 downloads
hand brake cable connected and showing bracket
 IMG_5904.JPG 319.91K
4 downloads
View from the front
 IMG_5907.JPG 318.38K
4 downloads
#69

Posted 11 November 2024 - 05:45 PM
What a fantastic update. This is getting some really nice work!
#70

Posted 03 January 2025 - 01:58 PM
Still plodding along. Been messy over Chrissy, road trip with my Daughter from Brissy to Cairns, couple of birthdays, wet or stinking hot and humid weather. Tail-shaft is in, custom handbrake cables are in, wiring is about 2/3rds, suspension is all torqued up and dodgy stringline wheel alignment since its been sitting under weight for about 6 weeks. Ive got the back screen in (except the corner blocks) bit of fiddling to do there and letting our summer heat ooze mastic out !! Seatbelts are in and working 100% and started getting the interior together. Sparky asked me to leave the front out for the time being - which is fair enough.
Got my NOS GTS mirrors on, and found that the drivers one is locked in place - bolt is firmly seized - probably should have checked when i bought them in 1986 ![]() . Luckily its 95% of the way to the highest setting. Rad and Condenser are in and fit nice. Decided on battery in the engine bay, so popped a side terminal Optima on the drivers site - looks ok, and will be quite balanced with the factory VS Commodore airbox on the passenger side. Leaves some boot space too.
. Luckily its 95% of the way to the highest setting. Rad and Condenser are in and fit nice. Decided on battery in the engine bay, so popped a side terminal Optima on the drivers site - looks ok, and will be quite balanced with the factory VS Commodore airbox on the passenger side. Leaves some boot space too.
Question? I'm intending to leave the mirrors satin. Has anyone out there left their GTS mirrors raw? How did/do they hold up? There are plenty of cars with plastic unpainted mirrors, so before I start covering them with Armoural and make painting harder for myself, whats the consensus? Is raw just being slack?
The last shot i got a chance to roll it out the shed...
 IMG_6216.JPG 323.29K
6 downloads
 IMG_6217.JPG 243.58K
3 downloads
 IMG_6239.JPG 191.98K
4 downloads
 IMG_6240.JPG 337.23K
3 downloads
 IMG_6243.JPG 505.9K
3 downloads
Edited by 4dabush, 03 January 2025 - 02:00 PM.
#71

Posted 03 January 2025 - 06:58 PM
awesome.
#72

Posted 03 January 2025 - 10:00 PM
Sent from my iPad using Tapatalk
#73

Posted 03 January 2025 - 10:42 PM
Looking good Adam
Imho i would paint the mirrors satin black they need something on them
Love the trim colour
1 user(s) are reading this topic
0 members, 1 guests, 0 anonymous users






 View Garage


