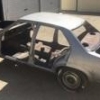
Did you end up finding a shifter handle?

Minimal Restro LX 77
#26

Posted 11 June 2024 - 01:36 PM
#27

Posted 15 June 2024 - 05:27 PM
Did you end up finding a shifter handle?
Na mate not yet. Keeping a good eye on Gummy etc
#28

Posted 15 June 2024 - 05:30 PM
First one Iv'e seen for a while without the factory installed rust behind the bonnet hinges.
#29

Posted 17 June 2024 - 04:17 PM
Plodding along having fun doing bits and pieces.
As long as I achieve something every day I'll get there. Not getting into a deep permanent show quality resto is keeping me moving while I learn from all that is available.
Every thing I am doing is to get the car licenced and on the road and not deteriorate over the next couple of years while being driven.
The hoist has been invaluable. I could not do this work laying on my stuffed back.
These couple of pics show some progress with cleaning, rust treatment and painting. It will be interesting to see how good or bad I have done in a couple of years.
I'm so glad I (quickly) decided to have a look in the fan ducting. Now a bit cleaner.
Attached Files
#30

Posted 17 June 2024 - 08:23 PM
Cool project Brad, inspiring and love the hoist have toyed with the idea but not sure my old concrete will handle it haha. What brand did you choose? Is there any link or page regarding Heath’s digital dash’s? I’d like to know the info if possible. Keep up the good work. Cheers from Brad
#31

Posted 17 June 2024 - 09:16 PM
#32

Posted 17 June 2024 - 11:02 PM
Cool project Brad, inspiring and love the hoist have toyed with the idea but not sure my old concrete will handle it haha. What brand did you choose? Is there any link or page regarding Heath’s digital dash’s? I’d like to know the info if possible. Keep up the good work. Cheers from Brad
Hi Brad and thanks, the hoist is a 'Classic Lift 4000' and there is a YouTube vid of Heath's dash. Just do a search for 'Speedhut Digital' and it will pop right up.
I contacted him through that I think but I do have his Email address if you like. The hoist manufactures can supply extra floor braces for 'unfooted' concrete.
This page will not allow links to be posted otherwise I would have done that. Cheers
Edited by redtorana#3, 17 June 2024 - 11:06 PM.
#33

Posted 18 June 2024 - 09:24 AM
Cool project Brad, inspiring and love the hoist have toyed with the idea but not sure my old concrete will handle it haha. What brand did you choose?
I got a 4 poster because they come with jockey wheels these days so you can move them around. Even outside if you want to degrease under the car.
 IMG_9766ss.jpg 248.13K
15 downloads
Edited by Shiney005, 18 June 2024 - 09:26 AM.
#34

Posted 19 June 2024 - 09:34 PM
Nice, the extra large footings sound like a good idea and the four poster being able to move around is awesome. I’ll check out the YouTube too. Thanks for all the info. Look forward to some more updates on the torana. Cheers
#35

Posted 23 June 2024 - 10:29 PM
Nice, the extra large footings sound like a good idea and the four poster being able to move around is awesome. I’ll check out the YouTube too. Thanks for all the info. Look forward to some more updates on the torana. Cheers

I got mine with these outriggers from classic lift a few years ago now, concrete is only about 70mm where I installed it. One day I might move it and cut out some of the old floor and lay some new 150mm concrete down.
Sent from my iPhone using Tapatalk
#36

Posted 24 June 2024 - 08:04 AM
I got mine with these outriggers from classic lift a few years ago now, concrete is only about 70mm where I installed it. One day I might move it and cut out some of the old floor and lay some new 150mm concrete down.
Sent from my iPhone using Tapatalk
I reckon with the outriggers and the offset arms (so the nose of the car is closer to centre) one of these would almost stand up by itself, not that you'd do it. The units without the outriggers both me, so little footprint for a cantilevered load.
#37

Posted 24 June 2024 - 08:06 AM
I got a 4 poster because they come with jockey wheels these days so you can move them around. Even outside if you want to degrease under the car.
I have the same parking hoist in my garage Laurie, just the extra height version. I tried it without bolting it down and levelling it and I wouldn't trust it at full height with a car on it, it was wobbly as hell. The floor has a small slope on it and one end ended up needing 60mm of packers.
#38

Posted 28 June 2024 - 04:46 PM
My footings for the hoist are 800mm x 800mm x 250mm with extra reinforcing mesh.
I planned for a hoist six years ago when building the shed.
#39

Posted 28 June 2024 - 05:06 PM
Got my M20 back after lots of new bits and fair bit of coin.
Looks and rotates smooth as.
Things are getting serious now.
Attached Files
#40

Posted 03 July 2024 - 12:31 AM
Just one more step deeper.
I noticed a small oil drip from the front of the engine so am renewing the sump gasket. The previous owner/builder used some kind of sealant that peeled straight off when removing it.
This has given me an opportunity to check the lower part of the bores that look brand new and also clean out the sludge of old oil in the sump. Happy to report no metal or moisture.
Attached Files
#41

Posted 03 July 2024 - 08:58 AM
That sealant doesnt look particularly nice.
Years ago though, I first used Wurth Hi Temp sealant.
It was brilliant at keeping everything in the parts of the engine they were supposed to be in.
I remember needing a cricket bat to get the sump off a 350 Chev it sealed that well.
Thought it was going to be a drama to clean up, but needed nothing more than fingers to get the stuff off.
Used it to seal the ends of V8 manifolds without gaskets many times without leaks.
It was unique back in the 90s when I found it, but no doubt most companies now have a very similar product.
Permatex works almost as good. It seals well, but is a bit harder to clean off.
Cheers
Rob
#42

Posted 03 July 2024 - 09:06 AM
With that sump off I'd crack a main and a rod bearing and have a look. Maybe plastiguage it. In the past when I've bought good running 308/304 they have had good compression with hone marks in the bores even with the car showing 125,00kM, but bearings looked pretty secondhand. A few times I've replaced them with the same size as what was already there and they've been good.
#43

Posted 03 July 2024 - 04:11 PM
Whipped my sump off a while ago, to re-seal a bad leak, motor just jacked up still in the car
Checked a few bearings, and rear main rope seal, found it all needs a birthday.
Motor is out now for a freshen up.
Might hurt a bit now if you find something a bit worn, but far better off doing it
while she’s upside down on a stand.
Can be a rabbit hole, but you only need to go as far as you want to
Next thing the heads are off, pistons and rods are out to see bores and your modest plans
have blown out to buggery
I was thinking the front oil weep could be the crank seal in the timing cover..
May as well do that too(?)
#44

Posted 03 July 2024 - 05:13 PM
In my experience 308's seem to be reasonably kind to rings, especially the injected 5litre engines. It's the cam/lifters and bearings that seem to be more wear prone.
#45

Posted 26 July 2024 - 06:08 PM
With that sump off I'd crack a main and a rod bearing and have a look. Maybe plastiguage it. In the past when I've bought good running 308/304 they have had good compression with hone marks in the bores even with the car showing 125,00kM, but bearings looked pretty secondhand. A few times I've replaced them with the same size as what was already there and they've been good.
Thanks for the idea but this engine has done less than 500Km since being machined and rebuilt.
I have all the receipts for the work. Cheers
#46

Posted 28 July 2024 - 05:44 PM
In my experience 308's seem to be reasonably kind to rings, especially the injected 5litre engines. It's the cam/lifters and bearings that seem to be more wear prone.
Ok guys I took your advise and had a look as I wanted to remove the oil pickup to remove some gunky old oil deposits and had to remove a mains bolt any way.
There was one small mark I could see on the crank and the bearing looked perfect. It's all back together now and the engine is back on the K frame with new mounts ready to accept the flywheel and clutch ETC.
Also have a look at the attached picture please and let me know the significance of the 'tang' on my engine mount if you might know.
Cheers
Attached Files
#47

Posted 28 July 2024 - 06:53 PM
I don't know but I'll have a guess the tang is some sort of attachment to put a chain or threaded rod in case of breaking an engine mount.
Just my guess,
The minimal resto looks good, lots of hard hand work going on there, well done!
#48

Posted 28 July 2024 - 07:13 PM
#49

Posted 28 July 2024 - 10:37 PM
#50

Posted 29 July 2024 - 09:36 PM
Thanks for the replies Re the bracket. No aircon but it can stay there.
Achieved getting the Aussie fitted up. This included shimming the Wilwood Hydraulic thrust bearing with supplied shims. Unfortunately I could not find the instructions for the required gap from the face of the thrust bearing to the clutch plate so just went with all the shims for a gap of about 1mm. If it needs redoing it will be a simple task at this stage.
The hydraulic pressure and breather line needed to be routed out of the bellhousing and I finally took the plunge and drilled the required holes for them. Really didn't like doing that but F it!
So looking pretty good except the supplied pressure line extension has got a fitting on the end of it that won't fit the kit reservoir. Bit strange.
Attached Files
1 user(s) are reading this topic
0 members, 1 guests, 0 anonymous users


 View Garage


