I'd say the last panel beater to work on it knew what he was doing.

SS hatch tidy up
#51

Posted 23 November 2024 - 11:37 AM
#52

Posted 26 November 2024 - 01:51 PM
The roof is coming along.
 FullSizeRender.jpeg 108.99K
14 downloads
 FullSizeRender.jpeg 149.68K
11 downloads
There are a couple of temporary braces underneath to help give it shape. Once its tacked in the finessing begins.
These turned up today
 FullSizeRender.jpeg 157.76K
7 downloads
The hinges are shagged and last time it was apart someone put bolts in to replace the worn pins. Repairable like all things made of metal but the new ones are cheap enough to not bother.
#53

Posted 30 November 2024 - 04:02 PM
 IMG_4621.jpeg 108.19K
5 downloads
 IMG_4616.jpeg 142.6K
6 downloads
 IMG_4609.jpeg 125.35K
5 downloads
IMG_4609.jpeg 125.35K
5 downloadsLots of adjustable braces. Slowly slowly.
#54

Posted 30 November 2024 - 07:08 PM
Rexy hi, the roof is looking fantastic, are you doing the welding yourself or is it in a panel shop, never the less it looks great, i have a friend with the same hole in his torana and would love to patch up the same way you have done.
#55

Posted 01 December 2024 - 09:44 AM
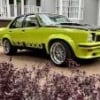
I have an old Croatian guy doing it. His welding is much better than mine. He also has a good eye for detail and while he's not the quickest the result will be very good.
 IMG_8466.jpeg 117.17K
5 downloads
He did this one for me a while ago.
#56

Posted 01 December 2024 - 11:50 AM
#57

Posted 01 December 2024 - 10:37 PM
If he can get the car to Keysborough Im sure he would do the job.
#58

Posted 05 December 2024 - 07:44 PM
In between letting welds cool off the new rear spoiler is being fettled.
 IMG_4647.jpeg 138.82K
7 downloads
 IMG_4644.jpeg 113.02K
6 downloads
#59

Posted 05 December 2024 - 08:47 PM
#60

Posted 09 December 2024 - 03:00 PM
Looks like good progress. ![]()
Those spoilers can be quite a pain. Very noticeable though, so worth getting them close.
#61

Posted 23 February 2025 - 07:21 PM
Its funny how at times there seems to be a lot of progress and then not so much….
There has been a lot of tedious looking work involved in bare metalling the shell. Lots of small areas needing welding around the hatch area on the body. Hardly worth taking pics of.
The nosecone was a lot rougher than expected once it was stripped. It was cut and shut down the middle and I decided given the hours it would take to reuse I might as well buy a rare spares one.
 IMG_4857.jpeg 129.26K
5 downloads
The pic doesn’t show the true horror….
 IMG_5483.jpeg 131.83K
3 downloads
Not bad out of the box.
 IMG_5546.jpeg 181.14K
2 downloads
 IMG_5547.jpeg 106.75K
1 downloads
 IMG_5548.jpeg 122.28K
1 downloads
Fit is very close. It was $650 - should have bought it at the Summernats at 30% off. Im sure I will get that back in saved labour costs.
#62

Posted 23 February 2025 - 07:38 PM
The hatch is pretty good although along with the rear quarters there is clear evidence of a serious crime.
 IMG_4854.jpeg 137.3K
1 downloads
It used to have a rear spoiler, now absent!
There were also odd marks on the inner upper on both sides, above the seal.
 IMG_5570.jpeg 128.17K
1 downloads
With a little digging these appeared.
 IMG_5571.jpeg 128.11K
3 downloads
I assume these are aeration ports to allow condensation out on warm days.
There is also a little bracket on one side only.
 IMG_5568.jpeg 135.96K
1 downloads
Anyone know what this is for?
#63

Posted 23 February 2025 - 07:55 PM
The passengers rear is the only sizeable rust repair so far.
 IMG_5317.jpeg 146.43K
1 downloads
Another $140 worth of rare spares steel added.
 IMG_5496.jpeg 157.84K
1 downloads
The fairly rough work cutting the guards has been tidied up
 IMG_5318.jpeg 142.02K
2 downloads
 IMG_5319.jpeg 177.22K
2 downloads
Lots of extra unnecessary holes from historical events welded up.
There are small screws in holes in the bottom of the sills just in front of the arch on both sides. On my other hatch the front of the rear flare is secured here so I presume they are not factory?
#64

Posted 23 February 2025 - 08:15 PM
And speaking of surprises…
 IMG_5495.jpeg 117.05K
2 downloads
The piece between the hinge openings didn't survive the wire wheel.
Sadly this replacement piece had to be made by hand - $5 worth of steel plus $700 labour. Ouch!
 IMG_5664.jpeg 35.07K
1 downloads
Looks good though.
#65

Posted 23 February 2025 - 08:27 PM
So it’s now in my favourite matte black.
 IMG_5660.jpeg 82.9K
1 downloads
 IMG_5569.jpeg 69.09K
1 downloads
Still a long way to go.
Its nice that so much of the car has original paint beneath the blue so most of the metal is being revealed for the first time in nearly 50 years.
Progressively collecting stuff for the finishing phase. Got discount mirrors and rubber kit at the Summernats. Headlining and carpets arrived.
Slowly slowly….
#66

Posted 23 February 2025 - 09:57 PM
Awesome progress! That new front nosecone looks ace.
#67

Posted 24 February 2025 - 03:53 AM
There is also a little bracket on one side only.
Anyone know what this is for?
Light switch
#68

Posted 24 February 2025 - 08:12 AM
I can't be sure about the hatchbacks, but sedans don't have any screws anywhere in the bottom of the sills. Are you putting a rear spoiler back on?
#69

Posted 24 February 2025 - 10:56 AM
Nothing, nothing, nothing, then bang! Progress. Ha ha. Defo how it feels sometimes. Looks great, keep going.
#70

Posted 02 March 2025 - 01:16 PM
So the hatch has come up very well after final strip of the rest of the paint.
 IMG_5629.jpeg 193.32K
2 downloads
 IMG_5630.jpeg 143.54K
2 downloads
There were a couple of dents that had been filled with bog. The most impressive was in the drivers sill.
 image000001.jpeg 81.9K
2 downloads
A long way in and still digging…
Came up very nicely.
 IMG_5628.jpeg 126.29K
2 downloads
One little bit on the passengers side.
 IMG_5637.jpeg 135.87K
3 downloads
And it seems the metal work is done.
#71

Posted 08 March 2025 - 04:27 PM
So the wire wheel reveals all.
 IMG_5695.jpeg 168.01K
3 downloads
 IMG_5696.jpeg 112.97K
2 downloads
A little more welding required…
Smoothing started.
 IMG_5698.jpeg 130.36K
2 downloads
 IMG_5697.jpeg 132.63K
2 downloads
#72

Posted 12 March 2025 - 11:37 AM
#73

Posted 14 March 2025 - 09:30 PM
Enjoying the progress. Cheers
1 user(s) are reading this topic
0 members, 1 guests, 0 anonymous users




 View Garage